For the complete documentation index, see llms.txt. This page is also available as Markdown.

Frontegg

Create an integration to manage access to Frontegg resources

Frontegg is a customer identity and access management (CIAM) platform for managing authentication, authorization, users, and accounts in customer-facing applications.

The Frontegg integration helps you securely discover and manage your Frontegg resources through Apono.

After integrating Frontegg with Apono, you'll be able to:

  • Automate resource discovery and mapping across your Frontegg environment

  • Enable administrators to implement just-in-time, least-privilege access policies and securely manage permissions

  • Allow users to request temporary access to Frontegg resources


Prerequisites

Item
Description

Apono Connector

On-prem connection serving as a bridge between a Frontegg instance and Apono:

Frontegg Access

User account with permission to create tenant tokens


Create Frontegg credentials for Apono

You must create credentials for the Apono connector.

Follow these steps:

  1. Create a tenant token. On the Generate Token pop-up window, set the following values:

    • Description: Apono Integration

    • Roles: Admin

    • This token will expire: Never

  2. Copy the Client ID and Secret Key.

  3. Create a secret with the credentials from step 2. Use the following key-value pair structure when generating the secret. Be sure to replace <FRONTEGG_CLIENT_ID> and <FRONTEGG_SECRET_KEY> with the actual values.

lightbulb

Integrate Frontegg

lightbulb

Follow these steps to complete the integration:

  1. On the Catalog tab, click Frontegg. The Connect Integration page appears.

  2. Under Discovery, click Next. The Apono connector section expands.

  3. From the Select Connector From List dropdown menu, select a connector. Choosing a connector links Apono to all the services available on the account where the connector is located.

  1. Click Next. The Integration Config section expands.

  2. Define the Integration Config settings.

    Setting
    Description

    Integration Name

    Unique, alphanumeric, user-friendly name used to identify this integration when constructing an access flow

  3. Click Next. The Secret Store section expands.

  4. Associate the secret or credentials.

    If you select the Apono secret manager, enter the Frontegg Client ID and Frontegg Client Secret for the Apono Connector.

  5. Click Next. The Get more with Apono section expands.

  6. Define the Get more with Apono settings.

    Setting
    Description

    Custom Access Details

    (Optional) Instructions explaining how to access this integration's resources Upon accessing an integration, a message with these instructions will be displayed to end users in the User Portal. The message may include up to 400 characters. To view the message as it appears to end users, click Preview.

    Integration Owner

    (Optional) Fallback approver if no resource owner is found Follow these steps to define one or several integration owners:

    1. From the Attribute dropdown menu, select User or Group under the relevant identity provider (IdP) platform.

    2. From the Value dropdown menu, select one or multiple users or groups.

    NOTE: When Resource Owner is defined, an Integration Owner must be defined.

    Resource Owner

    (Optional) Group or role responsible for managing access approvals or rejections for the resource Follow these steps to define one or several resource owners:

    1. Enter a Key name. This value is the name of the tag created in your cloud environment.

    2. From the Attribute dropdown menu, select an attribute under the IdP platform to which the key name is associated. Apono will use the value associated with the key (tag) to identify the resource owner. When you update the membership of the group or role in your IdP platform, this change is also reflected in Apono.

    NOTE: When this setting is defined, an Integration Owner must also be defined.

  7. (Recommended) Click Test Integration to validate the integration.

Test Integration is available after you have entered or selected values for all required integration fields.

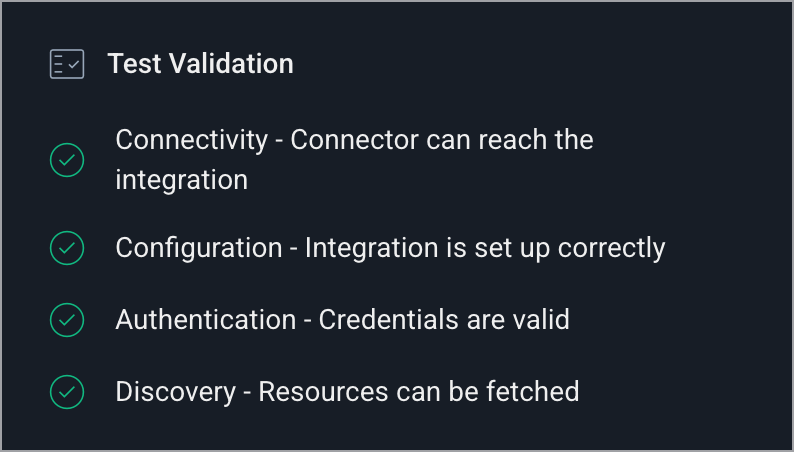
During the test, Apono runs the following validation checks:

  • Connectivity: The connector can reach the integration.

  • Configuration: The integration is set up correctly.

  • Authentication: The credentials are valid.

  • Discovery: Resources can be fetched.

The Test Validation checklist shows the result of each check.

If a check fails, Apono identifies the failed check and highlights the fields that need correction.

  1. Click Confirm.

💡Are you integrating with Apono using Terraform?

If you want to integrate with Apono using Terraform, follow these steps instead of clicking Confirm:

  1. At the top of the screen, click View as Code. A modal appears with the completed Terraform configuration code.

  2. Click to copy the code.

  3. Make any additional edits.

  4. Deploy the code in your Terraform.

Refer to Integration Config Metadata for more details about the schema definition.

Usage

Now that the integration is complete, you can add Frontegg as a resource in an access flow This allows requesters to securely request temporary access to those resources based on your approval and provisioning rules.

Follow the guidance in these articles to define Frontegg resources:

Last updated

Was this helpful?