> For the complete documentation index, see [llms.txt](https://docs.apono.io/llms.txt). Markdown versions of documentation pages are available by appending `.md` to page URLs; this page is available as [Markdown](https://docs.apono.io/docs/additional-integrations/identity-providers/windows-domain-servers.md).

# Windows Domain Servers

Integrate Active Directory to manage access to Windows domain servers

Active Directory (AD) is Microsoft's directory service for Windows domains, holding the users, groups, and computer accounts that Windows servers authenticate against. Windows grants Remote Desktop access to members of a server's built-in local groups. These local groups can include Active Directory groups.

Through this integration, Apono helps you discover your Windows servers and securely manage access through your Active Directory domain. Apono connects only to a domain controller, never to the servers themselves, so a server that is switched off or unreachable can still be granted.

***

### Prerequisites

<table><thead><tr><th width="260">Item</th><th>Description</th></tr></thead><tbody><tr><td><strong>Apono Connector</strong></td><td><p>On-prem connection serving as a bridge between an Active Directory domain and Apono:</p><ul><li><a href="/docs/aws-environment/apono-connector-for-aws.md">AWS</a></li><li><a href="/docs/azure-environment/apono-connector-for-azure.md">Azure</a></li><li><a href="/docs/gcp-environment/apono-connector-for-gcp.md">GCP</a></li><li><a href="/docs/kubernetes-environment/apono-connector-for-kubernetes.md">Kubernetes</a></li></ul></td></tr><tr><td><strong>Windows Server</strong></td><td>Windows domain server running Windows Server 2012 or later</td></tr><tr><td><strong>Network Access</strong></td><td><p>Access from the connector to one domain controller on the LDAP port:</p><ul><li><code>636</code> (LDAPS)</li><li><code>389</code> (LDAP)</li></ul><p><strong>NOTE</strong>: No other port is required. The connector does not communicate directly with the Windows servers.</p></td></tr><tr><td><strong>Domain Controller Address</strong></td><td><p>Hostname or address of one domain controller that the Apono Connector can reach</p><p>You will use this value to configure the <strong>LDAP Server URL</strong>.</p></td></tr><tr><td><strong>Active Directory Account Access</strong></td><td><p>Active Directory account with permission to create or configure the account used by the Apono Connector and assign it permission to manage groups in one container</p><p><strong>NOTE</strong>: Domain Admin privileges are not required.</p></td></tr><tr><td><strong>CA Certificate</strong></td><td><p>(Conditional) Certificate of the authority that issued your domain controller's LDAPS certificate, base64-encoded in PEM format</p><p><strong>NOTE</strong>: This is required whenever that certificate was not issued by a public certificate authority, which is usual for internal domain controllers.</p></td></tr></tbody></table>

***

### Obtain Active Directory distinguished names

Active Directory uses distinguished names (DNs) to uniquely identify objects and containers within a domain. For this integration, you need the DNs for the organizational unit containing the Windows servers and the container where Apono can create and manage groups.

<table><thead><tr><th width="178.49652099609375">Distinguished name</th><th width="355.48876953125">Usage</th><th>Example</th></tr></thead><tbody><tr><td><strong>Servers OU</strong></td><td><p>Identifies the organizational unit containing the Windows servers Apono should discover</p><p>Use this DN when creating the Apono Group Policy Object and as the <strong>Computers Scope</strong> when configuring the integration.</p></td><td><code>OU=Servers,OU=CORP,DC=corp,DC=example,DC=com</code></td></tr><tr><td><strong>Groups container</strong></td><td><p>Identifies the container where Apono can create and manage groups</p><p>In a self-managed Active Directory domain, use this DN when delegating permissions to the Apono account. Also use it as the <strong>Groups Scope</strong> when configuring the integration.</p></td><td><code>OU=AponoGroups,OU=CORP,DC=corp,DC=example,DC=com</code></td></tr></tbody></table>

Follow these steps:

1. Open **Active Directory Users and Computers**.
2. Click **View > Advanced Features**.
3. Open the organizational unit containing the Windows servers.
4. On the **Attribute Editor** tab, locate `distinguishedName` and copy its value.
5. Open the container where Apono will create and manage groups.
6. On the **Attribute Editor** tab, locate `distinguishedName` and copy its value.

***

### Create an Active Directory user

You must create a user in your Active Directory domain for the Apono Connector and grant that user permission to manage groups in one container. Apono requires permission to read computer objects in the **Servers OU** and to create, read, and manage group membership in the **Groups container**.

Follow these steps:

1. Create and configure a dedicated Active Directory user for the Apono Connector. Follow the instructions for your Active Directory deployment.

{% tabs %}
{% tab title="AWS Managed Microsoft AD" %}

1. Obtain the directory ID.

{% hint style="info" %}
This command also returns the domain name and domain controller addresses used later when configuring the integration.
{% endhint %}

{% code overflow="wrap" expandable="true" %}

```shellscript
aws ds describe-directories
```

{% endcode %}

2. Create the service account. Replace `<DIRECTORY-ID>` with the directory ID obtained in step **1**. The account is created in `OU=Users,OU=<NETBOIS>` and is initially disabled.

{% code overflow="wrap" expandable="true" %}

```shellscript
aws ds-data create-user --directory-id <DIRECTORY-ID> --sam-account-name svc-apono
```

{% endcode %}

3. Set the password. Replace `<DIRECTORY-ID>` with the directory ID obtained in step **1** and `<PASSWORD>` with a password. Setting the password enables the account.

{% code overflow="wrap" expandable="true" %}

```shellscript
aws ds reset-user-password --directory-id <DIRECTORY-ID> \   
  --user-name svc-apono --new-password '<PASSWORD>'
```

{% endcode %}

4. Grant the account permission to manage groups. Replace `<DIRECTORY-ID>` with the directory ID obtained in step **1**.

{% code overflow="wrap" expandable="true" %}

```shellscript
aws ds-data add-group-member --directory-id <DIRECTORY-ID> \ 
  --group-name "AWS Delegated Administrators" \ 
  --member-name svc-apono
```

{% endcode %}
{% endtab %}

{% tab title="Self-managed Active Directory" %}

1. Create a dedicated Active Directory account using your organization's standard process.
2. Delegate group management permissions on the **Groups container** identified earlier. Replace `<GROUPS-CONTAINER-DN>` with the Groups container DN identified earlier, `<DOMAIN>` with your domain, and `<ACTIVE-DIRECTORY-USER>` with the account you created.

{% code overflow="wrap" expandable="true" %}

```
dsacls "<GROUPS-CONTAINER-DN>" /I:T /G "<DOMAIN>\<ACTIVE-DIRECTORY-USER>:CCDC;group;" 
dsacls "<GROUPS-CONTAINER-DN>" /I:S /G "<DOMAIN>\<ACTIVE-DIRECTORY-USER>:WP;member;group"
```

{% endcode %}
{% endtab %}
{% endtabs %}

2. [Create a secret](/docs/connectors-and-secrets/apono-integration-secret.md) using the username and password of the Active Directory user. This enables the Apono Connector to use the secret to authenticate to Active Directory from within your environment. Apono does not store these credentials.\
   \
   Use the following key-value pair structure when generating the secret. Replace `<USERNAME>` and `<PASSWORD>` with the account credentials.

```json
{
 "username": "<USERNAME>", 
 "password": "<PASSWORD>" 
}
```

{% hint style="success" icon="lightbulb" %}
You can also input the user credentials directly into the Apono UI during the [integration process](#integrate-windows-domain-servers).
{% endhint %}

***

### Create the Apono Group Policy Object (GPO)

Windows uses built-in local groups to control access to servers. To support Apono-managed access, use the Apono-provided script to create a GPO that associates Apono-managed Active Directory groups with the appropriate local groups.

This is a one-time configuration performed by an account that can create and link GPO. It applies to every server in the Organizational Unit (OU), including servers added later, without requiring configuration on each server.

{% hint style="success" icon="lightbulb" %}
If you need to manually configure the GPO, expand the **Configure the Group Policy Object manually** callout below and follow the steps.
{% endhint %}

Follow these steps:

1. Sign in to a domain-joined machine using an account with permission to create and link GPOs.
2. If needed, install the **Group Policy Management** tools.

{% code overflow="wrap" expandable="true" %}

```
Install-WindowsFeature GPMC
```

{% endcode %}

3. Run the Apono-provided script and specify the **Servers OU**.

{% hint style="info" %}
The script creates and links a GPO named *Apono RDP Access* to the Servers OU. You can safely run the script again. If the configuration is already correct, the script makes no changes.
{% endhint %}

{% code overflow="wrap" expandable="true" %}

```
.\New-AponoRdpGpo.ps1 -TargetOU "OU=Servers,OU=CORP,DC=corp,DC=example,DC=com"
```

{% endcode %}

<details>

<summary><strong>💡 Configure the Group Policy Object manually</strong></summary>

You can also create the GPO manually in Group Policy Management. Create the GPO and link it to the Servers OU, then configure the required Local Users and Groups settings.

{% hint style="warning" %}
The manual configuration must match the values below exactly. If a Local Group item is configured incorrectly, Apono may grant access successfully but Windows will still refuse the sign-in.
{% endhint %}

Follow these steps for each item in the table below:

1. In **Group Policy Management**, open the GPO.
2. Click **Computer Configuration > Preferences > Control Panel Settings > Local Users and Groups**.
3. Add a Local Group item.
4. Configure the item:
   1. Set **Action** to **Update**.
   2. Select the group from the built-in group list. This allows Windows to identify the group by its built-in identifier rather than by its display name, which can differ on localized Windows installations.
   3. Add each corresponding value from the **Members to add** column exactly as shown. Do **not** replace `%DomainName%` or `%ComputerName%`. Each server substitutes its own domain and computer name when the policy is applied.
   4. Do not select **Apply once and do not reapply**.
5. Select **OK** to save the item.
6. Repeat steps **3–5** for each group in the following table.

<table><thead><tr><th width="271.40716552734375">Group name</th><th>Members to add</th></tr></thead><tbody><tr><td>Remote Desktop Users (built-in)</td><td><p><code>%DomainName%\Apono-555-%ComputerName%</code></p><p><code>%DomainName%\Apono-544-%ComputerName%</code></p><p><code>%DomainName%\Apono-551-%ComputerName%</code></p><p><code>%DomainName%\Apono-547-%ComputerName%</code></p><p><code>%DomainName%\Apono-580-%ComputerName%</code></p><p><code>%DomainName%\Apono-573-%ComputerName%</code></p><p><code>%DomainName%\Apono-558-%ComputerName%</code></p></td></tr><tr><td>Administrators (built-in)</td><td><code>%DomainName%\Apono-544-%ComputerName%</code></td></tr><tr><td>Backup Operators (built-in)</td><td><code>%DomainName%\Apono-551-%ComputerName%</code></td></tr><tr><td>Power Users (built-in)</td><td><code>%DomainName%\Apono-547-%ComputerName%</code></td></tr><tr><td>Remote Management Users (built-in)</td><td><code>%DomainName%\Apono-580-%ComputerName%</code></td></tr><tr><td>Event Log Readers (built-in)</td><td><code>%DomainName%\Apono-573-%ComputerName%</code></td></tr><tr><td>Performance Monitor Users (built-in)</td><td><code>%DomainName%\Apono-558-%ComputerName%</code></td></tr></tbody></table>

{% hint style="warning" %}
Remote Desktop Users (built-in) must include all seven Apono-managed groups. Remote Desktop connections require membership in this group regardless of the permission requested. For example, the `Apono-547` group is added to both **Remote Desktop Users** and **Power Users** so that a user granted Power Users permission can connect to the server.
{% endhint %}

</details>

***

### Integrate Windows Domain Servers

{% hint style="danger" %}
Before completing setup, create and link the [Apono Group Policy Object (GPO)](#create-the-apono-group-policy-object-gpo) to the Servers OU. The GPO is required for requesters to access Windows servers.
{% endhint %}

{% hint style="success" icon="lightbulb" %}
You can also use the steps below to integrate with Apono using Terraform.

In step **12**, instead of clicking **Confirm**, follow the **Are you integrating with Apono using Terraform?** guidance.
{% endhint %}

Follow these steps to complete the integration:

1. On the [**Catalog**](https://app.apono.io/catalog?search=windows+domain+servers) tab, click **Windows Domain Servers**. The **Connect Integration** page appears.
2. Under **Discovery**, select one or multiple resource types.

{% hint style="info" %}
Apono automatically discovers and syncs all the instances in the environment. After syncing, you can manage access flows to these resources.
{% endhint %}

3. Click **Next**. The **Apono connector** section expands.
4. From the **Select Connector From List** dropdown menu, select a connector. Choosing a connector links Apono to all the services available on the account where the connector is located.

{% hint style="success" %}
If the desired connector is not listed, click **New Connector** and follow the instructions for creating a connector ([AWS](/docs/aws-environment/apono-connector-for-aws.md), [Azure](/docs/azure-environment/apono-connector-for-azure.md), [GCP](/docs/gcp-environment/apono-connector-for-gcp.md), [Kubernetes](/docs/kubernetes-environment/apono-connector-for-kubernetes.md)).
{% endhint %}

5. Click **Next**. The **Integration Config** section expands.
6. Define the **Integration Config** settings.

   <table><thead><tr><th width="224">Setting</th><th width="496">Description</th></tr></thead><tbody><tr><td><strong>Integration Name</strong></td><td>Unique, alphanumeric, user-friendly name used to identify this integration when constructing an access flow</td></tr><tr><td><strong>LDAP Server URL</strong></td><td><p>Domain controller address identified in the <a href="#prerequisites">Prerequisites</a></p><p>Enter the address with the protocol and port:</p><ul><li><em>ldaps://&#x3C;HOSTNAME>:636</em> (LDAPS)</li><li><em>ldap://&#x3C;HOSTNAME>:389</em> (LDAP).</li></ul><p><strong>Example</strong>: <em>ldaps://dc1.corp.example.com:636</em></p><p><br>Apono recommends using LDAPS because LDAP sends the account password and group changes across the network in plain text.</p><p><strong>NOTE</strong>: If you omit the protocol and port, Apono uses <code>ldaps://</code> and port <strong>636</strong>.</p></td></tr><tr><td><strong>RDP Port</strong></td><td><p>Port requesters use to connect to the Windows server</p><p><strong>Default</strong>: <em>3389</em></p><p>This value appears in the access details provided to requesters. Apono does not connect to this port.</p></td></tr><tr><td><strong>Computers Scope</strong></td><td><p><a href="#obtain-active-directory-distinguished-names">Servers OU DN</a></p><p>Apono discovers enabled computer objects in this organizational unit and its child organizational units, excluding domain controllers.</p><p>Active Directory does not distinguish servers from workstations, so the organizational unit determines which computers Apono discovers.</p><p><strong>NOTE</strong>: You can enter a distinguished name relative to your domain, such as <code>OU=Servers,OU=CORP</code>, or as the full distinguished name, such as <code>OU=Servers,OU=CORP,DC=corp,DC=example,DC=com</code>.</p></td></tr><tr><td><strong>Groups Scope</strong></td><td><p>(Optional) <a href="#obtain-active-directory-distinguished-names">Groups container DN</a> where Apono creates and manages the groups used to grant access</p><p>If you leave this setting empty, Apono uses the default Active Directory Users container, <code>CN=Users</code>.</p><p><strong>IMPORTANT</strong>: For AWS Managed Microsoft AD, specify a writable container because the default <code>CN=Users</code> container cannot be written to.</p><p>You can enter a distinguished name relative to your domain, such as <code>OU=AponoGroups,OU=CORP</code>, or as the full distinguished name, such as <code>OU=AponoGroups,OU=CORP,DC=corp,DC=example,DC=com</code>.</p></td></tr><tr><td><strong>User Email Attribute</strong></td><td><p>(Optional) Active Directory attribute used to match a user to an Apono email address.</p><p><strong>Default</strong>: <em>userPrincipalName</em></p><p>Specify another attribute, such as <code>mail</code>, if your organization stores work email addresses in a different attribute.</p></td></tr><tr><td><strong>Self-signed Server</strong> or <strong>CA Certificate</strong></td><td><p>(Optional) Base64-encoded PEM CA certificate identified in the <a href="#prerequisites">Prerequisites</a></p><p><strong>IMPORTANT</strong>: Required when the domain controller's LDAPS certificate was not issued by a public certificate authority. Without this certificate, the connector cannot validate the domain controller and the connection fails.</p><p><br></p></td></tr></tbody></table>
7. Click **Next**. The **Secret Store** section expands.
8. [Associate the secret or credentials](/docs/connectors-and-secrets/apono-integration-secret.md).

   <div data-gb-custom-block data-tag="hint" data-style="info" class="hint hint-info"><p>If you select the <strong>Apono</strong> secret manager, enter the values of the <strong>Username</strong> and <strong>Password</strong> for the user you created.</p></div>
9. Click **Next**. The **Get more with Apono** section expands.
10. Define the **Get more with Apono** settings.

    <table><thead><tr><th width="224">Setting</th><th>Description</th></tr></thead><tbody><tr><td><strong>Custom Access Details</strong></td><td>(Optional) Instructions explaining how to access this integration's resources<br><br>Upon accessing an integration, a message with these instructions will be displayed to end users in the User Portal. The message may include up to <strong>400 characters</strong>.<br><br>To view the message as it appears to end users, click <strong>Preview</strong>.</td></tr><tr><td><strong>Integration Owner</strong></td><td><p>(Optional) Fallback approver if no <a href="/docs/access-flows/dynamic-access-management/resource-and-integration-owners.md">resource owner</a> is found<br><br>Follow these steps to define one or several integration owners:</p><ol><li>From the <strong>Attribute</strong> dropdown menu, select <strong>User</strong> or <strong>Group</strong> under the relevant identity provider (IdP) platform.</li><li>From the <strong>Value</strong> dropdown menu, select one or multiple users or groups.</li></ol><p><br><strong>NOTE</strong>: When <strong>Resource Owner</strong> is defined, an <strong>Integration Owner</strong> must be defined.</p></td></tr><tr><td><strong>Resource Owner</strong></td><td><p>(Optional) Group or role responsible for managing access approvals or rejections for the resource<br><br>Follow these steps to define one or several <a href="/docs/access-flows/dynamic-access-management/resource-and-integration-owners.md">resource owners</a>:</p><ol><li>Enter a <strong>Key name</strong>. This value is the name of the tag created in your cloud environment.</li><li>From the <strong>Attribute</strong> dropdown menu, select an attribute under the IdP platform to which the key name is associated.<br><br>Apono will use the value associated with the key (tag) to identify the resource owner. When you update the membership of the group or role in your IdP platform, this change is also reflected in Apono.</li></ol><p><br><strong>NOTE</strong>: When this setting is defined, an <strong>Integration Owner</strong> must also be defined.</p></td></tr></tbody></table>
11. (Recommended) Click **Test Integration** to validate the integration.

{% hint style="info" %}
**Test Integration** is available after you have entered or selected values for all required integration fields.

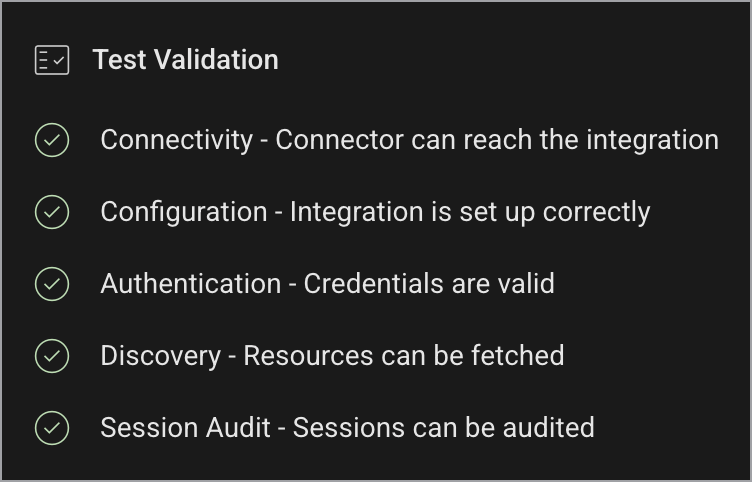
During the test, Apono runs the following validation checks:

* **Connectivity:** The connector can reach the integration.
* **Configuration:** The integration is set up correctly.
* **Authentication:** The credentials are valid.
* **Discovery:** Resources can be fetched.

The **Test Validation** checklist shows the result of each check.

<img src="https://1094436629-files.gitbook.io/~/files/v0/b/gitbook-x-prod.appspot.com/o/spaces%2Fv6MBfUGvblSdAz31yJXm%2Fuploads%2Fgit-blob-303b3a6834a7c7bf7a1a29aacfb9d323068a9133%2Fintegration-test-validation-new.png?alt=media" alt="" data-size="original">

If a check fails, Apono identifies the failed check and highlights the fields that need correction.
{% endhint %}

{% hint style="danger" %}
Test Integration does **not** validate the Group Policy Object (GPO) or confirm that requesters can connect to Windows servers. Verify that the [Apono Group Policy Object (GPO)](#create-the-apono-group-policy-object-gpo) is correctly linked to the Servers OU before granting access.
{% endhint %}

12. Click **Confirm**.

<details>

<summary>💡Are you integrating with Apono using Terraform?</summary>

If you want to integrate with Apono using Terraform, follow these steps instead of clicking **Confirm**:

1. At the top of the screen, click **View as Code**. A modal appears with the completed Terraform configuration code.
2. Click to copy the code.
3. Make any additional edits.
4. Deploy the code in your Terraform.

Refer to [Integration Config Metadata](https://docs.apono.io/metadata-for-integration-config/integration-metadata/windows-domain-servers) for more details about the schema definition.

</details>

#### Usage

resources in an access flow. This allows requesters to access your Windows servers securely based on your approval and provisioning rules.

{% hint style="warning" %}
If a server has been deleted but Apono has not yet discovered the deletion, access requests for that server do not fail. The associated domain groups remain visible to users and must be deleted manually by an administrator.
{% endhint %}

Follow the guidance in these articles to define the resource using Windows Domain Servers:

* [Define the resource (Self Serve Access Flows)](/docs/access-flows/creating-access-flows-in-apono/self-serve-access-flows.md#define-the-resource)
* [Define the resource (Automatic Access Flows)](/docs/access-flows/creating-access-flows-in-apono/automatic-access-flows.md#define-the-resource)

***

### Troubleshooting

<details>

<summary><strong>Servers are pending Group Policy enrollment.</strong></summary>

Apono cannot provision access to a server while Group Policy enrollment is pending.

Admins may see the following warning.

{% code overflow="wrap" expandable="true" %}

```
X/Y resources pending sync

Resources are pending due to GPO enrollment and can't be provisioned yet.
```

{% endcode %}

To identify and update the affected servers:

1. On the [**Resources**](https://app.apono.io/resources) tab, filter the resources by the **group\_policy\_pending** [resource tag](/docs/inventory/inventory.md#resource-tag) with the value of **true**.
2. For each affected server, apply the Group Policy by doing one of the following:
   * Restart the server.
   * Run the following command on the server.

{% code overflow="wrap" expandable="true" %}

```powershell
gpupdate /target:computer /force
```

{% endcode %}

</details>


---

# Agent Instructions
This documentation is published with GitBook. GitBook is the documentation platform designed so that both humans and AI agents can read, navigate, and reason over technical content effectively. Learn more at gitbook.com.

## Querying This Documentation
If you need additional information that is not directly available in this page, you can query the documentation dynamically by asking a question.

Perform an HTTP GET request on the current page URL with the `ask` query parameter, and the optional `goal` query parameter:

```
GET https://docs.apono.io/docs/additional-integrations/identity-providers/windows-domain-servers.md?ask=<question>&goal=<endgoal>
```

`ask` is the immediate question: it should be specific, self-contained, and written in natural language.
`goal` is optional and describes the broader end goal you are ultimately trying to accomplish on behalf of the user. GitBook uses it to tailor the answer towards what is most useful for that goal.

The response will contain a direct answer to the question and relevant excerpts and sources from the documentation.

Use this mechanism when the answer is not explicitly present in the current page, you need clarification or additional context, or you want to retrieve related documentation sections.