For the complete documentation index, see llms.txt. This page is also available as Markdown.

AI Sessions

Review AI agent sessions and activity

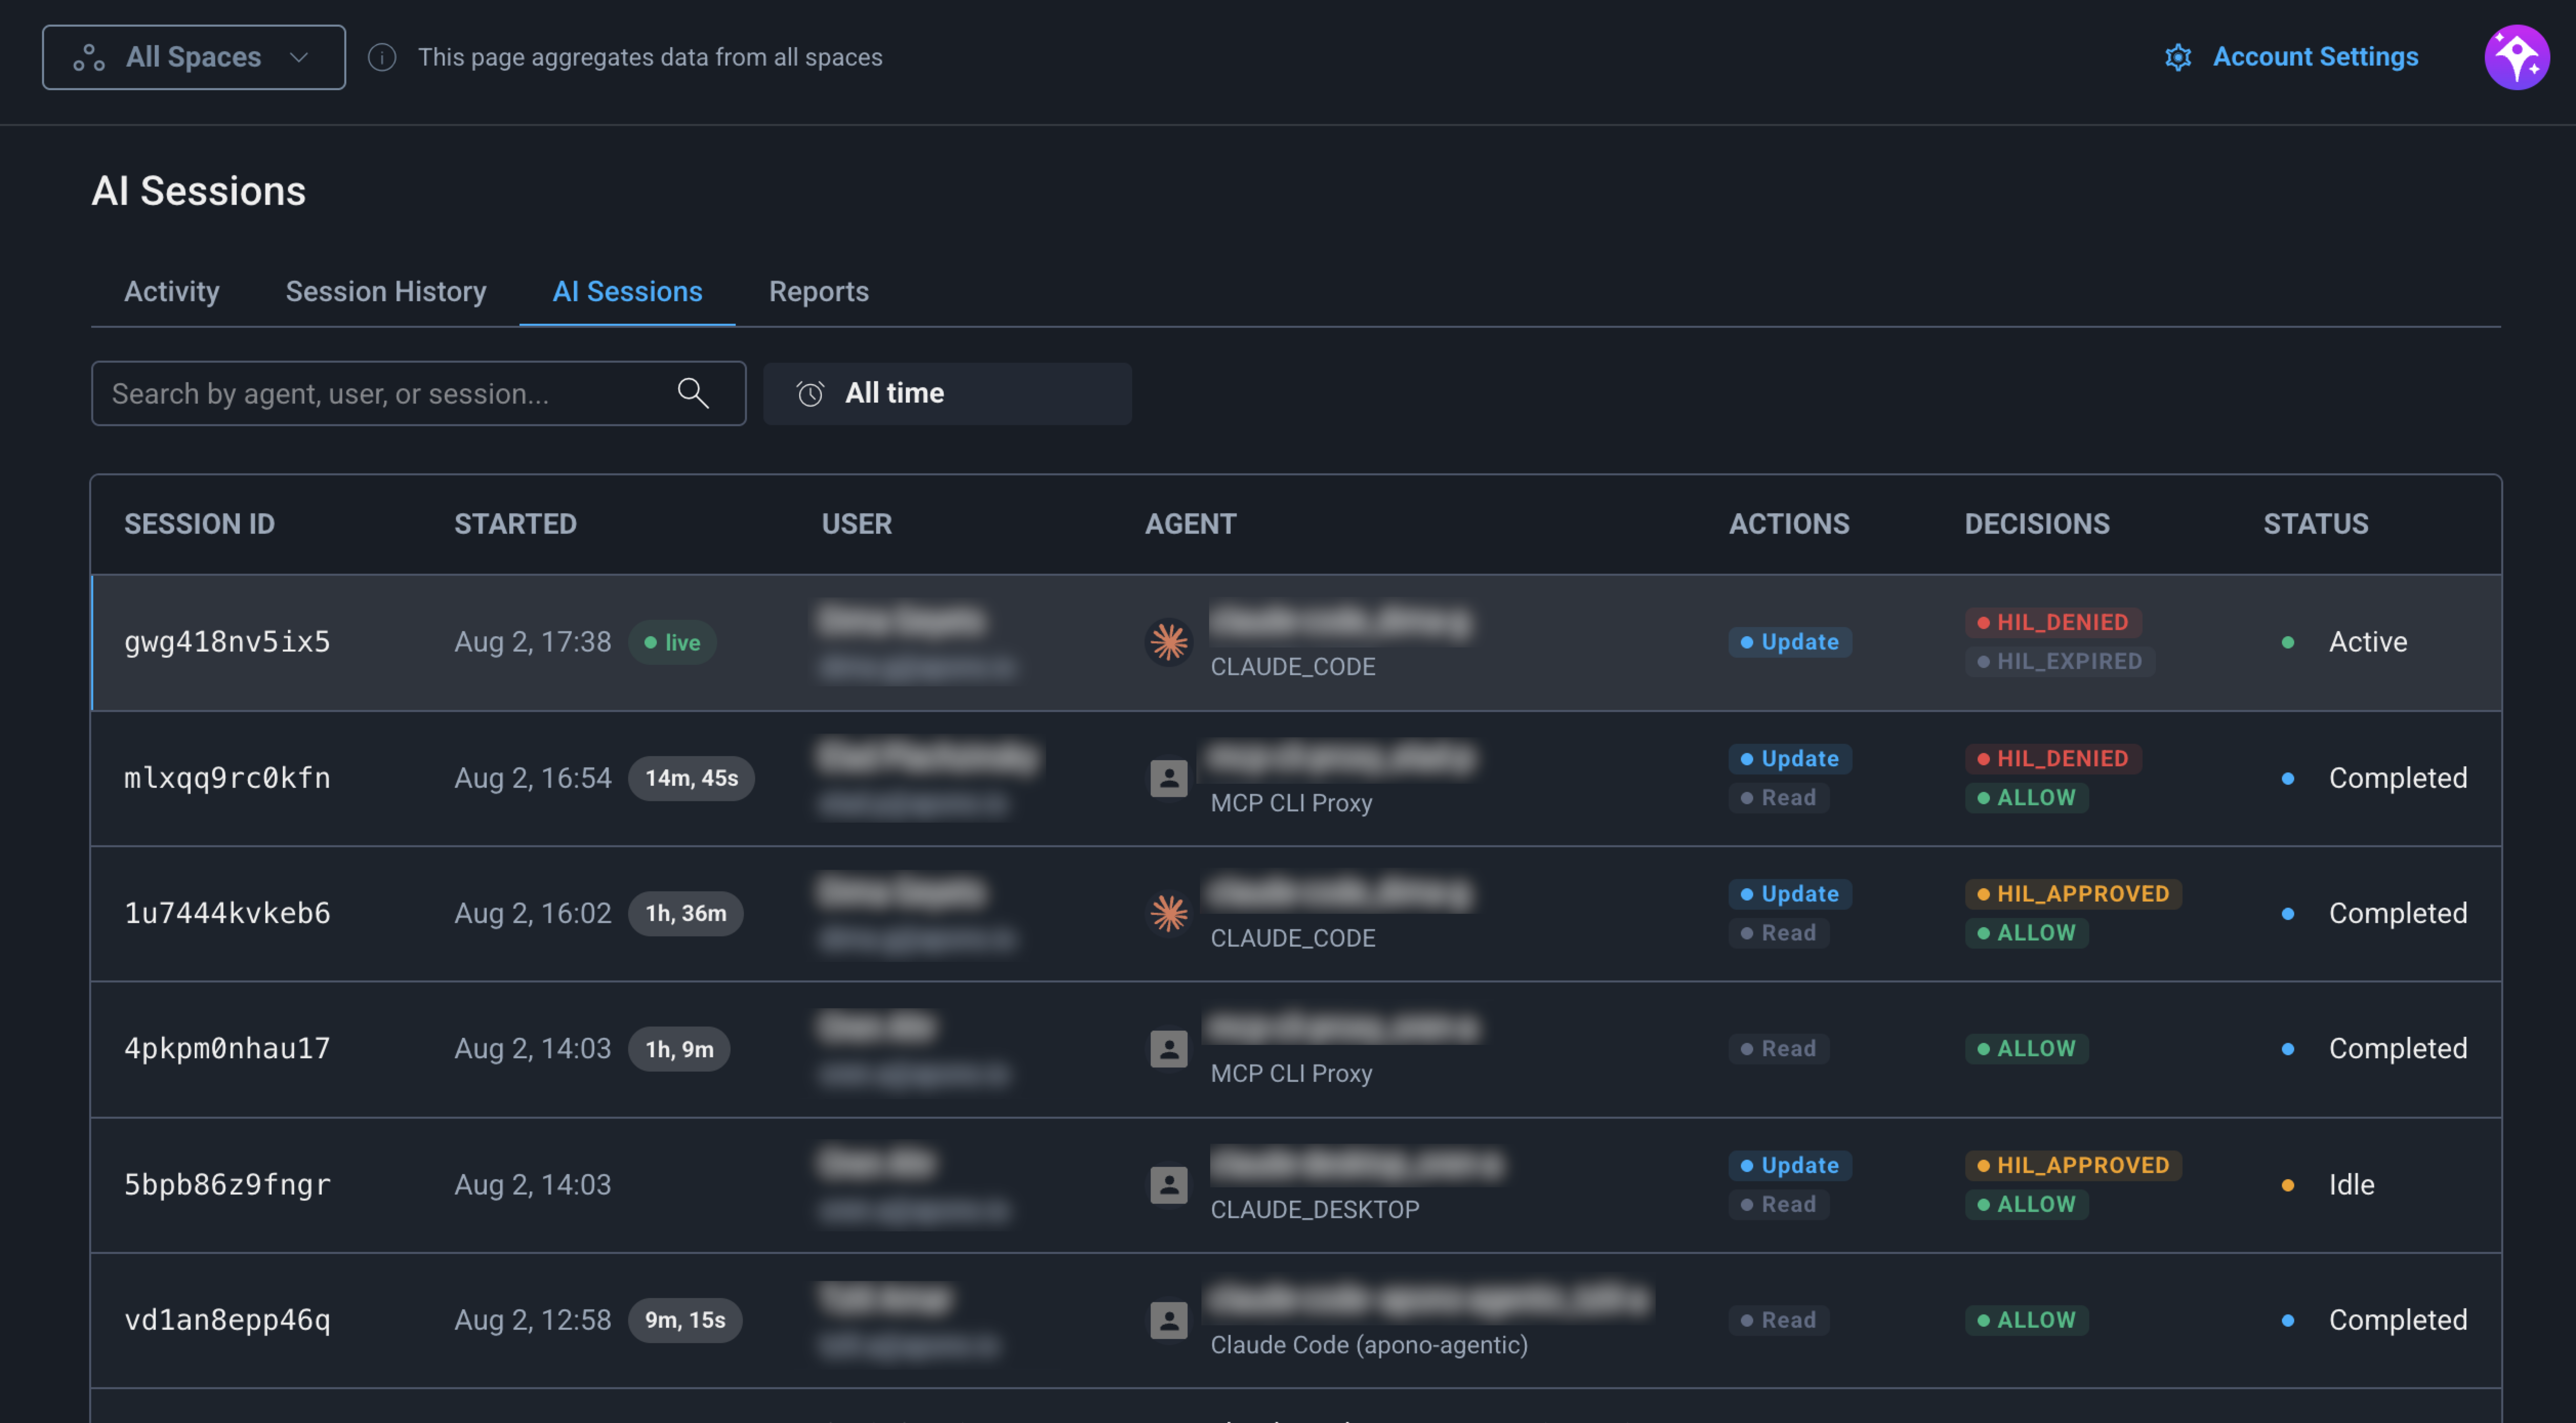
An AI session records an agent’s activity from the time it connects through the Apono Agentic Gateway until it disconnects. Each session is associated with the agent’s identity and the user on whose behalf it acts.

The AI Sessions tab on the Activity & Reports page provides a centralized audit trail of agent activity. It allows you to:

  • Identify sessions: Review the agent, associated user, start time, and session status.

  • Review activity: See the action categories and intent policy decisions recorded during each session.

  • Investigate actions: Trace access grants and tool calls in the order they occurred.

AI Sessions records activity under agent identities. Human access activity remains available in the existing Activity and Session Audit tabs.

Learn more about the Activity and Session Audit tabs.


View AI sessions

A session appears when an agent connects through the Apono Agentic Gateway. Active sessions display a live indicator. Completed sessions display their total duration.

AI Sessions

On the AI Sessions tab, the table provides a summary of each session.

Column
Description

Session ID

Unique identifier for the session

Started

When the session started

Active sessions display a live indicator. Completed sessions display their total duration.

User

Name and email address of the user associated with the agent

Agent

Agent identity and client type, such as Claude Code, Claude Desktop, or MCP CLI Proxy

Actions

Action categories recorded during the session

Possible values:

  • Read

  • Create

  • Update

  • Delete

  • Admin

Decisions

Intent policy decisions applied during the session

Possible values:

  • ALLOW

  • HIL

  • DENY

Sessions without tool calls do not display actions or decisions.

View session details

Follow these steps:

  1. On the AI Sessions tab, in the search field, enter a value to filter the sessions.

  2. Set the date range to refine the list of sessions. By default, all sessions are listed.

All Time

Relative

Follow these steps to set a relative date range:

  1. Click All Time, the date range settings appear.

  2. On the Relative tab, from the Last dropdown menu, select a time measure.

  3. In the Last text field, enter a number.

  4. (Optional) Click Round to the hours|days|months to begin the time filtering from the nearest hour, day, or month.

  5. Click Apply. The filter turns blue and shows a summary.

  6. Click the top or outside of the dropdown menu to close it.

Absolute

Follow these steps to set an absolute date range:

  1. Click All Time, the date range settings appear.

  2. On the Absolute tab, under From, select a start date:

    1. Select the start date from the date picker.

    2. Select the start time (local system time) from the time picker.

  3. Under To, select the end date:

    1. Select the end date from the date picker.

    2. Select the end time (local system time) from the time picker.

  4. (Optional) Click Use UTC to apply the Coordinated Universal Time (UTC) timezone to the start and end times instead of the local system time.

  5. Click Apply. The filter turns blue and shows a summary.

  6. Click the top or outside of the dropdown menu to close it.

  1. Click the row of a session. The session details panel opens.

  2. Review the session summary and Timeline.

The summary displays the session ID, start time, agent, associated user, and status. The Timeline displays the session events in chronological order. Each timeline entry is timestamped.

Timeline Event
Description

Session started

When the agent connected through the Apono Agentic Gateway

Access elevated

Access grant obtained during the session

Click the access request ID to review the access flow, target resources, permissions, and access duration.

Tool call

MCP tool called by the agent

The entry shows the MCP and tool name, action category, intent policy decision, and timestamp. Repeated identical calls may be grouped into one entry.

  1. To close the panel, click X in the upper-right corner.

Last updated

Was this helpful?