For the complete documentation index, see llms.txt. This page is also available as Markdown.

Model Context Protocol (MCP) servers

Manage MCP servers and their intent policies

Apono supports both Apono Managed MCPs and custom MCPs for secure agentic access. Apono Managed MCPs are provided and maintained by Apono for supported platforms. Custom MCPs are added and maintained by your organization.

Each MCP exposes a set of tools that an AI agent can call through the Apono Agentic Gateway. Each MCP also has its own intent policy, which governs every tool call made through that MCP. The gateway classifies each action as Read, Create, Update, Delete, or Admin, then allows it, pauses it for human approval, or blocks it according to the configured guardrail.


Enable and configure an Apono Managed MCP

Enabling an MCP makes its tools available through the Apono Agentic Gateway. It does not grant access to the platform. The agent must also receive access through an applicable agentic access flow created during the platform-specific setup.

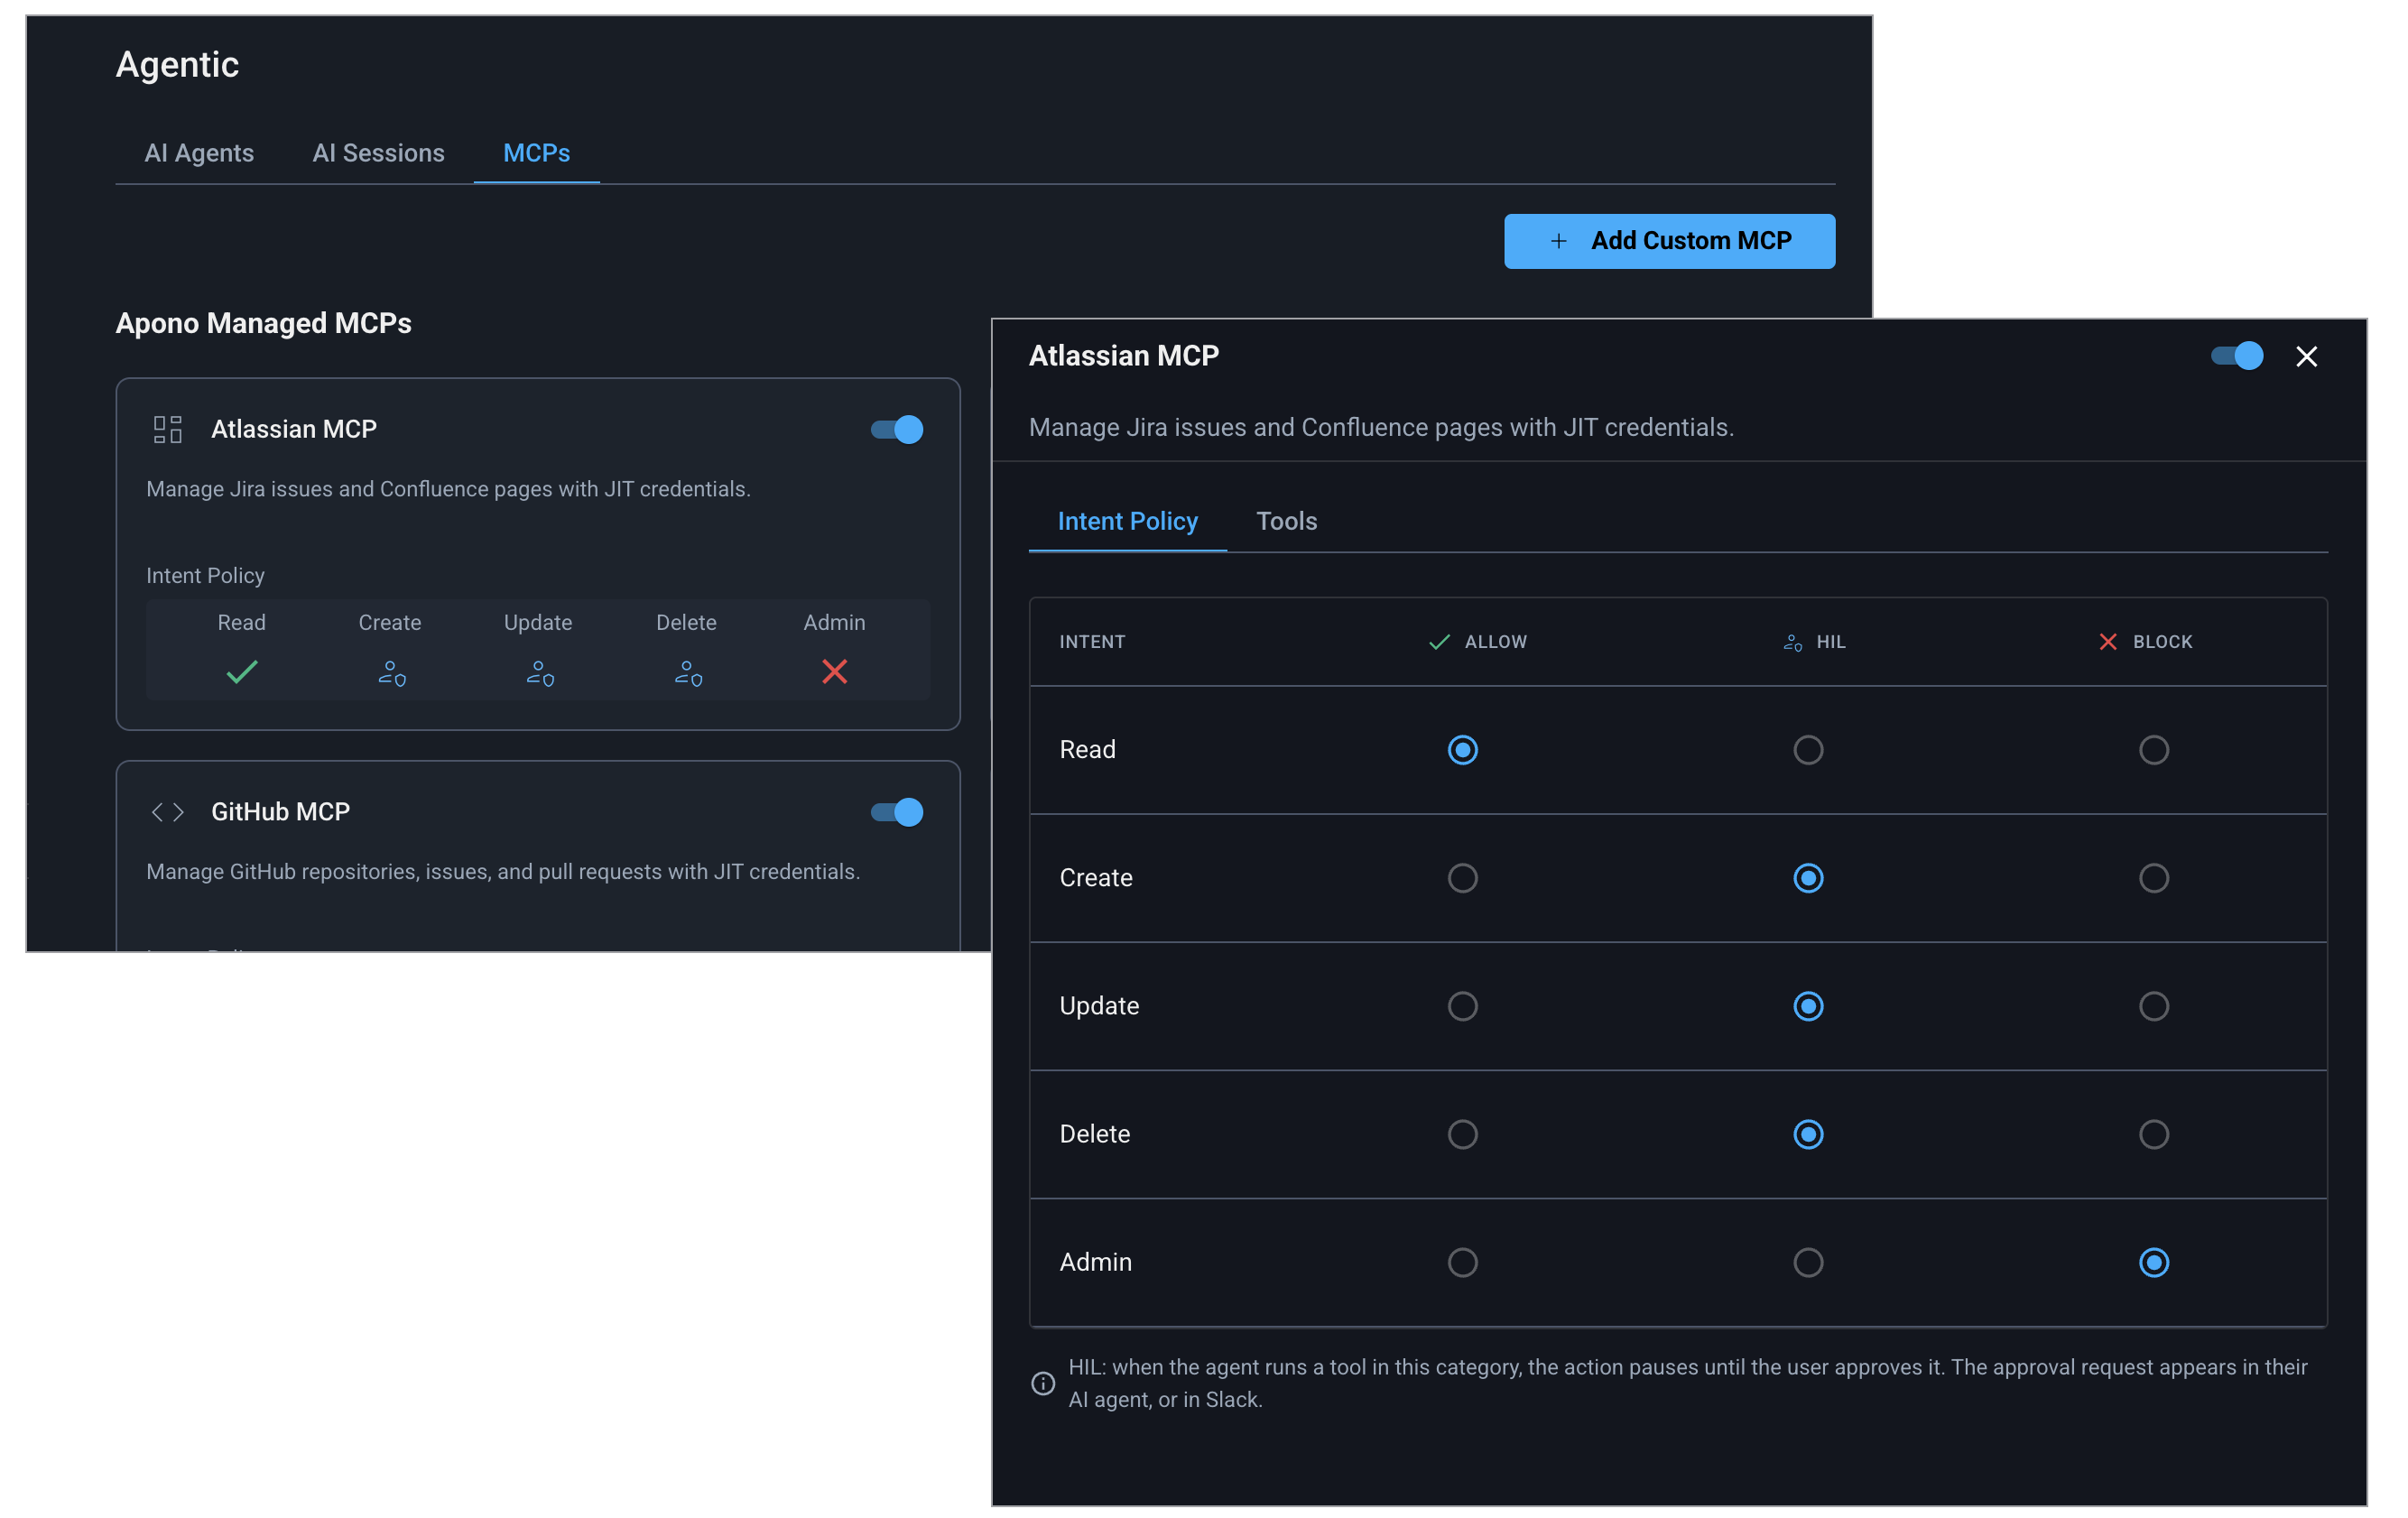
MCPs tab and panel

Follow these steps:

  1. On the MCPs tab, under Apono Managed MCPs, locate the required MCP.

  2. On the MCP card, enable it by clicking its toggle.

  3. Click the MCP card. The MCP settings panel opens.

  4. On the Intent Policy tab, select a guardrail for each action category.

By default, each MCP allows Read actions, requires human-in-the-loop approval for Create, Update, and Delete actions, and blocks Admin actions.

Guardrail
Behavior

Allow

The action can proceed without additional approval.

HIL

The action pauses until the agent’s human operator approves or rejects it.

Approval can be requested through a supported in-client experience or an external channel such as Slack.

IMPORTANT: Human-in-the-loop approval is separate from access-flow approval. Access-flow approval determines whether temporary access is granted. HIL approval determines whether a specific agent action can proceed.

Block

The action cannot proceed.

  1. Click Save. The panel closes.


Create a custom MCP server

Follow these steps:

  1. On the MCPs tab, click + Add Custom Tool. The Custom MCP panel opens.

  2. On the Config tab, enter the Name.

  3. Select one or more Resource Types.

  4. Define the MCP Server Configuration settings for STDIO or HTTP.

  1. Click STDIO.

  2. Define the configuration.

  1. Click HTTP.

  2. Enter the Endpoint.

  3. (Optional) Add headers for the MCP:

    1. Under Headers, click + Add Headers.

    2. Enter the Name and Value of any MCP headers.

  1. On the Intent Policy tab, select a guardrail for each action category.

By default, each MCP allows Read actions, requires human-in-the-loop approval for Create, Update, and Delete actions, and blocks Admin actions.

Guardrail
Behavior

Allow

The action can proceed without additional approval.

HIL

The action pauses until the agent’s human operator approves or rejects it.

Approval can be requested through a supported in-client experience or an external channel such as Slack.

IMPORTANT: Human-in-the-loop approval is separate from access-flow approval. Access-flow approval determines whether temporary access is granted. HIL approval determines whether a specific agent action can proceed.

Block

The action cannot proceed.

  1. Click Save. The panel closes.

Last updated

Was this helpful?