Manage EKS namespaces through an AWS Organization

Create an integration to manage access to EKS resources

With Elastic Kubernetes Service (EKS) on AWS, EKS simplifies the management complexities of Kubernetes.

This integration allows Apono to securely manage access to your AWS Elastic Kubernetes namespaces by connecting to your AWS Organization using ECS.

EKS namespace management allows you to grant access at the namespace level within a cluster, providing granular control and reducing overprivileged access to entire clusters.

circle-check

Prerequisite

Item
Description

Apono Connector

On-prem connection serving as a bridge between AWS and Apono Learn how to install a connector on ECS to manage EKS namespaces.


Integrate an AWS Organization with EKS resources

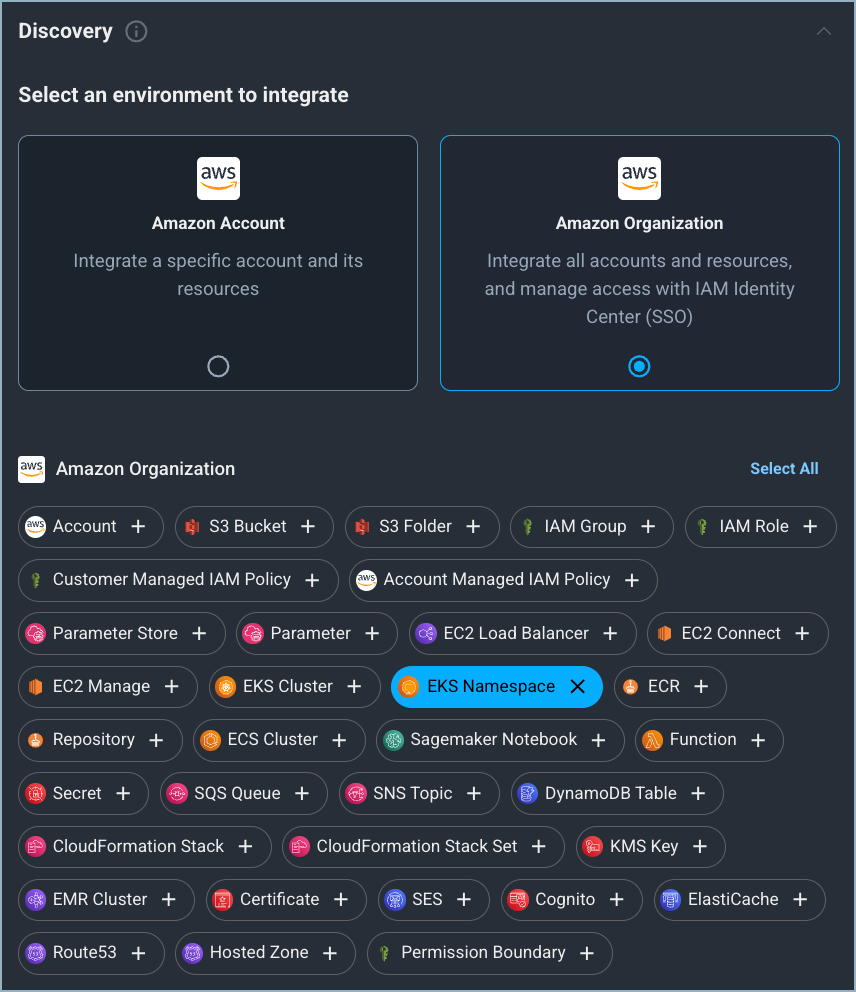
EKS Namespace resource type during integration
circle-check

Follow these steps to complete the integration:

  1. On the Catalogarrow-up-right tab, click AWS. The Connect Integrations Group page appears.

  2. Under Discovery, click Amazon Organization.

  3. Select the EKS Namespace resource type to sync with Apono. You can select other resource types as well.

circle-info

Apono automatically discovers and syncs all the instances in the environment. After syncing, you can manage access flows to these resources.

  1. Click Next. The Apono connector section expands.

  2. From the dropdown menu, select a connector. Choosing a connector links Apono to all the services available on the account where the connector is located.

circle-check
  1. Click Next. The Integration Config section expands.

  2. Define the Integration Config settings.

    Setting
    Description

    Integration Name

    Unique, alphanumeric, user-friendly name used to identify this integration when constructing an access flow

    Region

    Region in which the organization runs

    AWS Profile Name

    (Optional) User-defined label for a collection of AWS credentials and configuration settings stored locally Default: apono

    Enable Audit

    (Optional) Allows Apono to track and record access across the managed resources

  3. Click Next. The Get more with Apono section expands.

  4. Define the Get more with Apono settings.

    Setting
    Description

    Credential Rotation

    (Optional) Number of days after which the database credentials must be rotated Learn more about the Credentials Rotation Policy.

    Custom Access Details

    (Optional) Instructions explaining how to access this integration's resources Upon accessing an integration, a message with these instructions will be displayed to end users in the User Portal. The message may include up to 400 characters. To view the message as it appears to end users, click Preview.

    Integration Owner

    (Optional) Fallback approver if no resource owner is found Follow these steps to define one or several integration owners:

    1. From the Attribute dropdown menu, select User or Group under the relevant identity provider (IdP) platform.

    2. From the Value dropdown menu, select one or multiple users or groups.

    NOTE: When Resource Owner is defined, an Integration Owner must be defined.

    Resource Owner

    (Optional) Group or role responsible for managing access approvals or rejections for the resource Follow these steps to define one or several resource owners:

    1. Enter a Key name. This value is the name of the tag created in your cloud environment.

    2. From the Attribute dropdown menu, select an attribute under the IdP platform to which the key name is associated. Apono will use the value associated with the key (tag) to identify the resource owner. When you update the membership of the group or role in your IdP platform, this change is also reflected in Apono.

    NOTE: When this setting is defined, an Integration Owner must also be defined.

  5. Click Confirm.

chevron-right💡Are you integrating with Apono using Terraform?hashtag

If you want to integrate with Apono using Terraform, follow these steps instead of clicking Confirm:

  1. At the top of the screen, click View as Code. A modal appears with the completed Terraform configuration code.

  2. Click to copy the code.

  3. Make any additional edits.

  4. Deploy the code in your Terraform.

Refer to Integration Config Metadata for more details about the schema definition.

Now that you have completed this integration, you can create access flows that grant permission to your AWS Organization’s EKS namespaces.

Last updated

Was this helpful?