# The Apono Docs and API Reference
Welcome to the Apono Documentation Center. Here you will find comprehensive guides along with quick-start instructions to help you start working with Apono right away, as well as support if you get stuck. Let's jump right in!
# Why Choose Apono
Apono is the best solution for just-in-time, temporary access to sensitive cloud resources
Apono lets you automate static access policies by turning them into declarative, dynamic Access Flows. Integrate your cloud environment, CI/CD stack, cloud infrastructure and databases with Apono. Create Access Flows with our declarative UI or in Terraform, and your developers can use Slack, Teams or CLI to request and approve access.
Protect what matters without breaking a sweat.
The Apono Access Management Life Cycle
## Who is Accessing Cloud Resources Right Now?
Do developers have admin/write access or read-only access to production?
Can you answer that, or must you sort through your cloud resources to find out? Of course, by the time you get to the last one, you'll have to recheck the first because so much time has elapsed, and access changes constantly. While discussing it, how long would it take to revoke access to a production cloud resource in an emergency?
With Apono, you have a ***single point of control*** for managing access without creating a single point of failure.
## Apono Access: Automated, Just-in-Time, Just-Enough
Use Apono for on-demand access to critical resources. Grant an engineer permission to fix a production issue in an emergency. Grant a data scientist access to a data lake when needed. Just as important is to revoke access once it's no longer needed.
Apono's permissions are just-in-time and also ephemeral. Access is automatically revoked when no longer needed. No more forgotten privileges or group memberships left open. Access begins and ends according to Access Flow definition.
## Access Management that Scales
No need to manually change permissions for each resource on your cloud platform every time someone needs access to one of its resources. While access can be granted at a granular level, large-scale environments can be managed efficiently by creating Access Flows, for individuals and groups, to all cloud resources and assets.
Your environment is always evolving, and so does Apono. Use hierarchies, tags and exclude for [dynamic access management.](/docs/access-flows/dynamic-access-management)
## Apono Integrates with Terraform
Are you using Terraform to manage your cloud platforms?
That's great because Apono is a [Terraform provider](https://registry.terraform.io/providers/apono-io/apono/latest) and can be provisioned to work alongside your resources by adding code blocks to integrate them into Apono. When you bring up a resource, it will immediately benefit from Apono access management.
Apono lets you turn static access policies into dynamic Access Flows directly from Terraform. Reuse a simple build file to build the perfect workflows for your organization without ever leaving Terraform.
## Designed for DevX
With Apono, you will work smarter with less effort to manage and gain access to your cloud resources. You will take control of your cloud resource inventory from one central location.
Apono's Access Flows prepare for contingencies, emergency access and regular maintenance. Onboarding becomes quick and easy, with our dynamic Access Flows and access bundles. There's no need for writing and maintaining home-grown scripts and complex workflows.
Your developers can request access bundles and get just the access they need exactly when they need it, no hassle.
## Deployed Via Slack and Teams
Developers and engineers love ChatOps and CLI, so why should they have to use another interface?
Apono integrates with Slack, Teams and CLI, so your R\&D can use the tools they know to request & approve access, connect to the resources, and, after the access is automatically revoked, request the access again when they need it.
## Speaks Your (Declarative) Language
Apono has developed a declarative, natural language format for defining access permissions. No need to edit config files. We call it **Access Flow**, and it looks like this:
Select a resource and then add (a) who is allowed to gain access (b) what kind of access (roles or permissions) to grant, (c) which specific resources in the integration to allow access to, (d) how long the access should last, (e) should access be approved automatically or by someone in the organization.
In fact, integrating with Apono and creating Access Flows has proven so intuitive that most Apono customers set up and **deploy access control for their entire organizations within two weeks.**
## Keeps Your CISO Happy
Apono doesn't have access to any of your data. Ever.
[How does it work](/docs/getting-started/how-apono-works)? Install our connector in your environment, direct it to your secret store and you're done! The connector manages the data syncs to our app and handles access provisioning and de-provisioning to your services, without storing or caching secrets.
We call it **SasS with on-premise level of** [**security**](/docs/about-apono/security-and-architecture). And you can tell your customers that they can be confident that [access to their data](/docs/access-flows/common-use-cases/protecting-pii-and-customer-data) is protected.
## A Home Run With SOX IT Controls
Apono's comprehensive access management covers your entire cloud, with Access Flows defined for every cloud service and resource type. Need to maintain least-privileges to production environments, financial data, PII, and other critical assets? Check!
Access requests and granted access are all logged, so you have a reliable audit of the access to your data. As part of your [IT compliance reporting](broken://pages/ThHQBZlXKVOn4Qx4et1h) to SOX, HIPAA, GDPR, PCI DSS, SOC 2 and others, use Apono's audit logs and reports. Send them to external auditors, internal GRC and security teams, and export logs directly to ITSM, SIEM and compliance tools.
# Security and Architecture
Apono helps you manage just-in-time access in a secure, least privilege way
## Overview
Apono was built and designed with security in mind so that any company is able to use it in their environment.
We applied the same least privilege principles to our product that Apono unlocks for its users:
* Ensure users receive just the right amount of permissions they need
* Ensure users receive access only for the limited time they need them
How Apono works - architecture and framework
## Security
### Apono's secure architecture
The Apono platform is built by two separate components:
* The Web App
* The Connector
The web app continuously receives basic data about users, resources and permissions from the connector.
The connector is fully deployed within the organization’s environment and has a limited set of template functions that can be invoked and are fully in the organization control.
This architecture ensures high reliability as well as segregation of environments, keeping any access to the environment within the environment.
### The Web App security
Our web app is a portal for admins to create and manage integrations and Access Flows.
The portal:
* **Could only be accessed by admins** of the system who've authenticated using the organizational identity provider.
* **Doesn't require access to the organization's environment** resources. No roles, permissions, privileges, or actions are granted to the app.
* **Integrates with the organizational identity provider** as the source of truth for the organizational identities.
* **Doesn't access your data or environment**, and only communicates with the Apono connector.
### The Connector security
Our connector is a component you install in your cloud environment (AWS, GCP, Azure, Kubernetes). It communicates with your cloud services and cloud apps using, but not caching or storing, your secrets.
The connector:
* Is completely **within the organization's control**, as it is installed in your cloud provider.
* **Can be uninstalled or disconnected at any time** without support from Apono.
* Uses **fully visible template functions**, mutable by the organization’s environment owner. These functions limit the ability of the connector to only invoke specific actions that are predefined.
* **Has no permissions to access the data** itself.
* **Does not store any secrets**.
> 👍 The Apono Connector is High Availability
>
> No downtime, no outages, no problem!
>
> Our [Round Robin](https://www.techopedia.com/definition/13205/round-robin) method helps ensure uptime for your Apono integrations as users request access. Several connector instances will continue provisioning and deprovisioning access as needed.
### Your data
When you integrate your cloud applications and IdP with Apono, Apono syncs metadata and configuration information continuously. We **only sync basic information needed for access management**: users, groups, resources and permissions.
Apono:
* **Does not read your data**, like datasets, files, documents, code, etc.
* **Does not collect any personal data about your employees,** Apono only requires a user's email address.
* **Does not store or cache secrets** or credentials.
### Secrets
Apono **does not store or cache any of your secrets**.
When a data sync is required, the connector gets the secret from your cloud's Secret Store to access the data it needs. After authenticating, the secret is not saved anywhere.
> 👍 Credentials rotation as often as you need
>
> When granting access to users, Apono enforces password reset and credentials rotation out of the box to meet the strictest compliance and security standards. Read more [here](/docs/architecture-and-security/credentials-rotation-policy).
## Architecture
### Apono and AWS
### Apono and GCP
### Apono and Azure
# Glossary
Commonly used Apono terms
| Term | Meaning |
| ------------------- | ----------------------------------------------------------------------------------------------------------------------------------------------------------------------------------------------------------------------------------------------------------------------------------------------------------------------------------------------------------------------------------------------------------------------------------------------------------------------------------------------------------------------------------------------------------------------------------------------------------------------------------------------------------------------------------------------------------------------- |
| Access Flow |
A dynamic flow to manage and control access. The Access Flow, set by the admin, determines the: -Requester (the user or group of users) -Resource or bundle of resources -Permission or permissions -Approval flow (automatic or by approver) -Access duration
Visit the Access Flows page to see how easily an Access Flow definition is created with step by step instructions.
|
| Access Request |
Users request access to resources controlled by Apono's Access Flows using Slack, Teams or CLI. This Access Request is either automatically approved or sent to the flow's approver who must then either approve or reject it.
|
| Admin role | Admins are users in Apono who integrate Apono with their environment and create and manage Access Flows. |
| Agent identity | The Apono-generated identity the agent acts under — distinct from, and bound to, the human operator. |
| Agentic access flow | An access flow with **Restrict to agentic access** enabled — the only kind of flow an agent can request. |
| Agentic Gateway | The local MCP server (`@apono-io/apono-mcp`) that brokers all agent access through Apono. |
| Approver | A user, group of users, manager or shift member who have been listed on a specific Access Flow as those who must [approve or reject](/docs/access-requests-and-approvals/slack/approving-access-with-slack) an access request. |
| Bundle |
A bundle is a combination of resources and permissions, grouped together so that they can be easily requested and granted together.
Bundles are great for: -Dynamic management - Admins can create a bundle once and use it in different Access Flows with different requesters, approval flows, and access duration. -Ease of use - Requesters can request a bundle of access for the task or incident they are currently handling.
|
| Connector | [Connectors](/docs/about-apono/security-and-architecture#the-connector-security) are very small apps added to a cloud service that allows secure data sync and access management functions to be run by Apono. |
| End-user/Grantee | The person who has been granted access to a resource or resources according to an Access Flow and will actually be using it. |
| HIL | A per-action approval sent to the agent's human operator before a gated action executes. |
| Identities | Users in the organization, synced from your identity provider. |
| IdP | Identity Provider; A service that stores and manages digital identities. Companies use these services to allow their employees or users to connect with the resources they need. They provide a way to manage access, adding or removing privileges, while security remains tight. Read more [here](https://www.okta.com/identity-101/why-your-company-needs-an-identity-provider/). |
| Integration | Your cloud integrations must be connected with Apono to sync data on identities, resources and permissions and to manage access just-in-time. See the [Apono catalog](https://app.apono.io/catalog) for a complete list of supported integrations. |
| Intent Policy | Per-AI-Tool runtime policy: for each action category (Read / Update / Create / Delete / Admin), Allow, HIL, or Deny. |
| Just In Time (JIT) |
Just In Time refers to that part of the Access Flow that makes a resource available to a user only when they need it and only as long as it is needed. It is JIT, but it also means that access isn't left and forgotten and left available past the time it is used.
You might also have heard the terms short-lived access, ephemeral access or temporary access.
|
| MCP | An MCP server managed through Apono, enabled per organization on the MCPs tab. |
| Permission |
The type of action users can perform on a resource. Actions are usually grouped into roles; for example an Admin role usually contains all the possible actions, like read, write, delete, etc.
Some permissions are more powerful than other. For example, a write permission (which allows you to edit a resource) is more powerful than a read permission (which only allows you to view it).
Permissions are at the heart of the Least Privilege principal; permissions (especially strong ones/those that apply to sensitive or critical resources) should be kept to a minimum and be granted only upon need (just-in-time).
|
| RBAC | Role-based access control (RBAC) systems assign access and actions according to a person's role within the system. Everyone who holds that role has the same set of rights. Those who hold different roles have different rights. Read more [here](https://www.okta.com/identity-101/what-is-role-based-access-control-rbac/). |
| Resource |
A resource is a cloud service or other instance that a user can gain access to. For example, repositories, servers, machines, buckets, databases, but also accounts, projects, folders, clusters, etc. Every cloud application artifact can be a resource, and if integrated with Apono - users can request and be granted access to it.
The permission determines which actions the user can perform on the resources.
|
| Resource Type | The resource type is the family the resource belongs to. For example, every S3 bucket instance has a name and path, but all S3 Buckets belong to the S3 Bucket family. |
# Apono Agent Privilege Guard
Secure agentic access with just-in-time, least-privilege controls
**Apono Agent Privilege Guard** provides secure agentic access through the same just-in-time, least-privilege model used to govern human access. It helps organizations extend zero standing privileges to agentic workflows by applying several layers of control:
* **Just-in-time access**: Agents request time-bound access instead of relying on standing permissions or agent-held long-lived credentials.
* **Scoped authorization**: Agentic access flows limit who the agent can act for, which resources and permissions it can access, and how long access lasts.
* **Action-level guardrails**: Intent policies determine whether agent actions are allowed, require human approval, or are denied.
* **Traceable activity**: Agent identities and AI Sessions distinguish agent activity from human activity and record access grants, actions, and policy decisions.
Together, these controls allow organizations to adopt agentic workflows without creating a separate, less-governed access path.
***
### How Apono Agent Privilege Guard works
1. **Connect the AI client**. The client connects through the Apono Agentic Gateway.
2. **Make platform capabilities available.** Apono Managed MCPs expose supported operations through Model Context Protocol (MCP) servers. Enabling a Managed Tool makes its capabilities available but does not grant access to the target platform. The agent must still use an applicable agentic access flow, and its actions remain subject to intent policies. Depending on the integration, Apono provides access to the target platform through just-in-time credentials or the user’s OAuth authorization.
3. **Request scoped access.** An agentic access flow defines on whose behalf the agent can request access, the resources and permissions available to it, the access duration, and the approval process.
4. **Evaluate each action.** For every MCP tool call, the Apono Agentic Gateway classifies the action as **Read**, **Create**, **Update**, **Delete**, or **Admin** and applies the guardrail configured in that MCP’s intent policy.
5. **Record the activity**. The agent appears in AI Agents, while AI Sessions records its access grants, actions, and policy decisions.
***
### Get started
Choose the platform that you want agents to access.
Each end-to-end guide covers:
* Apono account prerequisites
* Agentic access-flow configuration
* Managed Tool enablement
* Agentic Gateway and AI-client setup
* Verification and troubleshooting
[Set up Apono Agent Privilege Guard for your platform](/docs/agent-privilege-guard/set-up-apono-agent-privilege-guard).
# Set up Apono Agent Privilege Guard
Configure supported platforms for secure agentic access
Apono Agent Privilege Guard setup varies by platform and authentication model. Use the guides in this section to configure the integration, agentic access flow, credentials, Apono Managed MCP, and AI client required for agents to interact with the platform.
In general, setup includes:
1. Connecting the platform to Apono through a connector or OAuth integration.
2. Creating an agentic access flow that defines the resources and permissions an agent can request.
3. Enabling and configuring the corresponding Apono Managed MCP.
4. Connecting the AI client to the Apono Agentic Gateway.
5. Verifying that the agent can request access and use the MCP tools.
Follow the applicable platform guide for the exact prerequisites and setup.
# Apono Agent Privilege Guard for AWS
Configure governed, just-in-time AI access to AWS resources
Set up Apono Agent Privilege Guard for AWS to give AI agents controlled, temporary access to AWS resources.
An Apono admin configures the AWS integration, an agentic access flow, and the AWS MCP. Each user then connects a supported AI client through the Local Agentic Gateway, which brokers requests between the AI client, Apono, and AWS.
***
### Set up the Apono account
An Apono admin completes this setup once.
After the Apono account setup is complete, each user can connect a supported AI client to the Agentic Gateway.
#### Prerequisites
Requirement
Details
AWS Organization integration
Connected Apono integration
Verify the integration exists and is healthy on the Connected tab. If no AWS Organization integration is connected, follow the AWS integration docs.
Full-Access connector
Required connector permissions
The connector used by the AWS Organization integration must be deployed with Full-Access (Manage IAM) permissions.
#### Create an agentic access flow
Create a Self Serve access flow that allows agents to request temporary access to AWS resources on behalf of permitted users:
1. Follow the procedure in [Self Serve Access Flows](/docs/access-flows/creating-access-flows-in-apono/self-serve-access-flows) to define the requestors, resources, access duration, and approval process. As you create the flow, apply the following settings for agentic access.
Setting
Configuration
Access Flow Name
Enter a unique, user-friendly name, such as Agentic - AWS.
When Requestor
Select the users or groups on whose behalf an agent can request access.
The agent can request access only on behalf of its associated user, so that user must match these requester conditions. For Can request for, select Themselves.
Request access to
Select your AWS Organization integration, and then select the resource types, resources, and permissions the agent can access.
Follow the Integrations instructions in the Define the resource section of the Self Serve Access Flows guide.
Grant for
Set the access duration to 5 minutes.
Approval
Select Automatic
Settings
Click the Restrict to agentic access toggle to enable the setting.
{% hint style="info" %}
**Allow Extend Duration** does not apply to agentic access flows. When access expires, the agent requests access again.
{% endhint %}
2. Configure any other Self Serve access flow settings according to your organization’s access policies.
3. Click **Save Access Flow**.
#### Enable MCP features and the AWS MCP
Follow these steps:
1. On the [**Account Settings**](https://app.apono.io/settings/account) page, under **AI & Automation**, click the **Enable MCP features** toggle to enable the setting. The toggle turns green.
2. On the [**MCPs**](https://app.apono.io/agentic/tools) tab, under **Apono Managed Tools**, click the toggle on the **AWS MCP** card to enable the tool.
{% hint style="info" %}
Learn more about [Model Context Protocol servers](/docs/agent-privilege-guard/apono-agent-privilege-guard-reference/model-context-protocol-mcp-servers).
{% endhint %}
After setup, use the [**AI Agents**](/docs/agent-privilege-guard/apono-agent-privilege-guard-reference/ai-agents) tab to view discovered agents and their associated users. Use the [**AI Sessions**](/docs/agent-privilege-guard/apono-agent-privilege-guard-reference/ai-sessions) tab to review agent activity, including access grants, tool calls, and intent policy decisions.
***
### Set up the Agentic Gateway on a local machine
{% hint style="info" %}
Learn more about [local](/docs/agent-privilege-guard/apono-agentic-gateway/install-the-local-agentic-gateway) and [remote](/docs/agent-privilege-guard/apono-agentic-gateway/deploy-the-remote-agentic-gateway) agentic gateways setups.
{% endhint %}
Each user running the gateway completes this setup on their local machine.
#### Prerequisites
Created an agentic access flow with Restrict to agentic access enabled
Enabled MCP features and the AWS MCP
Supported operating systems
Supported operating systems:
macOS
Windows 11 (native)
WSL2 (Ubuntu)
Node.js 20+
Required runtime
The gateway is launched with npx, which runs @apono-io/apono-mcp@latest, downloads the gateway binary, and manages the Apono sign-in. No separate Apono CLI installation is required.
#### Configure your AI client
{% hint style="info" %}
If the Agentic Gateway is already configured for this client, skip to [Verify your agent](#verify-your-agent).
{% endhint %}
{% tabs %}
{% tab title="Claude Code" %}
Follow these steps:
1. Run the following command for your operating system. If this is the first run, a separate browser tab opens.
**macOS**
{% code overflow="wrap" %}
```shellscript
claude mcp add apono-agentic -- npx -y @apono-io/apono-mcp@latest --agent-type claude-code
```
{% endcode %}
**Windows 11 (native)**
In Command Prompt or PowerShell:
{% code overflow="wrap" expandable="true" %}
```powershell
claude.cmd mcp add apono-agentic -- npx -y @apono-io/apono-mcp@latest --agent-type claude-code
```
{% endcode %}
**WSL2 (Ubuntu)**
{% code overflow="wrap" expandable="true" %}
```shellscript
claude mcp add apono-agentic -- npx -y @apono-io/apono-mcp@latest --agent-type claude-code
```
{% endcode %}
2. (First run only) Log in to Apono in the open browser tab.
{% endtab %}
{% tab title="Claude Desktop" %}
Follow these steps:
1. In Claude, from the main navigation, click **Claude > Settings > Developer**. The **Settings** page appears.
2. Click **Edit Config**. The **claude\_desktop\_config.json** file opens.
3. Add the following configuration.
{% code overflow="wrap" %}
```json
{
"mcpServers": {
"apono-agentic": {
"command": "npx",
"args": ["-y", "@apono-io/apono-mcp@latest", "--agent-type", "claude-desktop"]
}
}
}
```
{% endcode %}
4. Save the file.
5. Quit and restart Claude desktop.
6. (First run only) Log in to Apono in the browser tab that opens.
{% endtab %}
{% tab title="Cursor" %}
**Quick Start Installation**
Follow these steps:
1. Click the following button to install the MCP Server. The **MCP** page in Cursor opens.
Add to Cursor
2. Click **Install**.
3. Quit and restart Cursor.
4. (First run only) Log in to Apono in the browser tab that opens.
***
**Manual Installation**
Follow these steps:
1. In Cursor, from the main navigation, click **Tools & MCPs**. The **Tools** page appears.
2. Under **Home MCP Servers**, click **New MCP Server**. The **mcp.json** file opens.
3. Add the following configuration.
{% code overflow="wrap" %}
```json
{
"mcpServers": {
"apono-agentic": {
"command": "npx",
"args": ["-y", "@apono-io/apono-mcp@latest", "--agent-type", "cursor"]
}
}
}
```
{% endcode %}
4. Save the file.
5. Quit and restart Cursor.
6. (First run only) Log in to Apono in the browser tab that opens.
{% endtab %}
{% endtabs %}
#### Verify your agent
Perform the following tests:
1. Ask the assistant to list your available integrations. The AWS target should appear.
2. Ask it to perform an action, such as "*Request access to account X and list its S3 buckets*". The agent will request access through the agentic access flow.
{% hint style="info" %}
Apono handles AWS authentication for you: once the request is approved, it fetches short-lived AWS credentials and wires up the connection automatically. The call should return live AWS data.
{% endhint %}
If either task fails, [troubleshoot](#troubleshooting) your setup.
***
### Troubleshooting
#### Apono Account
Access is granted, but AWS grants fail.
The connector backing the AWS Organization integration is likely still **Read-Only (Discovery)**. The integration must be **Full-Access (Manage IAM)**.
See the Full-Access connector prerequisite above and the [Apono Connector for AWS docs](/docs/aws-environment/apono-connector-for-aws).
#### Local Machine
No targets or integrations are listed.
Follow these steps:
1. Reauthenticate to Apono.
{% code overflow="wrap" expandable="true" %}
```shellscript
npx -y @apono-io/apono-mcp@latest login
```
{% endcode %}
2. Fully restart the AI client so the updated credentials take effect.
3. If the target is still unavailable, confirm with an Apono admin that the platform setup is complete. This includes the integration, agentic access flow, MCP feature enablement, and applicable Apono Managed MCP.
4. Follow the troubleshooting instructions in the applicable platform setup guide.
AWS MCP fails to start.
Follow these steps:
1. Install `uv` and Python 3.13 on the local machine (`uv python install 3.13`).
2. After installing `uv`, fully restart the AI client so it can detect the updated PATH.
More details are needed on failures.
Add `--debug` to the gateway's args in your client config to enable verbose request/response logging, then check the gateway log.
Configuration changes are not reflected in the agent.
Fully restart the client. MCP servers are only launched at startup.
# Apono Agent Privilege Guard for PostgreSQL
Configure governed, just-in-time AI access to PostgreSQL databases
Set up Apono Agent Privilege Guard for PostgreSQL to give AI agents controlled, temporary access to PostgreSQL databases.
An Apono admin configures the PostgreSQL integration, an agentic access flow, and the PostgreSQL MCP. Each user then connects a supported AI client through the Local Agentic Gateway, which brokers requests between the AI client, Apono, and PostgreSQL.
***
### Set up the Apono account
An Apono admin completes this setup once.
After the Apono account setup is complete, each user can connect a supported AI client to the Agentic Gateway.
#### Prerequisites
Requirement
Details
PostgreSQL integration
Connected Apono integration
Verify that the integration exists and is healthy on the Connected tab. If no PostgreSQL integration is connected, follow the PostgreSQL integration docs.
NOTE: Managed variants (RDS, Azure, Cloud SQL) use their respective Apono integrations. No additional integration changes are required for the agentic setup.
Apono connector permission
Required connector permissions
Connector used by the PostgreSQL integration must be deployed with permissions to create users.
#### Create an agentic access flow
Create a Self Serve access flow that allows agents to request temporary access to PostgreSQL databases on behalf of permitted users:
1. Follow the procedure in [Self Serve Access Flows](/docs/access-flows/creating-access-flows-in-apono/self-serve-access-flows) to define the requestors, resources, access duration, and approval process. As you create the flow, apply the following settings for agentic access.
Setting
Configuration
Access Flow Name
Enter a unique, user-friendly name, such as Agentic - PostgreSQL.
When Requestor
Select the users or groups on whose behalf an agent can request access.
The agent can request access only on behalf of its associated user, so that user must match these requester conditions. For Can request for, select Themselves.
Request access to
Select your PostgreSQL integration, and then select the resource types, resources, and permissions the agent can access.
Follow the Integrations instructions in the Define the resource section of the Self Serve Access Flows guide.
NOTE: Use Read Only for query-only access. Grant Read Write or Admin only when required for the agent’s intended tasks.
Grant for
Set the access duration to 5 minutes.
Approval
Select Automatic
Settings
Click the Restrict to agentic access toggle to enable the setting.
{% hint style="info" %}
**Allow Extend Duration** does not apply to agentic access flows. When access expires, the agent requests access again.
{% endhint %}
2. Configure any other Self Serve access flow settings according to your organization’s access policies.
3. Click **Save Access Flow**.
#### Enable MCP features and the PostgreSQL MCP
Follow these steps:
1. On the [**Account Settings**](https://app.apono.io/settings/account) page, under **AI & Automation**, click the **Enable MCP features** toggle to enable the setting. The toggle turns green.
2. On the [**MCPs**](https://app.apono.io/agentic/tools) tab, under **Apono Managed Tools**, click the toggle on the **PostgreSQL MCP** card to enable the tool.
{% hint style="info" %}
Learn more about [Model Context Protocol servers](/docs/agent-privilege-guard/apono-agent-privilege-guard-reference/model-context-protocol-mcp-servers).
{% endhint %}
After setup, use the [**AI Agents**](/docs/agent-privilege-guard/apono-agent-privilege-guard-reference/ai-agents) tab to view discovered agents and their associated users. Use the [**AI Sessions**](/docs/agent-privilege-guard/apono-agent-privilege-guard-reference/ai-sessions) tab to review agent activity, including access grants, tool calls, and intent policy decisions.
***
### Set up the Agentic Gateway on a local machine
{% hint style="info" %}
Learn more about [local](/docs/agent-privilege-guard/apono-agentic-gateway/install-the-local-agentic-gateway) and [remote](/docs/agent-privilege-guard/apono-agentic-gateway/deploy-the-remote-agentic-gateway) agentic gateways setups.
{% endhint %}
Each user running the gateway completes this setup on their local machine.
#### Prerequisites
Created an agentic access flow with Restrict to agentic access enabled
Enabled MCP features and the PostgreSQL MCP
Supported operating systems
Supported operating systems:
macOS
Windows 11 (native)
WSL2 (Ubuntu)
Node.js 20+
Required runtime
The gateway is launched with npx, which runs @apono-io/apono-mcp@latest, downloads the gateway binary, and manages the Apono sign-in. No separate Apono CLI installation is required.
#### Configure your AI client
{% hint style="info" %}
If the Agentic Gateway is already configured for this client, skip to [Verify your agent](#verify-your-agent).
{% endhint %}
{% tabs %}
{% tab title="Claude Code" %}
Follow these steps:
1. Run the following command for your operating system. If this is the first run, a separate browser tab opens.
**macOS**
{% code overflow="wrap" %}
```shellscript
claude mcp add apono-agentic -- npx -y @apono-io/apono-mcp@latest --agent-type claude-code
```
{% endcode %}
**Windows 11 (native)**
In Command Prompt or PowerShell:
{% code overflow="wrap" expandable="true" %}
```powershell
claude.cmd mcp add apono-agentic -- npx -y @apono-io/apono-mcp@latest --agent-type claude-code
```
{% endcode %}
**WSL2 (Ubuntu)**
{% code overflow="wrap" expandable="true" %}
```shellscript
claude mcp add apono-agentic -- npx -y @apono-io/apono-mcp@latest --agent-type claude-code
```
{% endcode %}
2. (First run only) Log in to Apono in the open browser tab.
{% endtab %}
{% tab title="Claude Desktop" %}
Follow these steps:
1. In Claude, from the main navigation, click **Claude > Settings > Developer**. The **Settings** page appears.
2. Click **Edit Config**. The **claude\_desktop\_config.json** file opens.
3. Add the following configuration.
{% code overflow="wrap" %}
```json
{
"mcpServers": {
"apono-agentic": {
"command": "npx",
"args": ["-y", "@apono-io/apono-mcp@latest", "--agent-type", "claude-desktop"]
}
}
}
```
{% endcode %}
4. Save the file.
5. Quit and restart Claude desktop.
6. (First run only) Log in to Apono in the browser tab that opens.
{% endtab %}
{% tab title="Cursor" %}
**Quick Start Installation**
Follow these steps:
1. Click the following button to install the MCP Server. The **MCP** page in Cursor opens.
Add to Cursor
2. Click **Install**.
3. Quit and restart Cursor.
4. (First run only) Log in to Apono in the browser tab that opens.
***
**Manual Installation**
Follow these steps:
1. In Cursor, from the main navigation, click **Tools & MCPs**. The **Tools** page appears.
2. Under **Home MCP Servers**, click **New MCP Server**. The **mcp.json** file opens.
3. Add the following configuration.
{% code overflow="wrap" %}
```json
{
"mcpServers": {
"apono-agentic": {
"command": "npx",
"args": ["-y", "@apono-io/apono-mcp@latest", "--agent-type", "cursor"]
}
}
}
```
{% endcode %}
4. Save the file.
5. Quit and restart Cursor.
6. (First run only) Log in to Apono in the browser tab that opens.
{% endtab %}
{% endtabs %}
#### Verify your agent
Perform the following tests:
1. Ask the assistant to list your available integrations. The PostgreSQL target should appear.
2. Ask it to perform an action, such as *"Request access to account X and list its databases"*. The agent will request access through the agentic access flow.
{% hint style="info" %}
Apono handles PostgreSQL authentication for you. Once the request is approved, it fetches short-lived credentials and wires up the connection automatically. The call should return live PostgreSQL data.
{% endhint %}
If either task fails, [troubleshoot](#troubleshooting) your setup.
***
### Troubleshooting
#### Apono Account
Access is granted, but PostgreSQL grants fail.
Verify that the PostgreSQL integration is healthy in Apono. Confirm that the connector is reachable and that the `apono_connector` user is valid and has permission to [create temporary users](/docs/additional-integrations/databases-and-data-repositories/postgresql#create-a-postgresql-user) in the database.
#### Local Machine
No targets or integrations are listed.
Follow these steps:
1. Reauthenticate to Apono.
{% code overflow="wrap" expandable="true" %}
```shellscript
npx -y @apono-io/apono-mcp@latest login
```
{% endcode %}
2. Fully restart the AI client so the updated credentials take effect.
3. If the target is still unavailable, confirm with an Apono admin that the platform setup is complete. This includes the integration, agentic access flow, MCP feature enablement, and applicable Apono Managed MCP.
4. Follow the troubleshooting instructions in the applicable platform setup guide.
Writes are blocked or awaiting approval.
By default, every Update/Create/Delete action waits for your approval, and Admin actions are denied. Ask your admin to adjust the PostgreSQL MCP's Intent Policy if needed.
More details are needed on failures.
Add `--debug` to the gateway's args in your client config to enable verbose request/response logging, then check the gateway log.
Configuration changes are not reflected in the agent.
Fully restart the client. MCP servers are only launched at startup.
# Apono Agent Privilege Guard for MySQL
Configure governed, just-in-time AI access to MySQL databases
Set up Apono Agent Privilege Guard for MySQL to give AI agents controlled, temporary access to MySQL databases.
An Apono admin configures the MySQL integration, an agentic access flow, and the MySQL MCP. Each user then connects a supported AI client through the Local Agentic Gateway, which brokers requests between the AI client, Apono, and MySQL.
***
### Set up the Apono account
An Apono admin completes this setup once.
After the Apono account setup is complete, each user can connect a supported AI client to the Agentic Gateway.
#### Prerequisites
Requirement
Details
MySQL integration
Connected Apono integration
Verify that the integration exists and is healthy on the Connected tab. If no MySQL integration is connected, follow the MySQL integration docs.
NOTE: Managed variants (RDS, Azure, Cloud SQL) use their respective Apono integrations. No additional integration changes are required for the agentic setup.
Apono connector permission
Required connector permissions
Connector used by the MySQL integration must be deployed with permissions to create users.
#### Create an agentic access flow
Create a Self Serve access flow that allows agents to request temporary access to MySQL databases on behalf of permitted users:
1. Follow the procedure in [Self Serve Access Flows](/docs/access-flows/creating-access-flows-in-apono/self-serve-access-flows) to define the requestors, resources, access duration, and approval process. As you create the flow, apply the following settings for agentic access.
Setting
Configuration
Access Flow Name
Enter a unique, user-friendly name, such as Agentic - MySQL.
When Requestor
Select the users or groups on whose behalf an agent can request access.
The agent can request access only on behalf of its associated user, so that user must match these requester conditions. For Can request for, select Themselves.
Request access to
Select your MySQL integration, and then select the resource types, resources, and permissions the agent can access.
Follow the Integrations instructions in the Define the resource section of the Self Serve Access Flows guide.
NOTE: Use READ_ONLY for query-only access. Grant READ_WRITE or ADMIN only when required for the agent’s intended tasks.
Grant for
Set the access duration to 5 minutes.
Approval
Select Automatic
Settings
Click the Restrict to agentic access toggle to enable the setting.
{% hint style="info" %}
**Allow Extend Duration** does not apply to agentic access flows. When access expires, the agent requests access again.
{% endhint %}
2. Configure any other Self Serve access flow settings according to your organization’s access policies.
3. Click **Save Access Flow**.
#### Enable MCP features and the MySQL MCP
Follow these steps:
1. On the [**Account Settings**](https://app.apono.io/settings/account) page, under **AI & Automation**, click the **Enable MCP features** toggle to enable the setting. The toggle turns green.
2. On the [**MCPs**](https://app.apono.io/agentic/tools) tab, under **Apono Managed Tools**, click the toggle on the **MySQL MCP** card to enable the tool.
{% hint style="info" %}
Learn more about [Model Context Protocol servers](/docs/agent-privilege-guard/apono-agent-privilege-guard-reference/model-context-protocol-mcp-servers).
{% endhint %}
After setup, use the [**AI Agents**](/docs/agent-privilege-guard/apono-agent-privilege-guard-reference/ai-agents) tab to view discovered agents and their associated users. Use the [**AI Sessions**](/docs/agent-privilege-guard/apono-agent-privilege-guard-reference/ai-sessions) tab to review agent activity, including access grants, tool calls, and intent policy decisions.
***
### Set up the Agentic Gateway on a local machine
{% hint style="info" %}
Learn more about [local](/docs/agent-privilege-guard/apono-agentic-gateway/install-the-local-agentic-gateway) and [remote](/docs/agent-privilege-guard/apono-agentic-gateway/deploy-the-remote-agentic-gateway) agentic gateways setups.
{% endhint %}
Each user running the gateway completes this setup on their local machine.
#### Prerequisites
Created an agentic access flow with Restrict to agentic access enabled
Enabled MCP features and the MySQL MCP
Supported operating systems
Supported operating systems:
macOS
Windows 11 (native)
WSL2 (Ubuntu)
Node.js 20+
Required runtime
The gateway is launched with npx, which runs @apono-io/apono-mcp@latest, downloads the gateway binary, and manages the Apono sign-in. No separate Apono CLI installation is required.
#### Configure your AI client
{% hint style="info" %}
If the Agentic Gateway is already configured for this client, skip to [Verify your agent](#verify-your-agent).
{% endhint %}
{% tabs %}
{% tab title="Claude Code" %}
Follow these steps:
1. Run the following command for your operating system. If this is the first run, a separate browser tab opens.
**macOS**
{% code overflow="wrap" %}
```shellscript
claude mcp add apono-agentic -- npx -y @apono-io/apono-mcp@latest --agent-type claude-code
```
{% endcode %}
**Windows 11 (native)**
In Command Prompt or PowerShell:
{% code overflow="wrap" expandable="true" %}
```powershell
claude.cmd mcp add apono-agentic -- npx -y @apono-io/apono-mcp@latest --agent-type claude-code
```
{% endcode %}
**WSL2 (Ubuntu)**
{% code overflow="wrap" expandable="true" %}
```shellscript
claude mcp add apono-agentic -- npx -y @apono-io/apono-mcp@latest --agent-type claude-code
```
{% endcode %}
2. (First run only) Log in to Apono in the open browser tab.
{% endtab %}
{% tab title="Claude Desktop" %}
Follow these steps:
1. In Claude, from the main navigation, click **Claude > Settings > Developer**. The **Settings** page appears.
2. Click **Edit Config**. The **claude\_desktop\_config.json** file opens.
3. Add the following configuration.
{% code overflow="wrap" %}
```json
{
"mcpServers": {
"apono-agentic": {
"command": "npx",
"args": ["-y", "@apono-io/apono-mcp@latest", "--agent-type", "claude-desktop"]
}
}
}
```
{% endcode %}
4. Save the file.
5. Quit and restart Claude desktop.
6. (First run only) Log in to Apono in the browser tab that opens.
{% endtab %}
{% tab title="Cursor" %}
**Quick Start Installation**
Follow these steps:
1. Click the following button to install the MCP Server. The **MCP** page in Cursor opens.
Add to Cursor
2. Click **Install**.
3. Quit and restart Cursor.
4. (First run only) Log in to Apono in the browser tab that opens.
***
**Manual Installation**
Follow these steps:
1. In Cursor, from the main navigation, click **Tools & MCPs**. The **Tools** page appears.
2. Under **Home MCP Servers**, click **New MCP Server**. The **mcp.json** file opens.
3. Add the following configuration.
{% code overflow="wrap" %}
```json
{
"mcpServers": {
"apono-agentic": {
"command": "npx",
"args": ["-y", "@apono-io/apono-mcp@latest", "--agent-type", "cursor"]
}
}
}
```
{% endcode %}
4. Save the file.
5. Quit and restart Cursor.
6. (First run only) Log in to Apono in the browser tab that opens.
{% endtab %}
{% endtabs %}
#### Verify your agent
Perform the following tests:
1. Ask the assistant to list your available integrations. The MySQL target should appear.
2. Ask it to perform an action, such as *"Request access to account X and list its databases"*. The agent will request access through the agentic access flow.
{% hint style="info" %}
Apono handles MySQL authentication for you. Once the request is approved, it fetches short-lived credentials and wires up the connection automatically. The call should return live MySQL data.
{% endhint %}
If either task fails, [troubleshoot](#troubleshooting) your setup.
***
### Troubleshooting
#### Apono Account
Access is granted, but MySQL grants fail.
The connector backing the MySQL integration is likely still **READ\_ONLY**. The integration must have **CREATE\_USER** / **PROCESS** / **RELOAD** / **CONNECTION\_ADMIN** permissions with the ability to [create users](/docs/additional-integrations/databases-and-data-repositories/mysql#create-mysql-user) on the database.
#### Local Machine
No targets or integrations are listed.
Follow these steps:
1. Reauthenticate to Apono.
{% code overflow="wrap" expandable="true" %}
```shellscript
npx -y @apono-io/apono-mcp@latest login
```
{% endcode %}
2. Fully restart the AI client so the updated credentials take effect.
3. If the target is still unavailable, confirm with an Apono admin that the platform setup is complete. This includes the integration, agentic access flow, MCP feature enablement, and applicable Apono Managed MCP.
4. Follow the troubleshooting instructions in the applicable platform setup guide.
Writes are blocked or awaiting approval.
By default, every Update/Create/Delete action waits for your approval, and Admin actions are denied. Ask your admin to adjust the MySQL MCP's Intent Policy if needed.
More details are needed on failures.
Add `--debug` to the gateway's args in your client config to enable verbose request/response logging, then check the gateway log.
Configuration changes are not reflected in the agent.
Fully restart the client. MCP servers are only launched at startup.
# Apono Agent Privilege Guard for Atlassian
Configure governed, just-in-time AI access to an Atlassian instance
Set up Apono Agent Privilege Guard for Atlassian to give AI agents controlled, temporary access to Jira and Confluence.
An Apono admin configures the Atlassian integration, an agentic access flow, and the Atlassian MCP. Each user then connects a supported AI client through the Local Agentic Gateway, which brokers requests between the AI client, Apono, and Atlassian.
***
### Set up the Apono account
An Apono admin completes this setup once.
After the Apono account setup is complete, each user can connect a supported AI client to the Agentic Gateway.
#### Prerequisite
Requirement
Details
Atlassian MCP integration
Connected Apono integration
Verify that the integration exists and is healthy on the Connected tab. If no Atlassian MCP integration is connected, follow the Atlassian integration docs.
#### Create an agentic access flow
Create a Self Serve access flow that allows agents to request temporary access to an Atlassian instance on behalf of permitted users:
1. Follow the procedure in [Self Serve Access Flows](/docs/access-flows/creating-access-flows-in-apono/self-serve-access-flows) to define the requestors, resources, access duration, and approval process. As you create the flow, apply the following settings for agentic access.
Setting
Configuration
Access Flow Name
Enter a unique, user-friendly name, such as Agentic - Atlassian.
When Requestor
Select the users or groups on whose behalf an agent can request access.
The agent can request access only on behalf of its associated user, so that user must match these requester conditions. For Can request for, select Themselves.
Request access to
Select your Atlassian integration, and then select the User resource type and the Impersonate permission.
Follow the Integrations instructions in the Define the resource section of the Self Serve Access Flows guide.
Grant for
Set the access duration to 5 minutes.
Approval
Select Automatic
Settings
Click the Restrict to agentic access toggle to enable the setting.
{% hint style="info" %}
**Allow Extend Duration** does not apply to agentic access flows. When access expires, the agent requests access again.
{% endhint %}
2. Configure any other Self Serve access flow settings according to your organization’s access policies.
3. Click **Save Access Flow**.
#### Enable MCP features and the Atlassian MCP
Follow these steps:
1. On the [**Account Settings**](https://app.apono.io/settings/account) page, under **AI & Automation**, click the **Enable MCP features** toggle to enable the setting. The toggle turns green.
2. On the [**MCPs**](https://app.apono.io/agentic/tools) tab, under **Apono Managed Tools**, click the toggle on the **Atlassian MCP** card to enable the tool.
{% hint style="info" %}
Learn more about [Model Context Protocol servers](/docs/agent-privilege-guard/apono-agent-privilege-guard-reference/model-context-protocol-mcp-servers).
{% endhint %}
After setup, use the [**AI Agents**](/docs/agent-privilege-guard/apono-agent-privilege-guard-reference/ai-agents) tab to view discovered agents and their associated users. Use the [**AI Sessions**](/docs/agent-privilege-guard/apono-agent-privilege-guard-reference/ai-sessions) tab to review agent activity, including access grants, tool calls, and intent policy decisions.
***
### Set up the Agentic Gateway on a local machine
{% hint style="info" %}
Learn more about [local](/docs/agent-privilege-guard/apono-agentic-gateway/install-the-local-agentic-gateway) and [remote](/docs/agent-privilege-guard/apono-agentic-gateway/deploy-the-remote-agentic-gateway) agentic gateways setups.
{% endhint %}
Each user running the gateway completes this setup on their local machine.
#### Prerequisites
Created an agentic access flow with Restrict to agentic access enabled
Enabled MCP features and the Atlassian MCP
Supported operating systems
Supported operating systems:
macOS
Windows 11 (native)
WSL2 (Ubuntu)
Node.js 20+
Required runtime
The gateway is launched with npx, which runs @apono-io/apono-mcp@latest, downloads the gateway binary, and manages the Apono sign-in. No separate Apono CLI installation is required.
#### Configure your AI client
{% hint style="info" %}
If the Agentic Gateway is already configured for this client, skip to [Verify your agent](#verify-your-agent).
{% endhint %}
{% tabs %}
{% tab title="Claude Code" %}
Follow these steps:
1. Run the following command for your operating system. If this is the first run, a separate browser tab opens.
**macOS**
{% code overflow="wrap" %}
```shellscript
claude mcp add apono-agentic -- npx -y @apono-io/apono-mcp@latest --agent-type claude-code
```
{% endcode %}
**Windows 11 (native)**
In Command Prompt or PowerShell:
{% code overflow="wrap" expandable="true" %}
```powershell
claude.cmd mcp add apono-agentic -- npx -y @apono-io/apono-mcp@latest --agent-type claude-code
```
{% endcode %}
**WSL2 (Ubuntu)**
{% code overflow="wrap" expandable="true" %}
```shellscript
claude mcp add apono-agentic -- npx -y @apono-io/apono-mcp@latest --agent-type claude-code
```
{% endcode %}
2. (First run only) Log in to Apono in the open browser tab.
{% endtab %}
{% tab title="Claude Desktop" %}
Follow these steps:
1. In Claude, from the main navigation, click **Claude > Settings > Developer**. The **Settings** page appears.
2. Click **Edit Config**. The **claude\_desktop\_config.json** file opens.
3. Add the following configuration.
{% code overflow="wrap" %}
```json
{
"mcpServers": {
"apono-agentic": {
"command": "npx",
"args": ["-y", "@apono-io/apono-mcp@latest", "--agent-type", "claude-desktop"]
}
}
}
```
{% endcode %}
4. Save the file.
5. Quit and restart Claude desktop.
6. (First run only) Log in to Apono in the browser tab that opens.
{% endtab %}
{% tab title="Cursor" %}
**Quick Start Installation**
Follow these steps:
1. Click the following button to install the MCP Server. The **MCP** page in Cursor opens.
Add to Cursor
2. Click **Install**.
3. Quit and restart Cursor.
4. (First run only) Log in to Apono in the browser tab that opens.
***
**Manual Installation**
Follow these steps:
1. In Cursor, from the main navigation, click **Tools & MCPs**. The **Tools** page appears.
2. Under **Home MCP Servers**, click **New MCP Server**. The **mcp.json** file opens.
3. Add the following configuration.
{% code overflow="wrap" %}
```json
{
"mcpServers": {
"apono-agentic": {
"command": "npx",
"args": ["-y", "@apono-io/apono-mcp@latest", "--agent-type", "cursor"]
}
}
}
```
{% endcode %}
4. Save the file.
5. Quit and restart Cursor.
6. (First run only) Log in to Apono in the browser tab that opens.
{% endtab %}
{% endtabs %}
#### Verify your agent
Perform the following tests:
1. Ask the assistant to list your available integrations. The Atlassian target should appear.
2. Ask it to perform an action, such as *"Fetch Jira issue DVL-123"*. The agent will request access through the agentic access flow.
{% hint style="info" %}
The first time a user accesses the Atlassian MCP, the AI client prompts them to sign in with Atlassian and grant OAuth consent. The client remembers this authorization, and all subsequent Jira and Confluence actions are performed as the authenticated user.
{% endhint %}
If either task fails, [troubleshoot](#troubleshooting) your setup.
***
### Troubleshooting
#### Apono and Atlassian Accounts
Atlassian OAuth authorization fails.
Use any Atlassian tool to trigger the AI client's sign-in prompt, then complete the Atlassian OAuth consent in your browser. If authorization still fails, confirm with your administrator that both the [Atlassian (MCP OAuth) integration](/docs/additional-integrations/mcps/atlassian-mcp#integrate-the-atlassian-mcp) and the [Atlassian MCP tool](#enable-mcp-features-and-the-atlassian-mcp) are enabled.
#### Local Machine
No targets or integrations are listed.
Follow these steps:
1. Reauthenticate to Apono.
{% code overflow="wrap" expandable="true" %}
```shellscript
npx -y @apono-io/apono-mcp@latest login
```
{% endcode %}
2. Fully restart the AI client so the updated credentials take effect.
3. If the target is still unavailable, confirm with an Apono admin that the platform setup is complete. This includes the integration, agentic access flow, MCP feature enablement, and applicable Apono Managed MCP.
4. Follow the troubleshooting instructions in the applicable platform setup guide.
More details are needed on failures.
Add `--debug` to the gateway's args in your client config to enable verbose request/response logging, then check the gateway log.
Configuration changes are not reflected in the agent.
Fully restart the client. MCP servers are only launched at startup.
# Apono Agent Privilege Guard for monday.com
Configure governed, just-in-time AI access to monday.com resources
Set up Apono Agent Privilege Guard for monday.com to give AI agents controlled, temporary access to monday.com resources.
An Apono admin configures the monday.com integration, an agentic access flow, and the monday.com MCP. Each user then connects a supported AI client through the Local Agentic Gateway, which brokers requests between the AI client, Apono, and monday.com.
***
### Set up the Apono account
An Apono admin completes this setup once.
After the Apono account setup is complete, each user can connect a supported AI client to the Agentic Gateway.
#### Prerequisite
Requirement
Details
monday.com MCP integration
Connected Apono integration
Verify that the integration exists and is healthy on the Connected tab. If no monday.com MCP integration is connected, follow the monday.com integration docs.
#### Create an agentic access flow
Create a Self Serve access flow that allows agents to request temporary access to a monday.com instance on behalf of permitted users:
1. Follow the procedure in [Self Serve Access Flows](/docs/access-flows/creating-access-flows-in-apono/self-serve-access-flows) to define the requestors, resources, access duration, and approval process. As you create the flow, apply the following settings for agentic access.
Setting
Configuration
Access Flow Name
Enter a unique, user-friendly name, such as Agentic - monday.com.
When Requestor
Select the users or groups on whose behalf an agent can request access.
The agent can request access only on behalf of its associated user, so that user must match these requester conditions. For Can request for, select Themselves.
Request access to
Select your monday.com integration, and then select the resource types, resources, and permissions the agent can access.
Follow the Integrations instructions in the Define the resource section of the Self Serve Access Flows guide.
Grant for
Set the access duration to 5 minutes.
Approval
Select Automatic
Settings
Click the Restrict to agentic access toggle to enable the setting.
{% hint style="info" %}
**Allow Extend Duration** does not apply to agentic access flows. When access expires, the agent requests access again.
{% endhint %}
2. Configure any other Self Serve access flow settings according to your organization’s access policies.
3. Click **Save Access Flow**.
#### Enable MCP features and the monday.com MCP
Follow these steps:
1. On the [**Account Settings**](https://app.apono.io/settings/account) page, under **AI & Automation**, click the **Enable MCP features** toggle to enable the setting. The toggle turns green.
2. On the [**MCPs**](https://app.apono.io/agentic/tools) tab, under **Apono Managed Tools**, click the toggle on the **monday.com MCP** card to enable the tool.
{% hint style="info" %}
Learn more about [Model Context Protocol servers](/docs/agent-privilege-guard/apono-agent-privilege-guard-reference/model-context-protocol-mcp-servers).
{% endhint %}
After setup, use the [**AI Agents**](/docs/agent-privilege-guard/apono-agent-privilege-guard-reference/ai-agents) tab to view discovered agents and their associated users. Use the [**AI Sessions**](/docs/agent-privilege-guard/apono-agent-privilege-guard-reference/ai-sessions) tab to review agent activity, including access grants, tool calls, and intent policy decisions.
***
### Set up the Agentic Gateway on a local machine
{% hint style="info" %}
Learn more about [local](/docs/agent-privilege-guard/apono-agentic-gateway/install-the-local-agentic-gateway) and [remote](/docs/agent-privilege-guard/apono-agentic-gateway/deploy-the-remote-agentic-gateway) agentic gateways setups.
{% endhint %}
Each user running the gateway completes this setup on their local machine.
#### Prerequisites
Created an agentic access flow with Restrict to agentic access enabled
Enabled MCP features and the monday.com MCP
Supported operating systems
Supported operating systems:
macOS
Windows 11 (native)
WSL2 (Ubuntu)
Node.js 20+
Required runtime
The gateway is launched with npx, which runs @apono-io/apono-mcp@latest, downloads the gateway binary, and manages the Apono sign-in. No separate Apono CLI installation is required.
#### Configure your AI client
{% hint style="info" %}
If the Agentic Gateway is already configured for this client, skip to [Verify your agent](#verify-your-agent).
{% endhint %}
{% tabs %}
{% tab title="Claude Code" %}
Follow these steps:
1. Run the following command for your operating system. If this is the first run, a separate browser tab opens.
**macOS**
{% code overflow="wrap" %}
```shellscript
claude mcp add apono-agentic -- npx -y @apono-io/apono-mcp@latest --agent-type claude-code
```
{% endcode %}
**Windows 11 (native)**
In Command Prompt or PowerShell:
{% code overflow="wrap" expandable="true" %}
```powershell
claude.cmd mcp add apono-agentic -- npx -y @apono-io/apono-mcp@latest --agent-type claude-code
```
{% endcode %}
**WSL2 (Ubuntu)**
{% code overflow="wrap" expandable="true" %}
```shellscript
claude mcp add apono-agentic -- npx -y @apono-io/apono-mcp@latest --agent-type claude-code
```
{% endcode %}
2. (First run only) Log in to Apono in the open browser tab.
{% endtab %}
{% tab title="Claude Desktop" %}
Follow these steps:
1. In Claude, from the main navigation, click **Claude > Settings > Developer**. The **Settings** page appears.
2. Click **Edit Config**. The **claude\_desktop\_config.json** file opens.
3. Add the following configuration.
{% code overflow="wrap" %}
```json
{
"mcpServers": {
"apono-agentic": {
"command": "npx",
"args": ["-y", "@apono-io/apono-mcp@latest", "--agent-type", "claude-desktop"]
}
}
}
```
{% endcode %}
4. Save the file.
5. Quit and restart Claude desktop.
6. (First run only) Log in to Apono in the browser tab that opens.
{% endtab %}
{% tab title="Cursor" %}
**Quick Start Installation**
Follow these steps:
1. Click the following button to install the MCP Server. The **MCP** page in Cursor opens.
Add to Cursor
2. Click **Install**.
3. Quit and restart Cursor.
4. (First run only) Log in to Apono in the browser tab that opens.
***
**Manual Installation**
Follow these steps:
1. In Cursor, from the main navigation, click **Tools & MCPs**. The **Tools** page appears.
2. Under **Home MCP Servers**, click **New MCP Server**. The **mcp.json** file opens.
3. Add the following configuration.
{% code overflow="wrap" %}
```json
{
"mcpServers": {
"apono-agentic": {
"command": "npx",
"args": ["-y", "@apono-io/apono-mcp@latest", "--agent-type", "cursor"]
}
}
}
```
{% endcode %}
4. Save the file.
5. Quit and restart Cursor.
6. (First run only) Log in to Apono in the browser tab that opens.
{% endtab %}
{% endtabs %}
#### Verify your agent
Perform the following tests:
1. Ask the assistant to list your available integrations. The monday.com target should appear.
2. Ask it to perform an action, such as *"Fetch Jira issue DVL-123"*. The agent will request access through the agentic access flow.
{% hint style="info" %}
The first time a user accesses the monday.com MCP, the AI client prompts them to sign in with monday.com and grant OAuth consent. The client remembers this authorization, and all subsequent actions are performed as the authenticated user.
{% endhint %}
If either task fails, [troubleshoot](#troubleshooting) your setup.
***
### Troubleshooting
#### Apono and monday.com Accounts
OAuth authorization fails.
Use any monday.com tool to trigger the AI client's sign-in prompt, then complete the OAuth consent in your browser. If authorization still fails, confirm with your administrator that both the [monday.com (MCP OAuth) integration](https://docs.apono.io/docs/agent-privilege-guard/set-up-apono-agent-privilege-guard/pages/JwcyzggDKTgUFqM7bNbH#integrate-the-monday.com-mcp) and the [monday.com MCP tool](#enable-mcp-features-and-the-monday.com-mcp) are enabled.
#### Local Machine
No targets or integrations are listed.
Follow these steps:
1. Reauthenticate to Apono.
{% code overflow="wrap" expandable="true" %}
```shellscript
npx -y @apono-io/apono-mcp@latest login
```
{% endcode %}
2. Fully restart the AI client so the updated credentials take effect.
3. If the target is still unavailable, confirm with an Apono admin that the platform setup is complete. This includes the integration, agentic access flow, MCP feature enablement, and applicable Apono Managed MCP.
4. Follow the troubleshooting instructions in the applicable platform setup guide.
More details are needed on failures.
Add `--debug` to the gateway's args in your client config to enable verbose request/response logging, then check the gateway log.
Configuration changes are not reflected in the agent.
Fully restart the client. MCP servers are only launched at startup.
# Apono Agent Privilege Guard for GitHub
Configure governed, just-in-time AI access to GitHub resources
Set up Apono Agent Privilege Guard for GitHub to give AI agents controlled, temporary access to GitHub resources.
An Apono admin configures the GitHub integration, an agentic access flow, and the GitHub MCP. Each user then connects a supported AI client through the Local Agentic Gateway, which brokers requests between the AI client, Apono, and GitHub.
***
### Set up the Apono account
An Apono admin completes this setup once.
After the Apono account setup is complete, each user can connect a supported AI client to the Agentic Gateway.
#### Prerequisites
Requirement
Details
GitHub MCP integration
Connected Apono integration
Verify that the integration exists and is healthy on the Connected tab. If no GitHub MCP integration is connected, follow the GitHub integration docs.
#### Create an agentic access flow
Create a Self Serve access flow that allows agents to request temporary access to a GitHub instance on behalf of permitted users:
1. Follow the procedure in [Self Serve Access Flows](/docs/access-flows/creating-access-flows-in-apono/self-serve-access-flows) to define the requestors, resources, access duration, and approval process. As you create the flow, apply the following settings for agentic access.
Setting
Configuration
Access Flow Name
Enter a unique, user-friendly name, such as Agentic - GitHub.
When Requestor
Select the users or groups on whose behalf an agent can request access.
The agent can request access only on behalf of its associated user, so that user must match these requester conditions. For Can request for, select Themselves.
Request access to
Select your GitHub integration, and then select the resource types, resources, and permissions the agent can access.
Follow the Integrations instructions in the Define the resource section of the Self Serve Access Flows guide.
Grant for
Set the access duration to 5 minutes.
Approval
Select Automatic
Settings
Click the Restrict to agentic access toggle to enable the setting.
{% hint style="info" %}
**Allow Extend Duration** does not apply to agentic access flows. When access expires, the agent requests access again.
{% endhint %}
2. Configure any other Self Serve access flow settings according to your organization’s access policies.
3. Click **Save Access Flow**.
#### Enable MCP features and the GitHub MCP
Follow these steps:
1. On the [**Account Settings**](https://app.apono.io/settings/account) page, under **AI & Automation**, click the **Enable MCP features** toggle to enable the setting. The toggle turns green.
2. On the [**MCPs**](https://app.apono.io/agentic/tools) tab, under **Apono Managed Tools**, click the toggle on the **GitHub MCP** card to enable the tool.
{% hint style="info" %}
Learn more about [Model Context Protocol servers](/docs/agent-privilege-guard/apono-agent-privilege-guard-reference/model-context-protocol-mcp-servers).
{% endhint %}
After setup, use the [**AI Agents**](/docs/agent-privilege-guard/apono-agent-privilege-guard-reference/ai-agents) tab to view discovered agents and their associated users. Use the [**AI Sessions**](/docs/agent-privilege-guard/apono-agent-privilege-guard-reference/ai-sessions) tab to review agent activity, including access grants, tool calls, and intent policy decisions.
***
### Set up the Agentic Gateway on a local machine
{% hint style="info" %}
Learn more about [local](/docs/agent-privilege-guard/apono-agentic-gateway/install-the-local-agentic-gateway) and [remote](/docs/agent-privilege-guard/apono-agentic-gateway/deploy-the-remote-agentic-gateway) agentic gateways setups.
{% endhint %}
Each user running the gateway completes this setup on their local machine.
#### Prerequisites
Created an agentic access flow with Restrict to agentic access enabled
Enabled MCP features and the GitHub MCP
Supported operating systems
Supported operating systems:
macOS
Windows 11 (native)
WSL2 (Ubuntu)
Node.js 20+
Required runtime
The gateway is launched with npx, which runs @apono-io/apono-mcp@latest, downloads the gateway binary, and manages the Apono sign-in. No separate Apono CLI installation is required.
#### Configure your AI client
{% hint style="info" %}
If the Agentic Gateway is already configured for this client, skip to [Verify your agent](#verify-your-agent).
{% endhint %}
{% tabs %}
{% tab title="Claude Code" %}
Follow these steps:
1. Run the following command for your operating system. If this is the first run, a separate browser tab opens.
**macOS**
{% code overflow="wrap" %}
```shellscript
claude mcp add apono-agentic -- npx -y @apono-io/apono-mcp@latest --agent-type claude-code
```
{% endcode %}
**Windows 11 (native)**
In Command Prompt or PowerShell:
{% code overflow="wrap" expandable="true" %}
```powershell
claude.cmd mcp add apono-agentic -- npx -y @apono-io/apono-mcp@latest --agent-type claude-code
```
{% endcode %}
**WSL2 (Ubuntu)**
{% code overflow="wrap" expandable="true" %}
```shellscript
claude mcp add apono-agentic -- npx -y @apono-io/apono-mcp@latest --agent-type claude-code
```
{% endcode %}
2. (First run only) Log in to Apono in the open browser tab.
{% endtab %}
{% tab title="Claude Desktop" %}
Follow these steps:
1. In Claude, from the main navigation, click **Claude > Settings > Developer**. The **Settings** page appears.
2. Click **Edit Config**. The **claude\_desktop\_config.json** file opens.
3. Add the following configuration.
{% code overflow="wrap" %}
```json
{
"mcpServers": {
"apono-agentic": {
"command": "npx",
"args": ["-y", "@apono-io/apono-mcp@latest", "--agent-type", "claude-desktop"]
}
}
}
```
{% endcode %}
4. Save the file.
5. Quit and restart Claude desktop.
6. (First run only) Log in to Apono in the browser tab that opens.
{% endtab %}
{% tab title="Cursor" %}
**Quick Start Installation**
Follow these steps:
1. Click the following button to install the MCP Server. The **MCP** page in Cursor opens.
Add to Cursor
2. Click **Install**.
3. Quit and restart Cursor.
4. (First run only) Log in to Apono in the browser tab that opens.
***
**Manual Installation**
Follow these steps:
1. In Cursor, from the main navigation, click **Tools & MCPs**. The **Tools** page appears.
2. Under **Home MCP Servers**, click **New MCP Server**. The **mcp.json** file opens.
3. Add the following configuration.
{% code overflow="wrap" %}
```json
{
"mcpServers": {
"apono-agentic": {
"command": "npx",
"args": ["-y", "@apono-io/apono-mcp@latest", "--agent-type", "cursor"]
}
}
}
```
{% endcode %}
4. Save the file.
5. Quit and restart Cursor.
6. (First run only) Log in to Apono in the browser tab that opens.
{% endtab %}
{% endtabs %}
#### Verify your agent
Perform the following tests:
1. Ask the assistant to list your available integrations. The GitHub target should appear.
2. Ask it to perform an action, such as *"List the open pull requests in repository X"*. The agent will request access through the agentic access flow.
{% hint style="info" %}
The first time a user accesses the GitHub MCP, the AI client prompts them to sign in with GitHub and grant OAuth consent. The client remembers this authorization, and all subsequent actions are performed as the authenticated user.
{% endhint %}
If either task fails, [troubleshoot](#troubleshooting) your setup.
***
### Troubleshooting
#### Apono and GitHub Accounts
GitHub OAuth authorization fails.
Verify that the **GitHub Client ID** and **GitHub OAuth Scopes** are configured correctly, and that the OAuth App's **Authorization callback URL** matches the callback URL provided by Apono (GitHub OAuth Apps support only one callback URL).
After this, use any GitHub tool to trigger the AI client's sign-in prompt, then complete the OAuth consent in your browser. If authorization still fails, confirm with your administrator that both the [GitHub (MCP OAuth) integration](/docs/additional-integrations/mcps/github-mcp#integrate-the-github-mcp) and the [GitHub MCP tool](#enable-mcp-features-and-the-github-mcp) are enabled.
Access is granted, but GitHub grants fail.
The configured GitHub OAuth Scopes may not permit this action. For example, repository write operations require the repo scope. Ask your administrator to review the configured scopes.
#### Local Machine
No targets or integrations are listed.
Follow these steps:
1. Reauthenticate to Apono.
{% code overflow="wrap" expandable="true" %}
```shellscript
npx -y @apono-io/apono-mcp@latest login
```
{% endcode %}
2. Fully restart the AI client so the updated credentials take effect.
3. If the target is still unavailable, confirm with an Apono admin that the platform setup is complete. This includes the integration, agentic access flow, MCP feature enablement, and applicable Apono Managed MCP.
4. Follow the troubleshooting instructions in the applicable platform setup guide.
More details are needed on failures.
Add `--debug` to the gateway's args in your client config to enable verbose request/response logging, then check the gateway log.
Configuration changes are not reflected in the agent.
Fully restart the client. MCP servers are only launched at startup.
# Apono Agent Privilege Guard for Okta
Configure governed, just-in-time AI access to an Okta instance
Set up Apono Agent Privilege Guard for Okta to give AI agents controlled, temporary access to Okta resources.
An Apono admin configures the Okta integration, an agentic access flow, and the Okta MCP. Each user then connects a supported AI client through the Local Agentic Gateway, which brokers requests between the AI client, Apono, and Okta.
***
### Set up the Apono account
An Apono admin completes this setup once.
After the Apono account setup is complete, each user can connect a supported AI client to the Agentic Gateway.
#### Prerequisites
Requirement
Details
Okta MCP integration
Connected Apono integration
Verify that the integration exists and is healthy on the Connected tab. If no Okta MCP integration is connected, follow the Okta integration docs.
#### Create an agentic access flow
Create a Self Serve access flow that allows agents to request temporary access to an Okta instance on behalf of permitted users:
1. Follow the procedure in [Self Serve Access Flows](/docs/access-flows/creating-access-flows-in-apono/self-serve-access-flows) to define the requestors, resources, access duration, and approval process. As you create the flow, apply the following settings for agentic access.
Setting
Configuration
Access Flow Name
Enter a unique, user-friendly name, such as Agentic - Okta.
When Requestor
Select the users or groups on whose behalf an agent can request access.
The agent can request access only on behalf of its associated user, so that user must match these requester conditions. For Can request for, select Themselves.
Request access to
Select your Okta integration, and then select the resource types, resources, and permissions the agent can access.
Follow the Integrations instructions in the Define the resource section of the Self Serve Access Flows guide. Select User for the resource type and Impersonate for permissions.
Grant for
Set the access duration to 5 minutes.
Approval
Select Automatic
Settings
Click the Restrict to agentic access toggle to enable the setting.
{% hint style="info" %}
**Allow Extend Duration** does not apply to agentic access flows. When access expires, the agent requests access again.
{% endhint %}
2. Configure any other Self Serve access flow settings according to your organization’s access policies.
3. Click **Save Access Flow**.
#### Enable MCP features and the Okta MCP
Follow these steps:
1. On the [**Account Settings**](https://app.apono.io/settings/account) page, under **AI & Automation**, click the **Enable MCP features** toggle to enable the setting. The toggle turns green.
2. On the [**MCPs**](https://app.apono.io/agentic/tools) tab, under **Apono Managed Tools**, click the toggle on the **Okta MCP** card to enable the tool.
{% hint style="info" %}
Learn more about [Model Context Protocol servers](/docs/agent-privilege-guard/apono-agent-privilege-guard-reference/model-context-protocol-mcp-servers).
{% endhint %}
After setup, use the [**AI Agents**](/docs/agent-privilege-guard/apono-agent-privilege-guard-reference/ai-agents) tab to view discovered agents and their associated users. Use the [**AI Sessions**](/docs/agent-privilege-guard/apono-agent-privilege-guard-reference/ai-sessions) tab to review agent activity, including access grants, tool calls, and intent policy decisions.
***
### Set up the Agentic Gateway on a local machine
{% hint style="info" %}
Learn more about [local](/docs/agent-privilege-guard/apono-agentic-gateway/install-the-local-agentic-gateway) and [remote](/docs/agent-privilege-guard/apono-agentic-gateway/deploy-the-remote-agentic-gateway) agentic gateways setups.
{% endhint %}
Each user running the gateway completes this setup on their local machine.
#### Prerequisites
Created an agentic access flow with Restrict to agentic access enabled
Enabled MCP features and the GitHub MCP
Supported operating systems
Supported operating systems:
macOS
Windows 11 (native)
WSL2 (Ubuntu)
Node.js 20+
Required runtime
The gateway is launched with npx, which runs @apono-io/apono-mcp@latest, downloads the gateway binary, and manages the Apono sign-in. No separate Apono CLI installation is required.
#### Configure your AI client
{% hint style="info" %}
If the Agentic Gateway is already configured for this client, skip to [Verify your agent](#verify-your-agent).
{% endhint %}
{% tabs %}
{% tab title="Claude Code" %}
Follow these steps:
1. Run the following command for your operating system. If this is the first run, a separate browser tab opens.
**macOS**
{% code overflow="wrap" %}
```shellscript
claude mcp add apono-agentic -- npx -y @apono-io/apono-mcp@latest --agent-type claude-code
```
{% endcode %}
**Windows 11 (native)**
In Command Prompt or PowerShell:
{% code overflow="wrap" expandable="true" %}
```powershell
claude.cmd mcp add apono-agentic -- npx -y @apono-io/apono-mcp@latest --agent-type claude-code
```
{% endcode %}
**WSL2 (Ubuntu)**
{% code overflow="wrap" expandable="true" %}
```shellscript
claude mcp add apono-agentic -- npx -y @apono-io/apono-mcp@latest --agent-type claude-code
```
{% endcode %}
2. (First run only) Log in to Apono in the open browser tab.
{% endtab %}
{% tab title="Claude Desktop" %}
Follow these steps:
1. In Claude, from the main navigation, click **Claude > Settings > Developer**. The **Settings** page appears.
2. Click **Edit Config**. The **claude\_desktop\_config.json** file opens.
3. Add the following configuration.
{% code overflow="wrap" %}
```json
{
"mcpServers": {
"apono-agentic": {
"command": "npx",
"args": ["-y", "@apono-io/apono-mcp@latest", "--agent-type", "claude-desktop"]
}
}
}
```
{% endcode %}
4. Save the file.
5. Quit and restart Claude desktop.
6. (First run only) Log in to Apono in the browser tab that opens.
{% endtab %}
{% tab title="Cursor" %}
**Quick Start Installation**
Follow these steps:
1. Click the following button to install the MCP Server. The **MCP** page in Cursor opens.
Add to Cursor
2. Click **Install**.
3. Quit and restart Cursor.
4. (First run only) Log in to Apono in the browser tab that opens.
***
**Manual Installation**
Follow these steps:
1. In Cursor, from the main navigation, click **Tools & MCPs**. The **Tools** page appears.
2. Under **Home MCP Servers**, click **New MCP Server**. The **mcp.json** file opens.
3. Add the following configuration.
{% code overflow="wrap" %}
```json
{
"mcpServers": {
"apono-agentic": {
"command": "npx",
"args": ["-y", "@apono-io/apono-mcp@latest", "--agent-type", "cursor"]
}
}
}
```
{% endcode %}
4. Save the file.
5. Quit and restart Cursor.
6. (First run only) Log in to Apono in the browser tab that opens.
{% endtab %}
{% endtabs %}
#### Verify your agent
Perform the following tests:
1. Ask the assistant to list your available integrations. The Okta target should appear.
2. Ask it to perform an action, such as *"List the applications in Okta"*. The agent will request access through the agentic access flow.
{% hint style="info" %}
The first time a user accesses the Okta MCP, the AI client prompts them to sign in with Okta and grant OAuth consent. The client remembers this authorization, and all subsequent actions are performed as the authenticated user.
{% endhint %}
If either task fails, [troubleshoot](#troubleshooting) your setup.
***
### Troubleshooting
#### Apono and Okta Accounts
Okta OAuth authorization fails.
Verify that the Okta Org URL and Okta Client ID are configured correctly, and that the OAuth app's Sign-in redirect URI matches the value expected by Apono.
After this, use any Okta tool to trigger the AI client's sign-in prompt, then complete the OAuth consent in your browser. If authorization still fails, confirm with your administrator that both the [Okta (MCP OAuth) integration](/docs/additional-integrations/mcps/okta-mcp#integrate-the-okta-mcp) and the [Okta MCP tool](#enable-mcp-features-and-the-okta-mcp) are enabled.
#### Local Machine
No targets or integrations are listed.
Follow these steps:
1. Reauthenticate to Apono.
{% code overflow="wrap" expandable="true" %}
```shellscript
npx -y @apono-io/apono-mcp@latest login
```
{% endcode %}
2. Fully restart the AI client so the updated credentials take effect.
3. If the target is still unavailable, confirm with an Apono admin that the platform setup is complete. This includes the integration, agentic access flow, MCP feature enablement, and applicable Apono Managed MCP.
4. Follow the troubleshooting instructions in the applicable platform setup guide.
Okta fails to start.
Follow these steps:
1. Install `uv` and Python 3.13 on the local machine (`uv python install 3.13`).
2. After installing `uv`, fully restart the AI client so it can detect the updated PATH.
More details are needed on failures.
Add `--debug` to the gateway's args in your client config to enable verbose request/response logging, then check the gateway log.
Configuration changes are not reflected in the agent.
Fully restart the client. MCP servers are only launched at startup.
# Apono Agent Privilege Guard for Mixpanel
Configure governed, just-in-time AI access to an Atlassian instance
Set up Apono Agent Privilege Guard for Atlassian to give AI agents controlled, temporary access to Jira and Confluence.
An Apono admin configures the Atlassian integration, an agentic access flow, and the Atlassian MCP. Each user then connects a supported AI client through the Local Agentic Gateway, which brokers requests between the AI client, Apono, and Atlassian.
***
### Set up the Apono account
An Apono admin completes this setup once.
After the Apono account setup is complete, each user can connect a supported AI client to the Agentic Gateway.
#### Prerequisite
Requirement
Details
Mixpanel MCP integration
Connected Apono integration
Verify that the integration exists and is healthy on the Connected tab. If no Mixpanel MCP integration is connected, follow the Mixpanel integration docs.
#### Create an agentic access flow
Create a Self Serve access flow that allows agents to request temporary access to an Atlassian instance on behalf of permitted users:
1. Follow the procedure in [Self Serve Access Flows](/docs/access-flows/creating-access-flows-in-apono/self-serve-access-flows) to define the requestors, resources, access duration, and approval process. As you create the flow, apply the following settings for agentic access.
Setting
Configuration
Access Flow Name
Enter a unique, user-friendly name, such as Agentic - Mixpanel.
When Requestor
Select the users or groups on whose behalf an agent can request access.
The agent can request access only on behalf of its associated user, so that user must match these requester conditions. For Can request for, select Themselves.
Request access to
Select your Atlassian integration, and then select the User resource type and the Impersonate permission.
Follow the Integrations instructions in the Define the resource section of the Self Serve Access Flows guide.
Grant for
Set the access duration to 5 minutes.
Approval
Select Automatic
Settings
Click the Restrict to agentic access toggle to enable the setting.
{% hint style="info" %}
**Allow Extend Duration** does not apply to agentic access flows. When access expires, the agent requests access again.
{% endhint %}
2. Configure any other Self Serve access flow settings according to your organization’s access policies.
3. Click **Save Access Flow**.
#### Enable MCP features and the Mixpanel MCP
Follow these steps:
1. On the [**Account Settings**](https://app.apono.io/settings/account) page, under **AI & Automation**, click the **Enable MCP features** toggle to enable the setting. The toggle turns green.
2. On the [**MCPs**](https://app.apono.io/agentic/tools) tab, under **Apono Managed Tools**, click the toggle on the **Mixpanel MCP** card to enable the tool.
{% hint style="info" %}
Learn more about [Model Context Protocol servers](/docs/agent-privilege-guard/apono-agent-privilege-guard-reference/model-context-protocol-mcp-servers).
{% endhint %}
After setup, use the [**AI Agents**](/docs/agent-privilege-guard/apono-agent-privilege-guard-reference/ai-agents) tab to view discovered agents and their associated users. Use the [**AI Sessions**](/docs/agent-privilege-guard/apono-agent-privilege-guard-reference/ai-sessions) tab to review agent activity, including access grants, tool calls, and intent policy decisions.
***
### Set up the Agentic Gateway on a local machine
{% hint style="info" %}
Learn more about [local](/docs/agent-privilege-guard/apono-agentic-gateway/install-the-local-agentic-gateway) and [remote](/docs/agent-privilege-guard/apono-agentic-gateway/deploy-the-remote-agentic-gateway) agentic gateways setups.
{% endhint %}
Each user running the gateway completes this setup on their local machine.
#### Prerequisites
Created an agentic access flow with Restrict to agentic access enabled
Enabled MCP features and the Mixpanel MCP
Supported operating systems
Supported operating systems:
macOS
Windows 11 (native)
WSL2 (Ubuntu)
Node.js 20+
Required runtime
The gateway is launched with npx, which runs @apono-io/apono-mcp@latest, downloads the gateway binary, and manages the Apono sign-in. No separate Apono CLI installation is required.
#### Configure your AI client
{% hint style="info" %}
If the Agentic Gateway is already configured for this client, skip to [Verify your agent](#verify-your-agent).
{% endhint %}
{% tabs %}
{% tab title="Claude Code" %}
Follow these steps:
1. Run the following command for your operating system. If this is the first run, a separate browser tab opens.
**macOS**
{% code overflow="wrap" %}
```shellscript
claude mcp add apono-agentic -- npx -y @apono-io/apono-mcp@latest --agent-type claude-code
```
{% endcode %}
**Windows 11 (native)**
In Command Prompt or PowerShell:
{% code overflow="wrap" expandable="true" %}
```powershell
claude.cmd mcp add apono-agentic -- npx -y @apono-io/apono-mcp@latest --agent-type claude-code
```
{% endcode %}
**WSL2 (Ubuntu)**
{% code overflow="wrap" expandable="true" %}
```shellscript
claude mcp add apono-agentic -- npx -y @apono-io/apono-mcp@latest --agent-type claude-code
```
{% endcode %}
2. (First run only) Log in to Apono in the open browser tab.
{% endtab %}
{% tab title="Claude Desktop" %}
Follow these steps:
1. In Claude, from the main navigation, click **Claude > Settings > Developer**. The **Settings** page appears.
2. Click **Edit Config**. The **claude\_desktop\_config.json** file opens.
3. Add the following configuration.
{% code overflow="wrap" %}
```json
{
"mcpServers": {
"apono-agentic": {
"command": "npx",
"args": ["-y", "@apono-io/apono-mcp@latest", "--agent-type", "claude-desktop"]
}
}
}
```
{% endcode %}
4. Save the file.
5. Quit and restart Claude desktop.
6. (First run only) Log in to Apono in the browser tab that opens.
{% endtab %}
{% tab title="Cursor" %}
**Quick Start Installation**
Follow these steps:
1. Click the following button to install the MCP Server. The **MCP** page in Cursor opens.
Add to Cursor
2. Click **Install**.
3. Quit and restart Cursor.
4. (First run only) Log in to Apono in the browser tab that opens.
***
**Manual Installation**
Follow these steps:
1. In Cursor, from the main navigation, click **Tools & MCPs**. The **Tools** page appears.
2. Under **Home MCP Servers**, click **New MCP Server**. The **mcp.json** file opens.
3. Add the following configuration.
{% code overflow="wrap" %}
```json
{
"mcpServers": {
"apono-agentic": {
"command": "npx",
"args": ["-y", "@apono-io/apono-mcp@latest", "--agent-type", "cursor"]
}
}
}
```
{% endcode %}
4. Save the file.
5. Quit and restart Cursor.
6. (First run only) Log in to Apono in the browser tab that opens.
{% endtab %}
{% endtabs %}
#### Verify your agent
Perform the following tests:
1. Ask the assistant to list your available integrations. The Atlassian target should appear.
2. Ask it to perform an action, such as *"List my Mixpanel projects"*. The agent will request access through the agentic access flow.
{% hint style="info" %}
The first time a user accesses the Mixpanel MCP, the AI client prompts them to sign in with Mixpanel and grant OAuth consent. The client remembers this authorization, and all subsequent actions are performed as the authenticated user.
{% endhint %}
If either task fails, [troubleshoot](#troubleshooting) your setup.
***
### Troubleshooting
#### Apono and Mixpanel Accounts
Mixpanel OAuth authorization fails.
Use any Mixpanel tool to trigger the AI client's sign-in prompt, then complete the Mixpanel OAuth consent in your browser. If authorization still fails, confirm with your administrator that both the [Mixpanel (MCP OAuth) integration](/docs/additional-integrations/mcps/mixpanel-mcp#integrate-the-mixpanel-mcp) and the [Mixpanel MCP tool](#enable-mcp-features-and-the-mixpanel-mcp) are enabled.
#### Local Machine
No targets or integrations are listed.
Follow these steps:
1. Reauthenticate to Apono.
{% code overflow="wrap" expandable="true" %}
```shellscript
npx -y @apono-io/apono-mcp@latest login
```
{% endcode %}
2. Fully restart the AI client so the updated credentials take effect.
3. If the target is still unavailable, confirm with an Apono admin that the platform setup is complete. This includes the integration, agentic access flow, MCP feature enablement, and applicable Apono Managed MCP.
4. Follow the troubleshooting instructions in the applicable platform setup guide.
More details are needed on failures.
Add `--debug` to the gateway's args in your client config to enable verbose request/response logging, then check the gateway log.
Configuration changes are not reflected in the agent.
Fully restart the client. MCP servers are only launched at startup.
# Apono Agent Privilege Guard for Custom Tools
Configure governed, just-in-time AI access using your organization’s custom tools
Set up Apono Agent Privilege Guard for custom MCP and OAuth tools to give AI agents controlled, temporary access to your organization's applications and services.
An Apono admin configures the custom OAuth integration, an agentic access flow, and the custom MCP. Each user then connects a supported AI client through the Local Agentic Gateway, which brokers requests between the AI client, Apono, and your custom tool.
***
### Set up the Apono account
An Apono admin completes this setup once.
After the Apono account setup is complete, each user can connect a supported AI client to the Agentic Gateway.
#### Prerequisite
Requirement
Details
Custom MCP integration
Connected Apono integration
Verify that the integration exists and is healthy on the Connected tab. If no custom MCP integration is connected, follow the Custom integration docs.
#### Create an agentic access flow
Create a Self Serve access flow that allows agents to request temporary access to an Atlassian instance on behalf of permitted users:
1. Follow the procedure in [Self Serve Access Flows](/docs/access-flows/creating-access-flows-in-apono/self-serve-access-flows) to define the requestors, resources, access duration, and approval process. As you create the flow, apply the following settings for agentic access.
Setting
Configuration
Access Flow Name
Enter a unique, user-friendly name, such as Agentic - Custom.
When Requestor
Select the users or groups on whose behalf an agent can request access.
The agent can request access only on behalf of its associated user, so that user must match these requester conditions. For Can request for, select Themselves.
Request access to
Select your Atlassian integration, and then select the User resource type and the Impersonate permission.
Follow the Integrations instructions in the Define the resource section of the Self Serve Access Flows guide.
Grant for
Set the access duration to 5 minutes.
Approval
Select Automatic
Settings
Click the Restrict to agentic access toggle to enable the setting.
{% hint style="info" %}
**Allow Extend Duration** does not apply to agentic access flows. When access expires, the agent requests access again.
{% endhint %}
2. Configure any other Self Serve access flow settings according to your organization’s access policies.
3. Click **Save Access Flow**.
#### Enable MCP features and the Custom MCP
Follow these steps:
1. On the [**Account Settings**](https://app.apono.io/settings/account) page, under **AI & Automation**, click the **Enable MCP features** toggle to enable the setting. The toggle turns green.
2. On the [**MCPs**](https://app.apono.io/agentic/tools) tab, under **Apono Managed Tools**, click the toggle on your desired **Custom MCP** card to enable the tool.
{% hint style="info" %}
Learn more about [Model Context Protocol servers](/docs/agent-privilege-guard/apono-agent-privilege-guard-reference/model-context-protocol-mcp-servers).
{% endhint %}
After setup, use the [**AI Agents**](/docs/agent-privilege-guard/apono-agent-privilege-guard-reference/ai-agents) tab to view discovered agents and their associated users. Use the [**AI Sessions**](/docs/agent-privilege-guard/apono-agent-privilege-guard-reference/ai-sessions) tab to review agent activity, including access grants, tool calls, and intent policy decisions.
***
### Set up the Agentic Gateway on a local machine
{% hint style="info" %}
Learn more about [local](/docs/agent-privilege-guard/apono-agentic-gateway/install-the-local-agentic-gateway) and [remote](/docs/agent-privilege-guard/apono-agentic-gateway/deploy-the-remote-agentic-gateway) agentic gateways setups.
{% endhint %}
Each user running the gateway completes this setup on their local machine.
#### Prerequisites
Created an agentic access flow with Restrict to agentic access enabled
Enabled MCP features and the Mixpanel MCP
Supported operating systems
Supported operating systems:
macOS
Windows 11 (native)
WSL2 (Ubuntu)
Node.js 20+
Required runtime
The gateway is launched with npx, which runs @apono-io/apono-mcp@latest, downloads the gateway binary, and manages the Apono sign-in. No separate Apono CLI installation is required.
#### Configure your AI client
{% hint style="info" %}
If the Agentic Gateway is already configured for this client, skip to [Verify your agent](#verify-your-agent).
{% endhint %}
{% tabs %}
{% tab title="Claude Code" %}
Follow these steps:
1. Run the following command for your operating system. If this is the first run, a separate browser tab opens.
**macOS**
{% code overflow="wrap" %}
```shellscript
claude mcp add apono-agentic -- npx -y @apono-io/apono-mcp@latest --agent-type claude-code
```
{% endcode %}
**Windows 11 (native)**
In Command Prompt or PowerShell:
{% code overflow="wrap" expandable="true" %}
```powershell
claude.cmd mcp add apono-agentic -- npx -y @apono-io/apono-mcp@latest --agent-type claude-code
```
{% endcode %}
**WSL2 (Ubuntu)**
{% code overflow="wrap" expandable="true" %}
```shellscript
claude mcp add apono-agentic -- npx -y @apono-io/apono-mcp@latest --agent-type claude-code
```
{% endcode %}
2. (First run only) Log in to Apono in the open browser tab.
{% endtab %}
{% tab title="Claude Desktop" %}
Follow these steps:
1. In Claude, from the main navigation, click **Claude > Settings > Developer**. The **Settings** page appears.
2. Click **Edit Config**. The **claude\_desktop\_config.json** file opens.
3. Add the following configuration.
{% code overflow="wrap" %}
```json
{
"mcpServers": {
"apono-agentic": {
"command": "npx",
"args": ["-y", "@apono-io/apono-mcp@latest", "--agent-type", "claude-desktop"]
}
}
}
```
{% endcode %}
4. Save the file.
5. Quit and restart Claude desktop.
6. (First run only) Log in to Apono in the browser tab that opens.
{% endtab %}
{% tab title="Cursor" %}
**Quick Start Installation**
Follow these steps:
1. Click the following button to install the MCP Server. The **MCP** page in Cursor opens.
Add to Cursor
2. Click **Install**.
3. Quit and restart Cursor.
4. (First run only) Log in to Apono in the browser tab that opens.
***
**Manual Installation**
Follow these steps:
1. In Cursor, from the main navigation, click **Tools & MCPs**. The **Tools** page appears.
2. Under **Home MCP Servers**, click **New MCP Server**. The **mcp.json** file opens.
3. Add the following configuration.
{% code overflow="wrap" %}
```json
{
"mcpServers": {
"apono-agentic": {
"command": "npx",
"args": ["-y", "@apono-io/apono-mcp@latest", "--agent-type", "cursor"]
}
}
}
```
{% endcode %}
4. Save the file.
5. Quit and restart Cursor.
6. (First run only) Log in to Apono in the browser tab that opens.
{% endtab %}
{% endtabs %}
#### Verify your agent
Perform the following tests:
1. Ask the assistant to list your available integrations. The custom target should appear.
2. Ask it to perform an action, such as *"List my projects"*. The agent will request access through the agentic access flow.
{% hint style="info" %}
The first time a user accesses your custom MCP, the AI client prompts them to sign in and grant OAuth consent (if applicable). The client remembers this authorization, and all subsequent actions are performed as the authenticated user.
{% endhint %}
If either task fails, [troubleshoot](#troubleshooting) your setup.
***
### Troubleshooting
#### Apono Account
(If applicable) OAuth authorization fails.
Use any action supported by the custom tool to trigger the AI client's sign-in prompt, then complete the OAuth consent in your browser. If authorization still fails, confirm with your administrator that both the [custom MCP integration](/docs/additional-integrations/mcps/custom-mcp) and the [custom MCP](#enable-mcp-features-and-the-custom-mcp) are enabled.
#### Local Machine
No targets or integrations are listed.
Follow these steps:
1. Reauthenticate to Apono.
{% code overflow="wrap" expandable="true" %}
```shellscript
npx -y @apono-io/apono-mcp@latest login
```
{% endcode %}
2. Fully restart the AI client so the updated credentials take effect.
3. If the target is still unavailable, confirm with an Apono admin that the platform setup is complete. This includes the integration, agentic access flow, MCP feature enablement, and applicable Apono Managed MCP.
4. Follow the troubleshooting instructions in the applicable platform setup guide.
More details are needed on failures.
Add `--debug` to the gateway's args in your client config to enable verbose request/response logging, then check the gateway log.
Configuration changes are not reflected in the agent.
Fully restart the client. MCP servers are only launched at startup.
# Apono Agent Privilege Guard for Snowflake (BETA)
Configure governed, just-in-time AI access to a Snowflake instance
{% hint style="success" %}
**The Snowflake MCP is currently in Beta. Contact your Apono representative for setup information.**
{% endhint %}
Set up Apono Agent Privilege Guard for Snowflake to give AI agents controlled, temporary access to your Snowflake instance.
An Apono admin configures the Snowflake integration, an agentic access flow, and the Snowflake MCP. Each user then connects a supported AI client through the Local Agentic Gateway, which brokers requests between the AI client, Apono, and Snowflake.
***
### Set up the Apono account
An Apono admin completes this setup once.
After the Apono account setup is complete, each user can connect a supported AI client to the Agentic Gateway.
#### Prerequisites
Requirement
Details
Snowflake integration
Connected Apono integration
Verify that the integration exists and is healthy on the Connected tab. If no Snowflake integration is connected, follow the Snowflake integration docs.
Apono connector permission
Required connector permissions
Connector used by the Snowflake integration must be deployed with permissions to create users.
#### Create an agentic access flow
Create a Self Serve access flow that allows agents to request temporary access to a Snowflake instance on behalf of permitted users:
1. Follow the procedure in [Self Serve Access Flows](/docs/access-flows/creating-access-flows-in-apono/self-serve-access-flows) to define the requestors, resources, access duration, and approval process. As you create the flow, apply the following settings for agentic access.
Setting
Configuration
Access Flow Name
Enter a unique, user-friendly name, such as Agentic - Snowflake.
When Requestor
Select the users or groups on whose behalf an agent can request access.
The agent can request access only on behalf of its associated user, so that user must match these requester conditions. For Can request for, select Themselves.
Request access to
Select your Snowflake integration, and then select the resource types, resources, and permissions the agent can access.
Follow the Integrations instructions in the Define the resource section of the Self Serve Access Flows guide.
NOTE: Prefer narrowly scoped, read-oriented roles. Grant broader roles only when required for the agent’s intended tasks.
Grant for
Set the access duration to 5 minutes.
Approval
Select Automatic
Settings
Click the Restrict to agentic access toggle to enable the setting.
{% hint style="info" %}
**Allow Extend Duration** does not apply to agentic access flows. When access expires, the agent requests access again.
{% endhint %}
2. Configure any other Self Serve access flow settings according to your organization’s access policies.
3. Click **Save Access Flow**.
#### Enable MCP features and the Snowflake MCP
Follow these steps:
1. On the [**Account Settings**](https://app.apono.io/settings/account) page, under **AI & Automation**, click the **Enable MCP features** toggle to enable the setting. The toggle turns green.
2. On the [**MCPs**](https://app.apono.io/agentic/tools) tab, under **Apono Managed Tools**, click the toggle on the **Snmowflake MCP** card to enable the tool.
{% hint style="info" %}
Learn more about [Model Context Protocol servers](/docs/agent-privilege-guard/apono-agent-privilege-guard-reference/model-context-protocol-mcp-servers).
{% endhint %}
After setup, use the [**AI Agents**](/docs/agent-privilege-guard/apono-agent-privilege-guard-reference/ai-agents) tab to view discovered agents and their associated users. Use the [**AI Sessions**](/docs/agent-privilege-guard/apono-agent-privilege-guard-reference/ai-sessions) tab to review agent activity, including access grants, tool calls, and intent policy decisions.
***
### Set up the Agentic Gateway on a local machine
{% hint style="info" %}
Learn more about [local](/docs/agent-privilege-guard/apono-agentic-gateway/install-the-local-agentic-gateway) and [remote](/docs/agent-privilege-guard/apono-agentic-gateway/deploy-the-remote-agentic-gateway) agentic gateways setups.
{% endhint %}
Each user running the gateway completes this setup on their local machine.
#### Prerequisites
Created an agentic access flow with Restrict to agentic access enabled
Enabled MCP features and the Snowflake MCP
Supported operating systems
Supported operating systems:
macOS
Windows 11 (native)
WSL2 (Ubuntu)
Node.js 20+
Required runtime
The gateway is launched with npx, which runs @apono-io/apono-mcp@latest, downloads the gateway binary, and manages the Apono sign-in. No separate Apono CLI installation is required.
#### Configure your AI client
{% hint style="info" %}
If the Agentic Gateway is already configured for this client, skip to [Verify your agent](#verify-your-agent).
{% endhint %}
{% tabs %}
{% tab title="Claude Code" %}
Follow these steps:
1. Run the following command for your operating system. If this is the first run, a separate browser tab opens.
**macOS**
{% code overflow="wrap" %}
```shellscript
claude mcp add apono-agentic -- npx -y @apono-io/apono-mcp@latest --agent-type claude-code
```
{% endcode %}
**Windows 11 (native)**
In Command Prompt or PowerShell:
{% code overflow="wrap" expandable="true" %}
```powershell
claude.cmd mcp add apono-agentic -- npx -y @apono-io/apono-mcp@latest --agent-type claude-code
```
{% endcode %}
**WSL2 (Ubuntu)**
{% code overflow="wrap" expandable="true" %}
```shellscript
claude mcp add apono-agentic -- npx -y @apono-io/apono-mcp@latest --agent-type claude-code
```
{% endcode %}
2. (First run only) Log in to Apono in the open browser tab.
{% endtab %}
{% tab title="Claude Desktop" %}
Follow these steps:
1. In Claude, from the main navigation, click **Claude > Settings > Developer**. The **Settings** page appears.
2. Click **Edit Config**. The **claude\_desktop\_config.json** file opens.
3. Add the following configuration.
{% code overflow="wrap" %}
```json
{
"mcpServers": {
"apono-agentic": {
"command": "npx",
"args": ["-y", "@apono-io/apono-mcp@latest", "--agent-type", "claude-desktop"]
}
}
}
```
{% endcode %}
4. Save the file.
5. Quit and restart Claude desktop.
6. (First run only) Log in to Apono in the browser tab that opens.
{% endtab %}
{% tab title="Cursor" %}
**Quick Start Installation**
Follow these steps:
1. Click the following button to install the MCP Server. The **MCP** page in Cursor opens.
Add to Cursor
2. Click **Install**.
3. Quit and restart Cursor.
4. (First run only) Log in to Apono in the browser tab that opens.
***
**Manual Installation**
Follow these steps:
1. In Cursor, from the main navigation, click **Tools & MCPs**. The **Tools** page appears.
2. Under **Home MCP Servers**, click **New MCP Server**. The **mcp.json** file opens.
3. Add the following configuration.
{% code overflow="wrap" %}
```json
{
"mcpServers": {
"apono-agentic": {
"command": "npx",
"args": ["-y", "@apono-io/apono-mcp@latest", "--agent-type", "cursor"]
}
}
}
```
{% endcode %}
4. Save the file.
5. Quit and restart Cursor.
6. (First run only) Log in to Apono in the browser tab that opens.
{% endtab %}
{% endtabs %}
#### Verify your agent
Perform the following tests:
1. Ask the assistant to list your available integrations. The Snowflake target should appear.
2. Ask it to perform an action, such as *"Request all databases in Snowflake"*. The agent will request access through the agentic access flow.
{% hint style="info" %}
Apono handles Snowflake authentication for you. Once the request is approved, it fetches short-lived credentials and wires up the connection automatically. The call should return live Snowflake data.
{% endhint %}
If either task fails, [troubleshoot](#troubleshooting) your setup.
***
### Troubleshooting
#### Apono Account
Access is granted, but Snowflake grants fail.
The connector backing the Snowflake integration likely does not have the grants required by the [Snowflake integration](/docs/additional-integrations/databases-and-data-repositories/snowflake#create-a-snowflake-user).
#### Local Machine
No targets or integrations are listed.
Follow these steps:
1. Reauthenticate to Apono.
{% code overflow="wrap" expandable="true" %}
```shellscript
npx -y @apono-io/apono-mcp@latest login
```
{% endcode %}
2. Fully restart the AI client so the updated credentials take effect.
3. If the target is still unavailable, confirm with an Apono admin that the platform setup is complete. This includes the integration, agentic access flow, MCP feature enablement, and applicable Apono Managed MCP.
4. Follow the troubleshooting instructions in the applicable platform setup guide.
Writes are blocked or awaiting approval.
By default, every Update/Create/Delete action waits for your approval, and Admin actions are denied. Ask your admin to adjust the Snowflake MCP's Intent Policy if needed.
More details are needed on failures.
Add `--debug` to the gateway's args in your client config to enable verbose request/response logging, then check the gateway log.
Configuration changes are not reflected in the agent.
Fully restart the client. MCP servers are only launched at startup.
# Apono Agent Privilege Guard for Databricks (BETA)
Configure governed, just-in-time AI access to a Snowflake instance
{% hint style="success" %}
**The Databricks MCP is currently in Beta. Contact your Apono representative for setup information.**
{% endhint %}
Set up Apono Agent Privilege Guard for Databricks to give AI agents controlled, temporary access to Databricks resources.
An Apono admin configures the Databricks integration, an agentic access flow, and the Databricks MCP. Each user then connects a supported AI client through the Local Agentic Gateway, which brokers requests between the AI client, Apono, and Databricks.
# Apono Agent Privilege Guard Reference
# Model Context Protocol (MCP) servers
Manage MCP servers and their intent policies
Apono supports both **Apono Managed MCPs** and **custom MCPs** for secure agentic access. Apono Managed MCPs are provided and maintained by Apono for supported platforms. Custom MCPs are added and maintained by your organization.
Each MCP exposes a set of tools that an AI agent can call through the Apono Agentic Gateway. Each MCP also has its own intent policy, which governs every tool call made through that MCP. The gateway classifies each action as **Read**, **Create**, **Update**, **Delete**, or **Admin**, then allows it, pauses it for human approval, or blocks it according to the configured guardrail.
***
### Enable and configure an Apono Managed MCP
Enabling an MCP makes its tools available through the Apono Agentic Gateway. It does not grant access to the platform. The agent must also receive access through an applicable agentic access flow created during the [platform-specific setup.](/docs/agent-privilege-guard/set-up-apono-agent-privilege-guard)
MCPs tab and panel
Follow these steps:
1. On the [**MCPs**](https://app.apono.io/agentic/tools) tab, under **Apono Managed MCPs**, locate the required MCP.
2. On the MCP card, enable it by clicking its toggle.
3. Click the MCP card. The MCP settings panel opens.
4. On the **Intent Policy** tab, select a guardrail for each action category.
{% hint style="info" %}
By default, each MCP allows Read actions, requires human-in-the-loop approval for Create, Update, and Delete actions, and blocks Admin actions.
{% endhint %}
Guardrail
Behavior
Allow
The action can proceed without additional approval.
HIL
The action pauses until the agent’s human operator approves or rejects it.
Approval can be requested through a supported in-client experience or an external channel such as Slack.
IMPORTANT: Human-in-the-loop approval is separate from access-flow approval. Access-flow approval determines whether temporary access is granted. HIL approval determines whether a specific agent action can proceed.
Block
The action cannot proceed.
5. Click **Save**. The panel closes.
***
### Create a custom MCP server
Follow these steps:
1. On the [**MCPs**](https://app.apono.io/agentic/tools) tab, click **+ Add Custom Tool**. The **Custom MCP** panel opens.
2. On the **Config** tab, enter the **Name**.
3. Select one or more **Resource Types**.
4. Define the **MCP Server Configuration** settings for STDIO or HTTP.
{% tabs %}
{% tab title="STDIO" %}
1. Click **STDIO**.
2. Define the configuration.
{% endtab %}
{% tab title="HTTP" %}
1. Click **HTTP**.
2. Enter the **Endpoint**.
3. (Optional) Add headers for the MCP:
1. Under **Headers**, click **+ Add Headers**.
2. Enter the **Name** and **Value** of any MCP headers.
{% endtab %}
{% endtabs %}
4. On the **Intent Policy** tab, select a guardrail for each action category.
{% hint style="info" %}
By default, each MCP allows Read actions, requires human-in-the-loop approval for Create, Update, and Delete actions, and blocks Admin actions.
{% endhint %}
Guardrail
Behavior
Allow
The action can proceed without additional approval.
HIL
The action pauses until the agent’s human operator approves or rejects it.
Approval can be requested through a supported in-client experience or an external channel such as Slack.
IMPORTANT: Human-in-the-loop approval is separate from access-flow approval. Access-flow approval determines whether temporary access is granted. HIL approval determines whether a specific agent action can proceed.
Block
The action cannot proceed.
6. Click **Save**. The panel closes.
# AI Agents
View discovered AI agents and their users
An **AI agent** is an AI client that connects to Apono and acts on behalf of a user. Apono gives each agent its own identity and associates it with that user.
The **AI Agents** tab on the **Inventory** page provides a centralized view of the agents discovered in your organization. It allows you to:
* **Identify agents**: Review each agent’s generated identity and client type.
* **See the associated user**: Determine which user the agent acts on behalf of.
* **Review activity**: See when the agent was first discovered and when it was last active.
***
### View AI agents
An AI agent appears in the inventory when a user first connects an AI client to the Apono Agentic Gateway. Apono automatically creates the agent identity and associates it with that user. No manual registration is required.
Apono generates the agent name from the AI client and associated user. If the gateway connection uses a profile, the profile is included in the name to distinguish the agent from the same user’s agents in other Apono accounts or environments.
AI Agents tab
On the [**AI Agents**](https://app.apono.io/agentic/discovery) tab, the table provides the following information.
Field
Description
Agent
Generated agent identity
The agent type shown beneath the name identifies the AI client in which the agent operates, such as Claude Code, Claude Desktop, or MCP CLI Proxy.
User
Name and email address of the human operator bound to the agent
Last Active
Date when the agent most recently made a request
First Seen
Date when the agent first connected through the Apono Agentic Gateway
# AI Sessions
Review AI agent sessions and activity
An **AI session** records an agent’s activity from the time it connects through the Apono Agentic Gateway until it disconnects. Each session is associated with the agent’s identity and the user on whose behalf it acts.
The **AI Sessions** tab on the **Activity & Reports** page provides a centralized audit trail of agent activity. It allows you to:
* Identify sessions: Review the agent, associated user, start time, and session status.
* Review activity: See the action categories and intent policy decisions recorded during each session.
* Investigate actions: Trace access grants and tool calls in the order they occurred.
{% hint style="info" %}
AI Sessions records activity under agent identities. Human access activity remains available in the existing **Activity** and **Session Audit** tabs.
Learn more about the [Activity](/docs/audits-and-reports/requests-audit/activity) and [Session Audit](/docs/audits-and-reports/session-audit) tabs.
{% endhint %}
***
### View AI sessions
A session appears when an agent connects through the Apono Agentic Gateway. Active sessions display a live indicator. Completed sessions display their total duration.
AI Sessions
On the [**AI Sessions**](https://app.apono.io/agentic/audit) tab, the table provides a summary of each session.
Column
Description
Session ID
Unique identifier for the session
Started
When the session started
Active sessions display a live indicator. Completed sessions display their total duration.
User
Name and email address of the user associated with the agent
Agent
Agent identity and client type, such as Claude Code, Claude Desktop, or MCP CLI Proxy
Actions
Action categories recorded during the session
Possible values:
Read
Create
Update
Delete
Admin
Decisions
Intent policy decisions applied during the session
Possible values:
ALLOW
HIL
DENY
Sessions without tool calls do not display actions or decisions.
#### View session details
Follow these steps:
1. On the [**AI Sessions**](https://app.apono.io/agentic/audit) tab, in the search field, enter a value to filter the sessions.
2. Set the date range to refine the list of sessions. By default, all sessions are listed.
All Time
**Relative**
Follow these steps to set a relative date range:
1. Click **All Time**, the date range settings appear.
2. On the **Relative** tab, from the **Last** dropdown menu, select a time measure.
3. In the **Last** text field, enter a number.
4. (Optional) Click **Round to the hours|days|months** to begin the time filtering from the nearest hour, day, or month.
5. Click **Apply**. The filter turns blue and shows a summary.
6. Click the top or outside of the dropdown menu to close it.
**Absolute**
Follow these steps to set an absolute date range:
1. Click **All Time**, the date range settings appear.
2. On the **Absolute** tab, under **From**, select a start date:
1. Select the start date from the date picker.
2. Select the start time (local system time) from the time picker.
3. Under **To**, select the end date:
1. Select the end date from the date picker.
2. Select the end time (local system time) from the time picker.
4. (Optional) Click **Use UTC** to apply the Coordinated Universal Time (UTC) timezone to the start and end times instead of the local system time.
5. Click **Apply**. The filter turns blue and shows a summary.
6. Click the top or outside of the dropdown menu to close it.
3. Click the row of a session. The session details panel opens.
4. Review the session summary and **Timeline**.
{% hint style="info" %}
The summary displays the session ID, start time, agent, associated user, and status. The **Timeline** displays the session events in chronological order. Each timeline entry is timestamped.
{% endhint %}
Timeline Event
Description
Session started
When the agent connected through the Apono Agentic Gateway
Access elevated
Access grant obtained during the session
Click the access request ID to review the access flow, target resources, permissions, and access duration.
Tool call
MCP tool called by the agent
The entry shows the MCP and tool name, action category, intent policy decision, and timestamp. Repeated identical calls may be grouped into one entry.
5. To close the panel, click **X** in the upper-right corner.
# Apono Agentic Gateway
Choose how AI clients connect to Apono
The **Apono Agentic Gateway** brokers requests and tool calls between AI clients and Apono. You can run the gateway locally on each user’s machine or deploy it centrally in your environment.
Both implementations use the same Apono controls:
* Agentic access flows govern temporary access
* MCP intent policies govern tool calls
* Activity is recorded on the AI Agents and AI Sessions tabs.
The following table explains the difference between the implementations.
The Remote Agentic Gateway is available in private beta.
# Install the Local Agentic Gateway
Connect an AI client to Apono from a user’s machine
The **Local Agentic Gateway** connects a supported AI client to Apono from the user's machine. It runs over STDIO, is launched with `npx`, and brokers agent requests and tool calls through Apono.
Configure the gateway once for each AI client or Apono account profile that you want to use. This guide covers the local installation shared by all supported platforms. For Apono account configuration, platform-specific prerequisites, and functional verification, follow the applicable Agentic Access setup guide.
{% hint style="success" icon="lightbulb" %}
To deploy the gateway centrally instead of installing it on each user's machine, see [Deploy the Remote Agentic Gateway.](/docs/agent-privilege-guard/apono-agentic-gateway/deploy-the-remote-agentic-gateway) The Remote Agentic Gateway is available in private beta.
{% endhint %}
***
### How the Local Agentic Gateway works
When the AI client starts the gateway for the first time:
1. **The gateway starts**. `npx` downloads and launches the Local Agentic Gateway.
2. **The user signs in to Apono**. A browser tab opens for authentication. The session is stored locally and reused until it expires.
3. **Apono registers the agent**. The agent is linked to the signed-in user and appears on the AI Agents tab.
4. **The client can send tool calls**. The gateway begins brokering requests between the AI client and Apono.
***
### Prerequisites
Created an agentic access flow with Restrict to agentic access enabled
Enabled the corresponding Apono Managed MCP
Platform-specific setup
Apono Managed MCPs require additional local runtimes
Review the prerequisites in the applicable platform setup guide before connecting your AI client.
Supported operating systems
Supported operating systems:
macOS
Windows 11 (native)
WSL2 (Ubuntu)
Node.js 20+
Required runtime
The gateway is launched with npx, which runs @apono-io/apono-mcp@latest, downloads the gateway binary, and manages the Apono sign-in. No separate Apono CLI installation is required.
AI client
Supported AI client
Claude Code, Claude Desktop, or Cursor are currently supported.
***
### Configure your AI client
{% hint style="info" %}
If the Local Agentic Gateway is already configured for this client, return to the applicable [platform setup guide](/docs/agent-privilege-guard/set-up-apono-agent-privilege-guard) to verify access.
{% endhint %}
Add the Local Agentic Gateway as an MCP server using the instructions for your AI client below.
{% tabs %}
{% tab title="Claude Code" %}
Follow these steps:
1. Run the following command for your operating system. If this is the first run, a separate browser tab opens.
**macOS**
{% code overflow="wrap" %}
```shellscript
claude mcp add apono-agentic -- npx -y @apono-io/apono-mcp@latest --agent-type claude-code
```
{% endcode %}
**Windows 11 (native)**
In Command Prompt or PowerShell:
{% code overflow="wrap" expandable="true" %}
```powershell
claude.cmd mcp add apono-agentic -- npx -y @apono-io/apono-mcp@latest --agent-type claude-code
```
{% endcode %}
**WSL2 (Ubuntu)**
{% code overflow="wrap" expandable="true" %}
```shellscript
claude mcp add apono-agentic -- npx -y @apono-io/apono-mcp@latest --agent-type claude-code
```
{% endcode %}
2. (First run only) Log in to Apono in the open browser tab.
{% endtab %}
{% tab title="Claude Desktop" %}
Follow these steps:
1. In Claude, from the main navigation, click **Claude > Settings > Developer**. The **Settings** page appears.
2. Click **Edit Config**. The **claude\_desktop\_config.json** file opens.
3. Add the following configuration.
{% code overflow="wrap" %}
```json
{
"mcpServers": {
"apono-agentic": {
"command": "npx",
"args": ["-y", "@apono-io/apono-mcp@latest", "--agent-type", "claude-desktop"]
}
}
}
```
{% endcode %}
4. Save the file.
5. Quit and restart Claude desktop.
6. (First run only) Log in to Apono in the browser tab that opens.
{% endtab %}
{% tab title="Cursor" %}
**Quick Start Installation**
Follow these steps:
1. Click the following button to install the MCP Server. The **MCP** page in Cursor opens.
Add to Cursor
2. Click **Install**.
3. Quit and restart Cursor.
4. (First run only) Log in to Apono in the browser tab that opens.
***
**Manual Installation**
Follow these steps:
1. In Cursor, from the main navigation, click **Tools & MCPs**. The **Tools** page appears.
2. Under **Home MCP Servers**, click **New MCP Server**. The **mcp.json** file opens.
3. Add the following configuration.
{% code overflow="wrap" %}
```json
{
"mcpServers": {
"apono-agentic": {
"command": "npx",
"args": ["-y", "@apono-io/apono-mcp@latest", "--agent-type", "cursor"]
}
}
}
```
{% endcode %}
4. Save the file.
5. Quit and restart Cursor.
6. (First run only) Log in to Apono in the browser tab that opens.
{% endtab %}
{% endtabs %}
#### Gateway options
Add the applicable gateway options to your AI client’s MCP configuration. Restart the client to apply any changes.
Option
Description
--agent-type
(Required) Identifies the AI client running the gateway
The client-specific configurations above include the applicable value.
--debug
Enables verbose request and response logging while investigating a problem
***
### Verify the gateway connection
After the first successful start, confirm that the agent appears and is linked to your user on the **AI Agents** tab.
If the agent does not appear, continue to [Troubleshoot the Local Agentic Gateway](#troubleshoot-the-local-agentic-gateway).
After confirming the gateway connection, return to the applicable platform setup guide to verify platform access.
***
### Troubleshoot the Local Agentic Gateway
No targets or integrations are listed.
Follow these steps:
1. Reauthenticate to Apono.
{% code overflow="wrap" expandable="true" %}
```shellscript
npx -y @apono-io/apono-mcp@latest login
```
{% endcode %}
2. Fully restart the AI client so the updated credentials take effect.
3. If the target is still unavailable, confirm with an Apono admin that the platform setup is complete. This includes the integration, agentic access flow, MCP feature enablement, and applicable Apono Managed MCP.
4. Follow the troubleshooting instructions in the applicable platform setup guide.
The Apono sign-in does not open or must be refreshed.
Follow these steps:
1. Start a new Apono sign-in.
{% code overflow="wrap" expandable="true" %}
```shellscript
npx -y @apono-io/apono-mcp@latest login
```
{% endcode %}
2. Fully restart the AI client so the updated credentials take effect.
More details are needed on failures.
Add `--debug` to the gateway's args in your client config to enable verbose request/response logging, then check the gateway log.
Configuration changes are not reflected in the agent.
Fully restart the client. MCP servers are only launched at startup.
# Deploy the Remote Agentic Gateway (BETA)
Connect AI clients to Apono through a shared HTTPS endpoint
{% hint style="success" %}
**The Remote Agentic Gateway is currently available through a private beta program. Contact your Apono representative for setup information.**
{% endhint %}
The **Remote Agentic Gateway** connects AI clients to Apono through a shared HTTPS endpoint. It runs centrally as the proxy service of an Apono connector in your environment, so users do not need to install or run the gateway on their local machines. One deployment can serve multiple users and AI clients that can reach the endpoint.
***
### How the Remote Agentic Gateway works
1. The AI client connects to the gateway. The client sends MCP requests to `https:///mcp`.
2. The ingress or load balancer routes the request. It terminates TLS and forwards HTTP traffic to the `-proxy` service on port `10020`.
3. The connector proxy brokers the request through Apono. The applicable agentic access flow governs temporary access, and the MCP’s intent policy governs the tool call. Credentials are not exposed to the AI model.
4. Apono records the activity. The agent and associated user appear in AI Agents, while AI Sessions records access grants, tool calls, and policy decisions.
One gateway deployment can support multiple users and AI clients that can reach the endpoint.
{% hint style="success" icon="lightbulb" %}
The Remote and Local Agentic Gateways provide the same Apono access controls. Only the deployment model differs. To run the gateway on each user’s machine instead, see [Install the Local Agentic Gateway](/docs/agent-privilege-guard/apono-agentic-gateway/install-the-local-agentic-gateway).
{% endhint %}
***
### Prerequisites
Item
Details
Private beta access
Required program participation
Your organization is participating in the Remote Agentic Gateway private beta.
Created an agentic access flow with Restrict to agentic access enabled
Enabled the corresponding Apono Managed MCP
Apono connector
Connector deployment requirements
Confirm the following:
You have access to install or upgrade an Apono connector using Kubernetes and Helm.
The Apono connector is version 1.8.4+.
The apono-connector Helm chart is version 2.1.4+.
For a new connector, obtain the connector ID and token from Apono.
DNS hostname
Hostname for the gateway endpoint, such as apono-agentic-gateway.<your-domain>
TLS certificate
Certificate that matches the hostname and is trusted by the AI client runtime
Ingress or load balancer
Endpoint that terminates HTTPS and forwards HTTP traffic to the connector proxy service on port 10020
#### Network requirements
Source
Destination
Port
Protocol
AI client runtime
Remote Agentic Gateway HTTPS endpoint
443
HTTPS
Ingress or load balancer
Connector proxy service
10020
HTTP
Connector
Apono API
443
HTTPS
Connector
Integrated target systems
As required
As required
***
### Set up the gateway
#### Enable the connector proxy
Follow the steps:
1. Enable the connector proxy for a new or existing Apono connector.
{% tabs %}
{% tab title="New connector" %}
A dedicated connector is recommended for the Remote Agentic Gateway. This isolates gateway traffic from other connector workloads and requires no additional sizing beyond the Helm chart defaults.
Create the connector in Apono and obtain its connector ID and token. Then add the following configuration to a new **values.yaml** file.
{% code overflow="wrap" expandable="true" %}
```yml
apono:
connectorId:
token:
proxyService:
enabled: true
```
{% endcode %}
{% endtab %}
{% tab title="Existing connector" %}
You can reuse an existing connector when deploying a dedicated connector is not practical. Provide approximately one additional vCPU and 1.5 GB of memory for the agentic workload, then adjust the allocation based on actual usage.
Add the following configuration to the connector’s existing **values.yaml** file. Do not replace its other settings.
{% code overflow="wrap" expandable="true" %}
```yml
proxyService:
enabled: true
```
{% endcode %}
{% endtab %}
{% endtabs %}
{% hint style="warning" %}
The gateway connector must run as a single replica. Multiple replicas can route requests from the same session to different connector instances, resulting in `unknown session` errors.
{% endhint %}
2. Install the new connector or upgrade the existing connector using your Helm deployment process.
3. Confirm that the `${CONNECTOR_ID}-proxy` service appears. The service exposes the gateway internally over HTTP on port `10020`.\
\
If the service does not appear, confirm that `proxyService.enabled` is set to `true`, and then reinstall or upgrade the connector.
{% code overflow="wrap" expandable="true" %}
```shellscript
kubectl get svc -n ${NAMESPACE} ${CONNECTOR_ID}-proxy
```
{% endcode %}
#### Expose the connector proxy over HTTPS
Expose the `${CONNECTOR_ID}-proxy` service through an ingress or load balancer that:
* Accepts HTTPS connections from AI client runtimes
* Uses a certificate that matches the gateway hostname
* Terminates TLS
* Forwards HTTP traffic to `${CONNECTOR_ID}-proxy` on port `10020`
The following example uses an AWS Application Load Balancer ingress on Amazon EKS.
Follow these steps:
1. Create an **ingress.yaml** file with the following configuration. Be sure to replace the placeholder values listed below.
{% hint style="info" %}
This example creates an internal load balancer. Use an internet-facing endpoint only when required by your AI client and network architecture.
The unauthenticated / path can return `401` or `404` when the gateway is healthy. The ALB health check therefore accepts status codes from `200` through `499`.
{% endhint %}
{% code overflow="wrap" expandable="true" %}
```yml
apiVersion: networking.k8s.io/v1
kind: Ingress
metadata:
name: apono-agentic-gateway
namespace:
annotations:
alb.ingress.kubernetes.io/scheme: internal # internal LB; use internet-facing only if required
alb.ingress.kubernetes.io/target-type: ip
alb.ingress.kubernetes.io/listen-ports: '[{"HTTPS":443}]'
alb.ingress.kubernetes.io/certificate-arn: # cert matching
alb.ingress.kubernetes.io/backend-protocol: HTTP # HTTP to the connector (TLS already terminated)
alb.ingress.kubernetes.io/healthcheck-protocol: HTTP
alb.ingress.kubernetes.io/healthcheck-port: traffic-port
alb.ingress.kubernetes.io/healthcheck-path: /
alb.ingress.kubernetes.io/success-codes: "200-499" # IMPORTANT: '/' returns 401/404 without auth - that is healthy
external-dns.alpha.kubernetes.io/hostname:
spec:
ingressClassName: alb
rules:
- host:
http:
paths:
- path: /
pathType: Prefix
backend:
service:
name: -proxy
port:
number: 10020
```
{% endcode %}
Placeholder
Description
<NAMESPACE>
Namespace where the connector is installed
<CONNECTOR_ID>
ID of the connector running the gateway
<ACM_CERT_ARN>
ARN of the AWS Certificate Manager certificate matching the hostname
<HOSTNAME>
DNS hostname assigned to the gateway
2. Provision the ingress or load balancer using your existing deployment process.
3. Configure DNS and TLS:
* Point `` to the load balancer using an `A` or alias record.
* If ExternalDNS is not configured, remove the `external-dns.alpha.kubernetes.io/hostname` annotation and create the record manually after the load balancer is provisioned.
* Confirm that the certificate matches `` and is trusted by the AI client runtime.
#### Register the endpoint in Apono
Follow these steps:
1. On the [**Connectors**](https://app.apono.io/connectors) tab, in the row of the connector used for the Remote Agentic Gateway, click **︙> Edit**. The **Edit Connector** page opens.
2. Click the **Enable Agentic Proxy** toggle. The **Agentic Proxy Exposed Hostname** field appears.
3. Enter the **Agentic Proxy Exposed Hostname**.
{% hint style="warning" %}
Only enter the hostname, such as *apono-agentic-gateway.\*. Do **not** include the protocol (*https\://*) or the */mcp* path.
{% endhint %}
4. Click **Update Connector**. The connector is updated. The **Connectors** tab opens.
#### Validate the gateway endpoint
Run the following checks from a machine that can reach the gateway endpoint, which is typically internal.
Follow these steps:
1. Confirm that the `${CONNECTOR_ID}-proxy` service exists.
{% code overflow="wrap" expandable="true" %}
```shellscript
kubectl get svc -n ${NAMESPACE} ${CONNECTOR_ID}-proxy
```
{% endcode %}
2. Confirm that the ingress or load balancer is provisioned and routes traffic to `${CONNECTOR_ID}-proxy` on port `10020`.
{% code overflow="wrap" expandable="true" %}
```bash
kubectl get ingress -n ${NAMESPACE}
```
{% endcode %}
3. Confirm that `${HOSTNAME}` resolves to the ingress or load balancer.
{% code overflow="wrap" expandable="true" %}
```bash
nslookup ${HOSTNAME}
```
{% endcode %}
4. Verify the HTTPS endpoint.
{% tabs %}
{% tab title="OAuth protected-resource metadata" %}
Request the OAuth protected-resource metadata. A `200` response with a JSON body confirms that DNS, TLS termination, load-balancer routing, the Kubernetes service, and the connector proxy are connected.
{% code overflow="wrap" expandable="true" %}
```bash
curl -sS https://${HOSTNAME}/.well-known/oauth-protected-resource
```
{% endcode %}
{% endtab %}
{% tab title="MCP endpoint" %}
Request the MCP endpoint without credentials. A `401` response confirms that the request reached the gateway and requires authentication.
A timeout, connection refusal, or TLS error indicates a networking or certificate problem.
{% code overflow="wrap" expandable="true" %}
```bash
curl -i https://${HOSTNAME}/mcp
```
{% endcode %}
{% endtab %}
{% endtabs %}
#### Connect an AI client
Configure a supported AI client to connect to *https\://\/mcp*.
Apono will provide client-specific configuration and authentication instructions to Remote Agentic Gateway private-beta participants.
***
### Troubleshoot the Remote Agentic Gateway
The ${CONNECTOR_ID}-proxy service does not appear.
Follow these steps:
1. Confirm that `proxyService.enabled` is set to `true` in the connector’s **values.yaml** file.
2. Install the new connector or upgrade the existing connector again.
3. Confirm that the proxy service appears.
{% code overflow="wrap" expandable="true" %}
```bash
kubectl get svc -n ${NAMESPACE} ${CONNECTOR_ID}-proxy
```
{% endcode %}
The load balancer marks the target as unhealthy.
Configure the load-balancer health check to:
* Use `/` as the health-check path.
* Accept status codes from `200-499`.
The unauthenticated / path can return `401` or `404` when the gateway is healthy.
The curl request hangs or the connection is refused.
Confirm that the ingress or load balancer:
* Routes traffic to the `${CONNECTOR_ID}-proxy` service.
* Forwards traffic to port `10020`.
Also confirm that the applicable firewall rules, security groups, routing, and network policies allow the connection.
The curl request returns a TLS error.
Confirm that the TLS certificate:
* Matches ``.
* Is presented by the ingress or load balancer.
* Is trusted by the AI client runtime.
Agents intermittently receive an unknown session error.
Confirm that the gateway connector runs as a single replica. If the connector is running multiple replicas, scale it back to one.
The gateway is reachable, but all agent actions are denied
Confirm with an Apono admin that the Apono account setup is complete:
* MCP features are enabled.
* The applicable integration is connected.
* An agentic access flow exists with **Restrict to agentic access** enabled.
* The corresponding Apono Managed MCP is enabled.
# How Apono Works
Apono syncs with your apps' data, grants and revokes access
## How Apono Works
## Your Questions
1. How does Apono securely integrate with your environment?
2. How are Access Flows defined and managed?
3. How do developers request and approve access?
4. How do admins manage access logs and audit reports?
Great questions, let's get to it:
## Integrate with Apono in 3 easy steps
Three easy steps are what it takes to create Just-In-Time and Just Enough permissions for everyone with access to your cloud assets and resources.
### 1. Install a Connector
Connectors are the components that mediate between Apono and your resources to sync data from cloud applications and grant and revoke access permissions.
The Connector does not read, cache or store any secrets, nor does Apono need an account with admin privileges to function. The Connector contacts your secret store or key vault when it needs to sync data or provision access.
Here's how Connectors work:
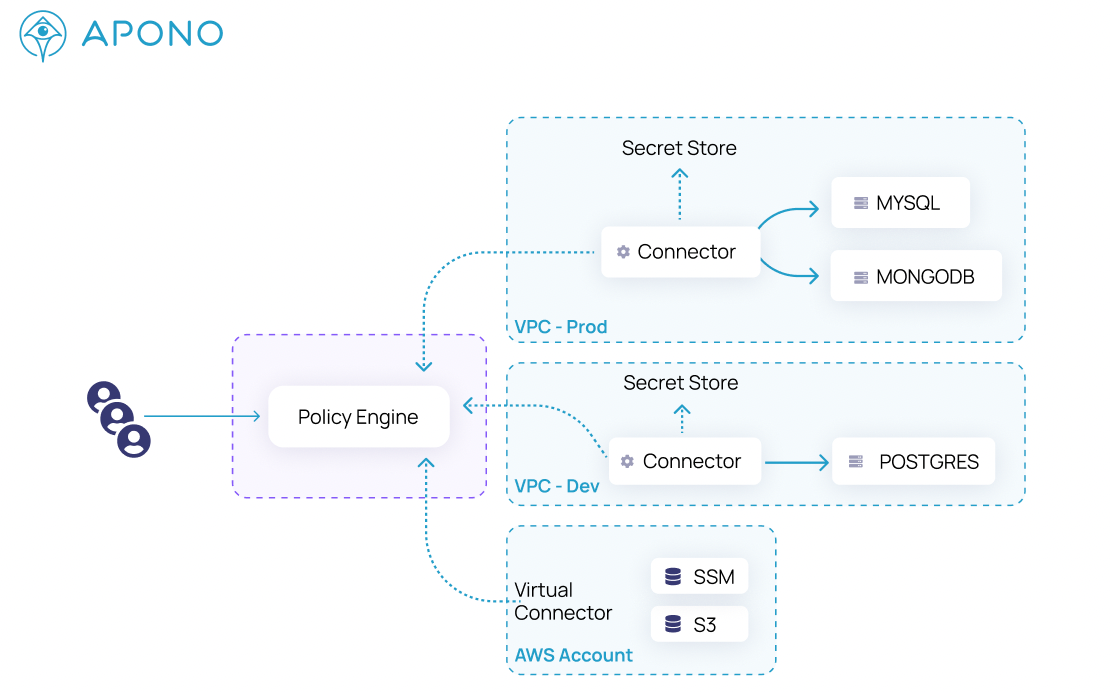
### 2. Integrate With Cloud Apps
After you've installed the Connector, integrate Apono with your cloud applications to sync data on users, groups, resources and permissions.
Apono currently has integrations for 35+ resource types in AWS, GCP, Azure and Kubernetes platforms, as well as development and CI/CD tools, databases, incident response tools, IdP, ChatOps products, and more. Check the [Integrations Catalog](https://app.apono.io/catalog) for details and to see the latest.
### 3. Create Access Flows
Create an Access Flows by answering five questions:
* **Who** should get access?
* **What** can they gain access to?
* What **Actions** will they be able to perform?
* **How Long** should they have the access?
* Who must **Approve** the request?
Fill in the blanks using information from drop-down lists, click Create, and you're done.
## Apono is Self-Serve
Apono is completely self-serve! Curious? [Try it](https://app.apono.io/account/sign-up) for yourself (no demo needed)!
* Connect and disconnect the Apono connector and cloud resources at will\
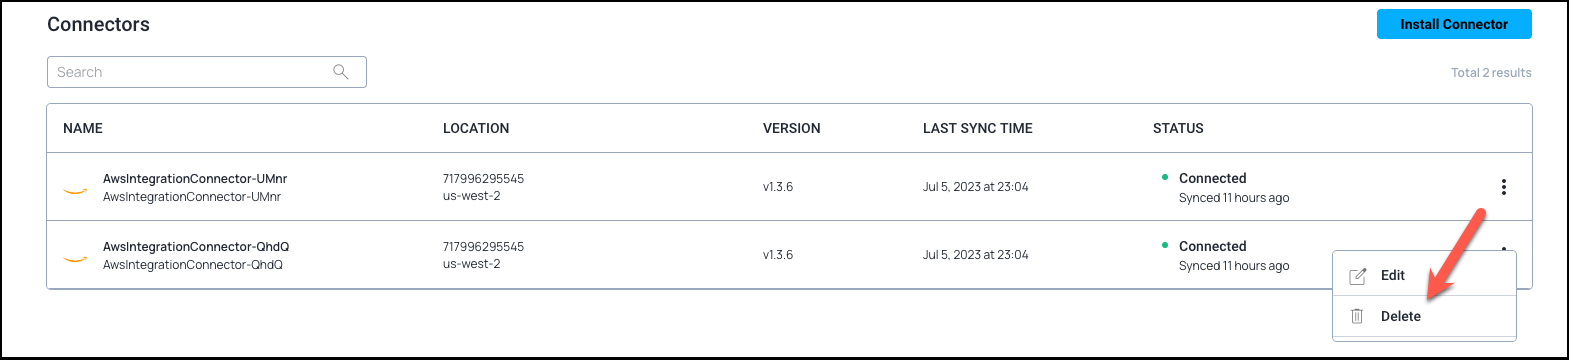
* Using Terraform? Edit your Terraform .tf file to add Apono access management to your resources
## Add Apono to Your IaC Configurations
Open-source Terraform or AWS ecosystem, Apono is a recognized provider for both.
Prepare Terraform configuration scripts by referring to the [Terraform Installation](https://registry.terraform.io/providers/apono-io/apono/latest/docs) Guide. You will also need the [Integrations Metadata](https://docs.apono.io/metadata-for-integration-config) to learn what to included in each Apono resource.
Apono's Terraform provider is great for creating and managing integrations, as well as Access Flows!
## Just Add Slack or Teams
Apono is built with DevX in mind. With Apono, developers can:
* Request access directly in their favorite tool: [Slack](/docs/access-requests-and-approvals/slack/requesting-access-with-slack), [Teams](/docs/access-requests-and-approvals/teams/requesting-access-with-teams) or [CLI](/docs/access-requests-and-approvals/cli/requesting-access-with-cli)
* Gain automatic access without waiting for approval if the Access Flow allows it
* Get access details directly in Slack, Teams or CLI and use them with ease
No more complex forms, old service systems, proxies and clients to install, or hackling your IT department when you need to get work done.
That's why thousands of engineers use Apono for access requests every month!
## Audit and Report on Access
Apono automates access logs and audit reports:
* Every access request and action are [fully logged](broken://pages/EQ9OHy1K3wcyMc9WZRIf)
* Query logs to get exactly what you need, even with our [Public API](https://docs.apono.io/reference)!
* Periodic reports and compliance needs? No problem! [Create, save, download and schedule reports](/docs/audits-and-reports/requests-audit/create-reports) at will. We'll send it directly to your inbox.
# Getting started
Get started with Apono in 10 minutes to get dynamic, centralized, just-in-time access management for your cloud!
## Getting started
Get a taste of what Apono can do by [signing up](https://app.apono.io/account/sign-up) (it's free!) and then follow our onboarding wizard.
You will complete 3 steps to see how easy it is for Admins to manage access with dynamic Access Flows, and how intuitive it is for developers and other end users to request and use Apono access just-in-time.
Try Apono in AWS, then unlock all of your cloud providers and applications for centralized, streamlined access management.
{% embed url="" %}
## Step 1
### Install the connector
{% hint style="info" %}
What's a connector? What makes it so secure?
The Apono Connector is an on-prem connection that can be used to connect resources to Apono and separate the Apono app from the environment for maximal security.
Read more [here](/docs/about-apono/security-and-architecture#the-connector-security).
{% endhint %}
If you're just getting started with Apono, we recommend using a **local connector deployed with docker image**.
You can also install a connector in your cloud environment. Read more [here](/docs/aws-environment/apono-connector-for-aws).
{% hint style="info" %}
You should know:
1. A local connector is **only active as long as the container is running**.\
This means you will have to rerun the command when the container is down.
2. The local connector **leverages your existing AWS Profiles**. Make sure you have an AWS Profile with Admin permissions to an AWS account, like playground, staging, dev, etc.
3. If your organization requires MFA, SSO login, VPN login or other security policies, the local connector using your AWS profile will need them to work.
{% endhint %}
#### How to deploy the local connector
**Prerequisites**
* [AWS CLI](https://docs.aws.amazon.com/cli/latest/userguide/getting-started-install.html)
* A configured AWS profile in your AWS CLI with these permissions: *List* and *IAM* to the AWS account and resources you want to integrate.
Necessary permissions policy - LIST
```json
{
"Version": "VERSION",
"Statement": [
{
"Sid": "SID",
"Effect": "Allow",
"Action": [
"iam:ListPolicies",
"ec2:DescribeInstances",
"lambda:ListFunctions",
"s3:ListAllMyBuckets",
"iam:ListRoles",
"ssm:GetParametersByPath",
"s3:ListBucket",
"ecr:DescribeRepositories",
"iam:ListGroups",
"secretsmanager:ListSecrets",
"tag:GetResources"
],
"Resource": "*"
}
]
}
```
Necessary permissions policy - IAM
```json
{
"Version": "VERSION",
"Statement": [
{
"Sid": "SID",
"Effect": "Allow",
"Action": [
"iam:GetUser",
"iam:CreateUser",
"iam:GetRole",
"iam:CreateRole",
"iam:UpdateAssumeRolePolicy",
"iam:ListAccessKeys",
"iam:CreateAccessKey",
"iam:GetRolePolicy",
"iam:DeleteAccessKey",
"iam:PutRolePolicy",
"iam:ListRolePolicies"
],
"Resource": "*"
}
]
}
```
* [Docker engine](https://docs.docker.com/engine/install/)
**Steps**
1. Go to the [Apono app](https://app.apono.io) and sign up
2. In the catalog, pick AWS.
3. Pick Account
4. Install a new connector and pick "Local Installation"
**For Linux/mac:**
5. Copy the command that appears in the Apono App and run it in your terminal:\
`bash <(curl -s https://apono-public.s3.amazonaws.com/local-connector/install.sh) --apono-token `\
The`` will appear in the one-liner the UI generates for you.
6. Follow the interactive prompts and assign:
1. AWS profile: Apono will leverage the permissions of the profile you pick. If you don't specify the profile, press enter and Apono will use the default profile.
7. **Results:**
1. If installed successfully, you will see this message: *Installation complete. You can return to the Apono App*
8. Go back to the Apono App and continue to integrate AWS. The local connector should appear on the screen with a green checkmark:
**For Windows**
5. Copy the command that appears in the Apono App and run it in your terminal:\
`iex ([System.Text.Encoding]::UTF8.GetString((Invoke-WebRequest -Uri "https://apono-public.s3.amazonaws.com/local-connector/install.ps1" -UseBasicParsing).Content))`
6. Follow the interactive prompts and assign:
1. The `` that appears in the Apono App under the one-liner command.
7. **Results:**
1. If installed successfully, you will see the container ID that started running.
8. Go back to the Apono App and continue to integrate AWS. The local connector should appear on the screen with a green checkmark:
### Integrate AWS with Apono
1. Provide the AWS config:
1. An integration name of your choosing
2. The region of the account you'd like to integrate
2. Click Connect
3. Wait for the integration to sync. This may take a few minutes.
4. **Results:**
1. You should see a success message indicating that Apono has successfully integrated with AWS Test.
2. Otherwise, go back and edit the integration to fix the errors that appear on the screen. Learn more [here](/docs/help-and-debugging/troubleshooting-errors).
## Step 2
### Create an Access Flow
An Access Flow is a smart, dynamic access workflow or policy in human readable language that determines who can request access to what, and what the access duration and approval flow should be. Read more about Access Flows [here](/docs/access-flows/access-flows).
1. Fill in the Access Flow form:
1. Click Someone to pick **who can request the access**. You can pick yourself under Users.
2. Click Select Target to pick **the AWS Account** you just connected and the **cloud service** you'd like to manage access to. Duplicate this line to include more cloud services in the Access Flow.
3. Click Any to pick **the specific resources** in the Access Flow by name, by AWS tags, or by excluding specific resources. You can also leave it as Any.
4. Click Permissions to pick **the permissions** users will be able to request.
5. You can leave the **access time** as *1 Hour* and the **approval** as *Automatic* or change them as you'd like.
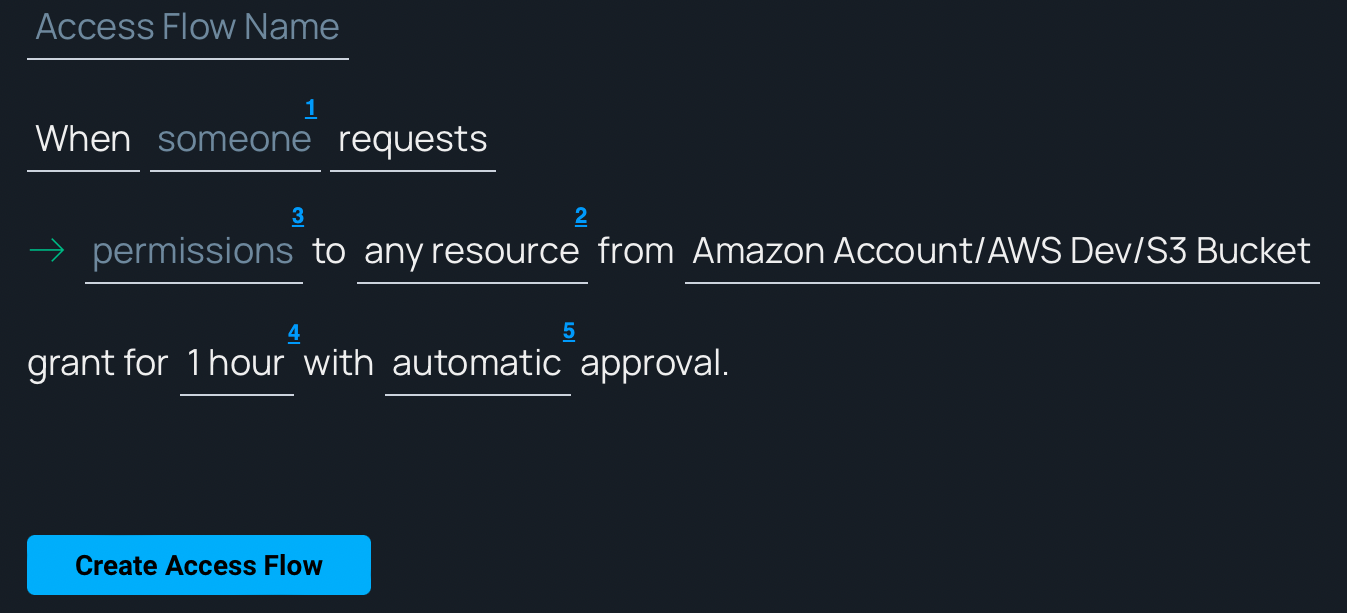
2. Click Create Access Flow.
3. In the next screen, click Request Access continue to Step 3.
## Step 3
### Request access
Developers and other end users in the organizations will request access according to the Access Flows using Slack, Teams, CLI, or the Apono Web Portal.
1. Fill in the request form:
1. Pick the integration
2. Pick the resource type
3. Pick resources
4. Pick permissions
5. Insert a justification
2. Click Request
### Gain and use access
1. The request will appear on the screen with the status Pending
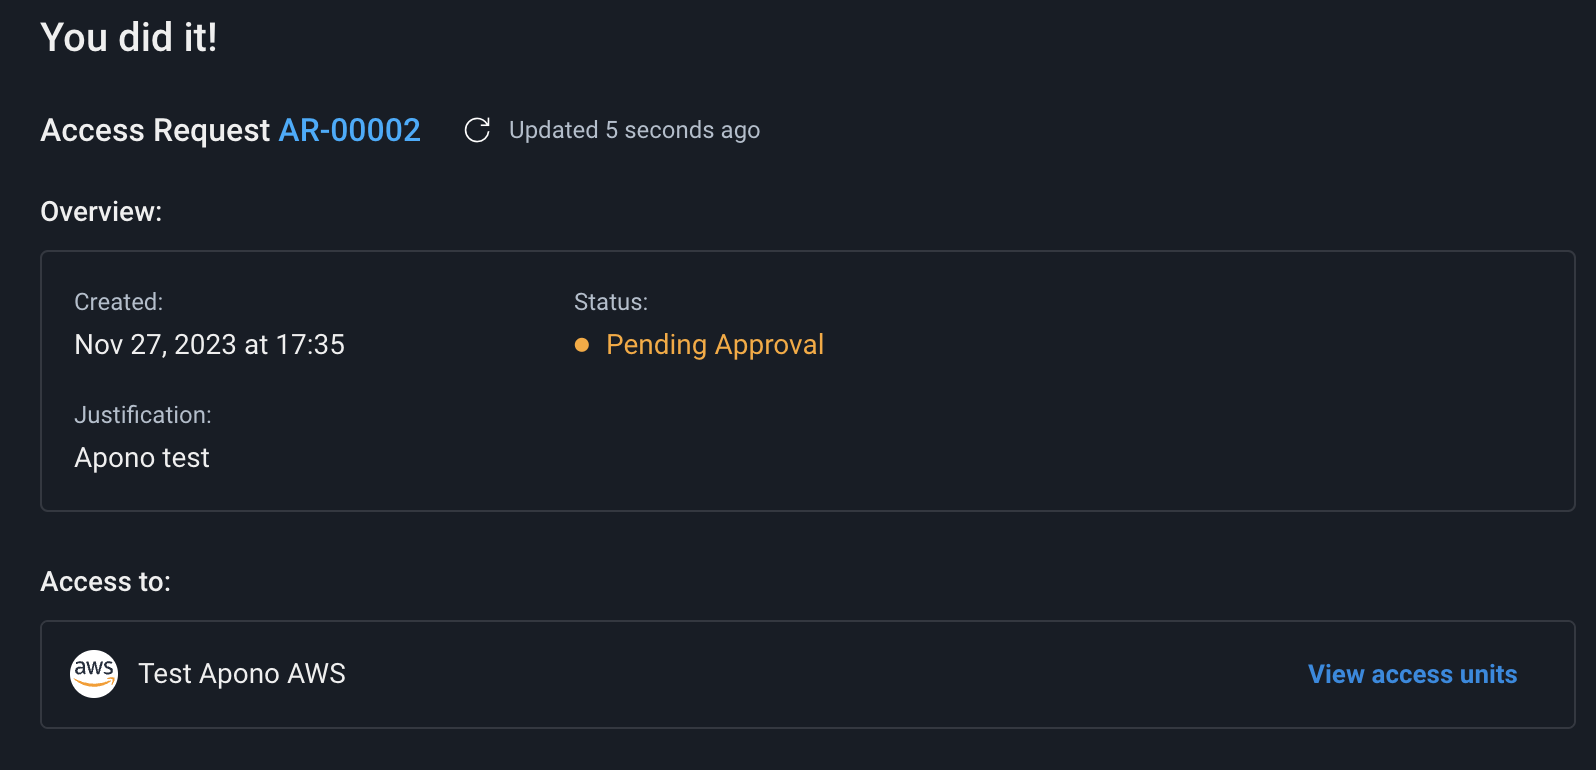
2. Once the connector provisions the access successfully, the status of the request will change to Granted
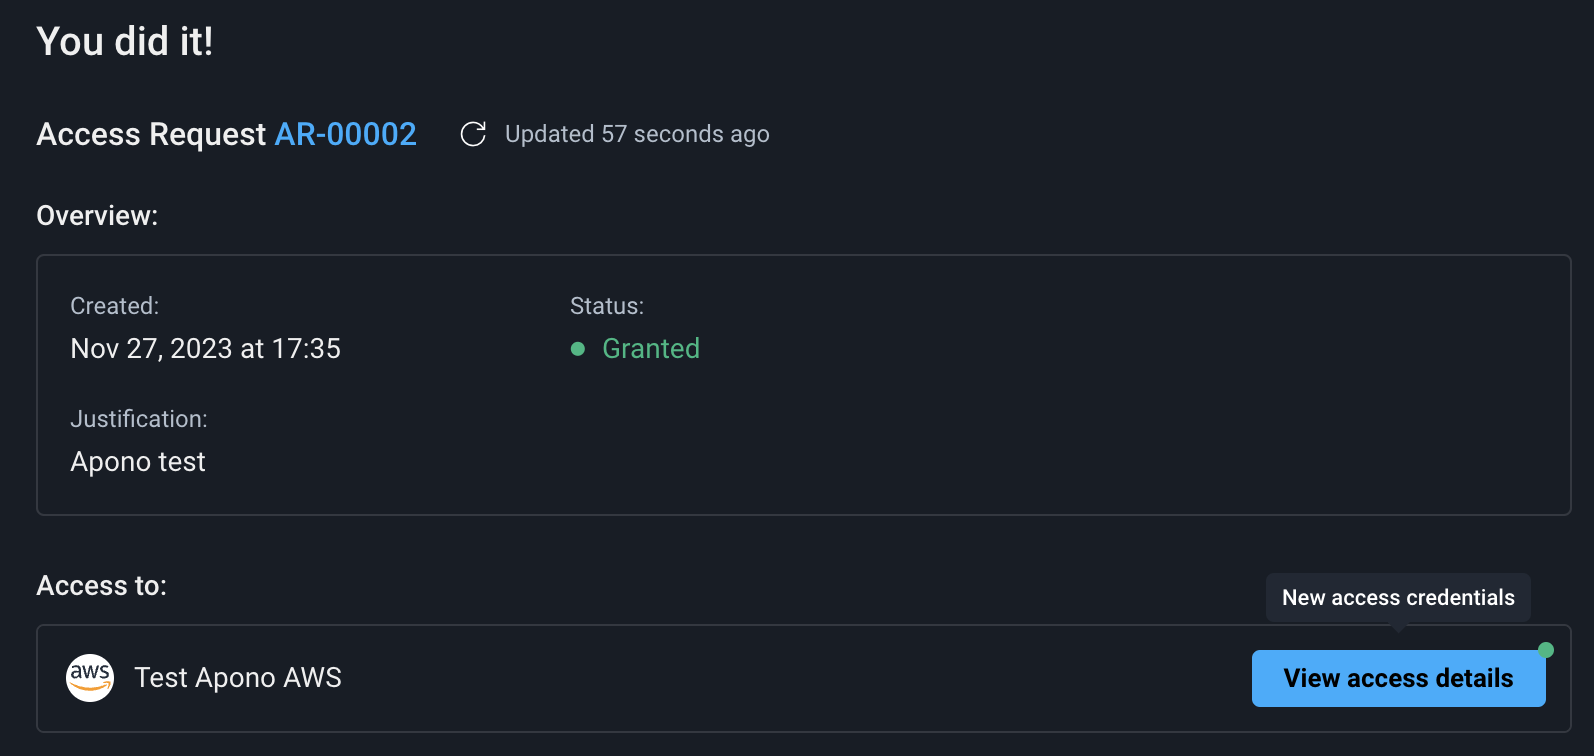
3. Click View access details
4. The access details can be used to gain the access you just requested! Test it in AWS!
5. Click Finish onboarding.
{% hint style="success" %}
All done!
Check out the Apono Activity log to see how Apono reports and audits access requests.
You can also Revoke the access you were just granted to see how Apono deprovisions access when the access time is up.
{% endhint %}
# Access Discovery
Discover unused permissions and enforce least privilege
Imagine an IAM role created for a staging service. Over time, it was granted administrator access to production. The staging service was later deprecated, and the role has gone unused for months. Yet its permissions remain active. Now multiply that scenario across hundreds or thousands of identities in your cloud environment. How do you find and fix this kind of unused, overly permissive access at scale?
**Access Discovery** helps you identify and remediate standing access across cloud environments. It combines access analytics, usage tracking, and policy-based recommendations to support the least privilege for both human and machine identities.
At the core of Access Discovery is the concept of a **principal**, a digital identity with cloud access. This includes IAM users, roles, service accounts, and programmatic credentials. Each principal is assigned one or more policies, which define its permissions, or the specific actions it can perform.
Access Discovery helps you assess and reduce access risk by:
* Categorizing permissions by privilege level, from low-risk LIST/READ to high-risk Admin/IAM controls
* Tracking whether principals are active or dormant
* Scoring each principal based on its permissions, resource sensitivity, and usage
* Flagging overprivileged principals for targeted remediation
With these insights, you can focus on what matters most: removing unused admin access, quarantining inactive accounts, and right-sizing policies without disrupting legitimate workflows.
# Create an assessment
Evaluate access usage across your cloud environments
Before you can begin identifying and remediating overprivileged access, you must first run an Access Discovery assessment.
An assessment scans your cloud environments and analyzes how principals use their permissions. This enables Apono to surface unused, excessive, or high-risk access across your infrastructure.
***
### Prerequisites
{% tabs %}
{% tab title="AWS (Cloudformation on ECS)" %}
Item
Description
CloudTrails
Record of AWS activities that is delivered and stored in an Amazon S3 bucket
Trails enabled for all regions and desired accounts to scan
Full Management events and Data events enabled
NOTE: If the trail bucket is located in a different account from the trail itself, add this tag to the trail so Apono can locate it:
Key: apono-bucket-account-id Value: [ACCOUNTID]
Apono connector & Cloud integration
On-prem connection serving as a bridge between a cloud instance and Apono and at least one cloud integration with Apono
Minimum Required Version: 1.7.3
**Set up the Apono connector and cloud organization integration**
{% hint style="success" %}
If you choose to use an existing connector, be sure to complete the following:
* Set all the parameters in step **9** below.
* [Upgrade your connector](/docs/aws-environment/apono-connector-for-aws/updating-a-connector-in-aws) to **version 1.7.3 or greater**.
* Complete step **12** below to finish the cloud organization integration.
{% endhint %}
Follow these steps to set up an Apono connector:
1. On the [**Catalog**](https://app.apono.io/catalog?search=aws) tab, click **AWS**. The **Connect Integrations Group** page appears.
2. Under **Discovery**, click **Amazon Organization**.
3. Select the **Permission Boundary** resource to allow Apono to temporarily restrict overprivileged access.
4. Click one or more resource additional types to sync with Apono.
{% hint style="info" %}
Apono automatically discovers and syncs all the instances in the environment. After syncing, you can manage access flows to these resources.
{% endhint %}
5. Click **Next**. The **Apono connector** section expands.
6. From the **Select Connector** dropdown menu, click **+ Add new connector**. The **Select connector installation strategy** section appears.
7. Select **Cloud installation > CloudFormation (ECS)**.
8. Under **Follow these steps to install connector**, click **Open Cloud Formation**. AWS CloudFormation opens. The **Create stack** page appears with one of Apono's AWS Account stack templates associated.
{% hint style="info" %}
If you are not already signed in, AWS will prompt you to your AWS user account. Be sure to sign in with your **Root user** account.
{% endhint %}
9. Define the following **Parameters**:
1. (Optional) Update the **AponoConnectorId** with a descriptive name.
2. From the **Permissions** dropdown menu, select **Full Access (Manage IAM)**.
3. From the **S3AWSLogsScanning**, select **Enabled** to allow Apono to read Cloudtrail logs.
4. Select one or several **SubnetIDs**.
5. Select a **VpcId**.
10. Under **Capabilities**, select **I acknowledge that AWS CloudFormation might create IAM resources with custom names**.
11. Click **Create stack**.
12. Complete steps **6-10** of the [AWS organization integration](/docs/aws-environment/aws-integrations/integrate-an-aws-account-or-organization#integrate-an-aws-organization).
You can now [create your first assessment](#create-an-assessment).
{% endtab %}
{% tab title="GCP" %}
Item
Description
Apono connector
On-prem connection serving as a bridge between a Google cloud instance and Apono
IMPORTANT: In the Integration Config settings, enter your Google customer ID in the Customer ID (optional) field.
Your Customer ID is located on the Account settings page in the Profile section.
BigQuery sink filter with audit activity
BigQuerey sink with audit activity with a filter that includes or does not exclude the following query: protoPayload.@type="type.googleapis.com/google.cloud.audit.AuditLog"
This log type enables Apono to generate assessments.
**Configure BigQuery Permissions for Apono**
Tag your BigQuery datasets and assign the required IAM roles to allow Apono to access them for discovery and auditing.
**Tag BigQuery datasets**
Follow these steps to tag your datasets:
1. In your Google Cloud environment, [create a tag](https://cloud.google.com/resource-manager/docs/tags/tags-creating-and-managing#creating_tag) with the following values:
1. Key: *apono\_access\_discovery\_audit\_log\_sink*
2. Value: *true*
2. [Apply the tag](https://cloud.google.com/bigquery/docs/tags#tag_datasets) from the previous step to all BigQuery datasets you want Apono to discover.
**Associate BigQuery dataset permissions**
Follow these steps to associate permissions to the service account:
1. In your shell environment, log in to Google Cloud and enable the API.
```sh
gcloud auth login
gcloud services enable cloudresourcemanager.googleapis.com
gcloud services enable iam.googleapis.com
gcloud services enable cloudidentity.googleapis.com
gcloud services enable admin.googleapis.com
```
2. Set the environment variables.
```sh
export GCP_ORGANIZATION_ID=
export GCP_PROJECT_ID=
export SERVICE_ACCOUNT_NAME=
```
3. Assign predefined roles to the connector service account.
{% code overflow="wrap" %}
```sh
/gcloud organizations add-iam-policy-binding $GCP_ORGANIZATION_ID \
--member="serviceAccount:$SERVICE_ACCOUNT_NAME@$GCP_PROJECT_ID.iam.gserviceaccount.com" \
--role="roles/iam.securityAuditor"
gcloud projects add-iam-policy-binding $GCP_PROJECT_ID \
--member="serviceAccount:$SERVICE_ACCOUNT_NAME@$GCP_PROJECT_ID.iam.gserviceaccount.com" \
--role="roles/bigquery.user"
gcloud projects add-iam-policy-binding $GCP_PROJECT_ID \
--member="serviceAccount:$SERVICE_ACCOUNT_NAME@$GCP_PROJECT_ID.iam.gserviceaccount.com" \
--role="roles/bigquery.dataViewer"
```
{% endcode %}
You can now [create your first assessment](#create-an-assessment).
{% endtab %}
{% endtabs %}
***
### Create an assessment
Follow these steps to assess an integration:
1. On the [**Access Discovery**](https://app.apono.io/access-discovery) page, click **New Assessment**. The **Create Access Discovery Assessment** page appears.
2. Under **Select Cloud Provider**, select an environment.
3. Under **Select Integration**, select one integration from the list.
4. Click **Assess** to evaluate permissions and usage.
Once configured, assessments will run nightly and present data from the last 7 days.
After the assessment is completed, click **Explore** to [analyze the assessment](/docs/getting-started/access-discovery/analyze-an-assessment) and [remediate overprivileged access](/docs/getting-started/access-discovery/investigate-and-resolve-overprivileged-access).
***
### Reassess an assessment
After an assessment has been created, you can always run a new assessment between the nightly runs.
Follow these steps to reassess an assessment:
1. On the [**Access Discovery**](https://app.apono.io/access-discovery) page, in the row of an assessment, click **Explore**. The **View Assessment** page opens.
2. Click **Reassess**.
After the assessment is completed, click **Explore** to [analyze the assessment](/docs/getting-started/access-discovery/analyze-an-assessment) and [remediate overprivileged access](/docs/getting-started/access-discovery/investigate-and-resolve-overprivileged-access).
# Analyze an assessment
Review access risk across principals using filters and tiered insights
After an assessment is completed, you can assess your security posture on the **View Assessment** page in both visual and tabular formats:
* Visual widgets highlight key insights from the assessment and also act as interactive filters.
* The table below displays detailed data for each principal and can be filtered using the widgets or additional filter controls.
View Assessment page
***
### Analyze assessment details
Follow these steps to analyze the assessment:
1. On the [**Access Discovery**](https://app.apono.io/access-discovery) page, in the row of an assessment, click **Explore**. The **View Assessment** page opens.
{% hint style="info" %}
The top section of the assessment displays the last assessment date, selected integration, number of accounts, number of identities, number of principals, and the status of the assessment.
{% endhint %}
2. Filter the assessment by clicking a [widget](#widgets) and viewing the details in the [table](#table-principals).
{% hint style="success" %}
Clicking a widget to filter the assessment also selects the corresponding criteria in the dropdown filter menus. You can also apply filters directly through the dropdown filter menus.
{% endhint %}
Each widget and table column is explained in the following sections. After exploring the assessment, you can [investigate and resolve overprivileged access](/docs/getting-started/access-discovery/investigate-and-resolve-overprivileged-access).
#### Widgets
Widget
Description
Overprivilege
Represents the percentage of permissions not used by a principal within the selected integration
Overprivilege over time
Displays the trend of overprivileged permission over the last seven days split between all permissions and privileged permissions (Admin, IAM)
Dormant (Unused) Principals
Number of principals who have been inactive within the last 90 days
High risk Overprivileged
Number of principals in the highest tier
Principals by Resource Type
Number of principals grouped by the following categories:
IAM Role
IAM User
IAM User Access Key
Secret
Principals by Tier
Number of principals grouped by the following tiers:
Critical
High
Medium
Low
Each tier is calculated based on the Over Privilege percent, Risk Score, and Privilege Permissions percentage.
#### Table (Principals)
{% hint style="success" %}
You can hover over a row and click **Ignore** to hide principal that you do not consider a threat.
{% endhint %}
Column
Description
Principal
Name of the principal
Account
Account associated with the resource
Risk Score
Calculation based on the Principal Risk Level (maximum score of policy actions sensitivity) and the account risk level
Identities
Number of human and machine identities assigned to the resource
Last used
Number of days since an identity assigned to the resource used the permissions
Over privilege
Percentage of unused permissions for the principal
Tiers
Calculation based on the Over Privilege percent, Risk Score, and Privilege Permissions percentage.
Examples:
If the Privileged Permissions percentage is over 60% and the Risk Score is greater than 4, the Tier will be Critical.
If the Privileged Permissions percentage is over 30%, the Over Privilege percentage is over 80%, and the Risk Score is greater than 4, the Tier will also be Critical.
# Investigate and resolve overprivileged access
Use insights to quarantine, delete, or right-size permissions
After [running an Access Discovery assessment](/docs/getting-started/access-discovery/create-an-assessment) and reviewing the results, you can investigate and remediate unused or excessive permissions identified across your environment.
Principal details panel
Using the **Recommendations** tab, you can review the top overprivileged issues for each principal. Access Discovery provides guided remediation options such as quarantine, deletion, or right-sizing to help reduce unnecessary access.
***
### Remediate overprivileged access
Follow these steps to remediate overprivileged access:
1. On the [**Access Discovery**](https://app.apono.io/access-discovery) page, in the row of an assessment, click **Explore**. The **View Assessment** page opens.
2. Filter the assessment by defining the filters or clicking a [widget](/docs/getting-started/access-discovery/analyze-an-assessment#widgets) and viewing details in the [table](/docs/getting-started/access-discovery/analyze-an-assessment#table-principals).
3. In the table, click the row of a principal. The **Principal Details** panel opens and displays information about the principal.
Field
Description
Account
Account where the principal is stored
Risk Score
Calculation based on the Principal Risk Level (maximum score of policy actions sensitivity) and the account risk level
ARN
Amazon resource name of the principal
Identities
Number of human and machine identities
Last Used
Last use date of the principal
Over Privilege
Overall percentage of overprivileged permissions
Beside this value in parentheses is the overprivilege percentage for high-risk permissions (Admin, AIM).
Tiers
Calculation based on the Over Privilege percent, Risk Score, and Privilege Permissions percentage.
4. On the **Recommendations** tab, expand a recommendation category to view the suggested summary:
* **Dormant Principal Detected**: Principals that have not been used within the past 90 days
* **Unused Privileged Permissions Detected**: High-risk actions assigned to but not used by a principal
* **Overprivileged Policy Detected**: Policy assigned to a principal that includes unused actions
{% hint style="info" %}
The **Recommendations** tab displays the top **three** overprivileged issues.
To support further investigation, you can explore the additional tabs:
* [Used By](#used-by) shows the identities that have used the principal.
* [Used For](#used-for) shows the permissions associated with each policy, including used and unused actions by privilege level.
As you resolve the initial recommendations, additional issues will appear in the **Recommendations** tab until all are addressed.
{% endhint %}
5. Click **How to Fix**. A pop-up window appears.
6. Complete the fix based on the type of recommendation.
Dormant Principal Detected
**Quarantine Principal**
This approach uses an Automatic Access Flow to restrict a principal's access using an AWS Permission Boundary until it can be reviewed or safely deleted.
Follow this step to block unused permissions:
1. On the **Quarantine Principal** tab, click **Remediate** to limit access within the dedicated access flow.
Apono will add the principle to a Permission Boundary that is always active, until the admin disables the Access Flow or deletes the principle.
***
**Delete Principal**
This approach removes the principal from your AWS environment.
Follow these steps to delete the principal:
1. On the **Delete Principal** tab, copy the code.
2. Run the code in your AWS CLI to remove the principal from your AWS account.
Unused Privileged Permissions Detected
This approach uses an Automatic Access Flow to restrict a principal's access using an AWS Permission Boundary until it can be reviewed or safely deleted.
Follow this step to block unused permissions:
1. On the **Custom Quarantine** tab, click **Remediate** to limit access within the dedicated access flow.
Apono will add the principle to a Permission Boundary that is always active, until the admin disables the Access Flow or deletes the principle.
Overprivileged Policy Detected
**Custom Quarantine**
This approach temporarily restricts sensitive actions until the policy is reviewed or replaced.
Follow these steps to block unused actions:
1. On the **Custom Quarantine** tab, click **Remediate** to deny actions within the dedicated access flow.
2. Copy the deny rule JSON provided by Apono.
3. In your AWS environment, create a deny rule using the Apono-provided JSON. This rule will prevent the principal from using the unused actions detected in its policy.
***
**Right-size**
This approach updates the policy.
Follow these steps to update the policy:
1. On the **Right Size Policy** tab, copy the code.
2. In AWS, replace the existing policy definition with the new, least-privilege policy definition that contains only used permissions.
#### Used By
The **Used By** tab displays the human and machine identities that have used the principal.
Machine Identities and Human Identities sections of the Used By tab
This view helps you trace usage and validate whether access is still needed. You can expand the row of an identity to view the details of the **Last 5 logins**:
* User Agent
* Source IP
* Date
#### Used For
The **Used For** tab displays the policies associated with the selected principal. Each policy summarizes the number of used and unused permissions, organized by privilege level.
Analysis tab
Unused access at higher privilege levels (such as Admin or IAM) represents increased risk and should be prioritized for review to reduce risk.
Follow these steps to remediate a policy:
1. On the **Used For** tab, expand a policy.
{% hint style="info" %}
The **Analysis** tab shows all privilege levels and shows the number of used and unused permissions based on observed activity within the last 90 days.
The **Current policy** tab shows the policy JSON.
{% endhint %}
2. Click **Right-size**. A pop-up window appears.
3. Quarantine or right-size the policy to reduce unnecessary access.
Custom Quarantine
This approach temporarily restricts sensitive actions until the policy is reviewed or replaced.
Follow this step to block unused actions:
1. On the **Custom Quarantine** tab, click **Remediate** to deny actions within the dedicated access flow.
Right-size
This approach updates the policy.
Follow these steps to update the policy:
1. On the **Right Size Policy** tab, copy the code.
2. In AWS, replace the existing policy definition with the new, least-privilege policy definition.
# Integrating with Apono
How Apono integrations work and what to expect
## Integrating with Apono
## Intro
In order to manage just-in-time access, Apono needs to integrate with your cloud applications. Our integration:
1. Syncs data on users, resources and permissions
2. Automates granting and revoking of users' access to cloud resources
Each integration requires:
1. An installed connector in your cloud environment
2. A specific configuration, which may include:
1. A role created for Apono
2. Metadata like proxy address, hostname, port, region, clusters, secret store, etc.\
To learn more about each integration's required config, visit the integration guide or our [Metadata for Integration Config](https://docs.apono.io/metadata-for-integration-config) guides.
{% hint style="info" %}
Apono's unique architecture makes the integration extra secure. Learn more [here](/docs/about-apono/security-and-architecture).
{% endhint %}
## How it works
1. Install a connector
1. A connector can be installed on AWS *(using Cloudformation \[ECS], Terraform \[EKS], CLI \[EKS])* , GCP *(using CLI \[GKE])*, Azure *(using Terraform or CLI)* or Kubernetes *(using Terraform or Helm)*.
2. Follow [this guide](/docs/connectors-and-secrets/high-availability-for-connectors/connector-management)\
\
**NOTE**: If you have installed a connector in the past, you may use it for more than 1 integration
2. Follow the integration guide\
Per each integration's requirements, supply Apono with:
1. The role or permission needed to manage access
2. The metadata to complete the integration\
\
**NOTE**: During this process, you may be required to leave Apono and complete some steps in the source application portal
3. Give the integration a name
1. The integration name is used when creating Access Flows
2. This name will be displayed to end-users when creating access requests
4. Wait for the first sync to complete
1. Follow the status in the Integrations page Connected tab. A healthy integration looks like this:\

2. In case of an error, follow our [troubleshoot guide](/docs/help-and-debugging/troubleshooting-errors)
5. All set! [Create Access Flows](/docs/access-flows/access-flows) with your new integration
This is what a healthy AWS Account integration process looks like when using an existing connector:
### Integration types
Apono currently supports 3 types of integrations:
1. Resources - these integrations sync data on resources and permissions. Apono then manages JIT access to these resources by granting and revoking users' access based on the Access Flows.
1. Cloud infrastructure
2. Databases
3. CI/CD and development tools
4. Network and VPN
5. IdP groups
2. User information - these integrations sync data on your users and their attributes, like manager, shift, groups, etc.
1. Identity providers (IdP)
2. Incident response/on-call tools
3. IT service management (ITSM) tools
3. Communications (chat-ops)
Browse our [integrations catalog](https://app.apono.io/catalog) in the Apono app.
### Integrating cloud environments
#### Overview
Whether you manage your cloud environment in AWS, GCP or Azure, Apono lets you integrate all your cloud services at once!
This means you can manage your entire environment with Apono in a single integration: Apono integrates multiple cloud services from the same AWS Account, GCP Project or Azure Subscription.
**In AWS**, simply install the connector and secret on any Account you'd like to manage, provide the region and we will do the rest: we'll sync all your resource types, like EC2, RDS, S3 buckets, IAM roles\&policies, ECR, EKS, and more all at once.
**In GCP**, simply install the connector and secret on any Project you'd like to manage and we will do the rest: we'll sync all your resource types, like BigQuery tables, Spanner, Storage, and more all at once.
**In Azure**, simply install the connector and secret on any Subscription you'd like to manage, and we will do the rest: we'll sync all your resource types, like Storage, MySQL, PostgreSQL, and more all at once.
#### How it works
1. Go to the Apono **Integrations page** and click the **Catalog tab**.
2. **Pick your cloud provider**: AWS, GCP or Azure
3. Pick the level you'd like to integrate on:
1. AWS:
1. Pick Organization to manage access to the SSO Identity Center
2. Pick Account to sync and manage access to a specific Account and multiple services it contains
2. GCP
1. Pick Organization to manage access to the Organization or Folder roles.
2. Pick Project to sync and manage access to a specific Project and multiple services it contains
3. Azure
1. Pick Subscription to sync and manage access to a specific Resource Group and multiple services it contains
4. Provide Apono with the **required configuration**, and you're done! We'll sync all the services for you.
5. You'll be redirected to the **Connected tab**, where you can see your integrations and all the services or resource types that were synced for it.\
This is also the place to see and troubleshoot integration errors and create new Access Flows.
# Apono Integration Secret
Many integrations require granting Apono connector credentials to allow it to authenticate and connect. You can create secrets in different secrets managers (e.g. AWS, GCP, Azure) and specify them in the integration secret store. This allows the connector to safely and securely retrieve its credentials in order to connect to the desired integration resources.
Apono supports the following secret managers:
{% tabs %}
{% tab title="Apono" %}
### Apono Secret
Use Apono to store your connector credentials for the desired integration resources.
{% hint style="danger" %}
**Using the Apono secret store option is not recommended for production environments.**
We suggest creating a secret in one of the supported cloud providers secret manager or in a Kubernetes secret. Storing secrets in a secret manager enables Apono to sync and provision cloud resources without the need to store credentials for a specific environment in Apono.
{% endhint %}
***
#### Set Credentials in Apono Secret
From your **Integration** configuration page expand **Secret Store**, click on the **APONO** tab and enter the required credentials information for the integration.
{% endtab %}
{% tab title="Kubernetes" %}
### Kubernetes Secret
Use Kubernetes secret to store your connector credentials for the desired integration resources.
{% tabs %}
{% tab title="cli" %}
#### Prerequisites
* [Apono connector](/docs/kubernetes-environment/apono-connector-for-kubernetes) installed in your Kubernetes cluster
* [Kubectl](https://kubernetes.io/docs/tasks/tools/) command-line interface
***
#### Create a secret
Run the following commands to create a secret from the Kubectl CLI.
1. Create the secret.
{% code overflow="wrap" %}
```bash
kubectl create secret generic --from-literal== --from-literal==
```
{% endcode %}
2. Label the secret with `apono-connector-read:true`
{% code overflow="wrap" %}
```bash
kubectl label secret "apono-connector-read=true"
```
{% endcode %}
3. Give the Apono connector permissions to the secret:
{% code overflow="wrap" %}
```sh
helm upgrade apono-connector apono-connector --repo https://apono-io.github.io/apono-helm-charts \
--set-string apono.token= \
--set-string apono.connectorId= \
--set serviceAccount.manageClusterRoles=true \
--set allowedSecretsToRead={secret1\,secret2\,secret3} \
--namespace apono-connector
```
{% endcode %}
{% endtab %}
{% tab title="terraform" %}
#### Prerequisites
* [Apono connector](/docs/kubernetes-environment/apono-connector-for-kubernetes) installed in your Kubernetes cluster
* [Terraform](https://developer.hashicorp.com/terraform/tutorials/aws-get-started/install-cli) command-line interface
***
#### Create a secret
Use the following configuration to create a secret from the Terraform CLI.
```hcl
terraform {
required_providers {
kubernetes = {
source = "hashicorp/kubernetes"
version = "2.32.0"
}
helm = {
source = "hashicorp/helm"
version = "2.15.0"
}
}
}
provider "helm" {
kubernetes {
config_path = "~/.kube/config"
}
}
resource "kubernetes_secret" "apono-k8s-secret" {
metadata {
name = ""
namespace = ""
labels = {
"apono-connector-read" = "true"
}
}
data = {
= ""
= ""
}
type = "Opaque"
}
resource "helm_release" "apono-helm" {
name = "apono-connector"
repository = "https://apono-io.github.io/apono-helm-charts"
chart = "apono-connector"
namespace = ""
set {
name = "apono.token"
value = ""
type = "string"
}
set {
name = "apono.connectorId"
value = ""
type = "string"
}
set {
name = "serviceAccount.manageClusterRoles"
value = "true"
}
set {
name = "allowedSecretsToRead"
value = "{secret1\,secret2\,secret3}"
}
}
```
{% endtab %}
{% endtabs %}
***
#### Configure Integration to Use Kubernetes Secret
From your **Integration** configuration page expand **Secret Store**, click on the **Kubernetes** tab and enter the required secret **namespace** and **name**.
{% endtab %}
{% tab title="AWS" %}
### AWS Secret
Use AWS Secret Manager to store your connector credentials for the desired integration resources.
{% tabs %}
{% tab title="cli" %}
#### Prerequisites
* AWS role or user with `SecretsManagerReadWrite` attached policy
* [AWS](https://docs.aws.amazon.com/cli/latest/userguide/getting-started-install.html) command-line interface
***
#### Create a secret
Run the following commands to create a secret from the AWS CLI.
```sh
aws secretsmanager create-secret \
--name "" \
--tags '[{"Key":"apono-connector-read","Value":"true"}]' \
--region \
--secret-string '{"KEY1":"VALUE1","KEY2":"VALUE2"}'
```
{% endtab %}
{% tab title="console" %}
#### Prerequisite
* AWS role or user with `SecretsManagerReadWrite` attached policy.
***
#### Create a secret
Follow these steps to create a secret:
1. From the [Secret Manager](https://console.aws.amazon.com/secretsmanager/), click **Store a new secret**. The **Choose secret type** page appears.
2. Select **Other type of secret**.
3. Under **Key/value** pairs, enter your secret through one of the following approaches:
* On the **Key/value** tab, enter your information in the two fields: key in the first field, value in the second field.
* On the **Plaintext** tab, enter your secret in JSON key/value pairs.
4. Click **Next**. The **Configure secret** page appears.
5. Under **Tags**, click **Add**.
6. In the **Key** field, enter *apono-connector-read*.
7. In the **Value** field, enter *true*.
{% endtab %}
{% tab title="terraform" %}
#### Prerequisites
* AWS role or user with `SecretsManagerReadWrite` attached policy
* [Terraform](https://developer.hashicorp.com/terraform/tutorials/aws-get-started/install-cli) command-line interface
***
#### Create a secret
Use the following configuration to create a secret from the Terraform CLI.
```hcl
resource "aws_secretsmanager_secret" "" {
name = ""
// This tag allows the Apono connector role to read the secret with predefined policy
tags = {
"apono-connector-read" = "true"
}
}
resource "aws_secretsmanager_secret_version" "" {
secret_id = aws_secretsmanager_secret..id
secret_string = jsonencode({
KEY1 = "VALUE1",
KEY2 = "VALUE2"
})
}
```
{% endtab %}
{% endtabs %}
***
#### Configure Integration to Use The AWS Secret
From your **Integration** configuration page expand **Secret Store**, click on the **AWS** tab and enter the required secret **region** and **secret name**.
{% endtab %}
{% tab title="Azure" %}
### Azure Secret
Use Azure Key Vault to store your connector credentials for the desired integration resources.
{% tabs %}
{% tab title="cli" %}
#### Prerequisites
Azure user with the following permission on the Key Vault:
* For Azure Key Vault that configured with '**Azure role-based access control**' permission model grant the user the `Key Vault Secrets Officer` role.
* For Azure Key Vault that configured with '**access policy**' permission model create and grant the user an access policy with the following secret permissions (Secret Management Operations):
* Get
* Set
* [Azure](https://learn.microsoft.com/en-us/cli/azure/install-azure-cli) command-line interface
***
#### Create a secret
Run the following commands to create a secret from the Azure CLI.
```sh
az keyvault secret set \
--vault-name "" \
--name "" \
--value '{"": "", "": ""}'
```
{% endtab %}
{% tab title="console" %}
#### Prerequisites
Azure user with the following permission on the Key Vault:
* For Azure Key Vault that configured with '**Azure role-based access control**' permission model grant the user the `Key Vault Secrets Officer` role.
* For Azure Key Vault that configured with '**access policy**' permission model create and grant the user an access policy with the following secret permissions (Secret Management Operations):
* Get
* Set
***
#### Create a secret
Follow these steps to create a secret:
1. Navigate to your key vault in the Azure portal.
2. On the Key Vault left-hand sidebar, select **Objects** then select **Secrets**.
3. Select **+ Generate/Import**.
4. On the **Create a secret** screen choose the following values:
* **Upload options**: Manual.
* **Name**: Type a name for the secret. The secret name must be unique within a Key Vault. The name must be a 1-127 character string, starting with a letter and containing only 0-9, a-z, A-Z, and -. For more information on naming, see [Key Vault objects, identifiers, and versioning](https://learn.microsoft.com/en-us/azure/key-vault/general/about-keys-secrets-certificates#objects-identifiers-and-versioning)
* **Value**: Type a value for the secret. Key Vault APIs accept and return secret values as strings.
* Leave the other values to their defaults. Select **Create**.
{% endtab %}
{% tab title="terraform" %}
#### Prerequisites
Azure user with the following permission on the Key Vault:
* For Azure Key Vault that configured with '**Azure role-based access control**' permission model grant the user the `Key Vault Secrets Officer` role.
* For Azure Key Vault that configured with '**access policy**' permission model create and grant the user an access policy with the following secret permissions (Secret Management Operations):
* Get
* Set
* [Terraform](https://developer.hashicorp.com/terraform/tutorials/aws-get-started/install-cli) command-line interface
***
#### Create a secret
Use the following configuration to create a secret from the Terraform CLI.
```hcl
data "azurerm_key_vault" "" {
name = ""
resource_group_name = ""
}
resource "azurerm_key_vault_secret" "" {
name = ""
value = '{"": "", "": ""}'
key_vault_id = azurerm_key_vault..id
}
```
{% endtab %}
{% endtabs %}
***
#### Configure Integration to Use The Azure Secret
From your **Integration** configuration page expand **Secret Store**, click on the **Azure** tab and enter the required secret **key vault URL** and **secret nam**
{% endtab %}
{% tab title="GCP" %}
### GCP Secret
Use GCP Secret Manager to store your connector credentials for the desired integration resources.
{% tabs %}
{% tab title="cli" %}
#### Prerequisites
* GCP user with **`Secret Manager Admin`**`(roles/secretmanager.admin)` role.
* [Secret Manager API](https://cloud.google.com/secret-manager/docs/configuring-secret-manager) (enabled once per project)
* [gcloud](https://cloud.google.com/sdk/docs/install) command-line interface
***
#### Create a secret
Run the following commands to create a secret from the gcloud CLI.
{% code overflow="wrap" %}
```sh
gcloud secrets create \
--replication-policy="" \
--data-file=-
gcloud secrets versions access 1 --secret='{"KEY1":"VALUE1","KEY2":"VALUE2"}'
```
{% endcode %}
{% endtab %}
{% tab title="console" %}
#### Prerequisites
* GCP user with **`Secret Manager Admin`**`(roles/secretmanager.admin)` role.
* [Secret Manager API](https://cloud.google.com/secret-manager/docs/configuring-secret-manager) (enabled once per project)
***
#### Create a secret
Follow these steps to create a secret:
1. [Go to the Secret Manager page](https://console.cloud.google.com/security/secret-manager) in the Google Cloud console.
2. On the **Secret Manager** page, click **Create Secret**.
3. On the **Create secret** page, under **Name**, enter `my-secret`.
4. In the **Secret value** field, enter `my super secret data`.
5. Click the **Create secret** button.
{% endtab %}
{% tab title="terraform" %}
#### Prerequisites
* GCP user with **`Secret Manager Admin`**`(roles/secretmanager.admin)` role.
* [Secret Manager API](https://cloud.google.com/secret-manager/docs/configuring-secret-manager) (enabled once per project)
* [Terraform](https://developer.hashicorp.com/terraform/tutorials/aws-get-started/install-cli) command-line interface
***
#### Create a secret
Use the following configuration to create a secret from the Terraform CLI.
```hcl
resource "google_secret_manager_secret" "" {
secret_id = ""
replication {
}
}
resource "google_secret_manager_secret_version" "-version" {
secret = google_secret_manager_secret..id
secret_data = '{"KEY1":"VALUE1","KEY2":"VALUE2"}'
}
```
{% endtab %}
{% endtabs %}
***
#### Configure Integration to Use The GCP Secret
From your **Integration** configuration page expand **Secret Store**, click on the **GCP** tab and enter the required secret **Project** and **secret ID**.
{% endtab %}
{% tab title="HashiCorp" %}
### HashiCorp Secret
Use HashiCorp Vault to store your connector credentials for the desired integration resources.
#### Prerequisites
* Required Apono connector version: 1.6.6
* [Vault command-line](https://developer.hashicorp.com/vault/docs/install)
* HashiCorp Vault token
* Create token using:
* [`token create` command](https://developer.hashicorp.com/vault/docs/commands/token/create)
* [HCP portal](https://developer.hashicorp.com/vault/tutorials/tokens/tokens)
***
#### Create Secret in HashiCorp Vault
You can use one of the following methods to create a secret in HashiCorp Vault to use in your integration.
{% tabs %}
{% tab title="cli" %}
**Enable Secret Engine**
If you did not set the `VAULT_ADDR`, `VAULT_NAMESPACE`, and `VAULT_TOKEN` environment variables, refer to the steps in the [Create a Vault Cluster on HCP](https://developer.hashicorp.com/vault/tutorials/cloud/get-started-vault#access-the-vault-cluster) tutorial.
1. Verify that the `VAULT_NAMESPACE` environment variable is set to `admin`.
```
$ echo $VAULT_NAMESPACE
admin
```
If not, be sure to set it before you continue.
```
$ export VAULT_NAMESPACE=admin
```
2. Enable key/value v2 secrets engine (`kv-v2`) at `secret/`.
```
$ vault secrets enable -path=secret kv-v2
Success! Enabled the kv-v2 secrets engine at: secret/
```
**Create New Secret**
1. Store `api-key` with value `ABC0DEFG9876` at the path `secret/test/webapp`.
```
$ vault kv put secret/test/webapp api-key="ABC0DEFG9876"
```
**Example output:**
```
Key Value
--- -----
created_time 2021-06-17T02:48:51.643350733Z
deletion_time n/a
destroyed false
version 1
```
2. To verify, read back the secret at `secret/test/webapp`.
```
$ vault kv get secret/test/webapp
```
**Example output:**
```
====== Metadata ======
Key Value
--- -----
created_time 2021-06-17T02:48:51.643350733Z
deletion_time n/a
destroyed false
version 1
===== Data =====
Key Value
--- -----
api-key ABC0DEFG9876
```
{% endtab %}
{% tab title="console" %}
**Enable Secret Engine**
1. In the Vault UI, set the current namespace to `admin/`.
2. Select **Secrets engines**.
3. Click **Enable new engine**.
4. Select **KV** from the list, and then click **Next**.
5. Enter `secret` in the **Path** field.
6. Click **Enable Engine** to complete.
Now that you have a secret engine enabled, you will create a new secret.
**Create New Secret**
1. Click **Create secret**. Enter `test/webapp` in the **Path for this secret** field.
2. Under the **Secret data** section, enter `api-key` in the **key** field, and `ABC0DEFG9876` in the **value** field. You can click on the sensitive information toggle to show or hide the entered secret values.
Create secret page
{% endtab %}
{% endtabs %}
**Update Apono Connector Configuration to Integrate with HashiCorp Vault**
Define vault in your connector using:
* environment variable: `export HASHICORP_VAULT_CONFIG='[{"address":"http://HASHICORP_VAULT_URL","token":"HASHICORP_VAULT_TOKEN"}]'`
* Read from file (docker secrets/secret file mount into the container): `export HASHICORP_VAULT_CONFIG_FILE_PATH="/path/to/vault/config.json"`
{% hint style="info" %}
To authenticate HashiCorp Vault with SSL/TLS client certificate you can use the following environment variable:
`[{"address":"http://HASHICORP_VAULT_URL","token":"HASHICORP_VAULT_TOKEN", "ca_cert_base64": "BASE64_HASHICORP_VAULT"}]`
To skip certificate verification use the following environment variable:
`[{"address":"http://HASHICORP_VAULT_URL","token":"HASHICORP_VAULT_TOKEN", "skip_verify": "true"}]`
{% endhint %}
**Define HashiCorp Vault Fetch Secret Definition from Secret Manager**
You can define HashiCorp vault to fetch secret definition from [AWS](#aws), [GCP](#gcp), [Azure](#azure) or [Kubernetes](#kubernetes) secret managers using the following environment variable:
{% code overflow="wrap" %}
```bash
HASHICORP_VAULT_CONFIG='[{"address":"http://HASHICORP_VAULT_URL","token":"HASHICORP_VAULT_TOKEN"},
{"from_secret_store": "AWS", "region": "AWS_REGION", "secret_id": "AWS_SECRET_ID",},
{"from_secret_store": "GCP", "project": "GCP_PROJECT_ID", "secret_id": "GCP_SECRET_ID"},
{"from_secret_store": "AZURE", "AZURE_KEY_VAULT_URL": "vault_url", "name": "SECRET_NAME"},
{"from_secret_store": "KUBERNETES", "NAMESPACE": "namespace", "name": "SECRET_NAME"}
]'
```
{% endcode %}
***
#### Configure Integration to Use The HashiCorp Vault Secret
From your **Integration** configuration page expand **Secret Store**, click on the **HashiCorp** tab and enter the required secret **Secret engine** and S**ecret path**.
{% endtab %}
{% endtabs %}
# High Availability for Connectors
Deploy active-active HA instances of the same connector
**Active-active availability** refers to a high availability (HA) architecture, where two or more systems are actively handling requests simultaneously.
HA can provide the following benefits:
* Provide redundancy by maintaining operations during downtime
* Distribute requests across multiple active systems to improve load balancing
* Maximize resource use by employing standby systems
* Reroute traffic through automatic failover to the remaining active system
Apono leverages HA to guarantee uptime to customers. Our on-premise connector can be deployed with several instances. If one instance is down, HA ensures that others are available to continue provisioning.
***
## Prerequisite
| Item | Description |
| ----------------------- | --------------------------------------------------------------------------------------------------------------------------------------------------------------------------------------------------------------------------------------------------------------------------------------------------------------------------------------------------------------------------------------------------------------------------------------------------- |
| **Installed connector** |
Active Apono connector
The connector can be installed in any of the following environments:
|
***
## Deploy HA connector instances
For HA, you can add instances to an existing connector using the same connector ID.
{% hint style="warning" %}
All connector instances must be the **same version**. Update any older versions to maintain functionality ([AWS](https://docs.apono.io/docs/updating-a-connector-in-aws) | [Azure](https://docs.apono.io/docs/updating-a-connector-in-azure) | [GCP](https://docs.apono.io/docs/updating-a-connector-in-google-cloud) | [Kubernetes](https://docs.apono.io/docs/updating-a-kubernetes-connector)).
{% endhint %}
Follow these steps to add a connector instance for high availability:
1. From the [**Connectors**](https://app.apono.io/connectors) page, click **Install Connector**. The **Install Connector** page appears.
2. Select **Cloud Installation**.
3. Select a platform for the connector. The permission options appear.
4. Select a permissions option.
5. Select an installation method.
{% hint style="info" %}
The Apono UI auto-populates the token for the new connector instance.
{% endhint %}
6. In the connector installation module, configure the connector ID parameter to share the **same value** as an existing connector ID in the environment.\
\
You can find the connector ID of an existing instance on the [**Connectors**](https://app.apono.io/connectors) page.
{% hint style="info" %}
Depending on the environment, the connector ID parameter may appear as any of the following properties:
* `APONO_CONNECTOR_ID`
* `apono.connectorId`
* `connectorId`
{% endhint %}
{% code overflow="wrap" lineNumbers="true" fullWidth="false" %}
```json
module "connector" {
source = "github.com/apono-io/terraform-modules/azure/connector-with-permissions/stacks/apono-connector"
aponoToken = $APONO_TOKEN
connectorId = $EXISTING_CONNECTOR_ID
resourceGroup = $AZURE_RESOURCE_GROUP
ipAddressType = // "Private" or "None"
subnetIds = [$SUBNET_ID]
}
```
{% endcode %}
7. Complete the installation of the connector in your environment ([AWS](https://docs.apono.io/docs/apono-connector-for-aws) | [Azure](https://docs.apono.io/docs/apono-azure-connector) | [GCP](https://docs.apono.io/docs/apono-connector-for-gcp) | [Kubernetes](https://docs.apono.io/docs/apono-connector-for-kubernetes)).
Upon completion, you can integrate your HA connectors with your environment.
# Installing a connector with Docker
To manage access to on-prem resources with Apono, install a connector as a Docker Container
## Intro
If you want the flexibility of installing the Apono connector on any machine, a docker container is a great alternative.
## Step-by-step guide
### Prerequisites
1. A docker installed on any machine
2. An Apono token
* Find Your Integration Token:
1. Select any integration in the [Catalog](https://app.apono.io/catalog).
2. Under the Connector section, select **Add a New Connector** from the drop-down list
3. Copy the token displayed toward the bottom of the section. This token is unique per account.
### Guide
1. In the following command, replace the variables:
1. Replace `APONO-TOKEN` with the token you copied in the Prerequisites
2. For `CONNECTOR_ID`, insert any name of your choosing
2. Run the command in the terminal:
{% code overflow="wrap" lineNumbers="true" %}
```sh
export APONO_TOKEN=[the token you copied from Apono Add Connector flow]
export CONNECTOR_ID=apono-connector
docker login registry.apono.io -u apono -p $APONO_TOKEN
docker run -e APONO_CONNECTOR_ID=$CONNECTOR_ID -e APONO_TOKEN=$APONO_TOKEN -e APONO_URL=api.apono.io registry.apono.io/apono-connector:v1.8.4
```
{% endcode %}
3. That's it!
## Results
1. If done correctly, you should see your docker Connector in the new integration dropdown list, or in the [Connectors page](https://app.apono.io/connectors).
# Manage integrations
Find, edit, delete and more for an integration
After creating an integration, you can use the Apono UI to find, edit, delete, and perform additional actions on that integration.
***
### Find an integration
You can search for an integration to view its related information.
Integrations page
Follow these steps to locate an integration in the Apono UI:
1. On the [**Connected**](https://app.apono.io/catalog/connected) tab, in the search bar, enter the name of the integration. All matching integrations appear.
2. (Optional) Apply one or more [filters](#apply-filters).
After searching and applying filters, only integrations matching criteria appear on the **Connected** tab.
{% hint style="info" %}
The **Connected** tab displays context information related to each integration:
* Name
* Connector
* Resource Types
* Sync Summary
* Status
This information is intended to help you quickly identify specific integrations.
{% endhint %}
#### Apply filters
Follow these steps to apply filters:
1. Click the **Filters** dropdown menu. The filter options appear.
2. From the **Where** dropdown menu, select an option.
3. From the **is** dropdown menu, select a value.
4. (Optional) Click **+ Add new filter** and repeat steps **2-3** to add more filters.
5. Click **Apply**.
***
### Edit an integration
Editing an integration
Follow these steps to edit an integration:
1. [Find an integration](#find-an-integration).
2. In the row of the integration, click ⠇**> Edit**. The **Edit Integration** page for the integration appears.
3. Update the integration information.
{% hint style="info" %}
You can update the integration name, selected connector, and integration-specific settings.
{% endhint %}
4. Click **Update**.
The integration will re-sync. If the updates are valid, you will get a success message and see synced resources. Otherwise, error messages will be displayed.
***
### Delete an integration
Deleting an integration
Follow these steps to delete an integration:
1. [Find an integration](#find-an-integration).
2. In the row of the integration, click ⠇**> Delete**. A confirmation pop-up window appears.
{% hint style="info" %}
Be mindful of the following:
* If your integration is associated with one or more access flows, a pop-up window will appear listing the access flows. For each access flow, click the link and [delete the access flow](/docs/access-flows/manage-access-flows#delete-an-access-flow).
* If your integration has active access requests, a pop-up window will appear listing the request IDs. For each request, click the link and [revoke the access](/docs/access-flows/revoking-access).
* If a request remains stuck in the **Revoking** state because the integration or connector is unreachable, see [Resolve stuck revocations](/docs/access-flows/revoking-access#resolve-stuck-revocations).
{% endhint %}
3. Click **Yes**.
***
### Troubleshoot an integration
Error panel
Follow these steps to troubleshoot an integration:
1. Filter the list for integrations by a **Status** of **Error** or **Warning**.
2. In the row of an integration, under **STATUS**, click **Error**. A panel opens and lists the integration’s detected errors and warnings.
3. Review the summary for each issue and use the available troubleshooting options.
{% hint style="info" %}
Depending on the issue, you can:
* Click **Show more** to view the full error details.
* Click the copy icon to copy the error details.
* Click **Read Docs** for troubleshooting guidance.
* Follow an available action, such as **Show failed resources**, to investigate further.
{% endhint %}
***
### Additional integration actions
In addition to finding, editing, or deleting integrations, you can perform other tasks to manage integrations from the Apono UI.
#### View associated integration resources
Follow these steps to view the associated integration resources:
1. [Find an integration](#find-an-integration).
2. In the row of the integration, click ⠇**> Resources**. A page of the integration's resources appears.
#### Refresh an integration
Follow these steps to refresh an integration:
1. [Find an integration](#find-an-integration).
2. In the row of the integration, click ⠇**> Refresh**. Apono syncs the integration.
# Manage connectors
Find, rename, and delete an existing Apono connector
After creating a connector in your [AWS](/docs/aws-environment/apono-connector-for-aws), [Azure](/docs/azure-environment/apono-connector-for-azure), [GCP](/docs/gcp-environment/apono-connector-for-gcp), or [Kubernetes](/docs/kubernetes-environment/apono-connector-for-kubernetes) environment, you can use the Apono UI to find, rename, and delete that connector.
***
### Find a connector
You can search for a connector to view its related information.
Connectors page
Follow this step to locate a connector in the Apono UI:
1. On the [**Connectors**](https://app.apono.io/connectors) page, in the search bar, enter the name of the connector. All matching connectors appear.
{% hint style="info" %}
The **Connectors** tab displays context information related to each connector:
* Name
* Location
* Version
* Status
This information is intended to help you quickly identify specific connectors.
{% endhint %}
***
### Rename a connector
{% hint style="danger" %}
If you change the name of a connector in the Apono UI, you must also change the `connector_id` param in the installed connector.
**Failure to update the `connector_id` will cause the integration to stop working.**
{% endhint %}
Edit the Connector page
Follow these steps to rename a connector:
1. On the [**Connectors**](https://app.apono.io/connectors) page, in the search bar, enter the name of the connector. All matching connectors appear.
2. In the row of the connector, click ⠇**> Edit**. The **Edit the Connector** page for the connector appears.
3. Update the **Connector Name**.
4. Click **Update Connector**.
***
### Delete a connector
Deleting a connector
Follow these steps to delete a connector:
1. Delete the connector within your cloud environment.
2. On the [**Connectors**](https://app.apono.io/connectors) page, in the search bar, enter the name of the connector. All matching connectors appear.
3. In the row of the connector, click ⠇**> Delete**. A confirmation popup window appears.
{% hint style="info" %}
If the connector is associated with one or more integrations, a popup window will appear with a link to show the integrations:
1. Click **Show Integrations** to see the list of associated integrations.
2. For each integration, [delete the integration](/docs/connectors-and-secrets/manage-integrations#delete-an-integration).
{% endhint %}
3. Click **Yes**.
# Connector IP Allowlist
Configure outbound access to ensure communication with Apono
If your organization restricts outbound network access by IP address or port, you must configure your IP allowlist to enable uninterrupted communication between Apono connectors and the Apono cloud infrastructure.
An IP allowlist defines which destination IP addresses your network permits outbound traffic to reach.
{% hint style="info" %}
Configuring an IP allowlist is not required if either of the following use cases applies to your organization:
* Uses **domain-based allowlists**, with entries such as *api.apono.io* and *registry.apono.io*
* Allows **unrestricted outbound HTTPS traffic**
{% endhint %}
***
### Network Access Requirements
To ensure consistent and reliable connector performance, the following endpoints and ports must be accessible from your environment.
{% hint style="danger" %}
All network configurations must comply with these requirements by **31 October 2025** to prevent disruption in connector functionality.
{% endhint %}
Domain
Connection Details
Destination IP Addresses
api.apono.io
Protocol: HTTPS
Port: 443
Source Port Range: 32768–60999
54.157.3.253
34.225.239.246
44.205.140.99
98.90.221.221 (New)
98.89.52.211 (New)
34.192.189.115 (New)
registry.apono.io
Protocol: HTTPS
Port: 443
Source Port Range: 32768–60999
107.22.56.232
98.83.51.175
3.221.81.104
35.172.125.116 (New)
54.90.163.79 (New)
107.21.204.50 (New)
***
### Support
For implementation support or questions regarding these requirements, contact ****.
# Apono Vault
Deploy an Apono native vault in your Kubernetes environment to store privileged accounts and manage access through Apono
Many organizations enforce strict policies that prohibit storing highly privileged credentials in third-party SaaS platforms. Security teams still need a way to securely store credentials such as cloud root accounts, database sysadmins, and emergency breakglass credentials while ensuring access is tightly controlled.
Apono Vault solves this problem by allowing you to deploy a lightweight vault inside your own Kubernetes environment. This vault stores secrets locally while Apono manages just-in-time (JIT) access, approvals, and auditing.
Through this integration, your organization can:
* Store sensitive credentials entirely inside your own infrastructure
* Eliminate hard-coded secrets and credentials sprawl
* Grant engineers temporary, policy-controlled access to secrets
* Maintain Zero Standing Privileges (ZSP) through time-bound access
* Audit who accessed privileged credentials and when
{% hint style="info" %}
Apono Vault is built on [OpenBao](https://openbao.org/) and deployed directly in your Kubernetes cluster.
{% endhint %}
***
### Prerequisites
Item
Description
Apono Connector
On-prem connection serving as a bridge between Kubernetes and Apono
***
### Deploy Apono Vault
Deploy Apono Vault in your Kubernetes cluster using one of the following methods.
{% tabs %}
{% tab title="Install script" %}
{% hint style="info" %}
**We recommend this deployment option**.
{% endhint %}
Follow this step to deploy Apono Vault in your cluster:
1. Run the installation script to automatically add the Helm repository, deploy the vault, and output the configuration details required for the Apono integration.
```
curl -s https://apono-public.s3.amazonaws.com/local-apono-vault/install.sh | bash
```
{% hint style="success" %}
**Optional parameters**
You can append parameters to the install script to add specific conditions to the vault deployment.
**Deploy to a custom namespace**:
```
curl -s https://apono-public.s3.amazonaws.com/local-apono-vault/install.sh | bash -s -- -n my-namespace
```
\
**Deploy to a specific Kubernetes context**:
```
curl -s https://apono-public.s3.amazonaws.com/local-apono-vault/install.sh | bash -s -- --kube-context my-cluster
```
\
**Deploy with custom Helm parameters**:
```
curl -s https://apono-public.s3.amazonaws.com/local-apono-vault/install.sh | bash -s -- \
--kube-context my-cluster -n my-namespace \
--set vault.server.dataStorage.size=5Gi
```
\
**Use a custom values file**:
```
curl -s https://apono-public.s3.amazonaws.com/local-apono-vault/install.sh | bash -s -- -f custom-values.yaml
```
{% endhint %}
{% endtab %}
{% tab title="Manual Helm deployment" %}
Follow this step to deploy Apono Vault in your cluster:
1. Deploy the vault using Helm.
```
helm repo add apono https://apono-io.github.io/apono-helm-charts
helm repo update
kubectl create namespace apono-vault
helm install apono-vault apono/apono-vault -n apono-vault --wait
```
{% hint style="info" %}
The `--wait` flag blocks the vault until all resources, including the initialization job, are ready. To monitor initialization in real time, omit `--wait` and tail the logs:
```
kubectl logs -f job/apono-vault-init -n apono-vault
```
{% endhint %}
{% hint style="success" %}
**Optional parameters**
You can add parameters in Helm to add specific conditions to the vault deployment.
**Deploy to a custom namespace**:
```
kubectl create namespace my-namespace
helm install apono-vault apono/apono-vault -n my-namespace --wait
```
{% endhint %}
{% endtab %}
{% endtabs %}
Configurable parameters
You can customize your deployment by passing the following Helm values with the `--set` flag.
Parameter
Description
Default
vault.server.image.tag
Vault image version
2.5.1
vault.server.resources.requests.memory
Memory request
128Mi
vault.server.resources.requests.cpu
CPU request
100m
vault.server.resources.limits.memory
Memory limit
256Mi
vault.server.resources.limits.cpu
CPU limit
250m
vault.server.dataStorage.size
PVC size for Raft data
1Gi
vault.server.dataStorage.storageClass
Storage class (uses cluster default if unset)
null
vault.server.service.type
Kubernetes service type
ClusterIP
vault.server.service.port
Service port
8200
**Example**:
```
curl -s https://apono-public.s3.amazonaws.com/local-apono-vault/install.sh | bash -s -- \
--kube-context my-cluster \
-n apono-vault \
--set vault.server.image.tag=2.5.1 \
--set vault.server.resources.requests.memory=128Mi \
--set vault.server.resources.requests.cpu=100m \
--set vault.server.resources.limits.memory=256Mi \
--set vault.server.resources.limits.cpu=250m \
--set vault.server.dataStorage.size=5Gi \
--set vault.server.service.type=ClusterIP \
--set vault.server.service.port=8200
```
#### Record installation output
After installation is complete, the output displays the connector configuration values you need to integrate Apono Vault. Record the values below.
| Setting | Description | Example |
| ---------------- | ------------------------------------------------------ | ------------------------------------------------------- |
| **Internal URL** | Cluster-internal URL for the vault | `http://apono-vault.apono-vault.svc.cluster.local:8200` |
| **External URL** | Optional externally accessible vault endpoint | — |
| **Namespace** | Kubernetes namespace where the vault was deployed | `apono-vault` |
| **Secret Name** | Kubernetes secret containing the `AppRole` credentials | `apono-vault-role` |
***
### Integrate Apono Vault
{% hint style="success" %}
You can also use the steps below to integrate with Apono using Terraform.
In step **11**, instead of clicking **Confirm**, follow the **Are you integrating with Apono using Terraform?** guidance.
{% endhint %}
Follow these steps to complete the integration:
1. On the [**Catalog**](https://app.apono.io/catalog/connect-integration/apono-vault) tab, click **Apono Vault**. The **Connect Integration** page appears.
2. Under **Discovery**, select one or both of the Apono Vault resource types (**Secret** and **Management**).
{% hint style="warning" %}
Users granted access to a resource type will be able to perform [different actions](#management-access) depending on their permission level. Granted permissions apply **only** to the secrets requested by the user.
{% endhint %}
3. Click **Next**. The **Apono connector section** expands.
4. From the dropdown menu, select a connector. Choosing a connector links Apono to all the services available on the account where the connector is located.
{% hint style="success" %}
If the desired connector is not listed, click **+ Add new connector** and follow the instructions to [install the connector](/docs/kubernetes-environment/apono-connector-for-kubernetes).
{% endhint %}
5. Click **Next**. The **Integration Config** section expands.
6. Define the **Integration Config** settings.
Setting
Description
Integration Name
Unique, alphanumeric, user-friendly name used to identify this integration when constructing an access flow
9. Click **Next**. The **Get more with Apono** section expands.
10. Define the **Get more with Apono** settings.
Setting
Description
Custom Access Details
(Optional) Instructions explaining how to access this integration's resources
Upon accessing an integration, a message with these instructions will be displayed to end users in the User Portal. The message may include up to 400 characters.
To view the message as it appears to end users, click Preview.
Integration Owner
(Optional) Fallback approver if no resource owner is found
Follow these steps to define one or several integration owners:
From the Attribute dropdown menu, select User or Group under the relevant identity provider (IdP) platform.
From the Value dropdown menu, select one or multiple users or groups.
NOTE: When Resource Owner is defined, an Integration Owner must be defined.
Resource Owner
(Optional) Group or role responsible for managing access approvals or rejections for the resource
Follow these steps to define one or several resource owners:
Enter a Key name. This value is the name of the tag created in your cloud environment.
From the Attribute dropdown menu, select an attribute under the IdP platform to which the key name is associated.
Apono will use the value associated with the key (tag) to identify the resource owner. When you update the membership of the group or role in your IdP platform, this change is also reflected in Apono.
NOTE: When this setting is defined, an Integration Owner must also be defined.
11. Click **Confirm**.
💡Are you integrating with Apono using Terraform?
If you want to integrate with Apono using Terraform, follow these steps instead of clicking **Confirm**:
1. At the top of the screen, click **View as Code**. A modal appears with the completed Terraform configuration code.
2. Click to copy the code.
3. Make any additional edits.
4. Deploy the code in your Terraform.
Refer to [Integration Config Metadata](/metadata-for-integration-config) for more details about the schema definition.
Now that you have completed this integration, you can [create access flows](/docs/access-flows/access-flows) that grant permission to your Apono Vault secrets. Users who are granted access can [manage secrets](#manage-secrets-in-apono-vault) using the Apono CLI.
***
### Manage secrets in Apono Vault
Users can perform different actions in Apono Vault depending on the resource types and permissions they have been granted through an access flow.
{% tabs %}
{% tab title="Management access" %}
Users granted access to the **Management** resource type can manage secrets within the vault. However, their available actions depend on their granted permissions.
| Permission | List | Create | Fetch | Update | Delete |
| ------------- | ---- | ------ | ----- | ------ | ------ |
| **Admin** | ✅ | ✅ | ✅ | ✅ | ✅ |
| **ReadWrite** | ✅ | ✅ | ✅ | ✅ | ❌ |
| **ReadOnly** | ✅ | ❌ | ✅ | ❌ | ❌ |
**List secrets**:
```
apono vault list --vault-id ""
```
**Create a secret**:
```
apono vault create / \
--vault-id "" \
--value '{"key": "value"}'
```
**Fetch a secret**:
```
apono vault fetch / \
--vault-id ""
```
**Update a secret**:
```
apono vault update / \
--vault-id "" \
--value '{"key": "new-value"}'
```
**Delete a secret**:
```
apono vault delete / \
--vault-id ""
```
{% endtab %}
{% tab title="Secret access" %}
Users granted the **Secret** resource type receive `ReadOnly` permissions and can fetch specific secrets.
```
apono vault fetch --vault-id ""
```
{% endtab %}
{% endtabs %}
***
### Troubleshooting Apono Vault
Expand the sections below to troubleshoot common issues. Contact Apono Support if you require additional help.
Initialization job failed
Run the following command to check the initialization job logs.
```
kubectl logs job/apono-vault-init -n apono-vault
```
Vault does not auto-unseal after restart
Run the following command to verify the unseal secret contains real values.
```
kubectl get secret apono-vault-unseal -n apono-vault \
-o jsonpath='{.data.unseal-key}' | base64 -d
```
If the value is `placeholder`, the initialization job has failed. Re-run the initialization.
```
kubectl delete job apono-vault-init -n apono-vault
helm upgrade apono-vault apono/apono-vault -n apono-vault
```
Pod stuck in CrashLoopBackOff
Run the following command to check the vault pod logs.
```
kubectl logs -n apono-vault apono-vault-0
```
Raft lock file error
If a vault pod is force-deleted, a stale Raft lock file may remain.
Run the following command to reinstall the vault.
```
helm uninstall apono-vault -n apono-vault
kubectl delete pvc -n apono-vault data-apono-vault-0
```
Then, reinstall the vault using one of the deployment methods above.
{% hint style="danger" %}
Deleting the PVC **permanently removes** all vault data.
{% endhint %}
***
### Uninstall Apono Vault
{% hint style="danger" %}
Deleting the PVC **permanently removes** all vault data.
{% endhint %}
Follow these steps to uninstall Apono Vault:
1. Run the following command to uninstall the vault deployment.
```
helm uninstall apono-vault -n apono-vault
```
2. (Optional) Run the following command to fully clean the environment.
```
kubectl delete pvc -n apono-vault data-apono-vault-0
kubectl delete secret -n apono-vault apono-vault-unseal apono-vault-role
kubectl delete namespace apono-vault
```
# AWS Overview
Cloud computing has become an essential tool for businesses of all sizes. As a provider of many services and tools, Amazon Web Services (AWS) is a cloud environment supported by Apono.
AWS logo
The articles in this section will help you connect Apono with your AWS-based resources so that you can effectively manage permissions to these resources.
# Apono Connector for AWS
How to install a Connector on an AWS account to integrate an AWS Account or Organization with Apono
## Overview
To integrate with AWS and start managing JIT access to AWS cloud resources, you must **first install a connector in your AWS environment**.
The connector should match the level of access management you want to achieve with Apono: on a single account or on the entire organization.
* To manage access to a single AWS account, install a connector on that account. Follow [this guide](#aws-account-connector).
* To manage access to all the accounts in the AWS organization:
* Install a connector on the management account. Follow [this guide](#aws-organization-connector-on-the-management-account).\
**OR**
* Install a connector in any account with ECS or EKS and give it assumable permissions to the management account. Follow [this guide](#connector-with-delegated-permissions-to-the-aws-management-account).
{% hint style="info" %}
What's a connector? What makes it so secure?
The Apono Connector is an on-prem connection that can be used to connect resources to Apono and separate the Apono web app from the environment for maximal [security](/docs/about-apono/security-and-architecture).
Read more about the recommended [AWS Installation Architecture](/docs/about-apono/security-and-architecture#apono-and-aws).
{% endhint %}
First, decide if you want to integrate Apono with a specific AWS Account or with the entire Organization (containing multiple Accounts).
Follow the guides below depending on your selection.
***
### AWS Account connector
#### Prerequisites
* Administrator permissions to the AWS account you want to connect.
* VPC with outbound connectivity
#### 1. In Apono
1. Login to the Apono platform
2. Go to the Apono Integrations page
3. From the Catalog, pick AWS
4. Pick Account\
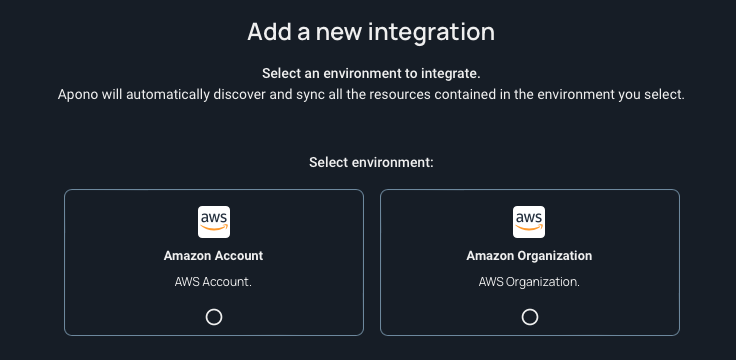
5. Install a new connector in AWS. Read more [here](https://app.apono.io/connectors/install).
6. Choose the desired deployment method\

#### 2. In CloudFormation
1. Choose Cloudformation
2. Click "Open Cloud Formation"
3. Sign in to your AWS user and click **Next**
4. Within the AWS create stack page, scroll down
5. Make sure you pick at least one Subnet and one VPC from the dropdown lists
6. Tick the acknowledge box and then select **Create Stack**
*Apono integrates with AWS natively, using AWS CloudFormation as a standard mechanism to deploy all required configurations including a Cross Account Role with Read permission, a SNS notification message, and the Apono Connector that runs using an AWS ECS on Fargate.*
***
### AWS Organization connector on the Management account
Apono integrates seamlessly with your AWS Organization, using CloudFormation to automate the deployment of all the necessary configurations:
* **Cross-account IAM role** with read permissions
* **Amazon SNS topic** for event notifications
* **Apono connector**, which runs on AWS Elastic Container Service (ECS)
Once installed, the connector syncs data from cloud applications and enables you to manage access to your Organization resources.
#### Prerequisites
Item
Description
AWS IAM Role
IAM role with permissions to manage resources in your AWS Organization
We recommend AdministratorAccess for connector deployment, but this policy is not required.
Full AWS access is not granted to Apono.
OrganizationID
Unique identifier of the Organization that will be connected via the integration (ex. o-k012345a67)
Follow these steps to find your OrganizationID:
In your AWS console settings, click Organization. The AWS accounts page appears.
In the left navigation, click Settings. The Settings page appears.
Under Organization details, copy your OrganizationID.
OrganizationUnitID
Root ID for the AWS Organization Unit that will be connected via the integration (ex. r-1a2b)
Follow these steps to obtain your OrganizationUnitID:
In your IAM Identity Center, expand Multi-account permissions.
Click AWS accounts. The AWS accounts page appears.
In the Organizational structure section, copy the ID from the Root folder. This is the parent organizational unit for all accounts in your organization.
VPC
Virtual Private Cloud (VPC) with outbound connectivity
Subnet
One or more Subnet IDs within the selected VPC where the connector resources will run
Permission
Full access (Manage IAM) permissions to enable the connector to create and manage the required IAM resources during deployment
EKSAccess Entry
(For EKS Namespaces and Groups) Connection between EKS permissions and an IAM identity
AWS-managed access entries link an IAM principal to a specific EKS cluster and define its Kubernetes access through associated access policies.
For each EKS cluster where Apono will manage resources, namespaces, or groups, create an access entry in the AWS account and region where the cluster is deployed:
IAM principal: ARN of the Apono connector cross-account role in the same AWS account as the EKS cluster
Type: Standard
AccessPolicies: AmazonEKSClusterAdminPolicy
AccessScope: Cluster
To find the ARN, open IAM in the cluster’s AWS account, locate the Apono connector cross-account role, and copy its ARN.
This enables Apono to discover and manage Kubernetes namespaces within the cluster.
(For EKS Groups only) Enablement to manage custom Kubernetes RBAC roles through Apono
To grant access to custom Kubernetes and cluster roles using EKS Groups, you must have the following items:
Connected cluster: An EKS cluster must already be integrated and discoverable via the AWS Organization connector.
Preconfigured RBAC roles in Kubernetes: Admins must create the relevant Role/ClusterRole and RoleBinding/ClusterRoleBinding. Apono does not create or manage these resources. Learn more.
Please note the following limitations of EKS Groups:
Groups with prefixes such as eks: and system: are not supported and are automatically filtered out.
AWS predefined access policies (such as AmazonEKSViewPolicy) are not applicable. Only custom Kubernetes RBAC roles are supported.
Minimum Required Version: 1.7.8
#### Install a connector
Installing a connector in Apono
Follow these steps to install the connector:
1. Start integrating your [AWS Organization](/docs/aws-environment/aws-integrations/integrate-an-aws-account-or-organization#integration-1) (steps **1-5**).
2. From the **Select Connector** dropdown menu, click **+ Add new connector**. The **Select connector installation strategy** section appears.
{% hint style="success" %}
If you choose an existing connector, we recommend [updating the connector](https://docs.apono.io/docs/aws-environment/apono-connector-for-aws/updating-a-connector-in-aws) in CloudFormation.
{% endhint %}
3. Click **Cloud installation > CloudFormation (ECS)**.
{% hint style="success" %}
You can also install the connector using [**CloudFormation (EKS)**](/docs/aws-environment/apono-connector-for-aws/installing-a-connector-on-eks-using-cloudformation) or [**Terraform (ECS)**](/docs/aws-environment/apono-connector-for-aws/installing-a-connector-on-aws-ecs-using-terraform).
{% endhint %}
4. Under **Follow these steps to install connector**, click **Open Cloud Formation**. AWS CloudFormation opens. The **Create stack** page appears with one of Apono's stack templates.
{% hint style="info" %}
If you are not already signed in, AWS will prompt you to log in to your AWS Management account.
{% endhint %}
5. From the settings dropdown at the top of the page, select your **Region**.
6. Enter the **Stack name**.
7. Define the following **Parameters**:
1. Enter the **AponoConnectorId**. This can be any alphanumeric name to identify the connector.
2. Enter your **OrganizationId**.
3. Enter your **OrganizationUnitId**.
4. From the **Permissions** dropdown menu, select **Full-Access (Manage IAM)**.
5. Select one or more **SubnetIDs**.
6. Select one or more **VpcId** parameters.
8. Under **Capabilities**, select **I acknowledge that AWS CloudFormation might create IAM resources with custom names**.
9. Click **Create stack**.
10. On the [**Connectors**](https://app.apono.io/connectors) page, verify that the connector has been deployed.
11. [Complete the integration](/docs/aws-environment/aws-integrations/integrate-an-aws-account-or-organization#integration-1) (steps **6-10**).
***
### Connector with IAM role permissions for AWS Organization management
You can install a connector with assumable permissions to the AWS Management account using either AWS Elastic Container Service (ECS) or Elastic Kubernetes Service (EKS) in CloudFormation.
Once installed, the connector syncs data from cloud applications and enables you to manage access permissions through access flows within Amazon ECS or EKS.
#### Prerequisites
Item
Description
AdminstratorAccess Policy
AWS role with AdministratorAccess policy providing full access to AWS services and resources
Full AWS access is not granted to Apono.
OrganizationID
Unique identifier of the AWS Organization that will be connected via the integration (ex. o-k012345a67)
Follow these steps to find your OrganizationID:
In your AWS console settings, click Organization. The AWS accounts page appears.
In the left navigation, click Settings. The Settings page appears.
Under Organization details, copy your OrganizationID.
OrganizationUnitID
Root ID for the AWS Organization Unit that will be connected via the integration (ex. r-1a2b)
Follow these steps to obtain your OrganizationUnitID:
In your IAM Identity Center, expand Multi-account permissions.
Click AWS accounts. The AWS accounts page appears.
In the Organizational structure section, copy the ID from the Root folder. This is the parent organizational unit for all accounts in your organization.
VPC
Virtual Private Cloud (VPC) with outbound connectivity
Subnet
One or more Subnet IDs within the selected VPC where the connector resources will run
Permission
Full access (Manage IAM) permissions to enable the connector to create and manage the required IAM resources during deployment
#### Install the connector
Installing the connector in Apono
Follow these steps to enable the connector to manage the entire AWS Organization:
1. On the [**Connectors**](https://app.apono.io/connectors) page, click **Install Connector**. The **Install Connector** page appears.
2. Under **Select connector installation strategy**, click **Cloud installation > AWS**. The permission options appear.
3. Click **No, Just Install the Connector**. The installation methods appear.
{% hint style="danger" %}
Do **not** select **Install and Connect AWS Account**. This option creates IAM roles in the member account that will conflict with the CloudFormation roles deployed in the Management account, causing the installation to fail.
{% endhint %}
4. Click the **CloudFormation (ECS)** or **CloudFormation (EKS)** installation method.
{% hint style="success" %}
You can also install the connector using [Terraform](/docs/aws-environment/apono-connector-for-aws/installing-a-connector-on-aws-ecs-using-terraform).
{% endhint %}
5. Finish [installing the connector](https://docs.apono.io/docs/aws-environment/apono-connector-for-aws#id-2.-in-cloudformation) in CloudFormation for your AWS Account.
6. Once the connector is installed, copy the following values from CloudFormation.
Key
Location
AponoConnectorRoleArn
On the Outputs tab, copy the Value for the AponoConnectorRoleArn.
AponoConnectorId
On the Parameters tab, copy the Value for the AponoConnectorId key.
7. Open [CloudFormation](https://console.aws.amazon.com/cloudformation/home#/stacks/quickcreate?templateURL=https%3A%2F%2Fapono-public.s3.amazonaws.com%2Fcloudformation%2Faws_organization_roles_only_integration_template.yml\&stackName=apono-aws-organization-integration) with your Management account. T**he Quick create stack** page appears.
8. Under **Parameters**, enter values for the following fields:
1. **AponoConnectorId**: Value copied in step **6**.
2. **ConnectorRoleArn**: Value copied in step **6**.
3. **OrganizationId**: Organization ID copied during the [prerequisites](#prerequisites-2).
4. **OrganizationUnitId**: Root ID copied during the [prerequisites](#prerequisites-2).
5. From the **Permissions** dropdown menu, select **Full-Access (Manage IAM)**.
9. Under **Capabilities**, select **I acknowledge that AWS CloudFormation might create IAM resources with custom names**.
10. Click **Create stack**.
11. (Optional) On the **Outputs** tab, copy the **Value** for the **ManagementAccountRoleArnOutput**.
{% hint style="info" %}
When integrating an AWS Organization, you can paste the **ManagementAccountRoleArnOutput** value in the **Integration Config** settings to use the connector.
{% endhint %}
12. On the [**Connectors**](https://app.apono.io/connectors) page, verify that the connector has been deployed.
13. (Optional) Follow the steps to [integrate an AWS organization](/docs/aws-environment/aws-integrations/integrate-an-aws-account-or-organization#integrate-an-aws-organization).
# Installing a connector on AWS ECS using Terraform (AWS Organization)
Integrate Apono with your AWS Organization for complete cloud discovery and JIT access management to AWS resources
Apono connects with the AWS Organization to discover all accounts and their respective cloud resources and services and manage just-in-time, just-enough access to them.
This guide explains how to integrate with an AWS Organization using Terraform.
## Prerequisites
* Terraform
* AWS Profile `mgmt-account` with Admin privileges in the Organization's Management Account
* AWS Profile `member-account` with Admin privileges in one of the Organization's Member Accounts
* Activate the CloudFormation StackSet service in your management account\
## Install a connector
Follow these steps to install the connector:
1. Go to the **Integrations** catalog, and select **AWS integration**.
2. Choose **Amazon Organization**, and in the **Select an Apono Connector**, choose **Add new connector**.
3. Copy the token shown in the UI.
4. Run the following Terraform Template:
{% hint style="info" %}
The Terraform template does the following:
* Installs Apono Connector in a Member Account of the organization
* Installs CloudFormation Stack in the Management Account of the organization that:
* Creates IAM Role with policies that allow manage access in IAM Identity Center
* Installs CloudFormation StackSet that creates IAM Role in all member accounts of an Organizational Unit, with policies that allow to list AWS resources
{% endhint %}
```
terraform {
required_providers {
aws = {
source = "hashicorp/aws"
version = "5.39.1"
}
}
}
provider "aws" {
alias = "member_account"
region = var.member_account_region
profile = "member-account"
}
provider "aws" {
alias = "mgmt_account"
region = var.mgmt_identity_center_region
profile = "mgmt-account"
}
module "apono-connector" {
providers = {
aws = aws.member_account
}
source = "github.com/apono-io/terraform-modules/aws/connector-without-permissions/stacks/apono-connector"
connectorId = var.connector_id
aponoToken = var.apono_token_connector
vpcId = var.member_account_vpc_id
subnetIds = var.member_account_subnet_ids
assignPublicIp = true # change to false if the subnets are configured with NAT gateway
}
resource "aws_cloudformation_stack" "connector_roles" {
provider = aws.mgmt_account
name = "apono-organization-integration"
parameters = {
AponoConnectorId = var.connector_id
ConnectorRoleArn = module.apono-connector.connector_role_arn
OrganizationalUnitId = var.org_unit_id
Permissions = "Full-Access (Manage IAM)"
}
capabilities = ["CAPABILITY_NAMED_IAM"]
template_url = "https://apono-public.s3.amazonaws.com/cloudformation/aws_organization_roles_only_integration_template.yml"
}
output "mgmt_account_role_arn" {
value = aws_cloudformation_stack.connector_roles.outputs.ManagementAccountRoleArnOutput
description = "The Management Account Role Arn parameter for the Apono AWS Organization integration"
}
```
```
variable "connector_id" {
description = "A that identifies the Connector."
type = string
default = "apono-organization-connector"
}
variable "apono_token_connector" {
description = "Connector Token that you copied from the Apono App"
type = string
}
variable "member_account_region" {
description = "The region where the Apono connector will be deployed"
type = string
}
variable "member_account_vpc_id" {
description = "The VPC ID where the Apono connector will be deployed (example value: vpc-000000000)"
type = string
}
variable "member_account_subnet_ids" {
description = "List of subnet IDs for the Apono connector (example value: [\"subnet-00000000000\"])"
type = list(string)
}
variable "mgmt_identity_center_region" {
description = "The region where the IAM Identity Center is configured"
type = string
}
variable "org_unit_id" {
description = "The Organizational Unit of the accounts to be discoverable by Apono (put the Root Organizational Unit to include all the accounts the organization)"
type = string
}
```
5. After the installation finishes, copy and save the **Management Account Role ARN** from the output.
6. Go back to the [Amazon Organization integration](https://app.apono.io/catalog/connect-integrations-group/amazon-web-services).
7. Choose the connector from the dropdown list.
8. Choose the resource types you want to connect, and click **Next**.
9. Under **name**, enter a name for the integration (i.e. AWS Organization).
10. Under **Region**, select a single region of the AWS resources you want to integrate.
11. Under **AWS SSO Region**, enter the region where the IAM Identity Center is configured.
12. Under **SSO Portal**, enter your **SSO Start URL** (i.e. ).
13. In **Management Account Role ARN**, enter the ARN you copied in step **5**.
14. Click **Connect**.
## Results
The initial connection should now be in progress! After a few minutes, you should see the AWS Org integration as Active on the Integrations page.
Now, start creating Access Flows for the discovered resources.
# Installing a connector on AWS ECS using Terraform
Create a connector on Amazon Elastic Container Service
Connectors are secure on-prem components that link Apono and your resources:
* No secrets are read, cached, or stored.
* No account admin privileges need to be granted to Apono.
* The connector contacts your secret store or key vault to sync data or provision access.
Once set up, this connector will enable you to sync data from cloud applications and grant and revoke access permissions through Amazon Elastic Container Service (ECS).
***
### Prerequisites
Item
Description
AdminstratorAccess Role
AWS role that provides full access to AWS services and resources
Apono Token
Account-specific Apono authentication value
Use the following steps to obtain your token:
On the Connectors page, click Install Connector. The Install Connector page appears.
***
### Install a connector
Use the following steps to install an Apono connector for AWS on ECS:
1. At the shell prompt, define an environment variable named `TF_VAR_APONO_TOKEN` with your Apono token value.
```sh
export TF_VAR_APONO_TOKEN=""
export TF_VAR_REGION=""
export TF_VAR_CONNECTOR_ID=""
export TF_VAR_VPC_ID=""
export TF_VAR_SUBNET_IDS="<["SUBNET_ID1","SUBNET_ID2"]>"
export TF_VAR_TAGS="<{tag1="value1"}>"
```
2. In a new or existing Terraform (.tf) file, add the following provider and module information to create a connector [with permissions](#with-permissions) or [without permissions](#without-permissions).
{% hint style="warning" %}
When using the following snippets, be sure to use the correct value for `assignPublicIp`:
* `true`: Set when a subnet has an Internet Gateway
* `false`: Set shen a subnet has a NAT Gateway
{% endhint %}
{% tabs %}
{% tab title="With Permissions" %}
Enables installing the connector in the cloud environment and managing access to resources, such as Amazon RDS, S3 buckets, EC2 machines, and self-hosted databases
{% code title="Terraform" overflow="wrap" %}
```
provider "aws" {
region = "{var.REGION}"
}
module "apono-connector" {
source = "github.com/apono-io/terraform-modules//aws/connector-with-permissions/stacks/apono-connector"
connectorId = "{var.CONNECTOR_ID}"
aponoToken = "{var.APONO_TOKEN}"
vpcId = "{var.VPC_ID}"
subnetIds = "{var.SUBNET_IDS}"
assignPublicIp = true
tags = "{var.TAGS}"
}
```
{% endcode %}
{% endtab %}
{% tab title="Without Permissions" %}
Enables installing the connector in the cloud environment but managing access to non-AWS resources, such as self-hosted databases
{% code title="Terraform" overflow="wrap" %}
```
provider "aws" {
region = "{var.REGION}"
}
module "apono-connector" {
source = "github.com/apono-io/terraform-modules//aws/connector-without-permissions/stacks/apono-connector"
connectorId = "{var.CONNECTOR_ID}"
aponoToken = "{var.APONO_TOKEN}"
vpcId = "{var.VPC_ID}"
subnetIds = "{var.SUBNET_IDS}"
assignPublicIp = true
tags = "{var.TAGS}"
}
```
{% endcode %}
{% endtab %}
{% endtabs %}
3. At the Terraform CLI, download and install the provider plugin and module.
```
terraform init
```
4. Apply the Terraform changes. The proposed changes and a confirmation prompt will be listed.
```
terraform apply
```
5. Enter *yes* to confirm deploying the changes to your AWS account.
6. On the [**Connectors**](https://app.apono.io/connectors) page, verify that the connector has been deployed.
***
### FAQ
Can the Apono Terraform module be pinned to a version?
Yes. You can append the version number to the `source` location with the `?ref=vX.X.X` query string.
The following example pins the version to **1.0.0** for a connector without permissions.
{% code title="Terraform" overflow="wrap" %}
```
provider "aws" {
region = "{var.REGION}"
}
module "apono-connector" {
source = "github.com/apono-io/terraform-modules//aws/connector-without-permissions/stacks/apono-connector"
connectorId = "{var.CONNECTOR_ID}"
aponoToken = "{var.APONO_TOKEN}"
vpcId = "{var.VPC_ID}"
subnetIds = "{var.SUBNET_IDS}"
assignPublicIp = true
tags = "{var.TAGS}"
}
```
{% endcode %}
# Installing a connector on EKS using CloudFormation
Installing a connector on Amazon Elastic Kubernetes Service (EKS) for AWS Account or Organization Management
Apono integrates seamlessly with AWS, using AWS CloudFormation to automate the deployment of all the necessary configurations:
* **Cross-account IAM role** with read permissions
* **Amazon SNS topic** for event notifications
* **Apono connector**, which runs on AWS EKS
Once installed, the connector syncs data from cloud applications and enables you to manage access permissions through access flows within Amazon EKS.
***
### Prerequisite
Item
Description
AdminstratorAccess Role
AWS role with AdministratorAccess providing full access to AWS services and resources, required for installing the connector
Full AWS access is not granted to Apono.
***
### Install a connector
Follow these steps to install the connector:
1. On the [**Catalog**](https://app.apono.io/catalog?search=aws) tab, click **AWS**. The **Connect Integrations Group** page appears.
2. Under **Discovery**, click **Amazon Account or Amazon Organization**.
3. Click one or more resource types to sync with Apono.
{% hint style="info" %}
Apono automatically discovers and syncs all the instances in the environment. After syncing, you can manage **Access Flows** to these resources.
{% endhint %}
4. Click **Next**. The **Apono connector** section expands.
5. From the **Select Connector** dropdown menu, click **+ Add new connector**. The **Select connector installation strategy** section appears.
6. Click **Cloud installation** > **CloudFormation + Helm (EKS).**
7. Open the [**CloudFormation**](https://console.aws.amazon.com/cloudformation/home?#/stacks/quickcreate?templateURL=https://apono-public.s3.amazonaws.com/cloudformation/aws_eks_connector_role.yml) **s**tack**.** The **Create stack** page appears.
{% hint style="info" %}
If you are not already signed in, AWS will prompt you to enter your AWS user account.
{% endhint %}
8. Define the following **Parameters**:
* **EKSClusterName**: Name of the EKS cluster where the Apono connector will be deployed.
* **EKSIamMode**: Authentication mode used by the EKS connector. Possible values include IRSA (IAM Roles for Service Accounts) or Pod Identity.
* (Optional) **EKSNamespace**: Kubernetes namespace in your EKS cluster where the Apono connector service account resides. Defaults to `apono-connector` if not specified.
* (Optional) **EKSServiceAccountName**: Name of the Kubernetes service account associated with the Apono connector in the EKS cluster. Defaults to `apono-connector` if not specified.
9. Under **Capabilities**, select **I acknowledge that AWS CloudFormation might create IAM resources with custom names**.
10. Click **Create stack**.
11. On the **Outputs** tab, copy the **Value** for the **ConnectorRoleArnOutput**. This value will be used to deploy the connector.
12. On the [**Connectors**](https://app.apono.io/connectors) page, verify that the connector has been deployed.
Now that you have installed the connector for your Account, you must [deploy](#deploy-the-eks-connector) the connector.
***
### Deploy the EKS connector
After installation, the connector must be deployed on your EKS cluster using the Apono Helm chart. You can choose between IRSA or Pod Identity authentication modes, depending on the value you defined for **EKSIamMode** when [installing the connector](#install-a-connector) (step **8**).
{% tabs %}
{% tab title="IRSA" %}
If using IRSA (IAM Roles for Service Accounts), use the Helm chart below to deploy the connector.
{% code overflow="wrap" %}
```
helm install apono-connector apono-connector --repo https://apono-io.github.io/apono-helm-charts \
--set-string apono.token=[APONO_TOKEN] \
--set-string apono.connectorId=[CONNECTOR_ID] \
--set serviceAccount.manageClusterRoles=[true/false] \
--set-string serviceAccount.awsRoleArn=[CONNECTOR_ROLE_ARN_OUTPUT] \
--namespace apono-connector \
--create-namespace
```
{% endcode %}
Parameter
Description
apono.token string
Unique token provided by Apono used to authenticate the connector with the Apono platform
Unique identifier associated with your Apono account
This ID links the Helm deployment to the configured connector.
serviceAccount.manageClusterRoles boolean
True/false flag that determines whether the Helm chart should create the necessary Kubernetes cluster roles and role bindings automatically
{% endtab %}
{% endtabs %}
After deployment, you can now manage access to your **AWS Account** from Apono.
{% hint style="info" %}
If you choose to integrate with the **AWS organization**, continue to [Deploy Organization roles using CloudFormation](#deploy-organization-roles-using-cloudformation) to allow an AWS Account to assume IAM role permissions to manage access across all AWS Organization accounts.
{% endhint %}
***
### Deploy Organization roles using CloudFormation
Using IAM role permissions, you can enable the Apono connector to manage an entire AWS Organization. Deploying Organization roles is **optional**.
Follow these steps to deploy your Organization roles:
1. Log in to the management account for your AWS Organization.
2. Open the IAM Identity Center in your AWS organization.
3. Select the relevant AWS account on the left menu.
4. Copy the organizational ID.
5. In [CloudFormation](https://console.aws.amazon.com/cloudformation/home?#/stacks/quickcreate?templateURL=https://apono-public.s3.amazonaws.com/cloudformation/aws_organization_roles_only_integration_template.yml), open the **Quick create stack** page.
6. Under **Parameters**, enter values for the following fields:
1. **AponoConnectorId**: Copied from the [Helm installation](#deploy-the-eks-connector).
2. **ConnectorRoleArn**: Value copied from step **11** of [Install a connector](#install-a-connector).
3. **OrganizationalUnitId**: Organizational Unit ID obtained in step **4**.
7. Click **Create stack**.
8. On the [**Connectors**](https://app.apono.io/connectors) page, verify that the connector has been deployed.
After installation, you can now manage access across your AWS Organization from Apono.
# Installing a connector on EKS using CloudFormation (AWS Organization)
Create a connector on Amazon Elastic Kubernetes Service (EKS)
Apono integrates seamlessly with AWS, using AWS CloudFormation to automate the deployment of all the necessary configurations:
* **Cross-account IAM role** with read permissions
* **Amazon SNS topic** for event notifications
* **Apono connector**, which runs on AWS EKS
Once installed, the connector syncs data from cloud applications and enables you to manage access permissions through access flows within Amazon EKS.
***
### Prerequisites
Item
Description
AdminstratorAccess policy
AWS role with AdministratorAccess policy providing full access to AWS services and resources, required for installing the connector
Full AWS access is not granted to Apono.
AWS Account connector
Connector installed and deployed on EKS using Cloudformation for an AWS Account
CloudFormation values from your AWS Account installation
Copy the following values from CloudFormation:
On the Outputs tab, copy the Value for the ConnectorRoleArnOutput.
On the Parameters tab, copy the Value for the AponoConnectorId key.
***
### Install a connector for your AWS Organization
Using IAM role permissions, you can enable the Apono connector to manage an entire AWS Organization.
Follow these steps to install a connector for your AWS Organization:
1. Log in to the management account for your AWS Organization.
2. Obtain the parent organizational unit ID:
1. From your user dropdown menu (at the top right of the page), click **Organization**.
2. In the **Organization** section, copy the ID for the **Root**.
3. In [CloudFormation](https://console.aws.amazon.com/cloudformation/home#/stacks/quickcreate?templateURL=https%3A%2F%2Fapono-public.s3.amazonaws.com%2Fcloudformation%2Faws_organization_roles_only_integration_template.yml\&stackName=apono-aws-organization-integration), open the **Quick create stack**. The page will be populated with Apono's EKS organization roles [stack template](https://apono-public.s3.amazonaws.com/cloudformation/aws_organization_roles_only_integration_template.yml).
4. Under **Parameters**, enter values for the following fields:
* **AponoConnectorId**: Value copied in [Prerequisites](#prerequisites).
* **ConnectorRoleArn**: Value copied in [Prerequisites](#prerequisites).
* **OrganizationalUnitId**: Root ID copied in step **2**.
5. Click **Create stack**.
6. On the [**Connectors**](https://app.apono.io/connectors) page, verify that the connector has been deployed.
After installation, you can now manage access across your AWS Organization from Apono.
# Connecting AWS Organizations to the managed Apono SaaS
Apono integrates seamlessly with AWS, using AWS CloudFormation to automate the deployment of all the necessary configurations:
* **Cross-account IAM role** with read permissions
* **Apono Managed Connector**, which runs on managed instances in Apono
Once installed, the connector syncs metadata information from cloud resources and enables you to manage access permissions through access flows within an AWS Organization.
### Prerequisites
| Item | Description |
| -------------------------------------------- | ------------------------------------------------------------------------------------------------------------------------------------------------------------------------------------------------------------------------------------------------------------------------------------------------------------------------------------------------------------ |
| **AdminstratorAccess Policy** |
User with an AWS role with AdministratorAccess policy providing full access to AWS services and resources, required for deploying an assumable role via a cloudformation stack
Full AWS access is not granted to Apono.
|
| **AWS Cloudformation Parameters from Apono** | Apono will provide an ARN and ConnectorID of the connector that will need to assume the role created using the CloudFormation template |
| **AWS OrganizationID** | Root organizationID for the AWS organization that will be connected via the integration (ex. r-1a2b) |
### Deploy the CloudFormation template for AWS Organization management
1. Open this [CloudFormation](https://console.aws.amazon.com/cloudformation/home#/stacks/quickcreate?templateURL=https%3A%2F%2Fapono-public.s3.amazonaws.com%2Fcloudformation%2Faws_organization_roles_only_integration_template.yml\&stackName=apono-aws-organization-integration) in the AWS management account. The **Create stack** page appears.
2. Under **Parameters**, enter values for the following fields:
* **AponoConnectorId:** Value provided by Apono Services**.**
* **ConnectorRoleArn:** Value provided by Apono Services**.**
* **OrganizationalUnitId:** AWS organization unit ID
3. Click **Create stack**.
4. Once completed, copy the value for **ManagementAccountRoleArnOutput** from the output of the CloudFormation stack
### Create AWS organization Integration
* To sync and manage access to EC2 servers, make sure you add the AmazonSSMManagedInstanceCore policy to the connector's IAM role

Follow these steps to integrate Apono with your AWS organization:
1. On the Catalog tab, click AWS. The Connect Integrations Group page appears.
2. Under Discovery, click Amazon Organization.
3. Click one or more resource types to sync with Apono.
Apono automatically discovers and syncs all the instances in the environment. After syncing, you can manage access flows to these resources.
1. Click Next. The Apono connector section expands.
2. From the dropdown menu, select the connector with the connector ID that Apono provided in the previous steps.
3. Click Next. The Integration Config section expands.
4. Define the Integration Config settings.
| Setting | Description |
| ----------------------------- | -------------------------------------------------------------------------------------------------------------------------------- |
| Integration Name | Unique, alphanumeric, user-friendly name used to identify this integration when constructing an access flow |
| Region | Region in which the organization runs |
| AWS SSO Region | Region for which your single sign-on is configured |
| SSO Portal |
Single sign-on URL
This is required for Apono to generate a sign-in link for end users to use their granted access.
|
| Management Account Role ARN | ARN (step 4) of the role to assume in the management account |
| Exclude Organization Unit IDs |
(Optional) ID of organizational units to exclude
Example: ou-aaa1-1111, ou-bbb2-2222
|
| Enable Audit | (Optional) Feature that allows Apono to ingest and aggregate session audit logs |
1. Click Next. The Get more with Apono section expands.
2. Define the Get more with Apono settings.
| Setting | Description |
| --------------------- | ------------------------------------------------------------------------------------------------------------------------------------------------------------------------------------------------------------------------------------------------------------------------------------------------------------------------------------------------------------------------------------------------------------------------------------------------------------------------------------------------------------------------------------------------------------------------------------------------------------------------------------------------------------------------------------------------------------------- |
| Custom Access Details |
(Optional) Instructions explaining how to access this integration's resources
Upon accessing an integration, a message with these instructions will be displayed to end users in the User Portal. The message may include up to 400 characters.
To view the message as it appears to end users, click Preview.
|
| Integration Owner |
(Optional) Fallback approver if no resource owner is found
Follow these steps to define one or several integration owners:
From the Attribute dropdown menu, select User or Group under the relevant identity provider (IdP) platform.
From the Value dropdown menu, select one or multiple users or groups.
NOTE: When the Resource Owner is defined, an Integration Owner must be defined.
|
| Resource Owner |
(Optional) Group or role responsible for managing access approvals or rejections for the resource
Follow these steps to define one or several resource owners:
Enter a Key name. This value is the name of the tag created in your cloud environment.
From the Attribute dropdown menu, select an attribute under the IdP platform to which the key name is associated.
Apono will use the value associated with the key (tag) to identify the resource owner. When you update the membership of the group or role in your IdP platform, this change is also reflected in Apono.
NOTE: When this setting is defined, an Integration Owner must also be defined.
|
1. Click Confirm.
After connecting your AWS account to Apono, you will be redirected to the Connected tab to view your integrations. The new AWS integration will initialize once it completes its first data fetch and will be marked Active upon completion.
Now that you have completed this integration, you can create access flows that grant permission to AWS IAM resources, such as AWS Roles.
# Updating a connector in AWS
Learn how to update a connector through the AWS CLI
Periodically, you may need to update your AWS connector to help maintain functionality, performance, and security.
This article explains how to update a connector through the AWS Management Console or AWS CLI and redeploy the CloudFormation stack with the latest connector template.
***
### Prerequisites
Item
Description
AWS Stack Name
In AWS CloudFormation, name of a collection of AWS resources managed as a single unit
Use the following steps to retrieve the stack name:
(CLI updates only) Open-source tool enabling interaction with AWS services using your command-line shell
AWS Permissions
Permissions enabling the ability to update the CloudFormation stack
***
### Update a connector
{% hint style="warning" %}
If you're updating an Organization-level connector, follow these steps for connectors installed in the Management account.
If updating a connector with [assumable permissions to the Management account](https://docs.apono.io/docs/aws-environment/apono-connector-for-aws#connector-with-assumable-permissions-to-the-aws-management-account), reach out to your Apono Customer Success representative.
{% endhint %}
#### AWS Management Console
Follow these steps to update the connector directly from the AWS CloudFormation console:
1. [Directly update the stack](https://docs.aws.amazon.com/AWSCloudFormation/latest/UserGuide/using-cfn-updating-stacks-direct.html) where the Apono connector is running.
2. When you replace the existing template, specify the template location for your connector type.
#### AWS CLI
Follow these steps to update a connector:
1. Copy the following Account level or Organization level AWS update script. Be sure to replace `AWS_STACK_NAME` with your AWS stack name.
{% tabs %}
{% tab title="Account Level" %}
{% code overflow="wrap" %}
```sh
aws cloudformation update-stack --stack-name AWS_STACK_NAME \
--template-url https://apono-public.s3.amazonaws.com/cloudformation/aws_integration_with_connector_template.yml \
--parameters ParameterKey=AponoConnectorId,UsePreviousValue=true \
ParameterKey=AponoConnectorToken,UsePreviousValue=true \
ParameterKey=ExternalID,UsePreviousValue=true \
ParameterKey=SubnetIDs,UsePreviousValue=true \
ParameterKey=VpcId,UsePreviousValue=true \
ParameterKey=S3AWSLogsScanning,ParameterValue=Enabled \
--capabilities CAPABILITY_NAMED_IAM
```
{% endcode %}
{% endtab %}
{% tab title="Organizational Level - Non-Dual Stack" %}
Use this command for an Organizational-level connector deployed directly in the AWS Management account.
{% code overflow="wrap" %}
```sh
aws cloudformation update-stack --stack-name AWS_STACK_NAME \
--template-url https://apono-public.s3.amazonaws.com/cloudformation/aws_organization_integration_template.yml \
--parameters ParameterKey=AponoConnectorId,UsePreviousValue=true \
ParameterKey=AponoConnectorToken,UsePreviousValue=true \
ParameterKey=AssignPublicIp,UsePreviousValue=true \
ParameterKey=ExternalID,UsePreviousValue=true \
ParameterKey=OrganizationalUnitId,UsePreviousValue=true \
ParameterKey=OrganizationId,UsePreviousValue=true \
ParameterKey=SubnetIDs,UsePreviousValue=true \
ParameterKey=VpcId,UsePreviousValue=true \
ParameterKey=Permissions,UsePreviousValue=true \
ParameterKey=EnableResourceExplorerDiscovery,UsePreviousValue=true \
ParameterKey=StackSetFailureTolerancePercentage,UsePreviousValue=true \
ParameterKey=S3AWSLogsScanning,ParameterValue=Enabled \
--capabilities CAPABILITY_NAMED_IAM
```
{% endcode %}
{% endtab %}
{% tab title="Organizational Level - Dual Stack" %}
Use this command for the Management-account stack of a dual-stack Organizational-level connector.
{% code overflow="wrap" expandable="true" %}
```shellscript
aws cloudformation update-stack --stack-name AWS_STACK_NAME \
--template-url https://apono-public.s3.amazonaws.com/cloudformation/aws_organization_roles_only_integration_template.yml \
--parameters ParameterKey=AponoConnectorId,UsePreviousValue=true \
ParameterKey=AponoConnectorToken,UsePreviousValue=true \
ParameterKey=AssignPublicIp,UsePreviousValue=true \
ParameterKey=ExternalID,UsePreviousValue=true \
ParameterKey=OrganizationalUnitId,UsePreviousValue=true \
ParameterKey=OrganizationId,UsePreviousValue=true \
ParameterKey=SubnetIDs,UsePreviousValue=true \
ParameterKey=VpcId,UsePreviousValue=true \
ParameterKey=Permissions,UsePreviousValue=true \
ParameterKey=EnableResourceExplorerDiscovery,UsePreviousValue=true \
ParameterKey=StackSetFailureTolerancePercentage,UsePreviousValue=true \
ParameterKey=S3AWSLogsScanning,ParameterValue=Enabled \
--capabilities CAPABILITY_NAMED_IAM
```
{% endcode %}
{% endtab %}
{% endtabs %}
{% hint style="info" %}
If you have not defined a default region and [default profile](https://docs.aws.amazon.com/cli/latest/userguide/cli-configure-files.html), you must specify the region and profile in the script:
```shell
--profile AWS_PROFILE --region AWS_SERVER_REGION
```
Be sure to replace `AWS_PROFILE` and `AWS_SERVER_REGION` with your profile and region values.
{% endhint %}
2. At your AWS CLI prompt, enter the updated script from the previous step to initiate the update. The AWS CLI will return an object containing the `StackId`.
3. In CloudFormation, on the **Stack Info** tab, confirm that the update has completed:
1. Go to the [Stacks](https://console.aws.amazon.com/cloudformation/home/stacks) page. A list of the stacks in the account are displayed.
2. Under the **Stack name** column, click the stack name.
3. On the **Stack info** tab, check the **Status**.
***
### Troubleshooting
This section details common errors that can occur during the updating process. If an error occurs that is not listed below, please contact your Apono representative.
An error occurred (ValidationError) when calling the UpdateStack operation: Stack [stack name] does not exist.
This occurs when the incorrect stack name has been included in the update script.
Use the following steps to correct this error:
1. Locate and copy the stack name under the **Stack name** column of the [**Stacks**](https://console.aws.amazon.com/cloudformation/home/stacks) page.
2. Repeat the [update process](#update-a-connector).
# AWS Integrations
If your organization uses Amazon Web Services (AWS) as a cloud platform, Apono's AWS integrations can help you securely manage access to your AWS cloud-based services and databases.
AWS logo
By identifying and transforming existing privileges, Apono can shift your cloud management from broad permissions to on-demand access flows.
Through our AWS integrations, Apono enables you to perform the following access tasks:
* **Limit Access:** Discover existing cloud privileges and convert them to just-in-time access flows.
* **Enable Self-Service Access:** Allow developers to request access to AWS services, buckets, and instances via Slack.
* **Automate Approval Workflows:** Create automatic approval processes for sensitive AWS resources.
* **Restrict Third-Party Access:** Grant third-parties (customers or vendors) time-based access to specific S3 buckets, RDS, or EC2 instances with MFA verification.
* **Review Access:** Audit user cloud access, permissions granted, and reasons for access across AWS.
# Integrate with AWS
Integrate AWS with Apono to manage access to your S3 buckets, IAM roles and groups, EC2, EKS clusters, RDS instances and many more
## Integrate with AWS
### Overview
* \*\* Reduce Over Privileges \*\*- Discover existing privileges to AWS roles, groups and services to convert to on-demand access flows to reduce over-privileges.
* \*\*Self Service Access \*\*- Empower your developers to gain self-servable access to AWS services, buckets, instances and more using Slack.
* \*\*Automated Approval Workflows \*\*- Create approval workflows to specific sensitive resources.
* \*\*Restricted Third Party Access \*\*- Grant third-party (customer or vendor) time-based access to specific S3 buckets, RDS or EC2 instances with MFA verification.
* **Review Access** - View a detailed access audit of who was granted access to which specific instances, buckets or other resources in AWS.
{% hint style="success" %}
Start Here
Great place to start! Follow these steps to integrating an AWS cloud account.
{% endhint %}
### Prerequisites
* Administrator permissions of the account you would like to connect.
### Connect an AWS Account
## In Apono
1. From the [Integration Catalog](https://app.apono.io/catalog), select **Connect Your AWS Account**
2. When clicking **Open Cloud Formation**, you will be redirected to the AWS sign in page in a new tab.
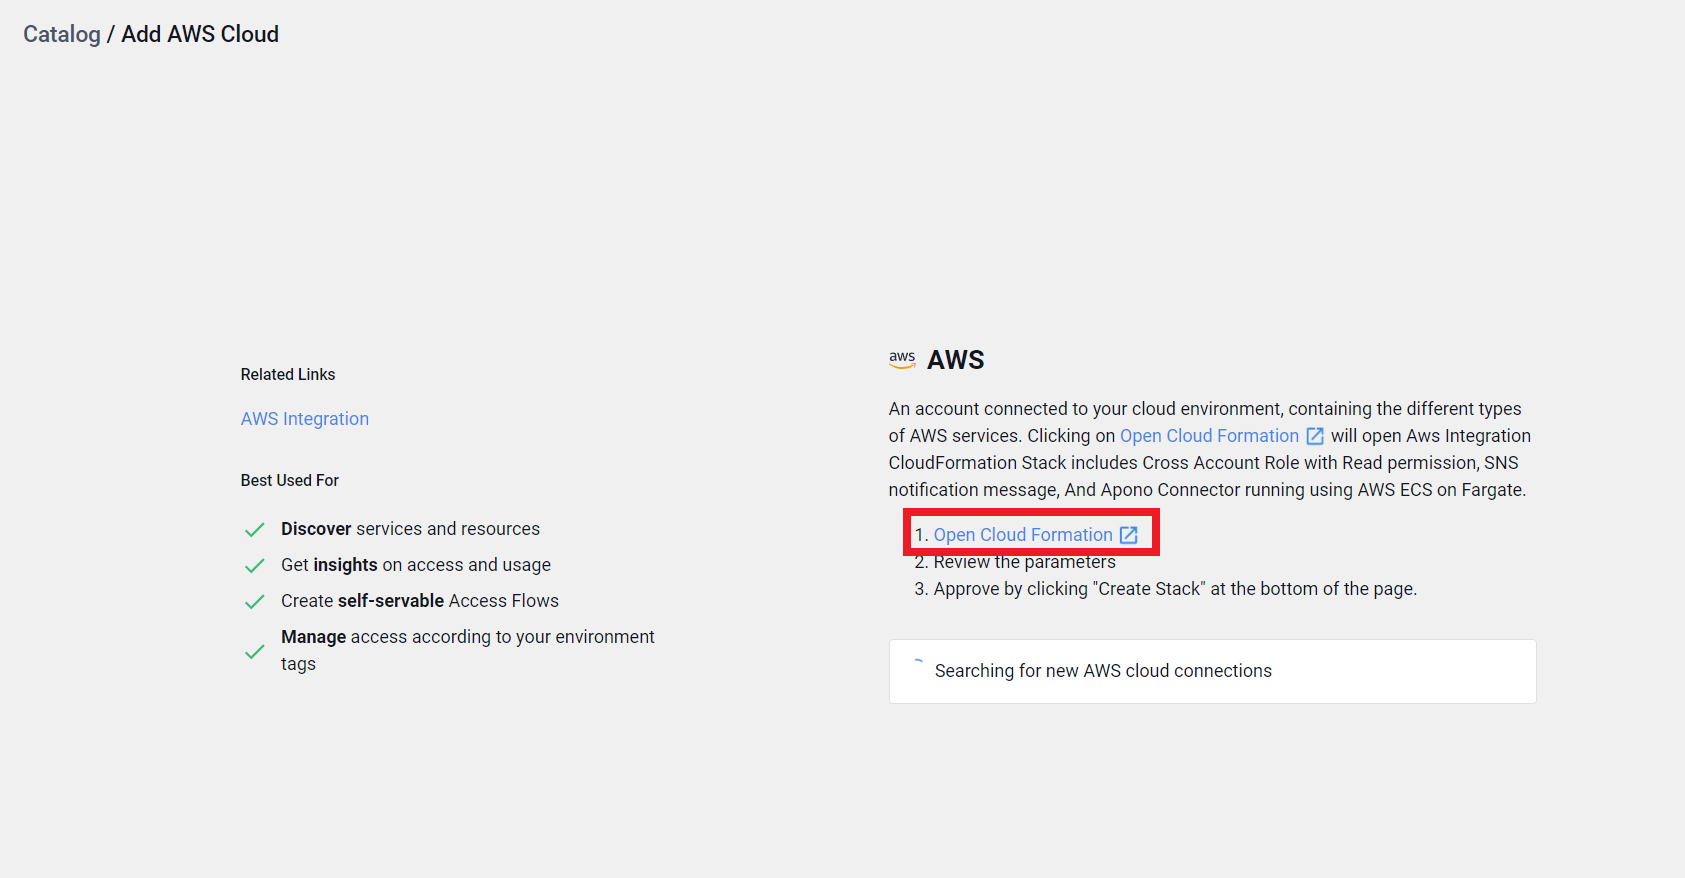
### In AWS
1. Sign in to your AWS user and click **Next**
2. Within the AWS create stack page, scroll down, tick the acknowledge box and then select **Create Stack**
*Apono integrates with AWS natively, using AWS CloudFormation as a standard mechanism to deploy all required configurations including a Cross Account Role with Read permission, a SNS notification message, and the Apono Connector that runs using an AWS ECS on Fargate.*
### Back to Apono
3. Validate you've integrated Apono by seeing the integration is active and synced [here](https://app.apono.io/catalog/connected?categories=Amazon+Web+Services).
{% hint style="success" %}
Hurray!
You've successfully integrated AWS with Apono. You can now create <\>s to AWS IAM resources like AWS Roles.
{% endhint %}
4. If you would like to use Apono to create Access Flows with resources like to S3 buckets, RDS databases or other AWS services you can easily connect them to Apono as well. Just select them from the [Integration Catalog](https://app.apono.io/catalog).
# Integrate an AWS Account or Organization
Learn how to complete an AWS integration in the Apono UI
Apono offers AWS users a simple way to centralize cloud management through our platform. Through a single integration, you can manage multiple AWS services across various Accounts and Organizations.
***
### Integrate an AWS Account
#### Prerequisites
* [Apono connector](/docs/aws-environment/apono-connector-for-aws#aws-account-connector) installed in your AWS Account
* To sync and manage access to EC2 servers, make sure you add the `AmazonSSMManagedInstanceCore` policy to the connector's IAM role
#### Integration
Integrating an AWS Account
{% hint style="success" %}
You can also use the steps below to integrate with Apono using Terraform.
In step **11**, instead of clicking **Confirm**, follow the **Are you integrating with Apono using Terraform?** guidance.
{% endhint %}
Follow these steps to integrate Apono with your AWS Account:
1. On the [**Catalog**](https://app.apono.io/catalog?search=aws) tab, click **AWS**. The **Connect Integrations Group** page appears.
2. Under **Discovery**, click **Amazon Account**.
3. Click one or more resource types to sync with Apono.
{% hint style="info" %}
Apono automatically discovers and syncs all the instances in the environment. After syncing, you can manage **Access Flows** to these resources.
{% endhint %}
4. Click **Next**. The **Apono connector** section expands.
5. From the dropdown menu, select a connector. Choosing a connector links Apono to all the services available on the account where the connector is located.
{% hint style="info" %}
If the desired connector is not listed, click **+ Add new connector** and follow the instructions for creating an [Apono connector](/docs/aws-environment/apono-connector-for-aws#aws-account-connector).
{% endhint %}
6. Click **Next**. The **Integration Config** section expands.
7. Define the **Integration Config** settings.
Setting
Description
Integration Name
Unique, alphanumeric, user-friendly name used to identify this integration when constructing an access flow
Region
Region in which the organization runs
AWS Profile Name
(Optional) Name of the AWS profile
By default, Apono sets this value to apono.
8. Click **Next**. The **Get more with Apono** section expands.
9. Define the **Get more with Apono** settings.
Setting
Description
Credential Rotation
(Optional) Number of days after which the database credentials must be rotated
(Optional) Instructions explaining how to access this integration's resources
Upon accessing an integration, a message with these instructions will be displayed to end users in the User Portal. The message may include up to 400 characters.
To view the message as it appears to end users, click Preview.
Integration Owner
(Optional) Fallback approver if no resource owner is found
Follow these steps to define one or several integration owners:
From the Attribute dropdown menu, select User or Group under the relevant identity provider (IdP) platform.
From the Value dropdown menu, select one or multiple users or groups.
NOTE: When Resource Owner is defined, an Integration Owner must be defined.
Resource Owner
(Optional) Group or role responsible for managing access approvals or rejections for the resource
Follow these steps to define one or several resource owners:
Enter a Key name. This value is the name of the tag created in your cloud environment.
From the Attribute dropdown menu, select an attribute under the IdP platform to which the key name is associated.
Apono will use the value associated with the key (tag) to identify the resource owner. When you update the membership of the group or role in your IdP platform, this change is also reflected in Apono.
NOTE: When this setting is defined, an Integration Owner must also be defined.
10. (Recommended) Click **Test Integration** to validate the integration.
{% hint style="info" %}
**Test Integration** is available after you have entered or selected values for all required integration fields.
During the test, Apono runs the following validation checks:
* **Connectivity:** The connector can reach the integration.
* **Configuration:** The integration is set up correctly.
* **Authentication:** The credentials are valid.
* **Discovery:** Resources can be fetched.
The **Test Validation** checklist shows the result of each check.
If a check fails, Apono identifies the failed check and highlights the fields that need correction.
{% endhint %}
11. Click **Confirm**.
💡Are you integrating with Apono using Terraform?
If you want to integrate with Apono using Terraform, follow these steps instead of clicking **Confirm**:
1. At the top of the screen, click **View as Code**. A modal appears with the completed Terraform configuration code.
2. Click to copy the code.
3. Make any additional edits.
4. Deploy the code in your Terraform.
Refer to [Integration Config Metadata](https://docs.apono.io/metadata-for-integration-config) for more details about the schema definition.
After connecting your AWS account to Apono, you will be redirected to the **Connected** tab to view your integrations. The new AWS integration will initialize once it completes its first data fetch. Upon completion, the integration will be marked **Active**.
Now that you have completed this integration, you can [create access flows](/docs/access-flows/access-flows) that grant permission to AWS IAM resources, such as AWS Roles.
***
### Integrate an AWS Organization
You can integrate with Apono to manage resources across your Organization.
#### Prerequisite
Item
Description
Apono Connector
On-prem connection serving as a bridge between AWS and Apono
To manage EKS Namespaces or Groups, you must have one or moreaccess entries for the Apono connector to discover your clusters or namespaces. See the connector’s prerequisites for more information.
To manage access to EC2 servers, you must add the AmazonSSMManagedInstanceCore policy to the connector's IAM role.
#### Integration
Integrating an AWS Organization
{% hint style="success" %}
You can also use the steps below to integrate with Apono using Terraform.
In step **11**, instead of clicking **Confirm**, follow the **Are you integrating with Apono using Terraform?** guidance.
{% endhint %}
Follow these steps to integrate Apono with your AWS Organization:
1. On the [**Catalog**](https://app.apono.io/catalog?search=aws) tab, click **AWS**. The **Connect Integrations Group** page appears.
2. Under **Discovery**, click **Amazon Organization**.
3. Click one or more resource types to sync with Apono.
{% hint style="info" %}
Apono automatically discovers and syncs all the instances in the environment. After syncing, you can manage access flows to these resources.
{% endhint %}
4. Select the **Permission Boundary** resource to allow Apono to temporarily restrict overprivileged access.
{% hint style="success" %}
To learn more about how to manage overprivileged access, read about [Access Discovery](/docs/getting-started/access-discovery).
{% endhint %}
5. Click **Next**. The **Apono connector** section expands.
6. From the dropdown menu, select a connector. Choosing a connector links Apono to all the services available on the account where the connector is located.
{% hint style="info" %}
If the desired connector is not listed, click **+ Add new connector** and follow the instructions for creating an [Apono connector](/docs/aws-environment/apono-connector-for-aws#aws-organization-connector-on-the-management-account).
{% endhint %}
6. Click **Next**. The **Integration Config** section expands.
7. Define the **Integration Config** settings.
Setting
Description
Integration Name
Unique, alphanumeric, user-friendly name used to identify this integration when constructing an access flow
Region
Region in which the organization runs
AWS SSO Region
Region for which your single sign-on is configured
8. Click **Next**. The **Get more with Apono** section expands.
9. Define the **Get more with Apono** settings.
Setting
Description
Custom Access Details
(Optional) Instructions explaining how to access this integration's resources
Upon accessing an integration, a message with these instructions will be displayed to end users in the User Portal. The message may include up to 400 characters.
To view the message as it appears to end users, click Preview.
Integration Owner
(Optional) Fallback approver if no resource owner is found
Follow these steps to define one or several integration owners:
From the Attribute dropdown menu, select User or Group under the relevant identity provider (IdP) platform.
From the Value dropdown menu, select one or multiple users or groups.
NOTE: When Resource Owner is defined, an Integration Owner must be defined.
Resource Owner
(Optional) Group or role responsible for managing access approvals or rejections for the resource
Follow these steps to define one or several resource owners:
Enter a Key name. This value is the name of the tag created in your cloud environment.
From the Attribute dropdown menu, select an attribute under the IdP platform to which the key name is associated.
Apono will use the value associated with the key (tag) to identify the resource owner. When you update the membership of the group or role in your IdP platform, this change is also reflected in Apono.
NOTE: When this setting is defined, an Integration Owner must also be defined.
10. (Recommended) Click **Test Integration** to validate the integration.
{% hint style="info" %}
**Test Integration** is available after you have entered or selected values for all required integration fields.
During the test, Apono runs the following validation checks:
* **Connectivity:** The connector can reach the integration.
* **Configuration:** The integration is set up correctly.
* **Authentication:** The credentials are valid.
* **Discovery:** Resources can be fetched.
The **Test Validation** checklist shows the result of each check.
If a check fails, Apono identifies the failed check and highlights the fields that need correction.
{% endhint %}
11. Click **Confirm**.
💡Are you integrating with Apono using Terraform?
If you want to integrate with Apono using Terraform, follow these steps instead of clicking **Confirm**:
1. At the top of the screen, click **View as Code**. A modal appears with the completed Terraform configuration code.
2. Click to copy the code.
3. Make any additional edits.
4. Deploy the code in your Terraform.
Refer to [Integration Config Metadata](https://docs.apono.io/metadata-for-integration-config/integration-metadata/aws-organization) for more details about the schema definition.
After connecting your AWS account to Apono, you will be redirected to the **Connected** tab to view your integrations. The new AWS integration will initialize once it completes its first data fetch. Upon completion, the integration will be marked **Active**.
### Enable multi-region resource discovery in Apono
Apono leverages AWS Resource Explorer for multi-region scans for your AWS Organization integration. Apono uses this organization-level configuration to automatically deploy local indexes and aggregate them into a single searchable view.
This configuration provides:
* A centralized aggregator index for organization-wide search
* Automated creation and maintenance of local indexes
* Consistent visibility across teams, regions, and environments
* Less manual setup and fewer cross-account visibility gaps
**Prerequisites**
SCPs must not deny CloudFormation in any target account or region:
SCPs must not explicitly deny:
cloudformation:CreateStack
cloudformation:UpdateStack
cloudformation:*
Region-restriction SCPs (aws:RequestedRegion) must adhere to one of the following:
Include all required regions in the allowlist.
Explicitly exempt CloudFormation from an explicit denial by adding cloudformation:* to NotAction.
IMPORTANT: Failure to adhere to these SCP requirements will prevent Quick Setup from successfully deploying in regions where the SCP has denied CloudFormation.
**Enable trusted access for Resource Explorer**
Follow these steps to enable trusted access:
1. From theyour Management account, open **AWS Resource Explorer**.
2. From the navigation, click **Settings**. The **Settings** page appears.
3. In the multi-account/organization section, follow the prompt to **Enable trusted access**.
{% hint style="success" %}
You can also enable trusted access from AWS Organizations.
Follow these steps:
1. From your Management account, open **AWS Organizations**.
2. From the navigation, click **Services**. The **Services** page appears.
3. Click **AWS Resource Explorer**. The **AWS Resource Explorer** page opens.
4. If **Trusted access** is disabled, click **Enable trusted access**. The **Enable trusted access for AWS Resource Explorer** pop-up window appears.
5. Click **Show the option to enable trusted access for AWS Resource Explorer without performing additional setup tasks**.
6. Type *enable* in the text field.
7. Click **Enable trusted access**.
{% endhint %}
**Configure the organization deployment**
Follow these steps to configure the organization deployment:
1. Open the Quick Setup from the Systems manager or Resource Explorer.
Systems Manager
1. Open **AWS Systems Manager**.
2. From the navigation, click **Change Management Tools > Quick Setup.** The **AWS Quick Setup** page opens.
3. Click **Get started**. The **Library** tab opens.
4. On the **Resource Explorer** card, click **Create**. The **Configure Resource Explorer for your Organization** page opens.
Resource Explorer
1. Open **AWS Resource Explorer**.
2. From the navigation, click **Settings**. The **Settings** page opens.
3. Under **Multi-account search in Resource Explorer**, click **Create configuration on Quick Setup**. The **Configure Resource Explorer for your Organization** page opens.
2. Select the **Aggregator Index Region**. This region becomes the central location for organization-wide search.
3. Under **Targets**, select the accounts that include the resources you want discovered:
* **Entire Organization**: (Recommended) Enables complete visibility
* **Specific OUs**: Enables scoping deployment
4. From the regions selector, choose all regions where Resource Explorer should create indexes.
{% hint style="info" %}
If a regions selector is not present, all supported regions for the selected targets may be implicitly included.
{% endhint %}
5. Under **Summary**, review the aggregator region, targets, and regions.
6. Select **Create**. The Quick Setup will deploy the following:
* Local indexes in each selected region or account
* An aggregator index in the Aggregator Region
* Default views for centralized search
**Verify the deployment**
After the deployment has completed, follow these steps to verify the deployment:
1. From the Management account, open **AWS Resource Explorer**.
2. From the navigation, click **Settings**. The **Settings** page opens.
3. Under **Indexes**, locate the region set as the aggregator index during the Quick Setup. The region should be denoted as **Aggregator**.
4. Spot check a member account:
1. Log in as or assume the role of a sample member account.
2. Open **AWS Resource Explorer** in one region that should have an index to ensure an index exists and is Active.
3. Open AWS Resource Explorer in one region that should not have an index to confirm an index does not exist.
{% hint style="info" %}
If some regions or accounts are missing the index, read [The index is missing in some regions or accounts.](#the-index-is-missing-in-some-regions-or-accounts)
{% endhint %}
**Troubleshoot Quick Setup**
Quick Setup fails in some regions.
**Symptoms**
* Quick Setup shows **Failed** for some configs.
* Error text mentions `cloudformation:CreateStack` (or similar) and an explicit denial in a service control policy.
**Likely Cause**
A Service Control Policy denies CloudFormation in some regions, often with `aws:RequestedRegion`. This results in regions that are allowed by SCP to be successful. And all other regions fail.
**Solution**
Follow these steps:
1. From the Admin account, open **AWS Organizations**.
2. From the navigation, click **Policies**. The **Policies** page opens.
3. Under **Service control policies**, examine SCPs attached to the affected organizational unit or account for `"Effect": "Deny"` statements that mention `cloudformation:*` or specific Cloudformation actions.
4. Fix the issues through one of the following options:
1. Add the required regions to the allowlist in `aws:RequestedRegion`.
2. Exclude CloudFormation from the deny list. For example, add `cloudformation:*` to `NotAction`.
3. Temporarily relax or detach the SCP, re-run Quick Setup, then restore the SCP.
The index is missing in some regions or accounts.
**Symptoms**
* Some accounts or regions have no index.
* Quick Setup shows partial success.
**Possible Causes**
* The region was not included in the Quick Setup region selection.
* The account or organizational unit was not part of the Quick Setup target scope.
* CloudFormation has been denied by SCP in that region.
**Solution**
Follow these steps:
1. Review the **Targets** and **Regions** (if applicable) selected when you [configured the organization deployment](#configure-the-organization-deployment).
2. [Check the SCP](#quick-setup-fails-in-some-regions) for the relevant accounts or regions.
{% hint style="success" %}
If CloudFormation must stay blocked, you can manually create indexes.
{% endhint %}
The aggregator index is missing from the Management account.
**Symptoms**
* In the Management account, in the chosen **Aggregator Region**:
* The index exists but is not marked as **Aggregator**.
* The index does not exist.
* The organization-wide view does not show everything.
**Possible Causes**
* The Management account is not in one of the Quick Setup targets, such as the selected organizational unit.
* AWS created aggregator indexes only in member accounts based on your config.
* The index was manually created as **Local**, not **Aggregator**.
**Solution**
Follow these steps:
1. In the Management account, in the **Aggregator Region**, ensure an index exists.
2. In the console, change the index to **Aggregator**.
{% hint style="success" %}
If the index cannot be changed to **Aggregator**, manually recreate the index as an **Aggregator**.
{% endhint %}
3. Create the organization-wide view in the specific account or region.
The view that was created in Resource Explorer is empty.
After enabling Resource Explorer, it can take up to 36 hours for all supported resources across all regions to be fully indexed. Read more [here](https://docs.aws.amazon.com/resource-explorer/latest/userguide/troubleshooting_search.html).
Now that you have completed this integration, you can [create access flows](/docs/access-flows/access-flows) that grant permission to AWS IAM resources, such as AWS Roles.
***
### Troubleshooting
Please refer to our [troubleshooting guide](https://docs.apono.io/docs/troubleshooting-errors) if you encounter errors while integrating.
# Auto Discover AWS RDS Instances
Automatically identify AWS RDS instances in an Account or Organization for JIT access management
Apono’s Auto Discovery feature identifies tagged AWS RDS instances, including MySQL and PostgreSQL. Rather than integrating each instance individually, you can integrate selected databases and their resources at once during your AWS Account or Organization setup.
{% hint style="warning" %}
This capability requires network access to each discoverable database. If your databases are in different AWS networks, make sure to create an AWS connector for each network.
{% endhint %}
***
### Prerequisites
Permissions to complete the following tasks in your AWS instance:
Create and manage AWS Secrets Store secrets
Tag RDS instances
***
### Enable Auto Discovery
Follow these steps to enable Auto Discovery:
1. In your AWS RDS database instance, create a user for the Apono connector. As part of this step, you will also create a secret.
* [RDS PostgreSQL](/docs/aws-environment/aws-integrations/rds-postgresql#create-an-aws-rds-postgresql-user)
* [AWS RDS MySQL](/docs/aws-environment/aws-integrations/aws-rds-mysql#create-aws-rds-mysql-integration)
2. [Tag your database instance](https://docs.aws.amazon.com/AmazonRDS/latest/UserGuide/USER_Tagging.html#Tagging.HowTo) based on the authentication method you selected in the previous step. In the tables below, the values shown in *italics* are the exact text you should enter when adding these tags.
IAM Authentication
Tag Key
Value or Description
auth_type
iam-auth
apono-connector-id
ID of the Apono connector in the same AWS Account or AWS Organization as the database
Password Authentication
Tag Key
Value or Description
auth_type
user-password
apono-connector-id
ID of the Apono connector in the same AWS Account or AWS Organization as the database
apono-secret
ARN of the secret containing the database credentials
region
AWS region where the secret is stored
3. In the Apono UI, on the [**Catalog**](https://app.apono.io/catalog?search=aws) tab, click **AWS**. The **Connect Integrations Group** page appears.
4. Under **Discovery**, click **Amazon Account** or **Amazon Organization**.
5. Under **Connect Sub Integration**, select **Database**, **Table**, and **Role** to control the granularity of discovery in each discovered instance.
AWS RDS MySQL under Connect Sub Integration
6. Complete the [Amazon Account](/docs/aws-environment/aws-integrations/integrate-an-aws-account-or-organization#integration) or [Amazon Organization](/docs/aws-environment/aws-integrations/integrate-an-aws-account-or-organization#integration-1) integration (steps **3-10**).
After connecting your AWS Account or AWS Organization to Apono, you will be redirected to the **Connected** tab to view your integrations. The new AWS integration, along with sub-integrations for each RDS instance, initialize during the first data fetch. The integration becomes **Active** once the process completes.
Now that you have completed this integration, you can [create access flows](/docs/access-flows/access-flows) that grant permission to your AWS RDS resources.
***
### Troubleshooting
If RDS instances appear with errors on your **Integrations** page, follow these steps:
1. **Check Tags**: Verify all required tags are present and correctly formatted.
2. **Connector Permissions**: Ensure the Apono connector has necessary permissions to read tags and access secrets.
3. **Network connectivity**: Ensure each RDS instance is accessible by an Apono connector within the same network.
{% hint style="success" %}
For any questions about the discovery process, please contact Apono Support.
{% endhint %}
# AWS Best Practices
Scale AWS resource management in access flows
When granting AWS access permissions, listing individual ARNs in IAM policies can quickly cause you to exceed [AWS's inline policy character limit](https://docs.aws.amazon.com/IAM/latest/UserGuide/reference_iam-quotas.html#reference_iam-quotas-entity-length). Apono solves this through [access scopes](/docs/inventory/access-scopes) and the [Apono Query Language (AQL)](/docs/inventory/apono-query-language). These solutions use regex patterns to efficiently manage resource groups instead of listing individual ARNs.
For additional protection, Apono has implemented a **100-resource threshold** as a guardrail when individual ARN specification is needed.
The following sections explain how Apono prevents you from exceeding AWS's inline policy limit:
* Create strategic AWS resource groupings for access flows
* Understand how Apono provides clear warnings when the AWS policy limit is exceeded
* Learn how Apono maintains consistent behavior whether your team uses Portal, Teams, or Slack
For example, instead of individually specifying 200 S3 buckets in a policy (which would exceed AWS's limit), you can use resource tags to group them by environment or function.
{% hint style="info" %}
Apono validates for the following types of AWS resources:
* ASM Secret
* DynamoDB table
* EC2 Connect
* EC2 Manage
* S3 Bucket (by "any resource" and region tags)
* SNS Topic
* SQS queue
{% endhint %}
***
### Prerequisite
Item
Description
Apono Connector
On-prem connection serving as a bridge between an AWS instance and Apono
***
### Admin Guidance
When defining access flows that include AWS resources, your resource definition strategy directly impacts policy management.
#### Questions
Before selecting AWS resources for an access flow, consider the following questions:
* Can all resources of an integration be selected?
* Have tags been applied to logically group resources by environment, function, or team?
* Can an [access scope](/docs/inventory/access-scopes) be created to group resources across multiple AWS integrations?
* Is individual resource selection truly necessary for security requirements?
#### Resource Definition Strategies
To effectively manage AWS permissions while avoiding policy character limits, you can use access scopes, integrations, or bundles. **When possible, we strongly recommend using access scopes or AQL.**
The following table explains the strategy for each approach.
Type
Strategy
Access Scopes
(Strongly Recommended, All Access Flows) Use when you need dynamic, rule-based resource grouping
Access scopes and AQL let you create flexible filters that adapt to your changing infrastructure. This makes them ideal for scenarios like all production databases or EC2 instances in the eu-region.
Integrations
(Automatic Access Flow) Use when providing access to an entire AWS account or organization, or to resources that share specific tags
Integrations let you align permissions with your organization structure:
Use tags in your cloud environment to group resources, such as production, eu-region, customer-support.
Apply Any resources when all resources of the integration can be included.
This strategy is ideal for scenarios like managing cross-account DevOps access or regional support team permissions.
Use tags in your cloud environment to group resources, such as production, eu-region, customer-support.
Apply Any resources when all resources of the integration can be included.
This strategy is ideal for scenarios like complete development environment access or full analytics platform access.
#### Apono Safeguard
If you select too many AWS resources for an access flow, the Apono UI will display a warning message instructing you to reduce the number of selected resources.
Warning message
Access Flow
Conditions
Automatic
You have selected more than 100 AWS resources by name (Select by name) from one integration or between multiple integrations.
You have selected more than 100 AWS resources by name (Select by name) within one bundle or between multiple bundles.
Self Serve
You have selected more than 100 AWS resources within one bundle or between multiple bundles.
***
### Requestor Guidance
When requesting access to many AWS resources, Apono will warn you if you have selected too many AWS resources.
Warning message
You will receive different notifications about AWS resource limits depending on which platform you use to submit your access request:
* **Portal & Teams**: Apono displays a warning before submission when you click Request, preventing requests that exceed the limit.
{% hint style="info" %}
In some cases, the request might pass initial validation but still trigger a post-submission notification to select fewer resources.
{% endhint %}
* **Slack**: Apono processes your request first, then sends a message if you need to resubmit with fewer resources.
#### Known Limitations While Building Access Flows, Bundles, and Access Scopes
The following configurations within access flows or when bundling multiple resources will exceed AWS policy size constraints.
* **Specifying resources by name or ID:** Selecting specific resource names or IDs one by one.
* **S3 buckets**: as AWS does not support tagging buckets, it should be handled with region tags or through access scopes or AQL patterns where possible.
* **Excluding a list of resource names or ID**: choosing a list of resources to exclude can similarly inflate policy size and is best handled through access scopes or AQL patterns where possible.
# S3 Storage
Amazon S3 (Simple Storage Service) object storage integration with Apono, enables Apono granular permission provisioning
This guide has been moved. Please visit [this guide](/docs/aws-environment/aws-integrations/integrate-an-aws-account-or-organization) instead
### KMS-encrypted buckets
If your organization encrypts S3 Buckets with Customer Managed Keys (or KMS kets), users need access to the key to be able to decrypt the data when they gain JIT access to a bucket.
Apono supports this use case by granting access to both the bucket and the key when users request access. If S3 Buckets have KMS keys in their metadata, when users request access to S3 Buckets, they also gain access to the KMS key without having to create an extra request.
# Amazon Redshift
Integrate with Apono to view existing permissions and create Access Flows to Amazon Redshift clusters
Amazon Redshift is a fast, scalable, and secure fully managed data warehouse service in the cloud, serving as a primary data store for vast datasets and analytic workloads. Amazon Web Services (AWS) enables businesses to analyze their data using standard SQL and existing business intelligence tools, promoting insightful decision-making and integration with various AWS services.
Through this integration, Apono helps you securely manage access to your Amazon Redshift instance.
***
### Prerequisites
Item
Description
Apono Connector
On-prem connection serving as a bridge between an Amazon Redshift instance and Apono
Apono does not store credentials. The Apono Connector uses the secret to communicate with services in your environment and separate the Apono web app from the environment for maximalsecurity.
User
Redshift user for Apono with the CREATEUSER permission
CREATE USER apono_connector WITH PASSWORD 'password';
ALTER USER apono_connector WITH CREATEUSER;
Amazon Redshift Info
Information for the Amazon Redshift instance to be integrated:
Hostname
Port Number
***
### Integrate Amazon Redshift
Amazon Redshift tile
{% hint style="success" %}
You can also use the steps below to integrate with Apono using Terraform.
In step **11**, instead of clicking **Confirm**, follow the **Are you integrating with Apono using Terraform?** guidance.
{% endhint %}
Follow these steps to complete the integration:
1. On the [**Catalog**](https://app.apono.io/catalog?search=redshift) tab, click **Amazon Redshift**. The **Connect Integration** page appears.
2. Under **Discovery**, click **Next**. The **Apono connector** section expands.
3. From the dropdown menu, select a connector. Choosing a connector links Apono to all the services available on the account where the connector is located.
{% hint style="info" %}
If the desired connector is not listed, click **+ Add new connector** and follow the instructions for creating an [Apono connector](/docs/aws-environment/apono-connector-for-aws).
{% endhint %}
4. Click **Next**. The **Integration Config** section expands.
5. Define the **Integration Config** settings.
Setting
Description
Integration Name
Unique, alphanumeric, user-friendly name used to identify this integration when constructing an access flow
Hostname
Hostname of the Amazon Redshift instance to connect
Port
Port value for the instance
By default, Apono sets this value to 5439.
Database Name
Name of the database
6. Click **Next**. The **Secret Store** section expands.
7. [Associate the secret or credentials](/docs/connectors-and-secrets/apono-integration-secret).
8. Click **Next**. The **Get more with Apono** section expands.
9. Define the **Get more with Apono** settings.
Setting
Description
Credential Rotation
(Optional) Number of days after which the database credentials must be rotated
(Optional) Instructions explaining how to access this integration's resources
Upon accessing an integration, a message with these instructions will be displayed to end users in the User Portal. The message may include up to 400 characters.
To view the message as it appears to end users, click Preview.
Integration Owner
(Optional) Fallback approver if no resource owner is found
Follow these steps to define one or several integration owners:
From the Attribute dropdown menu, select User or Group under the relevant identity provider (IdP) platform.
From the Value dropdown menu, select one or multiple users or groups.
NOTE: When Resource Owner is defined, an Integration Owner must be defined.
Resource Owner
(Optional) Group or role responsible for managing access approvals or rejections for the resource
Follow these steps to define one or several resource owners:
Enter a Key name. This value is the name of the tag created in your cloud environment.
From the Attribute dropdown menu, select an attribute under the IdP platform to which the key name is associated.
Apono will use the value associated with the key (tag) to identify the resource owner. When you update the membership of the group or role in your IdP platform, this change is also reflected in Apono.
NOTE: When this setting is defined, an Integration Owner must also be defined.
10. (Recommended) Click **Test Integration** to validate the integration.
{% hint style="info" %}
**Test Integration** is available after you have entered or selected values for all required integration fields.
During the test, Apono runs the following validation checks:
* **Connectivity:** The connector can reach the integration.
* **Configuration:** The integration is set up correctly.
* **Authentication:** The credentials are valid.
* **Discovery:** Resources can be fetched.
The **Test Validation** checklist shows the result of each check.
If a check fails, Apono identifies the failed check and highlights the fields that need correction.
{% endhint %}
11. Click **Confirm**.
💡Are you integrating with Apono using Terraform?
If you want to integrate with Apono using Terraform, follow these steps instead of clicking **Confirm**:
1. At the top of the screen, click **View as Code**. A modal appears with the completed Terraform configuration code.
2. Click to copy the code.
3. Make any additional edits.
4. Deploy the code in your Terraform.
Refer to [Integration Config Metadata](https://docs.apono.io/metadata-for-integration-config/integration-metadata/redshift) for more details about the schema definition.
Now that you have completed this integration, you can [create access flows](/docs/access-flows/access-flows) that grant permission to your Amazon Redshift instance.
***
### Troubleshooting
Refer to [Troubleshooting Errors](/docs/help-and-debugging/troubleshooting-errors) for information about errors that may occur.
# RDS PostgreSQL
Integrate with AWS-managed PostgreSQL for JIT access management for RDS
PostgreSQL databases are open-source relational database management systems emphasizing extensibility and SQL compliance. AWS enables developers to create cloud-hosted PostgreSQL databases.
Through this integration, Apono helps you securely manage access to your AWS RDS for PostgreSQL instances.
***
## Prerequisites
Item
Description
Apono Connector
On-prem connection with network access to your AWS RDS for PostgreSQL instances
***
### Create an AWS RDS PostgreSQL user
You must create a user in your AWS RDS PostgreSQL instance for the Apono connector and grant that user permissions to your databases.
Follow these steps to create a user and grant it database permissions:
1. Create a new user with either Built-in authentication or IAM authentication.
{% hint style="warning" %}
You can use only one authentication option on the RDS instance at a time.
{% endhint %}
{% tabs %}
{% tab title="Built-in Authentication" %}
Built-in authentication identifies a user through a username and password.
```sql
CREATE USER apono_connector WITH PASSWORD 'secret_passwd';
```
Be sure to select a strong password for the user.
{% endtab %}
{% tab title="IAM authentication" %}
After [enabling IAM](https://docs.aws.amazon.com/AmazonRDS/latest/UserGuide/UsingWithRDS.IAMDBAuth.Enabling.html) on your RDS instance, create an `AWSAuthenticationPlugin` user for the Apono connector. `AWSAuthenticationPlugin` is an AWS-provided plugin that works seamlessly with IAM to authenticate your users.
To create the user, run the following commands from your Postgre client.
```sql
CREATE USER apono_connector;
GRANT rds_iam TO apono_connector;
```
{% endtab %}
{% endtabs %}
2. From your preferred client tool, grant `rds_superuser` access to the user.
```sql
ALTER USER apono_connector WITH CREATEROLE;
GRANT rds_superuser TO apono_connector;
```
Permission
Description
ALTER USER apono_connector WITH CREATEROLE;
Allows Apono connector to create, alter, and drop user roles
GRANT rds_superuser TO apono_connector;
Assigns the RDS superuser role to the Apono connector, providing comprehensive permissions for database management
3. (IAM authentication only) Create and attach the following IAM policy to your identity center permissions set or role.
```
{
"Version": "2012-10-17",
"Statement": [
{
"Effect": "Allow",
"Action": [
"rds-db:connect"
],
"Resource": [
"arn:aws:rds-db:*:*:dbuser:*/${SAML:sub}"
]
},
{
"Effect": "Allow",
"Action": [
"rds:DescribeDBInstances"
],
"Resource": [
"arn:aws:rds:*:*:db:*"
]
}
]
}
```
4. (Built-in authentication only) [Create an AWS secret](/docs/connectors-and-secrets/apono-integration-secret#aws) with the credentials from step **1**.
{% hint style="info" %}
When using IAM authentication, **a secret does not need to be created**.
The service account and its permissions are managed through IAM roles and policies. The service account is used to authenticate the PostgreSQL instance instead of a secret.
{% endhint %}
***
### Integrate Amazon RDS for PostgreSQL
AWS RDS PostgreSQL
{% hint style="success" %}
You can also use the steps below to integrate with Apono using Terraform.
In step **12**, instead of clicking **Confirm**, follow the **Are you integrating with Apono using Terraform?** guidance.
{% endhint %}
Follow these steps to complete the integration:
1. On the [**Catalog**](https://app.apono.io/catalog?search=aws+rds+postgresql) tab, click **AWS RDS PostgreSQL**. The **Connect Integration** page appears.
2. Under **Discovery**, click one or more resource types to sync with Apono.
{% hint style="info" %}
Apono automatically discovers and syncs all the instances in the environment. After syncing, you can manage **Access Flows** to these resources.
{% endhint %}
3. Click **Next**. The **Apono connector** section expands.
4. From the dropdown menu, select a connector. Choosing a connector links Apono to all the services available on the account where the connector is located.
{% hint style="info" %}
If the desired connector is not listed, click **+ Add new connector** and follow the instructions for creating an [AWS connector](/docs/aws-environment/apono-connector-for-aws).
{% endhint %}
5. Click **Next**. The **Integration Config** section expands.
6. Define the **Integration Config** settings.
Setting
Description
Integration Name
Unique, alphanumeric, user-friendly name used to identify this integration when constructing an access flow
Auth Type
Authorization type for the MySQL service account user:
IAM Auth: IAM authentication
User / Password: Built-in authentication
Region
Location where the PostgreSQL database is deployed
Instance ID
ID of the PostgreSQL instance
Database Name
Name of the PostgreSQL database
SSL Mode
(Optional) Mode of Secure Sockets Layer (SSL) encryption used to secure the connection with the SQL database server
require: An SSL-encrypted connection must be used.
allow: An SSL-encrypted or unencrypted connection is used. If an SSL encrypted connection is unavailable, the unencrypted connection is used.
disable: An unencrypted connection is used.
prefer: An SSL-encrypted connection is attempted. If the encrypted connection is unavailable, the unencrypted connection is used.
verify-ca: An SSL-encrypted connection must be used and a server certification verification against the provided CA certificates must pass.
verify-full: An SSL-encrypted connection must be used and a server certification verification against the provided CA certificates must pass. Additionally, the server hostname is checked against the certificate's names.
Enable Audit
(Optional) Feature that allows Apono to ingest and aggregate session audit logs
7. Click **Next**. The **Secret Store** section expands.
8. [Associate the secret or credentials.](/docs/connectors-and-secrets/apono-integration-secret)
{% hint style="info" %}
A secret is **not** needed for IAM authentication.
{% endhint %}
9. Click **Next**. The **Get more with Apono** section expands.
10. Define the **Get more with Apono** settings.
Setting
Description
Credential Rotation
(Optional) Number of days after which the database credentials must be rotated
(Optional) Instructions explaining how to access this integration's resources
Upon accessing an integration, a message with these instructions will be displayed to end users in the User Portal. The message may include up to 400 characters.
To view the message as it appears to end users, click Preview.
Integration Owner
(Optional) Fallback approver if no resource owner is found
Follow these steps to define one or several integration owners:
From the Attribute dropdown menu, select User or Group under the relevant identity provider (IdP) platform.
From the Value dropdown menu, select one or multiple users or groups.
NOTE: When Resource Owner is defined, an Integration Owner must be defined.
Resource Owner
(Optional) Group or role responsible for managing access approvals or rejections for the resource
Follow these steps to define one or several resource owners:
Enter a Key name. This value is the name of the tag created in your cloud environment.
From the Attribute dropdown menu, select an attribute under the IdP platform to which the key name is associated.
Apono will use the value associated with the key (tag) to identify the resource owner. When you update the membership of the group or role in your IdP platform, this change is also reflected in Apono.
NOTE: When this setting is defined, an Integration Owner must also be defined.
11. (Recommended) Click **Test Integration** to validate the integration.
{% hint style="info" %}
**Test Integration** is available after you have entered or selected values for all required integration fields.
During the test, Apono runs the following validation checks:
* **Connectivity:** The connector can reach the integration.
* **Configuration:** The integration is set up correctly.
* **Authentication:** The credentials are valid.
* **Discovery:** Resources can be fetched.
The **Test Validation** checklist shows the result of each check.
If a check fails, Apono identifies the failed check and highlights the fields that need correction.
{% endhint %}
12. Click **Confirm**.
💡Are you integrating with Apono using Terraform?
If you want to integrate with Apono using Terraform, follow these steps instead of clicking **Confirm**:
1. At the top of the screen, click **View as Code**. A modal appears with the completed Terraform configuration code.
2. Click to copy the code.
3. Make any additional edits.
4. Deploy the code in your Terraform.
Refer to [Integration Config Metadata](https://docs.apono.io/metadata-for-integration-config/integration-metadata/aws-rds-postgresql) for more details about the schema definition.
Now that you have completed this integration, you can [create access flows](/docs/access-flows/access-flows) that grant permission to your RDS for PostgreSQL database.
# AWS RDS MySQL
### In this article
> [Prerequisites](#prerequisites)\
> [Create AWS RDS MySQL Integration](#create-aws-rds-mysql-integration)\
> [Next Steps](#next-steps)
Amazon RDS for MySQL is an open-source relational database management service in the cloud. Through AWS RDS MySQL integration, you will be able to integrate with AWS RDS MySQL:
* Database
* Table
* Role
## Prerequisites
* If you already have AWS Apono connector:
* Make sure the connector's minimum version is **1.5.3**.
* If you still don't have AWS Apono connector:
* [Install AWS Account connector on ECS using Terraform.](https://docs.apono.io/docs/aws-environment/apono-connector-for-aws/installing-a-connector-on-aws-ecs-using-terraform)
* [Install AWS Account connector on ECS using CloudFormation.](https://docs.apono.io/docs/aws-environment/apono-connector-for-aws#aws-account-connector)
* [Install AWS Organization connector on ECS using Terraform.](https://docs.apono.io/docs/aws-environment/apono-connector-for-aws/installing-a-connector-on-aws-organization-with-terraform)
* [Install AWS Organization connector on ECS using CloudFormation.](https://docs.apono.io/docs/aws-environment/apono-connector-for-aws#aws-organization-connector-on-the-management-account)
* [Install AWS Organization connector on EKS using Terraform.](https://docs.apono.io/docs/aws-environment/apono-connector-for-aws/installing-a-connector-on-eks-using-terraform)
* [AWS command-line](https://docs.aws.amazon.com/cli/latest/userguide/getting-started-install.html)
* [MySQL command-line](https://dev.mysql.com/doc/mysql-shell/8.0/en/mysql-shell-install.html)
## Create AWS RDS MySQL Integration
### Generate Credentials
Create user and grant permissions:
{% hint style="warning" %}
You can use only one authentication option on the RDS instance at a time.
{% endhint %}
{% hint style="info" %}
(MySQL 8.0+) Grant the service account the authority to manage other roles. This enables Apono to create, alter, and drop roles. However, this role does not inherently grant specific database access permissions.
{% endhint %}
{% tabs %}
{% tab title="cli" %}
Password Authentication
With password authentication, your database performs all administration of user accounts. You create users with SQL statements such as `CREATE USER`, with the appropriate clause required by the DB engine for specifying passwords.
1. Get your AWS RDS DB details.
```bash
aws rds describe-db-instances \
--filters "Name=engine,Values=mysql" \
--query "*[].[Endpoint.Address,Endpoint.Port]"
mysql -h [Endpoint.Address] -P [Endpoint.Port] -u USER_NAME -p
```
2. Connect RDS MySQL.
```bash
mysql -h [Endpoint.Address] -P [Endpoint.Port] -u USER_NAME -p
```
3. Create a username for the Apono connector. The username is arbitrary and can be set according to your preference.
4. Replace `USER_NAME` and `PASSWORD` with your desired credentials.
```sql
CREATE USER 'USER_NAME'@'%' IDENTIFIED BY 'PASSWORD';
```
5. Grant the necessary permissions to the user.
```sql
GRANT SHOW DATABASES ON *.* TO 'USER_NAME'@'%';
GRANT CREATE USER ON *.* TO 'USER_NAME'@'%';
GRANT UPDATE ON mysql.* TO 'USER_NAME'@'%';
GRANT PROCESS ON *.* TO 'USER_NAME'@'%';
GRANT SELECT ON *.* TO 'USER_NAME'@'%';
GRANT GRANT OPTION ON *.* TO 'USER_NAME'@'%';
GRANT EXECUTE,DROP,SELECT,ALTER,ALTER ROUTINE,CREATE,CREATE ROUTINE,CREATE TEMPORARY TABLES,CREATE VIEW,DELETE,INDEX,INSERT,TRIGGER,UPDATE ON *.* TO 'USER_NAME'@'%';
GRANT ROLE_ADMIN ON *.* TO 'USER_NAME'@'%';
```
`SHOW DATABASES` Allows the user to view all databases in the RDS instance.\
`CREATE USER` Grants the ability to create new users.\
`UPDATE` Permits updates in the MySQL system database, including user privileges.\
`PROCESS` Allows viewing the server's process list, including all executing queries.\
`ROLE_ADMIN` (MySQL 8.0 and above) Enables the user to create roles, assign permissions to roles, and grant or revoke roles to or from users. This privilege does not inherently grant any specific database access permissions.
IAM Authentication
You can authenticate to your DB instance using AWS Identity and Access Management (IAM) database authentication. With this authentication method, you don't need to use a password when you connect to a DB instance. Instead, you use an authentication token.
1. Get your AWS RDS DB details.
```bash
aws rds describe-db-instances \
--filters "Name=engine,Values=mysql" \
--query "*[].[DBInstanceIdentifier,Endpoint.Address,Endpoint.Port]"
```
2. Enable IAM database authentication.
```bash
aws rds modify-db-instance \
--db-instance-identifier DBInstanceIdentifier \
--apply-immediately \
--enable-iam-database-authentication
```
3. Connect RDS MySQL.
```bash
mysql -h [Endpoint.Address] -P [Endpoint.Port] -u USER_NAME -p
```
4. Create a username for the Apono connector. The username is arbitrary and can be set according to your preference.
5. Replace `USER_NAME` with your desired credentials.
```sql
CREATE USER USER_NAME IDENTIFIED WITH AWSAuthenticationPlugin AS 'RDS';
```
6. Grant the necessary permissions to the user.
```sql
GRANT SHOW DATABASES ON *.* TO 'USER_NAME'@'%';
GRANT CREATE USER ON *.* TO 'USER_NAME'@'%';
GRANT UPDATE ON mysql.* TO 'USER_NAME'@'%';
GRANT PROCESS ON *.* TO 'USER_NAME'@'%';
GRANT SELECT ON *.* TO 'USER_NAME'@'%';
GRANT EXECUTE,DROP,SELECT,ALTER,ALTER ROUTINE,CREATE,CREATE ROUTINE,CREATE TEMPORARY TABLES,CREATE VIEW,DELETE,INDEX,INSERT,TRIGGER,UPDATE ON *.* TO 'USER_NAME'@'%';
GRANT GRANT OPTION ON *.* TO 'USER_NAME'@'%';
GRANT ROLE_ADMIN ON *.* TO 'USER_NAME'@'%';
```
`SHOW DATABASES` Allows the user to view all databases in the RDS instance.\
`CREATE USER` Grants the ability to create new users.\
`UPDATE` Permits updates in the MySQL system database, including user privileges.\
`PROCESS` Allows viewing the server's process list, including all executing queries.\
`ROLE_ADMIN` (MySQL 8.0 and above) Enables the user to create roles, assign permissions to roles, and grant or revoke roles to or from users. This privilege does not inherently grant any specific database access permissions.
7. Add this policy to the connector role:
```json
{ "Version": "2012-10-17", "Statement": [ { "Action": "rds-db:connect", "Resource": "arn:aws:rds-db:::dbuser:*/USER_NAME", "Effect": "Allow" } ] }
```
8. To allow a user or role to connect to your DB instance, create the following IAM policy and attach it to your identity center permissions set or role.
```bash
aws iam create-policy --policy-name RDSConnectPolicy --policy-document '{
"Version": "2012-10-17",
"Statement": [
{
"Effect": "Allow",
"Action": [
"rds-db:connect"
],
"Resource": [
"arn:aws:rds-db:*:*:dbuser:*/${SAML:sub}"
]
},
{
"Effect": "Allow",
"Action": [
"rds:DescribeDBInstances"
],
"Resource": [
"arn:aws:rds:*:*:db:*"
]
}
]
}'
```
{% endtab %}
{% tab title="cmd" %}
Password Authentication
With password authentication, your database performs all administration of user accounts. You create users with SQL statements such as `CREATE USER`, with the appropriate clause required by the DB engine for specifying passwords.
1. Get your AWS RDS DB details.
```cmd
aws rds describe-db-instances \
--filters "Name=engine,Values=mysql" \
--query "*[].[Endpoint.Address,Endpoint.Port]"
mysql -h [Endpoint.Address] -P [Endpoint.Port] -u USER_NAME -p
```
2. Connect RDS MySQL.
```cmd
mysql -h [Endpoint.Address] -P [Endpoint.Port] -u USER_NAME -p
```
3. Create a username for the Apono connector. The username is arbitrary and can be set according to your preference.
4. Replace `USER_NAME` and `PASSWORD` with your desired credentials.
```sql
CREATE USER 'USER_NAME'@'%' IDENTIFIED BY 'PASSWORD';
```
4. Grant the necessary permissions to the user.
```sql
GRANT SHOW DATABASES ON *.* TO 'USER_NAME'@'%';
GRANT CREATE USER ON *.* TO 'USER_NAME'@'%';
GRANT UPDATE ON mysql.* TO 'USER_NAME'@'%';
GRANT PROCESS ON *.* TO 'USER_NAME'@'%';
GRANT SELECT ON *.* TO 'USER_NAME'@'%';
GRANT EXECUTE,DROP,SELECT,ALTER,ALTER ROUTINE,CREATE,CREATE ROUTINE,CREATE TEMPORARY TABLES,CREATE VIEW,DELETE,INDEX,INSERT,TRIGGER,UPDATE ON *.* TO 'USER_NAME'@'%';
GRANT GRANT OPTION ON *.* TO 'USER_NAME'@'%';
GRANT ROLE_ADMIN ON *.* TO 'USER_NAME'@'%';
```
`SHOW DATABASES` Allows the user to view all databases in the RDS instance.\
`CREATE USER` Grants the ability to create new users.\
`UPDATE` Permits updates in the MySQL system database, including user privileges.\
`PROCESS` Allows viewing the server's process list, including all executing queries.\
`ROLE_ADMIN` (MySQL 8.0 and above) Enables the user to create roles, assign permissions to roles, and grant or revoke roles to or from users. This privilege does not inherently grant any specific database access permissions.
IAM Authentication
You can authenticate to your DB instance using AWS Identity and Access Management (IAM) database authentication. With this authentication method, you don't need to use a password when you connect to a DB instance. Instead, you use an authentication token.
1. Get your AWS RDS DB details.
```cmd
aws rds describe-db-instances \
--filters "Name=engine,Values=mysql" \
--query "*[].[DBInstanceIdentifier,Endpoint.Address,Endpoint.Port]"
```
2. Enable IAM database authentication.
```cmd
aws rds modify-db-instance \
--db-instance-identifier DBInstanceIdentifier \
--apply-immediately \
--enable-iam-database-authentication
```
3. Connect RDS MySQL.
```cmd
mysql -h [Endpoint.Address] -P [Endpoint.Port] -u USER_NAME -p
```
4. Create a username for the Apono connector. The username is arbitrary and can be set according to your preference.
5. Replace `USER_NAME` with your desired credentials.
```sql
CREATE USER USER_NAME IDENTIFIED WITH AWSAuthenticationPlugin AS 'RDS';
```
6. Grant the necessary permissions to the user.
```sql
GRANT SHOW DATABASES ON *.* TO 'USER_NAME'@'%';
GRANT CREATE USER ON *.* TO 'USER_NAME'@'%';
GRANT UPDATE ON mysql.* TO 'USER_NAME'@'%';
GRANT PROCESS ON *.* TO 'USER_NAME'@'%';
GRANT SELECT ON *.* TO 'USER_NAME'@'%';
GRANT EXECUTE,DROP,SELECT,ALTER,ALTER ROUTINE,CREATE,CREATE ROUTINE,CREATE TEMPORARY TABLES,CREATE VIEW,DELETE,INDEX,INSERT,TRIGGER,UPDATE ON *.* TO 'USER_NAME'@'%';
GRANT GRANT OPTION ON *.* TO 'USER_NAME'@'%';
GRANT ROLE_ADMIN ON *.* TO 'USER_NAME'@'%';
```
`SHOW DATABASES` Allows the user to view all databases in the RDS instance.\
`CREATE USER` Grants the ability to create new users.\
`UPDATE` Permits updates in the MySQL system database, including user privileges.\
`PROCESS` Allows viewing the server's process list, including all executing queries.\
`ROLE_ADMIN` (MySQL 8.0 and above) Enables the user to create roles, assign permissions to roles, and grant or revoke roles to or from users. This privilege does not inherently grant any specific database access permissions.
7. Add this policy to the connector role:
```json
{ "Version": "2012-10-17", "Statement": [ { "Action": "rds-db:connect", "Resource": "arn:aws:rds-db:::dbuser:*/USER_NAME", "Effect": "Allow" } ] }
```
8. To allow a user or role to connect to your DB instance, create the following IAM policy and attach it to your identity center permissions set or role.
```json
aws iam create-policy --policy-name RDSConnectPolicy --policy-document '{
"Version": "2012-10-17",
"Statement": [
{
"Effect": "Allow",
"Action": [
"rds-db:connect"
],
"Resource": [
"arn:aws:rds-db:*:*:dbuser:*/${SAML:sub}"
]
},
{
"Effect": "Allow",
"Action": [
"rds:DescribeDBInstances"
],
"Resource": [
"arn:aws:rds:*:*:db:*"
]
}
]
}'
```
{% endtab %}
{% tab title="console" %}
Password Authentication
With password authentication, your database performs all administration of user accounts. You create users with SQL statements such as `CREATE USER`, with the appropriate clause required by the DB engine for specifying passwords.
1. Sign in to the AWS Management Console and open the Amazon RDS console [Amazon RDS console](https://console.aws.amazon.com/rds/) , and choose your DB instance.
2. Copy the following details:
* **Endpoint**: The DNS name of the DB instance.
* **Port**: The port number on which the DB instance accepts connections.
3. Connect to the DB instance using your SQL client using the copied details.
4. Create a user for the Apono connector. Replace `USER_NAME` and `PASSWORD` with your desired credentials.
CREATE USER 'USER_NAME'@'%' IDENTIFIED BY 'PASSWORD';
5. Grant the necessary permissions to the user.
```sql
GRANT SHOW DATABASES ON *.* TO 'USER_NAME'@'%';
GRANT CREATE USER ON *.* TO 'USER_NAME'@'%';
GRANT UPDATE ON mysql.* TO 'USER_NAME'@'%';
GRANT PROCESS ON *.* TO 'USER_NAME'@'%';
GRANT SELECT ON *.* TO 'USER_NAME'@'%';
GRANT EXECUTE,DROP,SELECT,ALTER,ALTER ROUTINE,CREATE,CREATE ROUTINE,CREATE TEMPORARY TABLES,CREATE VIEW,DELETE,INDEX,INSERT,TRIGGER,UPDATE ON *.* TO 'USER_NAME'@'%';
GRANT GRANT OPTION ON *.* TO 'USER_NAME'@'%';
GRANT ROLE_ADMIN ON *.* TO 'USER_NAME'@'%';
```
`SHOW DATABASES` Allows the user to view all databases in the RDS instance.\
`CREATE USER` Grants the ability to create new users.\
`UPDATE` Permits updates in the MySQL system database, including user privileges.\
`PROCESS` Allows viewing the server's process list, including all executing queries.\
`ROLE_ADMIN` (MySQL 8.0 and above) Enables the user to create roles, assign permissions to roles, and grant or revoke roles to or from users. This privilege does not inherently grant any specific database access permissions.
IAM Authentication
You can authenticate to your DB instance using AWS Identity and Access Management (IAM) database authentication. With this authentication method, you don't need to use a password when you connect to a DB instance. Instead, you use an authentication token.
1. Enable IAM database authentication
1. Open the [Amazon RDS console](https://console.aws.amazon.com/rds/).
2. In the navigation pane, choose Databases.
3. Choose the DB instance that you want to modify.
4. Make sure that the DB instance is compatible with IAM authentication. Check the compatibility requirements in Region and version availability.
5. Choose Modify.
6. In the Database authentication section, choose Password and IAM database authentication to enable IAM database authentication.
7. Choose Password authentication or Password and Kerberos authentication to disable IAM authentication.
8. Choose Continue.
9. To apply the changes immediately, choose Immediately in the Scheduling of modifications section.
10. Choose Modify DB instance.
2. Copy the following RDS SQL details:
* **Endpoint**: The DNS name of the DB instance.
* **Port**: The port number on which the DB instance accepts connections.
3. Connect to the DB instance using your SQL client using the copied details.
4. Create a username for the Apono connector. The username is arbitrary and can be set according to your preference.
5. Replace `USER_NAME` with your desired credentials.
```sql
CREATE USER USER_NAME IDENTIFIED WITH AWSAuthenticationPlugin AS 'RDS';
```
5. Grant the necessary permissions to the user.
```sql
GRANT SHOW DATABASES ON *.* TO 'USER_NAME'@'%';
GRANT CREATE USER ON *.* TO 'USER_NAME'@'%';
GRANT UPDATE ON mysql.* TO 'USER_NAME'@'%';
GRANT PROCESS ON *.* TO 'USER_NAME'@'%';
GRANT SELECT ON *.* TO 'USER_NAME'@'%';
GRANT EXECUTE,DROP,SELECT,ALTER,ALTER ROUTINE,CREATE,CREATE ROUTINE,CREATE TEMPORARY TABLES,CREATE VIEW,DELETE,INDEX,INSERT,TRIGGER,UPDATE ON *.* TO 'USER_NAME'@'%';
GRANT GRANT OPTION ON *.* TO 'USER_NAME'@'%';
GRANT ROLE_ADMIN ON *.* TO 'USER_NAME'@'%';
```
`SHOW DATABASES` Allows the user to view all databases in the RDS instance.\
`CREATE USER` Grants the ability to create new users.\
`UPDATE` Permits updates in the MySQL system database, including user privileges.\
`PROCESS` Allows viewing the server's process list, including all executing queries.\
`ROLE_ADMIN` (MySQL 8.0 and above) Enables the user to create roles, assign permissions to roles, and grant or revoke roles to or from users. This privilege does not inherently grant any specific database access permissions.
6. Add this policy to the connector role:
```json
{ "Version": "2012-10-17", "Statement": [ { "Action": "rds-db:connect", "Resource": "arn:aws:rds-db:::dbuser:*/USER_NAME", "Effect": "Allow" } ] }
```
7. To allow a user or role to connect to your DB instance, create the following IAM policy and attach it to your identity center permissions set or role.
```json
{
"Version": "2012-10-17",
"Statement": [
{
"Effect": "Allow",
"Action": [
"rds-db:connect"
],
"Resource": [
"arn:aws:rds-db:*:*:dbuser:*/${SAML:sub}"
]
},
{
"Effect": "Allow",
"Action": [
"rds:DescribeDBInstances"
],
"Resource": [
"arn:aws:rds:*:*:db:*"
]
}
]
}
```
{% endtab %}
{% endtabs %}
### Create Integration in Apono
1. In the [Apono admin console](https://app.apono.io), go to the **Integrations** page and click the **Add Integration** button in the top-left side, or press on the **Catalog** blade.
2. In the **Catalog** page search for and select **AWS RDS MySQL**.
3. In **Discovery** step, select one or multiple AWS RDS MySQL resource types for Apono to discover.
4. In **Apono connector** step, select the connector with the required permissions to be used with your AWS RDS MySQL.
5. In **Integration config** step, provide the following information about your AWS RDS MySQL:
| Variable | Value | Required |
| ---------------------------------------------- | ----------------------------------------------------------------------------------------------------------------------------------------------------- | -------- |
| Integration Name | The integration name. | Yes |
| Auth Type | The authentication method for connecting to an AWS RDS instance, with options for password (username and password) or iam (IAM-based authentication). | Yes |
| Region | AWS region where the RDS instance is located. | Yes |
| Instance ID | The unique identifier of the AWS RDS instance. | Yes |
| Credentials rotation period (in days) | i.e.: 90 | No |
| User cleanup after access is revoked (in days) | i.e.: 90 | No |
6. In [**Secret Store**](https://docs.apono.io/docs/connectors-and-secrets/apono-integration-secret) step, provide the connector credentials using one of the following secret store options:
* [AWS](https://docs.apono.io/docs/connectors-and-secrets/apono-integration-secret#aws-secret)
* [KUBERNETES](https://docs.apono.io/docs/connectors-and-secrets/apono-integration-secret#kubernetes-secret)
* [APONO](https://docs.apono.io/docs/connectors-and-secrets/apono-integration-secret#apono-secret)
* [HASHICORP](https://docs.apono.io/docs/connectors-and-secrets/apono-integration-secret#hashicorp-secret)
{% hint style="info" %}
When using IAM authentication, **a secret does not need to be created**. The service account and its permissions are managed through IAM roles and policies. The service account is used to authenticate the MySQL instance instead of a secret.
For the AWS RDS MySQL integration, use the following secret format:\
`username:`\
`password:`
{% endhint %}
7. (Optional) In **Get more with Apono** step, you can set up the following:
Setting
Description
Credential Rotation
(Optional) Number of days after which the database credentials must be rotated
(Optional) Instructions explaining how to access this integration's resources
Upon accessing an integration, a message with these instructions will be displayed to end users in the User Portal. The message may include up to 400 characters.
To view the message as it appears to end users, click Preview.
Integration Owner
(Optional) Fallback approver if no resource owner is found
Follow these steps to define one or several integration owners:
From the Attribute dropdown menu, select User or Group under the relevant identity provider (IdP) platform.
From the Value dropdown menu, select one or multiple users or groups.
NOTE: When Resource Owner is defined, an Integration Owner must be defined.
Resource Owner
(Optional) Group or role responsible for managing access approvals or rejections for the resource
Follow these steps to define one or several resource owners:
Enter a Key name. This value is the name of the tag created in your cloud environment.
From the Attribute dropdown menu, select an attribute under the IdP platform to which the key name is associated.
Apono will use the value associated with the key (tag) to identify the resource owner. When you update the membership of the group or role in your IdP platform, this change is also reflected in Apono.
NOTE: When this setting is defined, an Integration Owner must also be defined.
8. (Recommended) Click **Test Integration** to validate the integration.
{% hint style="info" %}
**Test Integration** is available after you have entered or selected values for all required integration fields.
During the test, Apono runs the following validation checks:
* **Connectivity:** The connector can reach the integration.
* **Configuration:** The integration is set up correctly.
* **Authentication:** The credentials are valid.
* **Discovery:** Resources can be fetched.
The **Test Validation** checklist shows the result of each check.
If a check fails, Apono identifies the failed check and highlights the fields that need correction.
{% endhint %}
## Next Steps
# Integrate with EKS
Create an integration to manage access to a Kubernetes cluster on AWS
With Elastic Kubernetes Service (EKS) on AWS, EKS simplifies the management complexities of Kubernetes.
Through this integration, Apono helps you securely manage access to your AWS Elastic Kubernetes cluster.
***
### Prerequisites
Item
Description
Apono Connector
Connection installed on the EKS cluster that serves as a bridge between the cluster and Apono
Apono Premium
Apono plan providing all available features and dedicated account support
Cluster Admin Access
Admin access to the cluster to integrate The cluster admin access can be the built-in cluster-admin role or equivalent permission level. Apono does not require admin permissions to the Kubernetes environment.
Authentication for requester Security Assertion Markup Language (SAML) federation for authentication can be provided by providers such as Okta, Onelogin, Jumpcloud, and Ping Identity.
***
### Configure user authentication
Authentication can be completed with an Identity and Access Management IAM user or an IAM role. To grant a user access to an EKS cluster, the IAM user or IAM role must be mapped with a specific user identifier, such as an email address.Apono supports this mapping with an IAM role through AWS SSO or SAML federation from any identity provider (IdP).
#### Create a new policy
Follow these steps to create a new policy:
1. Under **Access management** on the [**Identity and Access Management (IAM)**](http://console.aws.amazon.com/iam/home) page in AWS, click **Policies > Create policy**. The **Specify permission** page appears.
2. Click **JSON**.
3. Replace the default policy with the following policy. Be sure to replace the placeholder.
```json
{
"Version": "2012-10-17",
"Statement": [
{
"Effect": "Allow",
"Action": "eks:DescribeCluster",
"Resource": "arn:aws:eks:*::cluster/*"
}
]
}
```
Placeholder
Description
<AWS_ACCOUNT_ID>
AWS account ID where the EKS is hosted
4. Click **Next**. The **Review and create** page appears.
5. Enter a **Policy name**. This name is used to identify this policy.
6. Click **Create policy**.
#### Create the IAM role
Follow these steps to create the IAM role:
1. Under **Access management** on the [**Identity and Access Management (IAM)**](http://console.aws.amazon.com/iam/home) page in AWS, click **Roles > Create role**. The **Select trusted entity** page appears.
2. Under **Trusted entity type**, select **Custom trust policy**.
3. Under **Custom trust policy**, replace the default policy with one of the following trust policies. Be sure to replace the placeholders.
{% tabs %}
{% tab title="AWS SSO" %}
{% code overflow="wrap" %}
```json
{
"Version": "2012-10-17",
"Statement": [
{
"Sid": "Statement1",
"Effect": "Allow",
"Principal": {
"AWS": "*"
},
"Action": "sts:AssumeRole",
"Condition": {
"StringEqualsIgnoreCase": {
"sts:RoleSessionName": "${SAML:sub}"
},
"ArnLike": {
"aws:PrincipalArn": [
"arn:aws:iam:::role/aws-reserved/sso.amazonaws.com/AWSReservedSSO_*",
"arn:aws:iam:::role/aws-reserved/sso.amazonaws.com/*/AWSReservedSSO_*"
]
}
}
}
]
}
```
{% endcode %}
{% endtab %}
{% tab title="SAML" %}
{% code overflow="wrap" %}
```json
{
"Version": "2012-10-17",
"Statement": [
{
"Effect": "Allow",
"Principal": {
"Federated": "arn:aws:iam:::saml-provider/"
},
"Action": "sts:AssumeRoleWithSAML",
"Condition": {
"StringEquals": {
"SAML:aud": "https://signin.aws.amazon.com/saml"
}
}
}
]
}
```
{% endcode %}
{% endtab %}
{% endtabs %}
Placeholder
Description
<AWS_ACCOUNT_ID>
AWS account ID where the EKS is hosted
<SAML_PROVIDER>
Identity provider name
4. Click **Next**. The **Add permissions** page appears.
5. Under **Permissions policies**, select the newly created policy.
6. Click **Next**. The **Name, review, and create** page appears.
7. For the **Role name**, enter *apono-k8s-access*.
8. For the **Description**, enter *required for k8s access managed by Apono*.
9. Click **Create role.**
{% hint style="info" %}
If an **Overly permission trust policy** popup window appears, click **Continue**.
{% endhint %}
#### Authenticate the EKS cluster
Now that the IAM role has been created, you must authenticate the EKS cluster with the **ConfigMap** or **EKS API**.
{% tabs %}
{% tab title="ConfigMap" %}
{% hint style="success" %}
Read [Apply the `aws-auth ConfigMap` to your cluster](https://docs.aws.amazon.com/eks/latest/userguide/add-user-role.html#aws-auth-configmap) to learn more about editing the `aws-auth ConfigMap`.
{% endhint %}
Follow these steps to authenticate the cluster:
1. Log into the EKS cluster with a user account that has the cluster admin permission.
2. Edit the `aws-auth ConfigMap` to include the following `mapRoles` entry. Be sure to replace the placeholder.
```yaml
- rolearn: arn:aws:iam:::role/apono-k8s-access
username: "{{SessionNameRaw}}"
```
Placeholder
Description
<AWS_ACCOUNT_ID>
AWS account ID where the EKS is hosted
{% endtab %}
{% tab title="EKS API" %}
Follow these steps to authenticate the cluster:
1. [Change the authentication mode](https://docs.aws.amazon.com/eks/latest/userguide/access-entries.html#setting-up-access-entries) to **EKS API**.
2. [Create the access entry](https://docs.aws.amazon.com/eks/latest/userguide/access-entries.html#creating-access-entries):
* For the **IAM principal**, enter *arn:aws:iam::\:role/apono-k8s-access*.
* For the **Username** use `apono:{{SessionName}}`.
* Choose **Cluster** as the access scope.
{% endtab %}
{% endtabs %}
Now, you can [integrate with EKS](#integrate-with-elastic-kubernetes-service-eks).
***
### Integrate with Elastic Kubernetes Service (EKS)
Elastice Kubernetes Service (EKS) tile
{% hint style="success" %}
You can also use the steps below to integrate with Apono using Terraform.
In step **11**, instead of clicking **Confirm**, follow the **Are you integrating with Apono using Terraform?** guidance.
{% endhint %}
Follow these steps to complete the integration:
1. On the [**Catalog**](https://app.apono.io/catalog?search=EKS) tab, click **Elastic Kubernetes Service (EKS)**. The **Connect Integration** page appears.
2. Under **Discovery**, click one or more resource types to sync with Apono.
{% hint style="info" %}
Apono automatically discovers and syncs all the instances in the environment. After syncing, you can manage access flows to these resources.
{% endhint %}
3. Click **Next**. The **Apono connector** section appears.
4. From the dropdown menu, select a connector.
{% hint style="info" %}
If the desired connector is not listed, click **+ Add new connector** and follow the instructions for creating an [Apono Connector for Kubernetes](/docs/kubernetes-environment/apono-connector-for-kubernetes) on an EKS cluster.
{% endhint %}
5. Click **Next**. The **Integration Config** section expands.
6. Define the **Integration Config** settings.
{% hint style="info" %}
When the Apono connector is installed on the EKS cluster, you do not need to enter values for the other optional fields.
{% endhint %}
Setting
Description
Integration Name
Unique, alphanumeric, user-friendly name used to identify this integration when constructing an access flow
Server URL
(Optional) URL of the Kubernetes API server used to interact with the Kubernetes cluster
Certificate Authority
(Optional) Certificate that ensures that the Kubernetes API server is trusted and authentic
Leave this field empty if you want to connect the cluster where the connector is deployed.
EKS Cluster Name
Unique name of the cluster to integrate
AWS Role Name
(Optional) Role defined for the connector
Region
(Optional) Location where the AWS Elastic Kubernetes cluster is deployed
Identity Mapping Type
Method used to map AWS IAM principals to Kubernetes users and groups in the EKS cluster
7. Click **Next**. The **Secret Store** section expands.
{% hint style="info" %}
When the Apono connector is installed on the EKS cluster, you do not need to provide a secret.
{% endhint %}
8. (Optional) [Associate the secret or credentials](/docs/connectors-and-secrets/apono-integration-secret).
9. Click **Next**. The **Get more with Apono** section expands.
10. Define the **Get more with Apono** settings.
Setting
Description
Credential Rotation
(Optional) Number of days after which the database credentials must be rotated
(Optional) Instructions explaining how to access this integration's resources
Upon accessing an integration, a message with these instructions will be displayed to end users in the User Portal. The message may include up to 400 characters.
To view the message as it appears to end users, click Preview.
Integration Owner
(Optional) Fallback approver if no resource owner is found
Follow these steps to define one or several integration owners:
From the Attribute dropdown menu, select User or Group under the relevant identity provider (IdP) platform.
From the Value dropdown menu, select one or multiple users or groups.
NOTE: When Resource Owner is defined, an Integration Owner must be defined.
Resource Owner
(Optional) Group or role responsible for managing access approvals or rejections for the resource
Follow these steps to define one or several resource owners:
Enter a Key name. This value is the name of the tag created in your cloud environment.
From the Attribute dropdown menu, select an attribute under the IdP platform to which the key name is associated.
Apono will use the value associated with the key (tag) to identify the resource owner. When you update the membership of the group or role in your IdP platform, this change is also reflected in Apono.
NOTE: When this setting is defined, an Integration Owner must also be defined.
11. Click **Confirm**.
💡Are you integrating with Apono using Terraform?
If you want to integrate with Apono using Terraform, follow these steps instead of clicking **Confirm**:
1. At the top of the screen, click **View as Code**. A modal appears with the completed Terraform configuration code.
2. Click to copy the code.
3. Make any additional edits.
4. Deploy the code in your Terraform.
Refer to [Integration Config Metadata](https://docs.apono.io/metadata-for-integration-config/integration-metadata/aws-eks) for more details about the schema definition.
Now that you have completed this integration, you can [create access flows](/docs/access-flows/access-flows) that grant permission to your Elastic Kubernetes Service cluster.
***
### Log in to EKS with Apono access details
After a user gains access to an EKS resource, the user must authenticate with the cluster. The user must assume the [`apono-k8s-access` role](#create-the-iam-role).
The following table shows two approaches to assume this role.
Approach
Details
AWS CLI
In the AWS CLI, run the aws sts assume-role command. Be sure to replace the placeholders.
# AWS Lambda Custom Integration
Learn how to integrate an AWS Lambda Custom Integration with Apono
AWS Lambda enables you to build and connect cloud services and internal web apps by writing single-purpose functions that are attached to events emitted from your cloud infrastructure and services.
Its serverless architecture frees you to write, test, and deploy functions quickly without having to manage infrastructure setup.
With this integration, you can connect your internal applications to AWS Lambda functions and manage access to those applications with Apono.
***
## Prerequisites
Before starting this integration, create the items listed in the following table.
Item
Description
Apono Connector
On-prem connection serving as a bridge between your AWS Lambda functions and Apono
Manageable resources to display in Apono that users can be granted access to
Each item represents a single object the integration can grant or revoke access to.
permissions[]
Permissions to resources that can be granted to users, such as Read and Write
resources\[]
Parameter
Description
id
Unique resource identifier in the source system (such as ARN) that you receive back in grantAccess or revokeAccess
name
Human-readable resource name to show in Apono
type
Resource type or service
The value should always be the resource type (params.resource_type) that was passed in the request.
metadata
Tags or context associated with the resource
Examples:
"environment" = "prod"
"region" = "us-east-1"
permissions\[]
Parameter
Description
id
Integration-defined permission key you will receive back later in grantAccess
name
Display name for the permission shown in Apono to the requester
grantAccess
Parameter
Description
username
The Grantee’s email
grant_id
Apono’s unique ID for the request
resources
Resource IDs selected by the requester
permission
Permission ID chosen by the requester
custom_parameters.param1 custom_parameters.param2
Custom parameters defined for the Apono integration
revokeAccess
Parameter
Description
username
The Grantee’s email
grant_id
Apono’s unique ID for the request
resources
Resources previously granted
permission
Permission to remove
custom_parameters.param1 custom_parameters.param2
Custom parameters defined for the Apono integration
createCredentials
Parameter
Description
username
The Grantee’s email
grant_id
Apono’s unique ID for the grantee
resources
One or more target resources for which credentials should be created
permission
Permission to remove
custom_parameters.param1 custom_parameters.param2
Custom parameters defined for the Apono integration
***
### Integrate an AWS Lambda Custom Integration
AWS Lambda Custom Integration tile
{% hint style="success" %}
You can also use the steps below to integrate with Apono using Terraform.
In step **9**, instead of clicking **Confirm**, follow the **Are you integrating with Apono using Terraform?** guidance.
{% endhint %}
Follow these steps to complete the integration:
1. On the [**Catalog**](https://app.apono.io/catalog?search=aws+lambda) tab, click **AWS Lambda Custom Integration**. The **Connect Integration** page appears.
2. Under **Discovery**, click **Next**. The **Apono connector** section expands.
3. From the dropdown menu, select a connector.
{% hint style="info" %}
If the desired connector is not listed, click **+ Add new connector** and follow the instructions for creating an [AWS connector](/docs/aws-environment/apono-connector-for-aws#how-to-install-the-connector).
{% endhint %}
4. Click **Next**. The **Integration Config** section expands.
5. Define the **Integration Config** settings.
Setting
Description
Integration Name
Unique, alphanumeric, user-friendly name used to identify this integration when constructing an access flow
Custom Parameters
Key-value pairs to send to the lambda function
For example, you can provide a lambda function with a redirect URL that is used for internal provisioning access and passed as part of the action requests.
Region
Region of the AWS Lambda instance
Function Name
Named of the AWS Lambda function
6. Click **Next**. The **Get more with Apono** section expands.
7. Define the **Get more with Apono** settings.
Setting
Description
Credential Rotation
(Optional) Number of days after which the database credentials must be rotated
(Optional) Instructions explaining how to access this integration's resources
Upon accessing an integration, a message with these instructions will be displayed to end users in the User Portal. The message may include up to 400 characters.
To view the message as it appears to end users, click Preview.
Integration Owner
(Optional) Fallback approver if no resource owner is found
Follow these steps to define one or several integration owners:
From the Attribute dropdown menu, select User or Group under the relevant identity provider (IdP) platform.
From the Value dropdown menu, select one or multiple users or groups.
NOTE: When Resource Owner is defined, an Integration Owner must be defined.
Resource Owner
(Optional) Group or role responsible for managing access approvals or rejections for the resource
Follow these steps to define one or several resource owners:
Enter a Key name. This value is the name of the tag created in your cloud environment.
From the Attribute dropdown menu, select an attribute under the IdP platform to which the key name is associated.
Apono will use the value associated with the key (tag) to identify the resource owner. When you update the membership of the group or role in your IdP platform, this change is also reflected in Apono.
NOTE: When this setting is defined, an Integration Owner must also be defined.
8. (Recommended) Click **Test Integration** to validate the integration.
{% hint style="info" %}
**Test Integration** is available after you have entered or selected values for all required integration fields.
During the test, Apono runs the following validation checks:
* **Connectivity:** The connector can reach the integration.
* **Configuration:** The integration is set up correctly.
* **Authentication:** The credentials are valid.
* **Discovery:** Resources can be fetched.
The **Test Validation** checklist shows the result of each check.
If a check fails, Apono identifies the failed check and highlights the fields that need correction.
{% endhint %}
9. Click **Confirm**.
💡Are you integrating with Apono using Terraform?
If you want to integrate with Apono using Terraform, follow these steps instead of clicking **Confirm**:
1. At the top of the screen, click **View as Code**. A modal appears with the completed Terraform configuration code.
2. Click to copy the code.
3. Make any additional edits.
4. Deploy the code in your Terraform.
Refer to [Integration Config Metadata](https://docs.apono.io/metadata-for-integration-config/integration-metadata/aws-lambda-custom-integration) for more details about the schema definition.
Now that you have completed this integration, you can [create access flows](/docs/access-flows/access-flows) that grant permission to your AWS Lambda function.
# EC2 via Systems Manager Agent (SSM)
Apono AWS EC2 Integration utilizes SSM (System Manager) Agent to for JIT access management for AWS VMs
## EC2 via Systems Manager Agent (SSM)
{% hint style="info" %}
Have you connected an AWS account?
Make sure you integrated your AWS account to Apono. Follow this [AWS Integration](/docs/aws-environment/aws-integrations/integrate-with-aws) step-by-step guide.
{% endhint %}
## Intro
This integration provides the ability to grant users permissions to connect to the EC2 with a secure connection through SSM.
## Prerequisites
* An integration between Apono and the AWS Organization or Account where the EC2 is.
* EC2 machine with SSM agent installed. *Installed by default in most EC2s*\
[docs.aws.amazon.com/systems-manager/latest/userguide/ssm-agent](https://docs.aws.amazon.com/systems-manager/latest/userguide/ssm-agent.html)
* End users will need to install the session manager plugin for AWS CLI *on the local user's computer*.\
[docs.aws.amazon.com/systems-manager/latest/userguide/session-manager-working-with-install-plugin](https://docs.aws.amazon.com/systems-manager/latest/userguide/session-manager-working-with-install-plugin.html)
## Step-by-step guide
### The EC2 instance role
Follow the steps below to create an EC2 instance role with the `AmazonSSMManagedInstanceCore` managed policy. Read more [here](https://docs.aws.amazon.com/systems-manager/latest/userguide/session-manager-getting-started-instance-profile.html).
1. In the AWS IAM, Click **Create new IAM Role**
1. Click Create Role
2. Choose the AWS Service option
3. From the dropdown list, choose EC2
4. Choose EC2 Role for AWS System Manager. Click Next.
5. Verify that the `AmazonSSMManagerInstanceCore` policy is added. Click Next
6. Fill the Role name box (for example, ec2-ssm)
7. Click **Create role**
2. Go back to the Modify IAM Role page
1. From the dropdown list, choose the new IAM role we created (ec2-ssm)
2. Click **Update IAM role**
3. Pleas note: it takes about 30 minutes for the AWS sync to finish.
### Integrating Apono with the EC2 instances
1. In the Apono UI, edit an existing AWS Org or AWS Account integration or create a new one.
2. Add the EC2 Connect resource type.
3. Complete the integration and click **Integrate**.
## Results
Apono should now discover EC2 machines! You can now [create access flows](/docs/access-flows/access-flows) to EC2 instances.
# Apono Connector for Azure
The Apono connector is a secure bridge between Apono's access management platform and your Azure cloud resources. It facilitates data synchronization and manages access permissions across your cloud infrastructure.
The connector runs within your Azure environment via Azure Container Instances (ACI). This architecture ensures both complete operational control and maximum security.
After installing the connector, you can [integrate your resources](/docs/azure-environment/azure-integrations) with Apono and provide just-in-time access based on [access flows](/docs/access-flows/access-flows).
***
### Key Features
* **Azure-Native Deployment**: Runs as a container instance in your Azure environment using Azure Container Instances (ACI)
* **Complete Organizational Control**: Fully managed within your Azure infrastructure
* **Security-First Design**: No secret storage or caching
* **Flexible Installation**: Can be uninstalled or disconnected at any time without Apono support
* **Limited Scope**: Uses predefined template functions that restrict the connector to specific, authorized actions
***
### Next Step
Choose your preferred installation method.
{% content-ref url="/pages/x9g5HSIQtrQYEVuUTlC4" %}
[Install an Azure connector on ACI using Azure CLI](/docs/azure-environment/apono-connector-for-azure/install-azure-connector-on-aci-using-azure-cli)
{% endcontent-ref %}
{% content-ref url="/pages/iXX62BkFZxZWkruWgZo8" %}
[Install an Azure connector on ACI using PowerShell](/docs/azure-environment/apono-connector-for-azure/install-azure-connector-on-aci-using-powershell)
{% endcontent-ref %}
{% content-ref url="/pages/oc967htS5CoyRjnUaXBp" %}
[Install an Azure connector on ACI using Terraform](/docs/azure-environment/apono-connector-for-azure/install-azure-connector-on-aci-using-terraform)
{% endcontent-ref %}
# Install an Azure connector on ACI using Azure CLI
Learn how to deploy a connector in an Azure environment
Azure Container Instances (ACI) is a managed, serverless compute platform for running containerized applications. This guide explains how to install and configure an Apono connector on ACI in your Azure environment using Azure CLI.
***
### Prerequisites
Item
Description
Apono Token
Account-specific Apono authentication value
Use the following steps to obtain your token:
On the Connectors page, click Install Connector. The Install Connector page appears.
The user following this guide should have an Microsoft Entra role with the following permission:
Manages all aspects of Microsoft Entra ID and Microsoft services that use Microsoft Entra identities
❗Apono does not require Global Administrator access. This is required for the admin following this guide.❗
***
### Install a new connector
You can install a connector for an Azure **Management Group** or **Subscription.**
{% hint style="info" %}
The connector requires the following roles:
1. Directory Readers - to validate users in Azure
2. User Access Administrator - to provision and de-provision access in the Management Group
Read more about these Microsoft Entra ID roles [here](https://learn.microsoft.com/en-us/entra/identity/role-based-access-control/permissions-reference#directory-readers).
{% endhint %}
{% tabs %}
{% tab title="Management Group" %}
Follow these steps to install a new connector:
1. At the shell prompt, set the environment variables.
```bash
export APONO_CONNECTOR_ID=
export APONO_TOKEN=
export SUBSCRIPTION_ID=
export RESOURCE_GROUP_NAME=
export MANAGEMENT_GROUP_NAME=
```
2. Log in to your Azure account.
```bash
az login
```
3. Set the `REGION` environment variable.
{% code overflow="wrap" %}
```bash
export REGION=$(az group show --name $RESOURCE_GROUP_NAME --query location --output tsv)
```
{% endcode %}
4. Run the following command to deploy the connector on your ACI.
{% code overflow="wrap" %}
```bash
export PRINCIPAL_ID=$(az container create --subscription $SUBSCRIPTION_ID --resource-group $RESOURCE_GROUP_NAME --name $APONO_CONNECTOR_ID --ports 80 --os-type linux --image registry.apono.io/apono-connector:v1.8.4 --environment-variables APONO_CONNECTOR_ID=$APONO_CONNECTOR_ID APONO_TOKEN=$APONO_TOKEN APONO_URL=api.apono.io CONNECTOR_METADATA='{"cloud_provider":"AZURE","subscription_id":"'"$SUBSCRIPTION_ID"'","resource_group":"'"$RESOURCE_GROUP_NAME"'","region":"'"$REGION"'","is_azure_admin":true}' --cpu 1 --memory 2 --registry-login-server registry.apono.io --registry-username apono --registry-password $APONO_TOKEN --location $REGION --assign-identity --query identity.principalId --output tsv)
```
{% endcode %}
5. Add the **User Access Administrator** role to the connector in the management group scope.
{% code overflow="wrap" %}
```bash
az role assignment create --assignee-object-id $PRINCIPAL_ID --assignee-principal-type ServicePrincipal --role "User Access Administrator" --scope /providers/Microsoft.Management/managementGroups/$MANAGEMENT_GROUP_NAME
```
{% endcode %}
6. If your Azure resources have [resource locks](https://learn.microsoft.com/en-us/azure/azure-resource-manager/management/lock-resources) applied, assign the **Tag Contributor** role to the connector at the management scope. This allows Apono to add a tag marker during the grant or revoke process.
{% code overflow="wrap" %}
```bash
az role assignment create --assignee-object-id $PRINCIPAL_ID --assignee-principal-type ServicePrincipal --role "Tag Contributor" --scope /providers/Microsoft.Management/managementGroups/$MANAGEMENT_GROUP_NAME
```
{% endcode %}
7. For Azure AD, add the **Directory Readers** role to the connector. For Azure AD Groups, add the **Groups Administrator** and **Privileged Role Administrator** roles.
{% tabs %}
{% tab title="Azure AD" %}
{% code overflow="wrap" %}
```bash
az rest --method POST --uri 'https://graph.microsoft.com/beta/roleManagement/directory/roleAssignments' --body '{"principalId": "'"$PRINCIPAL_ID"'", "roleDefinitionId": "88d8e3e3-8f55-4a1e-953a-9b9898b8876b", "directoryScopeId": "/"}'
```
{% endcode %}
{% endtab %}
{% tab title="Azure AD Groups" %}
{% code overflow="wrap" %}
```bash
# First role assignment
az rest --method POST --uri 'https://graph.microsoft.com/beta/roleManagement/directory/roleAssignments' --body '{"principalId": "'"$PRINCIPAL_ID"'", "roleDefinitionId": "fdd7a751-b60b-444a-984c-02652fe8fa1c", "directoryScopeId": "/"}'
# Second role assignment
az rest --method POST --uri 'https://graph.microsoft.com/beta/roleManagement/directory/roleAssignments' --body '{"principalId": "'"$PRINCIPAL_ID"'", "roleDefinitionId": "e8611ab8-c189-46e8-94e1-60213ab1f814", "directoryScopeId": "/"}'
```
{% endcode %}
{% endtab %}
{% endtabs %}
8. On the [**Connectors**](https://app.apono.io/connectors) page, verify that the connector has been updated.
You can now integrate with an [Azure Management Group or Azure Subscription](/docs/azure-environment/azure-integrations/integrate-with-azure-management-groups-or-subscriptions).
{% endtab %}
{% tab title="Subscription" %}
Follow these steps to install a new connector:
1. At the shell prompt, set the environment variables.
```bash
export APONO_CONNECTOR_ID=
export APONO_TOKEN=
export SUBSCRIPTION_ID=
export RESOURCE_GROUP_NAME=
```
2. Log in to your Azure account.
```sh
az login
```
3. Set the `REGION` environment variable.
{% code overflow="wrap" %}
```bash
export REGION=$(az group show --name $RESOURCE_GROUP_NAME --query location --output tsv)
```
{% endcode %}
4. Run the following command to deploy the connector on your ACI.
{% code overflow="wrap" %}
```bash
export PRINCIPAL_ID=$(az container create --subscription $SUBSCRIPTION_ID --resource-group $RESOURCE_GROUP_NAME --name $APONO_CONNECTOR_ID --ports 80 --os-type linux --image registry.apono.io/apono-connector:v1.8.4 --environment-variables APONO_CONNECTOR_ID=$APONO_CONNECTOR_ID APONO_TOKEN=$APONO_TOKEN APONO_URL=api.apono.io CONNECTOR_METADATA='{"cloud_provider":"AZURE","subscription_id":"'"$SUBSCRIPTION_ID"'","resource_group":"'"$RESOURCE_GROUP_NAME"'","region":"'"$REGION"'","is_azure_admin":true}' --cpu 1 --memory 2 --registry-login-server registry.apono.io --registry-username apono --registry-password $APONO_TOKEN --location $REGION --assign-identity --query identity.principalId --output tsv)
```
{% endcode %}
5. Add the **User Access Administrator** role to the connector in the subscription scope.
{% code overflow="wrap" %}
```bash
az role assignment create --assignee-object-id $PRINCIPAL_ID --assignee-principal-type ServicePrincipal --role "User Access Administrator" --scope /subscriptions/$SUBSCRIPTION_ID
```
{% endcode %}
6. If your Azure resources have [resource locks](https://learn.microsoft.com/en-us/azure/azure-resource-manager/management/lock-resources) applied, assign the **Tag Contributor** role to the connector at the subscription scope. This allows Apono to add a tag marker during the grant or revoke process.
{% code overflow="wrap" %}
```bash
az role assignment create --assignee-object-id $PRINCIPAL_ID --assignee-principal-type ServicePrincipal --role "Tag Contributor" --scope /subscriptions/$SUBSCRIPTION_ID
```
{% endcode %}
7. For Azure AD, add the **Director Readers** role to the connector. For Azure AD Groups, add the **Groups Administrator** and **Privileged Role Administrator** roles.
{% tabs %}
{% tab title="Azure AD" %}
{% code overflow="wrap" %}
```bash
az rest --method POST --uri 'https://graph.microsoft.com/beta/roleManagement/directory/roleAssignments' --body '{"principalId": "'"$PRINCIPAL_ID"'", "roleDefinitionId": "88d8e3e3-8f55-4a1e-953a-9b9898b8876b", "directoryScopeId": "/"}'
```
{% endcode %}
{% endtab %}
{% tab title="Azure AD Groups" %}
{% code overflow="wrap" %}
```bash
# First role assignment
az rest --method POST --uri 'https://graph.microsoft.com/beta/roleManagement/directory/roleAssignments' --body '{"principalId": "'"$PRINCIPAL_ID"'", "roleDefinitionId": "fdd7a751-b60b-444a-984c-02652fe8fa1c", "directoryScopeId": "/"}'
# Second role assignment
az rest --method POST --uri 'https://graph.microsoft.com/beta/roleManagement/directory/roleAssignments' --body '{"principalId": "'"$PRINCIPAL_ID"'", "roleDefinitionId": "e8611ab8-c189-46e8-94e1-60213ab1f814", "directoryScopeId": "/"}'
```
{% endcode %}
{% endtab %}
{% endtabs %}
8. On the [**Connectors**](https://app.apono.io/connectors) page, verify that the connector has been updated.
You can now create integrate with an [Azure Management Group or Azure Subscription](/docs/azure-environment/azure-integrations/integrate-with-azure-management-groups-or-subscriptions).
{% endtab %}
{% endtabs %}
# Install an Azure connector on ACI using PowerShell
Learn how to deploy a connector in an Azure environment
Azure Container Instances (ACI) is a managed, serverless compute platform for running containerized applications. This guide explains how to install and configure an Apono connector on ACI in your Azure environment using PowerShell.
***
### Prerequisites
Item
Description
Apono Token
Account-specific Apono authentication value
Use the following steps to obtain your token:
On the Connectors page, click Install Connector. The Install Connector page appears.
Manages all aspects of Microsoft Entra ID and Microsoft services that use Microsoft Entra identities
❗Apono does not require Global Administrator access. This is required for the admin following this guide. ❗
***
### Install a new connector
{% hint style="info" %}
The connector requires the following roles:
1. Directory Readers - to validate users in Azure
2. User Access Administrator - to provision and deprovision access in the Management Group
Read more about these Microsoft Entra ID roles [here](https://learn.microsoft.com/en-us/entra/identity/role-based-access-control/permissions-reference#directory-readers).
{% endhint %}
Follow these steps to set up a new connector:
1. At the shell prompt, set the Apono environment variables to your account token.
```bash
export APONO_TOKEN=
export RESOURCE_GROUP_NAME=
export SUBNET_ID=[]
```
2. In a new or existing Terraform (.tf) file, add the following provider and module information to create a connector [with permissions](#with-permissions) or [without permissions](#without-permissions):
{% tabs %}
{% tab title="With Permissions" %}
Enables installing the connector in the cloud environment and managing access to resources
{% code overflow="wrap" %}
```hcl
module "connector" {
source = "github.com/apono-io/terraform-modules/azure/connector-with-permissions/stacks/apono-connector"
aponoToken = $APONO_TOKEN
resourceGroup = $AZURE_RESOURCE_GROUP
ipAddressType = // "Private" or "None"
subnetIds = [$SUBNET_ID]
}
```
{% endcode %}
{% endtab %}
{% tab title="Without Permissions" %}
Enables installing the connector in the cloud environment but managing access to non-Azure resources, such as self-hosted databases
{% code overflow="wrap" %}
```hcl
module "connector" {
source = "github.com/apono-io/terraform-modules/azure/connector-without-permissions/stacks/apono-connector"
aponoToken = $APONO_TOKEN
resourceGroup = $AZURE_RESOURCE_GROUP
ipAddressType = // "Private" or "None"
subnetIds = [$SUBNET_ID]
}
```
{% endcode %}
{% endtab %}
{% endtabs %}
3. At the Terraform CLI, download and install the provider plugin and module.
```hcl
terraform init
```
4. Apply the Terraform changes. The proposed changes and a confirmation prompt will be listed.
```
terraform apply
```
5. Enter *yes* to confirm deploying the changes to your Azure account.
6. On the [**Connectors**](https://app.apono.io/connectors) page, verify that the connector has been deployed.
You can now integrate with an [Azure Management Group or Azure Subscription](/docs/azure-environment/azure-integrations/integrate-with-azure-management-groups-or-subscriptions).
# Updating a connector in Azure
Learn how to update a connector through the Azure CLI
Periodically, you may need to update your Azure connector to help maintain functionality, performance, and security.
This article explains how to update and redeploy a connector through the Azure CLI.
***
### Prerequisites
Item
Description
Apono Token
Account-specific Apono authentication value
Use the following steps to obtain your token:
On the Connectors page, click Install Connector.The Install Connector page appears.
Click Azure > No, Just Install The Connector > CLI (Container Instance).
Copy the token in step listed on the page in step 1.
Azure Command Line Interface (Azure CLI)
Open-source tool that enables interacting with Azure services using your command-line shell
Reset passwords for users, helpdesk administrators, and user administrators
***
### Update a connector
To update an Apono connector for Azure, follow these steps in the shell environment with Azure CLI installed:
1. Set the `APONO_CONNECTOR_ID` environment variable to your chosen connector ID.
```shell
export APONO_CONNECTOR_ID=apono-connector
```
2. Set the `APONO_TOKEN` environment variable to your account token.
```shell
export APONO_TOKEN=abcd1234-e5f6-7g8h-90123i45678
```
3. Set the `SUBSCRIPTION_ID` environment variable to the Azure subscription ID.
```shell
export SUBSCRIPTION_ID=abcdef01-23456789-0abc-def012345678
```
4. Set the `RESOURCE_GROUP_NAME` environment variable to the Azure resource group name.
```shell
export RESOURCE_GROUP_NAME=myResourceGroup0816
```
5. Set the `REGION` environment variable.
export REGION=$(az group show --name $RESOURCE_GROUP_NAME --query location --output tsv)
6. Run the following command to deploy an updated version of the connector on the Azure Container Instance service.
7. On the [**Connectors**](https://app.apono.io/connectors) page, verify that the connector has been updated.
# Disable Locks
Understand how Apono handles Azure resource locks
Azure [resource locks](https://learn.microsoft.com/en-us/azure/azure-resource-manager/management/lock-resources) protect important cloud resources from being changed or deleted.
There are two types of locks:
* **CanNotDelete**: Allows changes but prevents deletion
* **ReadOnly**: Allows viewing but blocks changes and deletion
If you have set up Azure resource locks, you should enable the **Disable Locks** setting when integrating Apono with Azure Subscriptions or Management Groups. The **Disable Locks** setting allows Apono to temporarily remove and later restore locks in order to complete grant or revoke operations on protected resources. To support this, the Apono connector must also be assigned the **Tag Contributo**r role at the appropriate scope, allowing it to add a tag marker to locked resources.
Disable Locks setting
When **Disable Locks** is enabled, Apono performs the following operations during access provisioning or revocation:
1. Checks the target resource and its parent scopes for existing locks.
2. Adds a tag marker to the resource, if a lock exists.
3. Removes the lock.
4. Grants or revokes access. *(Delete-locked resources cannot be granted access.)*
5. Reapplies the lock.
If the connector fails after removing a lock but before reapplying it, the tag ensures the lock will be restored upon connector restart.
# Azure Integrations
If your organization uses Azure as a cloud platform, Apono can help you securely manage access to your Azure cloud-based services, subscriptions, and resource groups.
Azure logo
By identifying and transforming existing privileges, Apono can shift your cloud management from broad permissions to on-demand [access flows](/docs/access-flows/access-flows). Through our integrations, Apono enables you to perform the following access tasks:
* **Limit Access:** Discover existing privileges in Azure and convert them to just-in-time Access Flows.
* **Enable Self-Service Access:** Allow developers to request access to Azure services, buckets, and instances via Slack.
* **Automate Approval Workflows:** Create automatic approval processes for sensitive Azure resources.
* **Restrict Third-Party Access:** Grant third-parties (customers or vendors) time-based access to specific services with MFA verification.
* **Review Access:** Audit user cloud access, permissions granted, and reasons for access across Azure.
# Integrate with Azure Management Group or Subscription
Create an integration to manage access to your Azure services
Apono offers Azure users a simple way to centralize cloud management through our platform. Through a single integration, you can manage multiple Azure services across various management groups and subscriptions.
***
### Prerequisites
{% tabs %}
{% tab title="Management Group" %}
Item
Description
Apono Connector
On-prem connection serving as a bridge between an Azure instance and Apono
Install an Azure connector using one of these approaches:
Azure role applied to the Apono connector, allowing Apono to add tags to resources
This role is required when Azure resource locks are applied to your resources. Refer to our Azure connector documentation in the previous row to learn how to assign this role.
To understand how Apono uses this role, read about the Disable Locks feature.
Azure Management Group ID
ID of a container for enabling efficient management of access, policies, and compliance across multiple subscriptions
Azure role applied to the Apono connector, allowing Apono to add tags to resources
This role is required when Azure resource locks are applied to your resources. Refer to our Azure connector documentation in the previous row to learn how to assign this role.
To understand how Apono uses this role, read about the Disable Locks feature.
{% tabs %}
{% tab title="Management Group" %}
{% hint style="success" %}
You can also use the steps below to integrate with Apono using Terraform.
In step **11**, instead of clicking **Confirm**, follow the **Are you integrating with Apono using Terraform?** guidance.
{% endhint %}
Follow these steps to complete the integration:
1. On the [**Catalog**](https://app.apono.io/catalog?search=sql+-+mysql) tab, click **Azure**. The **Connect Integration** page appears.
2. Under **Discovery**, choose **Management Group**.
3. Select one or more resources.
4. Click **Next**. The **Apono connector** section expands.
5. From the dropdown menu, select a connector.
{% hint style="success" %}
If the desired connector is not listed, click **+ Add new connector** and follow the instructions for creating an [Azure](/docs/azure-environment/apono-connector-for-azure) connector.
{% endhint %}
6. Click **Next**. The **Integration Config** section expands.
7. Define the **Integration Config** settings.
Setting
Description
Integration Name
Unique, alphanumeric, user-friendly name used to identify this integration when constructing an access flow
Azure Management Group Id
ID of a container for enabling efficient management of access, policies, and compliance across multiple subscriptions
Azure Primary Domain
(Optional) Initial domain assigned to your tenant
Disable Locks
(Optional) Allows Apono to temporarily remove locks from Azure resources in order to grant or revoke access, then automatically restore the locks after the operation
(Optional) Instructions explaining how to access this integration's resources
Upon accessing an integration, a message with these instructions will be displayed to end users in the User Portal. The message may include up to 400 characters.
To view the message as it appears to end users, click Preview.
Integration Owner
(Optional) Fallback approver if no resource owner is found
Follow these steps to define one or several integration owners:
From the Attribute dropdown menu, select User or Group under the relevant identity provider (IdP) platform.
From the Value dropdown menu, select one or multiple users or groups.
NOTE: When Resource Owner is defined, an Integration Owner must be defined.
Resource Owner
(Optional) Group or role responsible for managing access approvals or rejections for the resource
Follow these steps to define one or several resource owners:
Enter a Key name. This value is the name of the tag created in your cloud environment.
From the Attribute dropdown menu, select an attribute under the IdP platform to which the key name is associated.
Apono will use the value associated with the key (tag) to identify the resource owner. When you update the membership of the group or role in your IdP platform, this change is also reflected in Apono.
NOTE: When this setting is defined, an Integration Owner must also be defined.
10. (Recommended) Click **Test Integration** to validate the integration.
{% hint style="info" %}
**Test Integration** is available after you have entered or selected values for all required integration fields.
During the test, Apono runs the following validation checks:
* **Connectivity:** The connector can reach the integration.
* **Configuration:** The integration is set up correctly.
* **Authentication:** The credentials are valid.
* **Discovery:** Resources can be fetched.
The **Test Validation** checklist shows the result of each check.
If a check fails, Apono identifies the failed check and highlights the fields that need correction.
{% endhint %}
11. Click **Confirm**.
💡Are you integrating with Apono using Terraform?
If you want to integrate with Apono using Terraform, follow these steps instead of clicking **Confirm**:
1. At the top of the screen, click **View as Code**. A modal appears with the completed Terraform configuration code.
2. Click to copy the code.
3. Make any additional edits.
4. Deploy the code in your Terraform.
Refer to [Integration Config Metadata](https://docs.apono.io/metadata-for-integration-config) for more details about the schema definition.
{% endtab %}
{% tab title="Subscription" %}
{% hint style="success" %}
You can also use the steps below to integrate with Apono using Terraform.
In step **11**, instead of clicking **Confirm**, follow the **Are you integrating with Apono using Terraform?** guidance.
{% endhint %}
Follow these steps to complete the integration:
1. On the [**Catalog**](https://app.apono.io/catalog?search=sql+-+mysql) tab, click **Azure**. The **Connect Integration** page appears.
2. Under **Discovery**, choose **Subscription**.
3. Select one or more resources.
4. Click **Next**. The **Apono connector** section expands.
5. From the dropdown menu, select a connector.
{% hint style="success" %}
If the desired connector is not listed, click **+ Add new connector** and follow the instructions for creating an [Azure](/docs/azure-environment/apono-connector-for-azure) connector.
{% endhint %}
6. Click **Next**. The **Integration Config** section expands.
7. Define the **Integration Config** settings.
Setting
Description
Integration Name
Unique, alphanumeric, user-friendly name used to identify this integration when constructing an access flow
Azure Subscription Id
(Optional) Unique identifier assigned to an Azure subscription
Azure Primary Domain
(Optional) Initial domain assigned to your tenant
Disable Locks
(Optional) Allows Apono to temporarily remove locks from Azure resources in order to grant or revoke access, then automatically restore the locks after the operation
8. Click **Next**. The **Get more with Apono** section expands.
9. Define the **Get more with Apono** settings.
Setting
Description
Custom Access Details
(Optional) Instructions explaining how to access this integration's resources
Upon accessing an integration, a message with these instructions will be displayed to end users in the User Portal. The message may include up to 400 characters.
To view the message as it appears to end users, click Preview.
Integration Owner
(Optional) Fallback approver if no resource owner is found
Follow these steps to define one or several integration owners:
From the Attribute dropdown menu, select User or Group under the relevant identity provider (IdP) platform.
From the Value dropdown menu, select one or multiple users or groups.
NOTE: When Resource Owner is defined, an Integration Owner must be defined.
Resource Owner
(Optional) Group or role responsible for managing access approvals or rejections for the resource
Follow these steps to define one or several resource owners:
Enter a Key name. This value is the name of the tag created in your cloud environment.
From the Attribute dropdown menu, select an attribute under the IdP platform to which the key name is associated.
Apono will use the value associated with the key (tag) to identify the resource owner. When you update the membership of the group or role in your IdP platform, this change is also reflected in Apono.
NOTE: When this setting is defined, an Integration Owner must also be defined.
10. (Recommended) Click **Test Integration** to validate the integration.
{% hint style="info" %}
**Test Integration** is available after you have entered or selected values for all required integration fields.
During the test, Apono runs the following validation checks:
* **Connectivity:** The connector can reach the integration.
* **Configuration:** The integration is set up correctly.
* **Authentication:** The credentials are valid.
* **Discovery:** Resources can be fetched.
The **Test Validation** checklist shows the result of each check.
If a check fails, Apono identifies the failed check and highlights the fields that need correction.
{% endhint %}
11. Click **Confirm**.
💡Are you integrating with Apono using Terraform?
If you want to integrate with Apono using Terraform, follow these steps instead of clicking **Confirm**:
1. At the top of the screen, click **View as Code**. A modal appears with the completed Terraform configuration code.
2. Click to copy the code.
3. Make any additional edits.
4. Deploy the code in your Terraform.
Refer to [Integration Config Metadata](https://docs.apono.io/metadata-for-integration-config/integration-metadata/azure-subscription) for more details about the schema definition.
{% endtab %}
{% endtabs %}
Now that you have completed this integration, you can [create access flows](/docs/access-flows/creating-access-flows-in-apono) that grant permission to your Azure services.
# Auto Discover Azure SQL Databases
Automatically identify Azure SQL database instances in a Subscription or Management Group for JIT access management
Apono’s Auto Discovery feature identifies tagged Azure SQL database instances, including MySQL and PostgreSQL. Rather than integrating each instance individually, you can integrate selected databases and their resources at once during your Azure Subscription or Azure Management Group setup.
{% hint style="warning" %}
This capability requires network access to each discoverable database. If your databases are in different Azure networks, make sure to create an Azure connector for each network.
Since Auto Discovery uses Azure Resource Graph, direct database access is not required for the initial discovery.
{% endhint %}
***
### Prerequisites
Permissions to complete the following tasks in your Azure instance:
Create and manage Azure Key Vault secrets
Tag Azure resources
Access to your Azure Subscription or Azure Management Group instance
***
### Enable Auto Discovery
Azure SQL instances under Connect Sub Integration
Follow these steps to enable Auto Discovery:
1. In your Azure SQL database, create a user for the Apono connector. As part of this step, you will also create a secret.
* [Azure MySQL](/docs/azure-environment/azure-integrations/azure-mysql#create-a-mysql-user)
* [Azure PostgreSQL](/docs/azure-environment/azure-integrations/azure-postgresql#create-a-postgresql-user)
2. [Tag your database instance](https://learn.microsoft.com/en-us/azure/azure-resource-manager/management/tag-resources-portal#add-tags) based on the authentication method you selected in the previous step. In the table below, the values shown in *italics* are the exact text you should enter when adding these tags.
Key
Value or Description
vault-url
URL of the Azure Key Vault containing the secret
Example: https://mystore.vault.azure.net/
secret-name
Name of the secret in Azure Key Vault
Example: db-credentials
3. In the Apono UI, on the [**Catalog**](https://app.apono.io/catalog?search=azure) tab, click **Azure**. The **Connect Integrations Group** page appears.
4. Under **Discovery**, click **Azure Management Group** or **Azure Subscription**.
5. Under **Connect Sub Integration**, select **Database**, **Table**, and **Role** to control the granularity of discovery in each discovered instance.
6. Complete the Azure Management or Azure Subscription [integration](/docs/azure-environment/azure-integrations/integrate-with-azure-management-groups-or-subscriptions#integrate-azure) (steps **3-10**).
After connecting your Azure Management or Azure Subscription to Apono, you will be redirected to the **Connected** tab to view your integrations. The new Azure integration, along with sub-integrations for each database instance, initialize during the first data fetch. The integration becomes **Active** once the process completes.
Now that you have completed this integration, you can [create access flows](/docs/access-flows/access-flows) that grant permission to your Azure SQL database resources.
***
### Troubleshooting
If SQL database instances appear with errors on your **Integrations** page, follow these steps:
1. **Check Tags**: Verify all required tags are present and correctly formatted.
2. **Connector Permissions**: Ensure the Apono connector has necessary permissions to read tags and access secrets.
3. **Network connectivity**: Ensure each SQL database instance is accessible by an Apono connector within the same network.
{% hint style="success" %}
For any questions about the discovery process, please contact Apono Support.
{% endhint %}
# Azure MySQL
Create an integration to manage access to Azure-managed MySQL databases
MySQL is a reliable and secure open-source relational database system. It serves as the main data store for various applications, websites, and products. This includes mission-critical applications and dynamic websites.
Microsoft enables developers to create cloud-hosted MySQL databases.
Through this integration, Apono helps you securely manage access to your Azure MySQL databases.
***
### Prerequisites
Before starting this integration, create the items listed in the following table.
Item
Description
Apono Connector
On-prem connection serving as a bridge between an Azure MySQL database instance and Apono
Minimum Required Version: 1.3.0
MySQL Info
Information for the database instance to be integrated:
Hostname
Port Number
***
### Create a MySQL user
You must create a user in your MySQL instance for the Apono connector and grant that user permissions to your databases.
Use the following steps to create a user and grant it permissions:
1. In your preferred client tool, create a new user. Be sure to set a strong password for the user.
```sql
CREATE USER 'apono_connector'@'%' IDENTIFIED BY 'password';
```
2. Expose databases to the user. This allows Apono to view database names without accessing the contents of each database.
```sql
GRANT SHOW DATABASES ON *.* TO 'apono_connector'@'%';
```
3. Grant the user database permissions.\
\
The following commands grant Apono the following permissions:
* Creating users
* Updating user information and privileges
* Monitoring and troubleshooting processes running on the database\\
```sql
GRANT CREATE USER ON *.* TO 'apono_connector'@'%';
GRANT UPDATE ON mysql.* TO 'apono_connector'@'%';
GRANT PROCESS ON *.* TO 'apono_connector'@'%';
```
4. Grant the user **only one** of the following sets of permissions. The chosen set defines the highest level of permissions to provision with Apono.\
\
Expand each of the following options to reveal the SQL commands:
{% tabs %}
{% tab title="READ\_ONLY" %}
```sql
GRANT SELECT ON *.* TO 'apono_connector'@'%';
GRANT GRANT OPTION ON *.* TO 'apono_connector'@'%';
```
{% endtab %}
{% tab title="READ\_WRITE" %}
{% code overflow="wrap" %}
```sql
GRANT SELECT,ALTER,ALTER ROUTINE,CREATE,CREATE ROUTINE,CREATE TEMPORARY TABLES,CREATE VIEW,DELETE,INDEX,INSERT,TRIGGER,UPDATE ON *.* TO 'apono_connector'@'%';
GRANT GRANT OPTION ON *.* TO 'apono_connector'@'%';
```
{% endcode %}
{% endtab %}
{% tab title="ADMIN" %}
{% code overflow="wrap" %}
```sql
GRANT EXECUTE,DROP,SELECT,ALTER,ALTER ROUTINE,CREATE,CREATE ROUTINE,CREATE TEMPORARY TABLES,CREATE VIEW,DELETE,INDEX,INSERT,TRIGGER,UPDATE ON *.* TO 'apono_connector'@'%';
GRANT GRANT OPTION ON *.* TO 'apono_connector'@'%';
```
{% endcode %}
{% endtab %}
{% endtabs %}
5. (MySQL 8.0+) Grant the service account the authority to manage other roles. This enables Apono to create, alter, and drop roles. However, this role does not inherently grant specific database access permissions.
```sql
GRANT ROLE_ADMIN on *.* to 'apono_connector';
```
6. Using the credentials from step **1**, [create a secret](/docs/connectors-and-secrets/apono-integration-secret#azure) for the database instance and associate it to the Azure connector. Use the following key-value pair structure when generating the secret. Be sure to replace `#PASSWORD` with the actual value. If you used a different name for the user, replace `apono-connector` with the name you assigned to the user.
```json
"username": "apono_connector",
"password": "#PASSWORD"
```
You can now [integrate Azure MySQL](#integrate-azure-mysql).
***
### Integrate Azure MySQL
Azure MySQL
{% hint style="success" %}
You can also use the steps below to integrate with Apono using Terraform.
In step **12**, instead of clicking **Confirm**, follow the **Are you integrating with Apono using Terraform?** guidance.
{% endhint %}
Follow these steps to complete the integration:
1. On the [**Catalog**](https://app.apono.io/catalog?search=azure+mysql) tab, click **Azure MySQL**. The **Connect Integration** page appears.
2. Under **Discovery**, click one or more resource types and cloud services to sync with Apono.
{% hint style="info" %}
Apono automatically discovers and syncs all the instances in the environment. After syncing, you can manage **Access Flows** to these resources.
{% endhint %}
3. Click **Next**. The **Apono connector** section appears.
4. From the dropdown menu, select a connector.
{% hint style="info" %}
If the desired connector is not listed, click **+ Add new connector** and follow the instructions for creating an [Azure connector](/docs/azure-environment/apono-connector-for-azure) and [associate the secret](/docs/connectors-and-secrets/apono-integration-secret#azure) with the connector.
{% endhint %}
5. Click **Next**. The **Integration Config** section expands.
6. Define the **Integration Config** settings.
Setting
Description
Integration Name
Unique, alphanumeric, user-friendly name used to identify this integration when constructing an access flow
Hostname
Hostname of the MySQL instance to connect
Port
Port value for the database
By default, Apono sets this value to 3306.
7. Click **Next**. The **Secret Store** section expands.
8. [Associate the secret or credentials](/docs/connectors-and-secrets/apono-integration-secret).
9. Click **Next**. The **Custom Access Details** section expands.
10. Define the **Get more with Apono** settings.
Setting
Description
Credential Rotation
(Optional) Number of days after which the database credentials must be rotated
(Optional) Instructions explaining how to access this integration's resources
Upon accessing an integration, a message with these instructions will be displayed to end users in the User Portal. The message may include up to 400 characters.
To view the message as it appears to end users, click Preview.
Integration Owner
(Optional) Fallback approver if no resource owner is found
Follow these steps to define one or several integration owners:
From the Attribute dropdown menu, select User or Group under the relevant identity provider (IdP) platform.
From the Value dropdown menu, select one or multiple users or groups.
NOTE: When Resource Owner is defined, an Integration Owner must be defined.
Resource Owner
(Optional) Group or role responsible for managing access approvals or rejections for the resource
Follow these steps to define one or several resource owners:
Enter a Key name. This value is the name of the tag created in your cloud environment.
From the Attribute dropdown menu, select an attribute under the IdP platform to which the key name is associated.
Apono will use the value associated with the key (tag) to identify the resource owner. When you update the membership of the group or role in your IdP platform, this change is also reflected in Apono.
NOTE: When this setting is defined, an Integration Owner must also be defined.
11. (Recommended) Click **Test Integration** to validate the integration.
{% hint style="info" %}
**Test Integration** is available after you have entered or selected values for all required integration fields.
During the test, Apono runs the following validation checks:
* **Connectivity:** The connector can reach the integration.
* **Configuration:** The integration is set up correctly.
* **Authentication:** The credentials are valid.
* **Discovery:** Resources can be fetched.
The **Test Validation** checklist shows the result of each check.
If a check fails, Apono identifies the failed check and highlights the fields that need correction.
{% endhint %}
12. Click **Confirm**.
💡Are you integrating with Apono using Terraform?
If you want to integrate with Apono using Terraform, follow these steps instead of clicking **Confirm**:
1. At the top of the screen, click **View as Code**. A modal appears with the completed Terraform configuration code.
2. Click to copy the code.
3. Make any additional edits.
4. Deploy the code in your Terraform.
Refer to [Integration Config Metadata](https://docs.apono.io/metadata-for-integration-config/integration-metadata/azure-mysql) for more details about the schema definition.
Now that you have completed this integration, you can [create access flows](/docs/access-flows/access-flows) that grant permission to your Azure MySQL database instance.
# Azure PostgreSQL
Create an integration to manage access to Azure-managed PostgreSQL databases
PostgreSQL databases are open-source relational database management systems emphasizing extensibility and SQL compliance. Microsoft enables developers to create cloud-hosted PostgreSQL databases.
Through this integration, Apono helps you securely manage access to your Azure PostgreSQL instances.
To enable Apono to manage Azure PostgreSQL user access, you must create a user and then configure the integration within the Apono UI.
***
### Prerequisites
Item
Description
Apono Connector
On-prem connection serving as a bridge between an Azure MySQL database instance and Apono
Minimum Required Version: 1.3.0
PostgreSQL Info
Information for the database instance to be integrated:
Hostname
Port Number
Database Name
***
### Create a PostgreSQL user
You must create a user in your PostgreSQL instance for the Apono connector and grant that user permissions to your databases.
{% hint style="danger" %}
You must use the admin account and password to connect to your database.
{% endhint %}
Use the following steps to create a user and grant it permissions:
1. In your preferred client tool, create a new user. Use `apono_connector` for the username. Be sure to set a strong password for the user.\
You must also grant the `azure_pg_admin` role to the user in the database instance.
```sql
CREATE USER apono_connector WITH ENCRYPTED PASSWORD 'password';
ALTER USER apono_connector WITH CREATEROLE;
GRANT azure_pg_admin TO apono_connector;
```
2. Grant privileges to the `azure_pg_admin` role on all databases except `template0` and `azure_sys`.\
This allows Apono to perform tasks that are not restricted to a single schema or object within the database, such as creating, altering, and dropping database objects.
{% code overflow="wrap" %}
```sql
DO $$
DECLARE
database_name text;
BEGIN
FOR database_name IN (SELECT datname FROM pg_database WHERE datname != 'template0' AND datname != 'azure_sys' AND datname != 'azure_maintenance') LOOP
EXECUTE 'GRANT ALL PRIVILEGES ON DATABASE ' || quote_ident(database_name) || ' TO azure_pg_admin WITH GRANT OPTION';
END LOOP;
END; $$
```
{% endcode %}
3. For each database to be managed through Apono, connect to the database and grant `azure_pg_admin` privileges on all objects in the schemas.\
\
This allows Apono to perform tasks that are restricted to schemas within the database, such as modifying table structures, creating new sequences, or altering functions.
{% code overflow="wrap" %}
```sql
DO $$
DECLARE
schema text;
BEGIN
FOR schema IN (SELECT schema_name FROM information_schema.schemata WHERE schema_name NOT LIKE 'pg_%' AND schema_name != 'information_schema' AND schema_name != 'cron') LOOP
EXECUTE 'GRANT ALL PRIVILEGES ON SCHEMA ' || quote_ident(schema) || ' TO azure_pg_admin WITH GRANT OPTION';
EXECUTE 'GRANT ALL PRIVILEGES ON ALL TABLES IN SCHEMA ' || quote_ident(schema) || ' TO azure_pg_admin WITH GRANT OPTION';
EXECUTE 'GRANT ALL PRIVILEGES ON ALL SEQUENCES IN SCHEMA ' || quote_ident(schema) || ' TO azure_pg_admin WITH GRANT OPTION';
EXECUTE 'GRANT ALL PRIVILEGES ON ALL FUNCTIONS IN SCHEMA ' || quote_ident(schema) || ' TO azure_pg_admin WITH GRANT OPTION';
END LOOP;
EXECUTE 'ALTER DEFAULT PRIVILEGES GRANT ALL PRIVILEGES ON TABLES TO azure_pg_admin WITH GRANT OPTION';
EXECUTE 'ALTER DEFAULT PRIVILEGES GRANT ALL PRIVILEGES ON SEQUENCES TO azure_pg_admin WITH GRANT OPTION';
EXECUTE 'ALTER DEFAULT PRIVILEGES GRANT ALL PRIVILEGES ON FUNCTIONS TO azure_pg_admin WITH GRANT OPTION';
EXECUTE 'ALTER DEFAULT PRIVILEGES GRANT ALL PRIVILEGES ON SCHEMAS TO azure_pg_admin WITH GRANT OPTION';
END; $$
```
{% endcode %}
4. Connect to the `template1` database and grant `azure_pg_admin` privileges on all objects in the schemas.\
\
For any new databases created in the future, this allows Apono to perform tasks that are restricted to schemas within the database, such as modifying table structures, creating new sequences, or altering functions.
{% code overflow="wrap" %}
```sql
DO $$
DECLARE
schema text;
BEGIN
FOR schema IN (SELECT schema_name FROM information_schema.schemata WHERE schema_name NOT LIKE 'pg_%' AND schema_name != 'information_schema' AND schema_name != 'cron') LOOP
EXECUTE 'GRANT ALL PRIVILEGES ON SCHEMA ' || quote_ident(schema) || ' TO azure_pg_admin WITH GRANT OPTION';
EXECUTE 'GRANT ALL PRIVILEGES ON ALL TABLES IN SCHEMA ' || quote_ident(schema) || ' TO azure_pg_admin WITH GRANT OPTION';
EXECUTE 'GRANT ALL PRIVILEGES ON ALL SEQUENCES IN SCHEMA ' || quote_ident(schema) || ' TO azure_pg_admin WITH GRANT OPTION';
EXECUTE 'GRANT ALL PRIVILEGES ON ALL FUNCTIONS IN SCHEMA ' || quote_ident(schema) || ' TO azure_pg_admin WITH GRANT OPTION';
END LOOP;
EXECUTE 'ALTER DEFAULT PRIVILEGES GRANT ALL PRIVILEGES ON TABLES TO azure_pg_admin WITH GRANT OPTION';
EXECUTE 'ALTER DEFAULT PRIVILEGES GRANT ALL PRIVILEGES ON SEQUENCES TO azure_pg_admin WITH GRANT OPTION';
EXECUTE 'ALTER DEFAULT PRIVILEGES GRANT ALL PRIVILEGES ON FUNCTIONS TO azure_pg_admin WITH GRANT OPTION';
EXECUTE 'ALTER DEFAULT PRIVILEGES GRANT ALL PRIVILEGES ON SCHEMAS TO azure_pg_admin WITH GRANT OPTION';
END; $$
```
{% endcode %}
5\. Using the credentials from step **1**, [create a secret](/docs/connectors-and-secrets/apono-integration-secret#azure) for the database instance and associate it to the Azure connector. Use the following key-value pair structure when generating the secret. Be sure to replace `#PASSWORD` with the actual value. If you used a different name for the user, replace `apono-connector` with the name you assigned to the user.
```json
"username": "apono_connector",
"password": "#PASSWORD"
```
***
### Integrate Azure PostgreSQL
Azure PostgreSQL
{% hint style="success" %}
You can also use the steps below to integrate with Apono using Terraform.
In step **12**, instead of clicking **Confirm**, follow the **Are you integrating with Apono using Terraform?** guidance.
{% endhint %}
Follow these steps to complete the integration:
1. On the [**Catalog**](https://app.apono.io/catalog?search=azure+postgresql) tab, click **Azure PostgreSQL**. The **Connect Integration** page appears.
2. Under **Discovery**, click one or more resource types to sync with Apono.
{% hint style="info" %}
Apono automatically discovers and syncs all the instances in the environment. After syncing, you can manage **Access Flows** to these resources.
{% endhint %}
3. Click **Next**. The **Apono connector** section appears.
4. From the dropdown menu, select the connector that has been granted read access to the secret for the PostgreSQL instance.
{% hint style="success" %}
If the desired connector is not listed, click **+ Add new connector** and follow the instructions for [creating an Azure connector](/docs/azure-environment/apono-connector-for-azure) and [associate the secret](/docs/connectors-and-secrets/apono-integration-secret#azure) with the connector.
{% endhint %}
5. Click **Next**. The **Integration Config** section expands.
6. Define the **Integration Config** settings.
Setting
Description
Integration Name
Unique, alphanumeric, user-friendly name used to identify this integration when constructing an access flow
Hostname
Hostname of the PostgreSQL instance to connect
Port
Port value for the database
By default, Apono sets this value to 5432.
Database Name
Name of the database to integrate
By default, Apono sets this value to postgre.
SSL Mode
(Optional) Mode of Secure Sockets Layer (SSL) encryption used to secure the connection with the SQL database server
require: An SSL-encrypted connection must be used.
allow: An SSL-encrypted or unencrypted connection is used. If an SSL encrypted connection is unavailable, the unencrypted connection is used.
disable: An unencrypted connection is used.
prefer: An SSL-encrypted connection is attempted. If the encrypted connection is unavailable, the unencrypted connection is used.
verify-ca: An SSL-encrypted connection must be used and a server certification verification against the provided CA certificates must pass.
verify-full: An SSL-encrypted connection must be used and a server certification verification against the provided CA certificates must pass. Additionally, the server hostname is checked against the certificate's names.
7. Click **Next**. The **Secret Store** section expands.
8. [Associate the secret or credentials](/docs/connectors-and-secrets/apono-integration-secret).
9. Click **Next**. The **Get more with Apono** section expands.
10. Define the **Get more with Apono** settings.
Setting
Description
Credential Rotation
(Optional) Number of days after which the database credentials must be rotated
(Optional) Instructions explaining how to access this integration's resources
Upon accessing an integration, a message with these instructions will be displayed to end users in the User Portal. The message may include up to 400 characters.
To view the message as it appears to end users, click Preview.
Integration Owner
(Optional) Fallback approver if no resource owner is found
Follow these steps to define one or several integration owners:
From the Attribute dropdown menu, select User or Group under the relevant identity provider (IdP) platform.
From the Value dropdown menu, select one or multiple users or groups.
NOTE: When Resource Owner is defined, an Integration Owner must be defined.
Resource Owner
(Optional) Group or role responsible for managing access approvals or rejections for the resource
Follow these steps to define one or several resource owners:
Enter a Key name. This value is the name of the tag created in your cloud environment.
From the Attribute dropdown menu, select an attribute under the IdP platform to which the key name is associated.
Apono will use the value associated with the key (tag) to identify the resource owner. When you update the membership of the group or role in your IdP platform, this change is also reflected in Apono.
NOTE: When this setting is defined, an Integration Owner must also be defined.
11. (Recommended) Click **Test Integration** to validate the integration.
{% hint style="info" %}
**Test Integration** is available after you have entered or selected values for all required integration fields.
During the test, Apono runs the following validation checks:
* **Connectivity:** The connector can reach the integration.
* **Configuration:** The integration is set up correctly.
* **Authentication:** The credentials are valid.
* **Discovery:** Resources can be fetched.
The **Test Validation** checklist shows the result of each check.
If a check fails, Apono identifies the failed check and highlights the fields that need correction.
{% endhint %}
12. Click **Confirm**.
💡Are you integrating with Apono using Terraform?
If you want to integrate with Apono using Terraform, follow these steps instead of clicking **Confirm**:
1. At the top of the screen, click **View as Code**. A modal appears with the completed Terraform configuration code.
2. Click to copy the code.
3. Make any additional edits.
4. Deploy the code in your Terraform.
Refer to [Integration Config Metadata](https://docs.apono.io/metadata-for-integration-config/integration-metadata/azure-postgresql) for more details about the schema definition.
Now that you have completed this integration, you can [create access flows](/docs/access-flows/access-flows) that grant permission to your Azure PostgreSQL instances.
# Integrate with AKS
Create an integration to manage access to a Kubernetes cluster on Azure
With Azure Kubernetes Service (AKS) on Microsoft Azure, AKS simplifies the management complexities of Kubernetes.
Through this integration, Apono helps you securely manage access to your Microsoft Azure Kubernetes cluster.
***
### Prerequisites
Item
Description
Apono Connector
On-prem connection installed on the AKS cluster that serves as a bridge between the cluster and Apono
Apono Premium
Apono plan providing all available features and dedicated account support
User Access Administrator Role
Azure role that enables granting users the Azure Kubernetes Service Cluster User role.
Apono does not require admin permissions to the Kubernetes environment.
Apono Secret
(Optional) If your AKS setup does not use Azure RBAC, create a secret using the following structure:
"token": "<Kubernetes service account token>"
Apono does not store credentials. The Apono Connector uses the secret to communicate with services in your environment and separate the Apono web app from the environment for maximalsecurity.
***
### Integrate Azure Kubernetes Service (AKS)
Azure Kubernetes Service tile
{% hint style="success" %}
You can also use the steps below to integrate with Apono using Terraform.
In step **12**, instead of clicking **Confirm**, follow the **Are you integrating with Apono using Terraform?** guidance.
{% endhint %}
Follow these steps to complete the integration:
1. On the [**Catalog**](https://app.apono.io/catalog?search=AKS) tab, click **Azure Kubernetes Service (AKS)**. The **Connect Integration** page appears.
2. Under **Discovery**, click one or more resource types and cloud services to sync with Apono.
{% hint style="info" %}
Apono automatically discovers and syncs all the instances in the environment. After syncing, you can manage **Access Flows** to these resources.
{% endhint %}
3. Click **Next**. The **Apono connector** section appears.
4. From the dropdown menu, select a connector.
{% hint style="info" %}
If the desired connector is not listed, click **+ Add new connector** and follow the instructions for creating a [Kubernetes connector](/docs/kubernetes-environment/apono-connector-for-kubernetes).
{% endhint %}
5. Click **Next**. The **Integration Config** section expands.
6. Define the **Integration Config** settings.
Setting
Description
Integration Name
Unique, alphanumeric, user-friendly name used to identify this integration when constructing an access flow
Server URL
(Optional) URL of the Kubernetes API server used to interact with the Kubernetes cluster
Certificate Authority
(Optional) Certificate that ensures that the Kubernetes API server is trusted and authentic
Leave this field empty if you want to connect the cluster where the connector is deployed.
Resource Group
(Optional) Resource group where the cluster is deployed
(Optional) Subscription ID where the cluster is deployed
7. Click **Next**. The **Secret Store** section expands.
8. [Associate the secret or credentials](/docs/connectors-and-secrets/apono-integration-secret).
9. Click **Next**. The **Get more with Apono** section expands.
10. Define the **Get more with Apono** settings.
Setting
Description
Credential Rotation
(Optional) Number of days after which the database credentials must be rotated
(Optional) Instructions explaining how to access this integration's resources
Upon accessing an integration, a message with these instructions will be displayed to end users in the User Portal. The message may include up to 400 characters.
To view the message as it appears to end users, click Preview.
Integration Owner
(Optional) Fallback approver if no resource owner is found
Follow these steps to define one or several integration owners:
From the Attribute dropdown menu, select User or Group under the relevant identity provider (IdP) platform.
From the Value dropdown menu, select one or multiple users or groups.
NOTE: When Resource Owner is defined, an Integration Owner must be defined.
Resource Owner
(Optional) Group or role responsible for managing access approvals or rejections for the resource
Follow these steps to define one or several resource owners:
Enter a Key name. This value is the name of the tag created in your cloud environment.
From the Attribute dropdown menu, select an attribute under the IdP platform to which the key name is associated.
Apono will use the value associated with the key (tag) to identify the resource owner. When you update the membership of the group or role in your IdP platform, this change is also reflected in Apono.
NOTE: When this setting is defined, an Integration Owner must also be defined.
11. (Recommended) Click **Test Integration** to validate the integration.
{% hint style="info" %}
**Test Integration** is available after you have entered or selected values for all required integration fields.
During the test, Apono runs the following validation checks:
* **Connectivity:** The connector can reach the integration.
* **Configuration:** The integration is set up correctly.
* **Authentication:** The credentials are valid.
* **Discovery:** Resources can be fetched.
The **Test Validation** checklist shows the result of each check.
If a check fails, Apono identifies the failed check and highlights the fields that need correction.
{% endhint %}
12. Click **Confirm**.
💡Are you integrating with Apono using Terraform?
If you want to integrate with Apono using Terraform, follow these steps instead of clicking **Confirm**:
1. At the top of the screen, click **View as Code**. A modal appears with the completed Terraform configuration code.
2. Click to copy the code.
3. Make any additional edits.
4. Deploy the code in your Terraform.
Refer to [Integration Config Metadata](https://docs.apono.io/metadata-for-integration-config/integration-metadata/azure-aks) for more details about the schema definition.
Now that you have completed this integration, you can [create access flows](/docs/access-flows/access-flows) that grant permission to your Azure Kubernetes Service cluster.
# Apono Connector for GCP
How to install a Connector on a GCP Project to integrate a GCP Organization or Project with Apono with Helm
To [integrate with GCP](/docs/gcp-environment/gcp-integrations/integrate-a-gcp-organization-or-project) and start managing JIT access to GCP cloud resources, you must first install a connector in your GCP environment.
The GCP connector must be installed on a GKE cluster. You can do this with CLI or with GCP Deployment Manager in the GCP Portal. The Apono connector will require permissions to the organization or to a specific project, depending on the level of access management you want to achieve with Apono.
* To manage access to a single GCP Project, install a connector in a GKE cluster on that project and give the connector the appropriate role to the project. Follow [this guide](#gcp-project-connector).
* To manage access to a GCP Organization, install a connector in a GKE cluster on any project and give the connector the appropriate role to the organization. Follow [this guide](#gcp-organization-connector).
{% hint style="info" %}
What's a connector? What makes it so secure?
The Apono Connector is an on-prem connection that can be used to connect resources to Apono and separate the Apono web app from the environment for maximal [security](/docs/about-apono/security-and-architecture).
Read more about the recommended [GCP Installation Architecture](/docs/about-apono/security-and-architecture#apono-and-gcp).
{% endhint %}
## How to install
### GCP Organization Connector
#### Using Helm
**Prerequisites**
* [A GCP user with *owner* permissions for the organization](https://support.google.com/cloud/answer/7284057?hl=en)
* A GKE cluster on any GCP Project of your choosing
* [Google CLI](https://cloud.google.com/sdk/docs/install)
* [Kubernetes CLI](https://kubernetes.io/docs/reference/kubectl/) (`kubectl`)
* The Apono GCP token generated in the Apono UI:
* [Organization ID](https://cloud.google.com/resource-manager/docs/creating-managing-organization#retrieving_your_organization_id)
* [Project ID](https://cloud.google.com/resource-manager/docs/creating-managing-projects#identifying_projects)
* Make sure `Cloud Asset API` is [turned on](https://console.developers.google.com/apis/api/cloudasset.googleapis.com/overview?project=\[CONNECTOR_PROJECT]) in the Project where the connector is installed.
{% hint style="info" %}
Learn more about the [Cloud Asset API](https://cloud.google.com/asset-inventory/docs/reference/rest).
{% endhint %}
**Step-by-step guide**
1. **Prepare parameters for Apono installation**
Fill and set the values for the following variables:
```shell
# Your GCP Project ID
export PROJECT_ID=
# The token from your Apono Account
export APONO_TOKEN=
# Your Organization Id (gcloud projects get-ancestors $PROJECT_ID)
export ORGANIZATION_ID=
# The connector identifier
export APONO_CONNECTOR_ID=apono-google-integration
# The namespace to deploy the cluster on
export NAMESPACE=apono-connector-namespace
echo "PROJECT_ID: $PROJECT_ID"
echo "APONO_TOKEN: $APONO_TOKEN"
echo "APONO_CONNECTOR_ID: $APONO_CONNECTOR_ID"
echo "NAMESPACE: $NAMESPACE"
echo "ORGANIZATION_ID: $ORGANIZATION_ID"
```
Set the connector service account variable:
{% code overflow="wrap" %}
```shell
export GCP_SERVICE_ACCOUNT_EMAIL=apono-connector-iam-sa@$PROJECT_ID.iam.gserviceaccount.com &&
echo "GCP_SERVICE_ACCOUNT_EMAIL: $GCP_SERVICE_ACCOUNT_EMAIL"
```
{% endcode %}
2. **Make sure Cloud Resource Manager API is enabled**
```shell
gcloud services enable cloudresourcemanager.googleapis.com --project $PROJECT_ID
```
3. **Create IAM Service Account and grant it the roles: Browser, Security Admin and Tag Viewer for the entire organization.**
```shell
gcloud iam service-accounts create apono-connector-iam-sa --project $PROJECT_ID
gcloud organizations add-iam-policy-binding $ORGANIZATION_ID \
--member="serviceAccount:$GCP_SERVICE_ACCOUNT_EMAIL" \
--role="roles/browser"
gcloud organizations add-iam-policy-binding $ORGANIZATION_ID \
--member="serviceAccount:$GCP_SERVICE_ACCOUNT_EMAIL" \
--role="roles/iam.securityAdmin"
gcloud organizations add-iam-policy-binding $ORGANIZATION_ID \
--member="serviceAccount:$GCP_SERVICE_ACCOUNT_EMAIL" \
--role="roles/resourcemanager.tagViewer"
```
4. **Verifying default GKE cluster for installation**
* Open the Kubernetes command-line tool
* Run `kubectl config get-contexts` to see the GKE clusters list
* Set the desired cluster to be the default - `kubectl config use-context` #the name of the cluster
* Run `kubectl get-contexts` - verify the "\*" indicates the correct cluster.
5. **Bind the IAM Service Account to the K8S Service Account**
```shell
gcloud iam service-accounts add-iam-policy-binding $GCP_SERVICE_ACCOUNT_EMAIL \
--member="serviceAccount:$PROJECT_ID.svc.id.goog[$NAMESPACE/apono-connector-service-account]" \
--role="roles/iam.workloadIdentityUser" \
--project $PROJECT_ID
```
6. **Install Helm Chart**
The helm chart installs the following:
* Kubernetes Deployment containing the Apono-Connector image container
* Kubernetes Service Account annotated with GCP IAM Service Account
* Kubernetes Secret containing Docker Registry credentials
{% code overflow="wrap" %}
```shell
helm install apono-connector apono-connector --repo https://apono-io.github.io/apono-helm-charts \
--set-string apono.token=$APONO_TOKEN \
--set-string apono.connectorId=$APONO_CONNECTOR_ID \
--set-string serviceAccount.gcpServiceAccountEmail=$GCP_SERVICE_ACCOUNT_EMAIL \
--namespace $NAMESPACE \
--create-namespace
```
{% endcode %}
{% hint style="info" %}
Interested in HA for the connector?
Add this variable to the Helm chart to create one or more replicas of the Apono connector instance:
`--set-string replicaCount=`
Read more [here](/docs/connectors-and-secrets/high-availability-for-connectors).
{% endhint %}
### GCP Project Connector
#### Using Helm
**Prerequisites**
* [A GCP user with *owner* permissions for the organization](https://support.google.com/cloud/answer/7284057?hl=en)
* A GKE cluster on the GCP Project you'd like to integrate with Apono
* [Google CLI](https://cloud.google.com/sdk/docs/install)
* [Kubernetes CLI](https://kubernetes.io/docs/reference/kubectl/) (`kubectl`)
* The Apono GCP token generated in the Apono UI:
* [Project ID](https://cloud.google.com/resource-manager/docs/creating-managing-projects#identifying_projects)
* Make sure `Cloud Asset API` is [turned on](https://console.developers.google.com/apis/api/cloudasset.googleapis.com/overview?project=\[CONNECTOR_PROJECT]) in the Project where the connector is installed.
{% hint style="info" %}
Learn more about the [Cloud Asset API](https://cloud.google.com/asset-inventory/docs/reference/rest).
{% endhint %}
**Step-by-step guide**
1. **Prepare parameters for Apono installation**
Fill and set the values for the following variables:
```sh
# Your GCP Project ID
export PROJECT_ID=
# The token from your Apono Account
export APONO_TOKEN=
# The connector identifier
export APONO_CONNECTOR_ID=apono-google-integration
# The namespace to deploy the cluster on
export NAMESPACE=apono-connector-namespace
echo "PROJECT_ID: $PROJECT_ID"
echo "APONO_TOKEN: $APONO_TOKEN"
echo "APONO_CONNECTOR_ID: $APONO_CONNECTOR_ID"
echo "NAMESPACE: $NAMESPACE"
```
Set the following variable:
{% code overflow="wrap" %}
```shell
export GCP_SERVICE_ACCOUNT_EMAIL=apono-connector-iam-sa@$PROJECT_ID.iam.gserviceaccount.com && echo "GCP_SERVICE_ACCOUNT_EMAIL: $GCP_SERVICE_ACCOUNT_EMAIL"
```
{% endcode %}
2. **Enable Cloud Resource Manager API**
{% code overflow="wrap" %}
```shell
gcloud services enable cloudresourcemanager.googleapis.com --project $PROJECT_ID
```
{% endcode %}
3. **Create IAM Service Account and grant it with the roles: Browser, Security Admin and Tag Viewer for the project.**
```shell
gcloud iam service-accounts create apono-connector-iam-sa --project $PROJECT_ID
gcloud projects add-iam-policy-binding $PROJECT_ID \
--member="serviceAccount:$GCP_SERVICE_ACCOUNT_EMAIL" \
--role="roles/browser" \
--project $PROJECT_ID
gcloud projects add-iam-policy-binding $PROJECT_ID \
--member="serviceAccount:$GCP_SERVICE_ACCOUNT_EMAIL" \
--role="roles/iam.securityAdmin" \
--project $PROJECT_ID
gcloud projects add-iam-policy-binding $PROJECT_ID \
--member="serviceAccount:$GCP_SERVICE_ACCOUNT_EMAIL" \
--role="roles/resourcemanager.tagViewer" \
--project $PROJECT_ID
```
4. **Verifying default GKE cluster for installation**
* Open the Kubernetes command-line tool
* Run `kubectl config get-contexts` to see the GKE clusters list
* Set the desired cluster to be the default - `kubectl config use-context` #the name of the cluster
* Run `kubectl get-contexts` - verify the "\*" indicates the correct cluster.
5. **Bind the IAM Service Account to the K8S Service Account**
```shell
gcloud iam service-accounts add-iam-policy-binding $GCP_SERVICE_ACCOUNT_EMAIL \
--member="serviceAccount:$PROJECT_ID.svc.id.goog[$NAMESPACE/apono-connector-service-account]" \
--role="roles/iam.workloadIdentityUser" \
--project $PROJECT_ID
```
6. **Install Helm Chart**
The helm chart installs the following:
* Kubernetes Deployment containing the Apono-Connector image container
* Kubernetes Service Account annotated with GCP IAM Service Account
* Kubernetes Secret containing Docker Registry credentials
{% code overflow="wrap" %}
```shell
helm install apono-connector apono-connector --repo https://apono-io.github.io/apono-helm-charts \
--set-string apono.token=$APONO_TOKEN \
--set-string apono.connectorId=$APONO_CONNECTOR_ID \
--set-string serviceAccount.gcpServiceAccountEmail=$GCP_SERVICE_ACCOUNT_EMAIL \
--namespace $NAMESPACE \
--create-namespace
```
{% endcode %}
{% hint style="success" %}
Interested in HA for the connector?
Add this variable to the Helm chart to create one or more replicas of the Apono connector instance:
`--set-string replicaCount=`
Read more [here](/docs/connectors-and-secrets/high-availability-for-connectors).
{% endhint %}
### Results
You can validate the Connector is installed in the [Connector status page](https://app.apono.io/connectors).
Then, In the Apono app, you will see the connector was found and a green checkmark indication.
{% hint style="success" %}
Hurray!
You now have a GCP connector installed in your GCP environment with permissions to the Project.
You can now integrate Apono with a [GCP Project](/docs/gcp-environment/gcp-integrations/integrate-a-gcp-organization-or-project#integrate-a-gcp-project) or [GCP Organization](/docs/gcp-environment/gcp-integrations/integrate-a-gcp-organization-or-project#integrate-a-gcp-organization).
{% endhint %}
# Installing a GCP connector on Cloud Run using CLI
Deploy the Docker image of the Apono connector as Cloud Run service
Cloud Run is a managed compute platform that enables running containerized applications in a fully managed serverless environment.
This article explains how to setup an Apono connector for Cloud Run with a Docker image.
***
### Prerequisites
Item
Description
Apono Token
Account-specific Apono authentication value
Use the following steps to obtain your token:
On the Connectors page, click Install Connector. The Install Connector page appears.
Google Cloud role that provides Owner permissions for the project or organization
Project Implementation Role:
Owner
Organization Implementation Roles:
Owner
Organization Administrator
***
### Create a Cloud Run user
Use the following sections to create a Cloud Run user for either your [Google Project](#project) or [Google Organization](#organization).
#### Project
Follow these steps to create a service account for Cloud Run in a Google Project:
1. Set the environment variables.
```shell
export GCP_PROJECT_ID=
export SERVICE_ACCOUNT_NAME=
export GCP_ARTIFACT_REPOSITORY_NAME=
export GCP_CLOUDRUN_SERVICE_NAME=
export GCP_LOCATION=
export APONO_TOKEN=
export APONO_CONNECTOR_ID=
```
2. In your shell environment, log in to Google Cloud and enable the API.
```shell
gcloud auth login
   gcloud services enable cloudresourcemanager.googleapis.com --project $GCP_PROJECT_ID
   gcloud services enable cloudasset.googleapis.com --project $GCP_PROJECT_ID
   gcloud services enable cloudidentity.googleapis.com --project $GCP_PROJECT_ID
   gcloud services enable admin.googleapis.com --project $GCP_PROJECT_ID
```
3. Create the service account.
gcloud iam service-accounts create $SERVICE_ACCOUNT_NAME --project $GCP_PROJECT_ID
4. Assign the following roles to the service account.
Role
Permissions Granted
role/secretmanager.secretAccessor
Access secret versions
Read the secret data
roles/iam.securityAdmin
Manage IAM policies, roles, and service accounts
Set and update IAM policies
Grant, modify, and revoke IAM roles for users and service accounts
{% code overflow="wrap" %}
```sh
gcloud projects add-iam-policy-binding $GCP_PROJECT_ID \
--member="serviceAccount:$SERVICE_ACCOUNT_NAME@$GCP_PROJECT_ID.iam.gserviceaccount.com" \
--role="roles/secretmanager.secretAccessor" \
--project $GCP_PROJECT_ID
gcloud projects add-iam-policy-binding $GCP_PROJECT_ID \
--member="serviceAccount:$SERVICE_ACCOUNT_NAME@$GCP_PROJECT_ID.iam.gserviceaccount.com" \
--role="roles/iam.securityAdmin" \
--project $GCP_PROJECT_ID
```
{% endcode %}
#### Organization
Follow these steps to create a service account for Cloud Run in a Google Organization:
1. In your shell environment, log in to Google Cloud and enable the API.
```shell
gcloud alpha auth login
gcloud services enable cloudresourcemanager.googleapis.com
gcloud services enable cloudasset.googleapis.com
gcloud services enable cloudidentity.googleapis.com
gcloud services enable admin.googleapis.com
```
2. Set the environment variables.
```shell
export GCP_ORGANIZATION_ID=
export GCP_PROJECT_ID=
export SERVICE_ACCOUNT_NAME=
export GCP_ARTIFACT_REPOSITORY_NAME=
export GCP_CLOUDRUN_SERVICE_NAME=
export GCP_LOCATION=
export APONO_TOKEN=
export APONO_CONNECTOR_ID=
```
3. Create the service account.
gcloud iam service-accounts create $SERVICE_ACCOUNT_NAME --project $GCP_PROJECT_ID
4. Assign the following roles to the service account.
Role
Permissions Granted
role/secretmanager.secretAccessor
Access secret versions
Read the secret data
roles/iam.securityAdmin
Manage IAM policies, roles, and service accounts
Set and update IAM policies
Grant, modify, and revoke IAM roles for users and service accounts
***
### Deploy the connector
Follow these steps to deploy the Apono connector:
1. Push the connector image to GCP Artifact Registry.
The following sets of commands push the connector image to the GCP Artifact Registry:
* **New Registry**: Use the code on this tab to push the Apono connector Docker image to a new GCP Artifact Registry.
* **Existing Registry**: Use the code on this tab to push the Apono connector Docker image to an existing Docker-format GCP Artifact Registry
{% tabs %}
{% tab title="New Registry" %}
{% code overflow="wrap" %}
```sh
gcloud artifacts repositories create $GCP_ARTIFACT_REPOSITORY_NAME --repository-format=docker \
--location=$GCP_LOCATION --description="Docker repository" \
--project=$GCP_PROJECT_ID
docker login registry.apono.io -u apono --password $APONO_TOKEN
docker pull --platform linux/amd64 registry.apono.io/apono-connector:v1.8.4

export IMAGE_PATH=$GCP_LOCATION-docker.pkg.dev/$GCP_PROJECT_ID/$GCP_ARTIFACT_REPOSITORY_NAME/registry.apono.io/apono-connector:v1.8.4

echo $IMAGE_PATH

docker image tag registry.apono.io/apono-connector:v1.8.4 $IMAGE_PATH
gcloud auth configure-docker \
$GCP_LOCATION-docker.pkg.dev
docker push $IMAGE_PATH
```
{% endcode %}
{% endtab %}
{% tab title="Existing Registry" %}
{% code overflow="wrap" %}
```sh
docker login registry.apono.io -u apono --password $APONO_TOKEN
docker pull --platform linux/amd64 registry.apono.io/apono-connector:v1.8.4
export IMAGE_PATH=$GCP_LOCATION-docker.pkg.dev/$GCP_PROJECT_ID/$GCP_ARTIFACT_REPOSITORY_NAME/registry.apono.io/apono-connector
echo $IMAGE_PATH
docker image tag registry.apono.io/apono-connector $IMAGE_PATH
gcloud auth configure-docker \
$GCP_LOCATION-docker.pkg.dev
docker push $IMAGE_PATH
```
{% endcode %}
{% endtab %}
{% endtabs %}
2. Deploy the Docker image of the Apono connector to the Cloud Run service.
{% code overflow="wrap" %}
```shell
gcloud run deploy $GCP_CLOUDRUN_SERVICE_NAME --image $IMAGE_PATH --region=$GCP_LOCATION --allow-unauthenticated --max-instances=1 --min-instances=1 --cpu=1 --memory=2Gi --no-cpu-throttling --service-account $SERVICE_ACCOUNT_NAME --update-env-vars APONO_CONNECTOR_ID=$APONO_CONNECTOR_ID,APONO_TOKEN=$APONO_TOKEN,APONO_URL=api.apono.io
```
{% endcode %}
# Installing a GCP connector on GKE using CLI (Helm)
Deploy the Apono connector with Helm
Integrating a cloud account with Apono allows you to sync and manage your resources:
* Discover existing privileges and identities
* Manage employee and application provisioning to cloud assets and data repositories with delegated approval workflows
* Provide granular permissions to customer-sensitive data
This article explains how to set up an Apono connector for Google Cloud with Helm.
***
### Prerequisites
Item
Description
Apono Token
Account-specific Apono authentication value
Use the following steps to obtain your token:
On the Connectors page, click Install Connector. The Install Connector page appears.
Google Cloud role that provides Owner permissions for the project or organization
***
### Create an IAM service account
Use the following sections to create an IAM service account user for either your [Google Project](#project) or [Google Organization](#organization).
#### Project
Follow these steps to create a service account for a Google Project:
1. Set the environment variables.
```shell
export GCP_PROJECT_ID=
export APONO_TOKEN=
export APONO_CONNECTOR_ID=
export NAMESPACE=
export SERVICE_ACCOUNT_NAME=
```
2. In your shell environment, log in to Google Cloud and enable the API.
***
### Deploy the connector
Follow these steps to deploy the Apono connector:
1. Deploy the Apono connector on a GKE cluster.
{% tabs %}
{% tab title="New GKE Cluster" %}
1. Create a new GKE cluster
```shell
gcloud container clusters create CLUSTER_NAME
```
2. Connect the GKE cluster.
{% code overflow="wrap" %}
```
gcloud container clusters get-credentials CLUSTER_NAME --region REGION --project $GCP_PROJECT_ID
```
{% endcode %}
3. Verify the GKE cluster is selected as the default cluster. The default cluster is denoted with `\*`.
```shell
kubectl get-contexts
```
{% endtab %}
{% tab title="Existing GKE Cluster" %}
1. Connect the GKE cluster.
{% code overflow="wrap" %}
```
gcloud container clusters get-credentials CLUSTER_NAME --region REGION --project $GCP_PROJECT_ID
```
{% endcode %}
2. Verify the GKE cluster is selected as the default cluster. The default cluster is denoted with `\*`.
```shell
kubectl get-contexts
```
{% endtab %}
{% endtabs %}
2. Bind the IAM Service Account to the GKE Service Account.
{% code overflow="wrap" lineNumbers="true" fullWidth="false" %}
```shell
gcloud iam service-accounts add-iam-policy-binding $SERVICE_ACCOUNT_NAME@$GCP_PROJECT_ID.iam.gserviceaccount.com \
--member="serviceAccount:$GCP_PROJECT_ID.svc.id.goog[$NAMESPACE/apono-connector-service-account]" \
--role="roles/iam.workloadIdentityUser" \
--project $GCP_PROJECT_ID
```
{% endcode %}
3. Deploy Apono connector on your GKE cluster using Helm Chart.
{% code overflow="wrap" lineNumbers="true" %}
```shell
helm install apono-connector apono-connector --repo https://apono-io.github.io/apono-helm-charts \
--set resources.limits.cpu=1 \
--set resources.limits.memory=2Gi \
--set resources.requests.cpu=1 \
--set resources.requests.memory=2Gi \
--set-string apono.token=$APONO_TOKEN \
--set-string apono.connectorId=$APONO_CONNECTOR_ID \
--set-string serviceAccount.gcpServiceAccountEmail=$SERVICE_ACCOUNT_NAME@$GCP_PROJECT_ID.iam.gserviceaccount.com \
--namespace $NAMESPACE \
--create-namespace
```
{% endcode %}
# Installing a GCP connector on GKE using Terraform
Create a connector on Google Kubernetes Engine
Connectors are secure on-premises components that link Apono to your resources:
* No secrets are read, cached, or stored
* No account admin privileges need to be granted to Apono
* The connector contacts your secret store or key vault to sync data or provision access
Once set up, this connector will enable you to sync data from cloud applications and grant and revoke access permissions through Google Kubernetes Engine (GKE).
***
### Prerequisites
Item
Description
Apono Token
Account-specific Apono authentication value
Use the following steps to obtain your token:
On the Connectors page, click Install Connector. The Install Connector page appears.
Google Cloud role that provides Owner permissions for the project or organization
***
### Install a connector
Use the following sections to install a connector for either your [Google Project](#project) or [Google Organization](#organization).
#### Project
Follow these steps to install an Apono connector for a Google Project:
1. Set the environment variables.
```shell
export TF_VAR_PROJECT_ID=""
export TF_VAR_REGION=""
export TF_VAR_NAME=""
export TF_VAR_LOCATION=""
export TF_VAR_APONO_TOKEN=""
export TF_VAR_TAGS="<{tag1="value1"}>"
```
2. (Optional) Set the following optional environment variables.
```shell
export TF_VAR_CONNECTOR_ID=""
export TF_VAR_SERVICE_ACCOUNT_NAME=""
export TF_VAR_NAMESPACE=""
```
3. In your shell environment, log in to Google Cloud and enable the API.
{% code overflow="wrap" %}
```shell
gcloud auth login
gcloud services enable cloudresourcemanager.googleapis.com --project $GCP_PROJECT_ID
gcloud services enable cloudasset.googleapis.com --project $GCP_PROJECT_ID
gcloud services enable cloudidentity.googleapis.com --project $GCP_PROJECT_ID
gcloud services enable admin.googleapis.com --project $GCP_PROJECT_ID
```
{% endcode %}
4. In a new or existing Terraform (.tf) file, add the following provider and module information to create a connector.
{% code overflow="wrap" %}
```
provider "google" {
project = "{var.PROJECT_ID}"
region = "{var.REGION}"
}
data "google_client_config" "provider" {}
data "google_container_cluster" "gke" {
name = "{var.NAME}"
location = "{var.LOCATION}"
}
provider "helm" {
kubernetes{
host = "https://${data.google_container_cluster.gke.endpoint}"
token = data.google_client_config.provider.access_token
cluster_ca_certificate = base64decode(
data.google_container_cluster.gke.master_auth[0].cluster_ca_certificate,)
exec {
api_version = "client.authentication.k8s.io/v1beta1"
command = "gke-gcloud-auth-plugin"
}
}
}
module "apono-connector" {
source = "github.com/apono-io/terraform-modules//gcp/organization-wide-connector/gke/stacks/apono-connector"
connectorId = "{var.CONNECTOR_ID}" //OPTIONAL
aponoToken = "{var.APONO_TOKEN}"
projectId = "{var.PROJECT_ID}"
serviceAccountName = "{var.SERVICE_ACCOUNT_NAME}" //OPTIONAL
namespace = "{var.NAMESPACE}" //OPTIONAL
tags = "{var.TAGS}"
}
```
{% endcode %}
5. At the Terraform CLI, download and install the provider plugin and module.
```shell
terraform init
```
6. Apply the Terraform changes. The proposed changes and a confirmation prompt will be listed.
```shell
terraform apply
```
7. Enter *yes* to confirm deploying the changes to your Google Project instance.
8. On the [**Connectors**](https://app.apono.io/connectors) page, verify that the connector has been deployed.
#### Organization
Follow these steps to install an Apono connector for a Google Organization:
1. In your shell environment, log in to Google Cloud and enable the API.
```shell
gcloud alpha auth login
gcloud services enable cloudresourcemanager.googleapis.com
gcloud services enable cloudasset.googleapis.com
gcloud services enable cloudidentity.googleapis.com
gcloud services enable admin.googleapis.com
```
2. Set the environment variables.
```shell
export TF_VAR_PROJECT_ID=""
export TF_VAR_REGION=""
export TF_VAR_NAME=""
export TF_VAR_LOCATION=""
export TF_VAR_APONO_TOKEN=""
export TF_VAR_ORGANIZATION_ID=""
export TF_VAR_TAGS="<{tag1="value1"}>"
```
3. (Optional) Set the following optional environment variables.
```shell
export TF_VAR_CONNECTOR_ID=""
export TF_VAR_SERVICE_ACCOUNT_NAME=""
export TF_VAR_NAMESPACE=""
```
4. In a new or existing Terraform (.tf) file, add the following provider and module information to create a connector.
{% code overflow="wrap" %}
```
provider "google" {
project = "{var.PROJECT_ID}"
region = "{var.REGION}"
}
data "google_client_config" "provider" {}
data "google_container_cluster" "gke" {
name = "{var.NAME}"
location = "{var.LOCATION}"
}
provider "helm" {
kubernetes{
host = "https://${data.google_container_cluster.gke.endpoint}"
token = data.google_client_config.provider.access_token
cluster_ca_certificate = base64decode(
data.google_container_cluster.gke.master_auth[0].cluster_ca_certificate,)
exec {
api_version = "client.authentication.k8s.io/v1beta1"
command = "gke-gcloud-auth-plugin"
}
}
}
module "apono-connector" {
source = "github.com/apono-io/terraform-modules//gcp/organization-wide-connector/gke/stacks/apono-connector"
connectorId = "{var.CONNECTOR_ID}" //OPTIONAL
aponoToken = "{var.APONO_TOKEN}"
projectId = "{var.PROJECT_ID}"
organizationId = "{var.ORGANIZATION_ID}"
serviceAccountName = "{var.SERVICE_ACCOUNT_NAME}" //OPTIONAL
namespace = "{var.NAMESPACE}" //OPTIONAL
tags = "{var.TAGS}"
}
```
{% endcode %}
5. At the Terraform CLI, download and install the provider plugin and module.
```shell
terraform init
```
6. Apply the Terraform changes. The proposed changes and a confirmation prompt will be listed.
```shell
terraform apply
```
7. Enter *yes* to confirm deploying the changes to your Google Organization instance.
8. On the [**Connectors**](https://app.apono.io/connectors) page, verify that the connector has been deployed.
***
### FAQ
Can the Apono Terraform module be pinned to a version?
Yes. You can append the version number to the `source` location with the `?ref=vX.X.X` query string.
The following examples pin the version to **1.0.0** for a connector without permissions.
{% code title="Pinned Version (Project)" overflow="wrap" %}
```
provider "google" {
project = "{var.PROJECT_ID}"
region = "{var.REGION}"
}
data "google_client_config" "provider" {}
data "google_container_cluster" "gke" {
name = "{var.NAME}"
location = "{var.LOCATION}"
}
provider "helm" {
kubernetes{
host = "https://${data.google_container_cluster.gke.endpoint}"
token = data.google_client_config.provider.access_token
cluster_ca_certificate = base64decode(
data.google_container_cluster.gke.master_auth[0].cluster_ca_certificate,)
exec {
api_version = "client.authentication.k8s.io/v1beta1"
command = "gke-gcloud-auth-plugin"
}
}
}
module "apono-connector" {
source = "github.com/apono-io/terraform-modules//gcp/organization-wide-connector/gke/stacks/apono-connector?ref=v1.0.0"
connectorId = "{var.CONNECTOR_ID}" //OPTIONAL
aponoToken = "{var.APONO_TOKEN}"
projectId = "{var.PROJECT_ID}"
serviceAccountName = "{var.SERVICE_ACCOUNT_NAME}" //OPTIONAL
namespace = "{var.NAMESPACE}" //OPTIONAL
tags = "{var.TAGS}"
}
```
{% endcode %}
{% code title="Pinned Version (Organization)" overflow="wrap" %}
```
provider "google" {
project = "{var.PROJECT_ID}"
region = "{var.REGION}"
}
data "google_client_config" "provider" {}
data "google_container_cluster" "gke" {
name = "{var.NAME}"
location = "{var.LOCATION}"
}
provider "helm" {
kubernetes{
host = "https://${data.google_container_cluster.gke.endpoint}"
token = data.google_client_config.provider.access_token
cluster_ca_certificate = base64decode(
data.google_container_cluster.gke.master_auth[0].cluster_ca_certificate,)
exec {
api_version = "client.authentication.k8s.io/v1beta1"
command = "gke-gcloud-auth-plugin"
}
}
}
module "apono-connector" {
source = "github.com/apono-io/terraform-modules//gcp/organization-wide-connector/gke/stacks/apono-connector?ref=v1.0.0"
connectorId = "{var.CONNECTOR_ID}" //OPTIONAL
aponoToken = "{var.APONO_TOKEN}"
projectId = "{var.PROJECT_ID}"
organizationId = "{var.ORGANIZATION_ID}"
serviceAccountName = "{var.SERVICE_ACCOUNT_NAME}" //OPTIONAL
namespace = "{var.NAMESPACE}" //OPTIONAL
tags = "{var.TAGS}"
}
```
{% endcode %}
# Updating a connector in Google Cloud
Learn how to update a connector through the Helm CLI
Periodically, you may need to update your Google Cloud connector to help maintain functionality, performance, and security.
This article explains how to update a connector through the Helm CLI.
***
### Prerequisites
Item
Description
Apono Token
Account-specific Apono authentication value
Use the following steps to obtain your token:
On the Connectors page, click Install Connector. The Install Connector page appears.
***
### Update a connector
To update an Apono connector for Google Cloud, follow these steps in the shell environment:
1. Set the `APONO_CONNECTOR_ID` environment variable to your chosen connector ID value.
```shell
export APONO_CONNECTOR_ID=apono-google-integration
```
2. Set the `APONO_TOKEN` environment variable to your account token.
```shell
export APONO_TOKEN=abcd1234-e5f6-7g8h-90123i45678
```
3. Set the `PROJECT_ID` environment variable to the Google Project ID.
```shell
export PROJECT_ID=my-project-12345
```
4. Set the `GCP_SERVICE_ACCOUNT_EMAIL` environment variable.
```shell
export GCP_SERVICE_ACCOUNT_EMAIL=apono-connector-iam-sa@$PROJECT_ID.iam.gserviceaccount.com
```
5. Set the `NAMESPACE` to the namespace where the connector is installed.
6. Run the following `helm upgrade` command to pull the most recent connector version.
```shell
helm upgrade apono-connector apono-connector --repo https://apono-io.github.io/apono-helm-charts \
--set-string apono.token=$APONO_TOKEN \
--set-string apono.connectorId=$APONO_CONNECTOR_ID \
--set-string serviceAccount.gcpServiceAccountEmail=$GCP_SERVICE_ACCOUNT_EMAIL \
--namespace $NAMESPACE \
--create-namespace
```
7. On the [**Connectors**](https://app.apono.io/connectors) page, verify that the connector has been updated.
# Update a GCP connector in Cloud Run with CLI
Deploy the latest Docker image of the Apono connector to your Cloud Run service
Periodically, you may need to update your Google Cloud connector to help maintain functionality, performance, and security.
This article explains how to update an existing connector deployed on Google Cloud Run using the CLI.
***
### Prerequisites
Item
Description
Apono token
Account-specific Apono authentication value
Follow these steps to obtain your token:
On the Connectors page, click Install Connector. The Install Connector page appears.
Copy the token in step listed on the page in step 1.
NOTE: This value must be the same token that was used in the existing connector. You can also find the APONO_TOKEN on the YAML tab of your Cloud Run service in the GCP console.
Google Cloud role that provides Owner permissions for the project or organization
Project implementation role:
Owner
Organization implementation roles:
Owner
Organization Administrator
Google Cloud information
Information for your Google Cloud instance
Google-defined values:
Organization ID (GCP_ORGANIZATION_ID): (For Organization connectors only) Unique identifier of your GCP organization
Project ID (GCP_PROJECT_ID): (For Organization and Project connectors) Unique identifier of your GCP project where the Cloud Run service is running
Location (GCP_LOCATION): Region where your Cloud Run service and artifact repository are located
Customer-defined values:
Service account name (SERVICE_ACCOUNT_NAME): Name of the GCP service account used by the connector
Artifact repository name (GCP_ARTIFACT_REPOSITORY_NAME): Name of your Docker-format GCP Artifact Registry
Cloud Run service name (GCP_CLOUDRUN_SERVICE_NAME): Name of the Cloud Run service where the connector is deployed
Apono-defined values:
Apono connector ID (APONO_CONNECTOR_ID): Unique identifier used when the connector was originally installed
NOTE: You can find all parameters above on the YAML tab of your Cloud Run service in the GCP console.
***
### Update a connector
To update an Apono connector on Google Cloud Run, follow these steps in your shell environment:
1. Log in to Google Cloud.
```bash
gcloud auth login
```
2. Set the environment variables.
{% hint style="info" %}
The `GCP_ORGANIZATION_ID` is **only** required for Organization connectors.
{% endhint %}
{% code overflow="wrap" %}
```bash
export GCP_ORGANIZATION_ID=
export GCP_PROJECT_ID=
export SERVICE_ACCOUNT_NAME=
export GCP_ARTIFACT_REPOSITORY_NAME=
export GCP_CLOUDRUN_SERVICE_NAME=
export GCP_LOCATION=
export APONO_TOKEN=
export APONO_CONNECTOR_ID=
```
{% endcode %}
3. Authenticate with the Apono Docker registry.
{% code overflow="wrap" %}
```bash
docker login registry.apono.io -u apono --password $APONO_TOKEN
```
{% endcode %}
4. Pull and tag the latest connector image.
5. Configure Docker for your GCP region.
{% code overflow="wrap" %}
```bash
gcloud auth configure-docker $GCP_LOCATION-docker.pkg.dev
```
{% endcode %}
6. Push the image to GCP Artifact Registry.
{% code overflow="wrap" %}
```bash
docker push $IMAGE_PATH
```
{% endcode %}
7. Deploy the updated image to Cloud Run.
{% code overflow="wrap" %}
```bash
gcloud run deploy "$GCP_CLOUDRUN_SERVICE_NAME" \
--image "$IMAGE_PATH" \
--region="$GCP_LOCATION" \
--allow-unauthenticated \
--max-instances=1 \
--min-instances=1 \
--cpu=1 \
--memory=2Gi \
--no-cpu-throttling \
--service-account "$SERVICE_ACCOUNT_NAME" \
--update-env-vars \
APONO_CONNECTOR_ID="$APONO_CONNECTOR_ID",APONO_TOKEN="$APONO_TOKEN",APONO_URL=api.apono.io
```
{% endcode %}
8. On the [**Connectors**](https://app.apono.io/connectors) page in the Apono UI, verify that the connector is updated.
# GCP Integrations
Learn how to integrate and manage access to your GCP cloud
If your organization uses Google Cloud Platform (GCP), Apono's GCP integrations can help you securely manage access to your GCP cloud-based services and databases.
Google Cloud logo
By identifying and transforming existing privileges, Apono can shift your cloud management from broad permissions to on-demand access flows.
Through our GCP integrations, Apono enables you to perform the following access tasks:
* **Limit Access:** Discover existing privileges in GCP and convert them to just-in-time Access Flows.
* **Enable Self-Service Access:** Allow developers to request access to GCP services, buckets, and instances via Slack.
* **Automate Approval Workflows:** Create automatic approval processes for sensitive GCP resources.
* **Restrict Third-Party Access:** Grant third-parties (customers or vendors) time-based access to specific services with MFA verification.
* **Review Access:** Audit user cloud access, permissions granted, and reasons for access across GCP.
\\
# Integrate a GCP organization or project
Create an integration to manage access to a GCP organization or project resources
Apono offers GCP users a simple way to centralize cloud management through our platform. Through a single integration, you can manage multiple GCP services across various organizations and projects.
***
### Prerequisites
Item
Description
Apono Connector
On-prem connection serving as a bridge between a Google Cloud instance and Apono
Apono Premium
Apono plan providing the most features and dedicated account support
***
### Associate BigQuery dataset permissions
Google BigQuery is a fast, scalable, secure, fully managed data warehouse service in the cloud, serving as a primary data store for vast datasets and analytic workloads.
To add this resource to your Google Project or Organization, you must create a custom role with BigQuery dataset permissions and assign the role to the service account for the Apono connector.
{% hint style="success" %}
The following instructions in this section use the Google Cloud CLI.
However, you can also [create a custom role](https://cloud.google.com/iam/docs/creating-custom-roles#creating) through the Google Console, and IAM client library, or the REST API. Additionally, you can [assign the custom role](https://cloud.google.com/iam/docs/granting-changing-revoking-access#iam-grant-single-role-console) to the Apono connector through the Google Console.
{% endhint %}
Follow these steps to associate the permissions through the Google Cloud CLI:
1. In your shell environment, log in to Google Cloud and enable the API.
```shell
gcloud auth login
gcloud services enable cloudresourcemanager.googleapis.com
gcloud services enable iam.googleapis.com
```
2. Set the environment variables.
{% tabs %}
{% tab title="Project" %}
```sh
export GCP_PROJECT_ID=
export SERVICE_ACCOUNT_NAME=
```
{% endtab %}
{% tab title="Organization" %}
```sh
export GCP_ORGANIZATION_ID=
export GCP_PROJECT_ID=
export SERVICE_ACCOUNT_NAME=
```
{% endtab %}
{% endtabs %}
3. Create the custom role. Be sure to replace the placeholders (``, ``, and `<DESCRIPTION>`) with actual values of your choosing for the role ID, title, and description of the role.
{% tabs %}
{% tab title="Project" %}
{% code overflow="wrap" %}
```sh
gcloud iam roles create <ROLE_ID> --project=$GCP_PROJECT_ID --title="<TITLE>" --description="<DESCRIPTION>" --permissions=bigquery.datasets.get,bigquery.datasets.update,bigquery.datasets.getIamPolicy,bigquery.datasets.setIamPolicy --stage=ALPHA
```
{% endcode %}
{% endtab %}
{% tab title="Organization" %}
<pre class="language-sh" data-overflow="wrap"><code class="lang-sh"><strong>gcloud iam roles create <ROLE_ID> --organization=$GCP_ORGANIZATION_ID --title="<TITLE>" --description="<DESCRIPTION>" --permissions=bigquery.datasets.get,bigquery.datasets.update,bigquery.datasets.getIamPolicy,bigquery.datasets.setIamPolicy --stage=ALPHA
</strong></code></pre>
{% endtab %}
{% endtabs %}
4. Using the role ID defined in the previous step, assign the custom role to the Apono connector service account.
{% tabs %}
{% tab title="Project" %}
{% code overflow="wrap" %}
```sh
gcloud projects add-iam-policy-binding $GCP_PROJECT_ID --member="serviceAccount:$SERVICE_ACCOUNT_NAME@$GCP_PROJECT_ID.iam.gserviceaccount.com" --role="projects/$GCP_PROJECT_ID/roles/<ROLD_ID>"
```
{% endcode %}
{% endtab %}
{% tab title="Organization" %}
{% code overflow="wrap" %}
```sh
gcloud organizations add-iam-policy-binding $GCP_ORGANIZATION_ID --member="serviceAccount:$SERVICE_ACCOUNT_NAME@$GCP_PROJECT_ID.iam.gserviceaccount.com" --role="organizations/$GCP_ORGANIZATION_ID/roles/<ROLE_ID>"
```
{% endcode %}
{% endtab %}
{% endtabs %}
***
### Enable the Cloud Asset API
To manage and monitor your cloud assets, you must enable the Cloud Asset API.
Follow these steps to enable this API:
1. In your shell environment, log in to Google Cloud and enable the API.
```shell
gcloud auth login
gcloud services enable cloudasset.googleapis.com --project=<GOOGLE_PROJECT_ID>
```
***
### Integrate with GCP
#### Organization
<figure><img src="/files/P8lptSiqDKjI5YluFmJ2" alt="" width="563"><figcaption><p>Google Organization environment option</p></figcaption></figure>
{% hint style="success" %}
You can also use the steps below to integrate with Apono using Terraform.
In step **11**, instead of clicking **Confirm**, follow the **Are you integrating with Apono using Terraform?** guidance.
{% endhint %}
Follow these steps to integrate Apono with your GCP organization:
1. On the [**Catalog**](https://app.apono.io/catalog?search=gcp) tab, click **GCP.** The **Connect Integrations Group** page appears.
2. Under **Discovery**, click **Google Organization**.
3. Click one or more resource types to sync with Apono.
{% hint style="info" %}
Apono automatically discovers and syncs all the instances in the environment. After syncing, you can manage [access flows](/docs/access-flows/access-flows) to these resources.
{% endhint %}
4. Click **Next**. The **Apono connector** section expands.
5. From the dropdown menu, select a connector. Choosing a connector links Apono to the roles available in the organization where the connector is located.
{% hint style="success" %}
If the desired connector is not listed, click **+ Add new connector** and follow the instructions for creating an [Apono connector](/docs/gcp-environment/apono-connector-for-gcp).
{% endhint %}
6. Click **Next**. The **Integration Config** section expands.
7. Define the **Integration Config** settings.
<table><thead><tr><th width="183">Setting</th><th>Description</th></tr></thead><tbody><tr><td><strong>Integration Name</strong></td><td>Unique, alphanumeric, user-friendly name used to identify this integration when constructing an access flow</td></tr><tr><td><strong>Organization ID</strong></td><td><a href="https://cloud.google.com/resource-manager/docs/creating-managing-organization#retrieving_your_organization_id">GCP organization ID</a></td></tr></tbody></table>
8. Click **Next**. The **Get more with Apono** section expands.
9. Define the **Get more with Apono** settings.
<table><thead><tr><th width="184">Setting</th><th>Description</th></tr></thead><tbody><tr><td><strong>Credential Rotation</strong></td><td>(Optional) Number of days after which the database credentials must be rotated<br><br>Learn more about the <a href="/pages/UsMtClaCM1SlvPsARUsM">Credentials Rotation Policy</a>.</td></tr><tr><td><strong>User cleanup after access is revoked (in days)</strong></td><td><p>(Optional) Defines the number of days after access has been revoked that the user should be deleted</p><p><br>Learn more about <a href="/pages/zJwQEG15iEhbPYg9hpqp">Periodic User Cleanup & Deletion</a>.</p></td></tr><tr><td><strong>Custom Access Details</strong></td><td>(Optional) Instructions explaining how to access this integration's resources<br><br>Upon accessing an integration, a message with these instructions will be displayed to end users in the User Portal. The message may include up to <strong>400 characters</strong>.<br><br>To view the message as it appears to end users, click <strong>Preview</strong>.</td></tr><tr><td><strong>Integration Owner</strong></td><td><p>(Optional) Fallback approver if no <a href="/pages/Ey4wuziyr2BzKYQnd5am">resource owner</a> is found<br><br>Follow these steps to define one or several integration owners:</p><ol><li>From the <strong>Attribute</strong> dropdown menu, select <strong>User</strong> or <strong>Group</strong> under the relevant identity provider (IdP) platform.</li><li>From the <strong>Value</strong> dropdown menu, select one or multiple users or groups.</li></ol><p><br><strong>NOTE</strong>: When <strong>Resource Owner</strong> is defined, an <strong>Integration Owner</strong> must be defined.</p></td></tr><tr><td><strong>Resource Owner</strong></td><td><p>(Optional) Group or role responsible for managing access approvals or rejections for the resource<br><br>Follow these steps to define one or several <a href="/pages/Ey4wuziyr2BzKYQnd5am">resource owners</a>:</p><ol><li>Enter a <strong>Key name</strong>. This value is the name of the tag created in your cloud environment.</li><li>From the <strong>Attribute</strong> dropdown menu, select an attribute under the IdP platform to which the key name is associated.<br><br>Apono will use the value associated with the key (tag) to identify the resource owner. When you update the membership of the group or role in your IdP platform, this change is also reflected in Apono.</li></ol><p><br><strong>NOTE</strong>: When this setting is defined, an <strong>Integration Owner</strong> must also be defined.</p></td></tr></tbody></table>
10. (Recommended) Click **Test Integration** to validate the integration.
{% hint style="info" %}
**Test Integration** is available after you have entered or selected values for all required integration fields.
During the test, Apono runs the following validation checks:
* **Connectivity:** The connector can reach the integration.
* **Configuration:** The integration is set up correctly.
* **Authentication:** The credentials are valid.
* **Discovery:** Resources can be fetched.
The **Test Validation** checklist shows the result of each check.
<img src="/files/ODqRkUwvqKuEtRqYQKaz" alt="" data-size="original">
If a check fails, Apono identifies the failed check and highlights the fields that need correction.
{% endhint %}
11. Click **Confirm**.
<details>
<summary>💡Are you integrating with Apono using Terraform?</summary>
If you want to integrate with Apono using Terraform, follow these steps instead of clicking **Confirm**:
1. At the top of the screen, click **View as Code**. A modal appears with the completed Terraform configuration code.
2. Click to copy the code.
3. Make any additional edits.
4. Deploy the code in your Terraform.
Refer to [Integration Config Metadata](https://docs.apono.io/metadata-for-integration-config/integration-metadata/gcp-organization) for more details about the schema definition.
</details>
After connecting your GCP organization to Apono, you will be redirected to the **Connected** tab to view your integrations. The new GCP integration will initialize once it completes its first data fetch. Upon completion, the integration will be marked **Active**.
Now that you have completed this integration, you can [create access flows](/docs/access-flows/access-flows) that grant permission to GCP organizational roles.
#### Project
<figure><img src="/files/wFpZup5RqSm5q6u7evHG" alt="" width="563"><figcaption><p>Google Project environment option</p></figcaption></figure>
{% hint style="success" %}
You can also use the steps below to integrate with Apono using Terraform.
In step **11**, instead of clicking **Confirm**, follow the **Are you integrating with Apono using Terraform?** guidance.
{% endhint %}
Follow these steps to integrate Apono with your GCP project:
1. On the [**Catalog**](https://app.apono.io/catalog?search=gcp) tab, click **GCP.** The **Connect Integrations Group** page appears.
2. Under **Discovery**, click **Google Project**.
3. Click one or more resource types to sync with Apono.
{% hint style="info" %}
Apono automatically discovers and syncs all the instances in the environment. After syncing, you can manage [access flows](/docs/access-flows/access-flows) to these resources.
{% endhint %}
4. Click **Next**. The **Apono connector** section expands.
5. From the dropdown menu, select a connector. Choosing a connector links Apono to the roles available in the organization where the connector is located.
{% hint style="success" %}
If the desired connector is not listed, click **+ Add new connector** and follow the instructions for creating an [Apono connector](/docs/gcp-environment/apono-connector-for-gcp).
{% endhint %}
6. Click **Next**. The **Integration Config** section expands.
7. Define the **Integration Config** settings.
<table><thead><tr><th width="193">Setting</th><th>Description</th></tr></thead><tbody><tr><td><strong>Integration Name</strong></td><td>Unique, alphanumeric, user-friendly name used to identify this integration when constructing an access flow</td></tr><tr><td><strong>Project ID</strong></td><td><a href="https://cloud.google.com/resource-manager/docs/creating-managing-projects#identifying_projects">GCP project ID</a></td></tr></tbody></table>
8. Click **Next**. The **Get more with Apono** section expands.
9. Define the **Get more with Apono** settings.
<table><thead><tr><th width="193">Setting</th><th>Description</th></tr></thead><tbody><tr><td><strong>Custom Access Details</strong></td><td>(Optional) Instructions explaining how to access this integration's resources<br><br>Upon accessing an integration, a message with these instructions will be displayed to end users in the User Portal. The message may include up to <strong>400 characters</strong>.<br><br>To view the message as it appears to end users, click <strong>Preview</strong>.</td></tr><tr><td><strong>Integration Owner</strong></td><td><p>(Optional) Fallback approver if no <a href="/pages/Ey4wuziyr2BzKYQnd5am">resource owner</a> is found<br><br>Follow these steps to define one or several integration owners:</p><ol><li>From the <strong>Attribute</strong> dropdown menu, select <strong>User</strong> or <strong>Group</strong> under the relevant identity provider (IdP) platform.</li><li>From the <strong>Value</strong> dropdown menu, select one or multiple users or groups.</li></ol><p><br><strong>NOTE</strong>: When <strong>Resource Owner</strong> is defined, an <strong>Integration Owner</strong> must be defined.</p></td></tr><tr><td><strong>Resource Owner</strong></td><td><p>(Optional) Group or role responsible for managing access approvals or rejections for the resource<br><br>Follow these steps to define one or several <a href="/pages/Ey4wuziyr2BzKYQnd5am">resource owners</a>:</p><ol><li>Enter a <strong>Key name</strong>. This value is the name of the tag created in your cloud environment.</li><li>From the <strong>Attribute</strong> dropdown menu, select an attribute under the IdP platform to which the key name is associated.<br><br>Apono will use the value associated with the key (tag) to identify the resource owner. When you update the membership of the group or role in your IdP platform, this change is also reflected in Apono.</li></ol><p><br><strong>NOTE</strong>: When this setting is defined, an <strong>Integration Owner</strong> must also be defined.</p></td></tr></tbody></table>
10. (Recommended) Click **Test Integration** to validate the integration.
{% hint style="info" %}
**Test Integration** is available after you have entered or selected values for all required integration fields.
During the test, Apono runs the following validation checks:
* Integration reachability
* Target host connectivity
* Credential validity
* Resource discovery
The **Test Validation** checklist shows the result of each check.
<img src="/files/ODqRkUwvqKuEtRqYQKaz" alt="" data-size="original">
If a check fails, Apono identifies the failed check and highlights the fields that need correction.
{% endhint %}
11. Click **Confirm**.
<details>
<summary>💡Are you integrating with Apono using Terraform?</summary>
If you want to integrate with Apono using Terraform, follow these steps instead of clicking **Confirm**:
1. At the top of the screen, click **View as Code**. A modal appears with the completed Terraform configuration code.
2. Click to copy the code.
3. Make any additional edits.
4. Deploy the code in your Terraform.
Refer to [Integration Config Metadata](https://docs.apono.io/metadata-for-integration-config/integration-metadata/gcp-project) for more details about the schema definition.
</details>
After connecting your GCP project to Apono, you will be redirected to the **Connected** tab to view your integrations. The new GCP integration will initialize once it completes its first data fetch. Upon completion, the integration will be marked **Active**.
Now that you have completed this integration, you can [create access flows](/docs/access-flows/access-flows) that grant permission to GCP organizational roles.
# CloudSQL - MySQL
Create an integration to manage access to Cloud SQL MySQL databases
MySQL is a reliable and secure open-source relational database system. It serves as the main data store for various applications, websites, and products. This includes mission-critical applications and dynamic websites. With Cloud SQL, users benefit from Google Cloud's robust infrastructure, which ensures high availability, security, and scalability for their databases.
Through this integration, Apono helps you securely manage access to your Cloud SQL MySQL databases.
***
### Prerequisites
<table><thead><tr><th width="219">Item</th><th>Description</th></tr></thead><tbody><tr><td><strong>Apono Connector</strong></td><td>On-prem <a href="/pages/xPrzAcLGsoliEpPJuozp">connection</a> serving as a bridge between your Google Cloud SQL MySQL databases and Apono<br><br><strong>Minimum Required Version</strong>: 1.4.1<br><br>Use the following steps to <a href="/pages/TmT0CXNeTeCE9vImZPl4">update an existing connector</a>.</td></tr><tr><td><strong>Cloud SQL Admin API</strong></td><td><a href="https://cloud.google.com/sql/docs/mysql/admin-api#enable_the_api">API</a> for managing database instances with resources, such as BackupRuns, Databases, and Instances</td></tr><tr><td><strong>Cloud SQL Admin Role</strong></td><td>(Cloud IAM authentication only) Google Cloud role that the Apono connector's service user must have at the instance's project or organization level</td></tr></tbody></table>
***
### Create a MySQL user
You must create a user in your MySQL instance for the Apono connector and grant that user permissions to your databases.
Follow these steps to create a user and grant it permissions:
1. In the Google Cloud console, [create a new user](https://cloud.google.com/sql/docs/postgres/create-manage-users#creating) with either **Built-in authentication** or **Cloud IAM** authentication.
{% tabs %}
{% tab title="Built-In Authentication" %}
Use *apono\_connector* for the username.
Be sure to set a strong password for the user.
{% hint style="success" %}
As an alternative, you can run the following common from your MySQL client:
`CREATE USER 'apono_connector'@'%' IDENTIFIED BY 'password';`
{% endhint %}
{% endtab %}
{% tab title="Cloud IAM" %}
Use *apono-connector-iam-sa@\[PROJECT\_ID].iam.gserviceaccount.com* for the **Principal**.
{% hint style="warning" %}
Be sure that the Apono connector GCP service account (*apono-connector-iam-sa@\[PROJECT\_ID].iam.gserviceaccount.com*) has the `Cloud SQL Admin` role.
{% endhint %}
{% endtab %}
{% endtabs %}
2. In your preferred client tool, expose databases to the user. This allows Apono to view database names without accessing the contents of each database.
```sql
GRANT SHOW DATABASES ON *.* TO 'apono_connector'@'%';
```
3. Grant the user database permissions.\
\
The following commands grant Apono the following permissions:
* Creating users
* Updating user information and privileges
* Monitoring and troubleshooting processes running on the database
```sql
GRANT CREATE USER ON *.* TO 'apono_connector'@'%';
GRANT UPDATE ON mysql.* TO 'apono_connector'@'%';
GRANT PROCESS ON *.* TO 'apono_connector'@'%';
```
4. Grant the user **only one** of the following sets of permissions. The chosen set defines the highest level of permissions to provision with Apono.\
\
Click on each tab to reveal the SQL commands.
{% tabs %}
{% tab title="READ\_ONLY" %}
Allows Apono to read data from databases
```sql
GRANT SELECT ON *.* TO 'apono_connector'@'%';
GRANT GRANT OPTION ON *.* TO 'apono_connector'@'%';
```
{% endtab %}
{% tab title="READ\_WRITE" %}
Allows Apono to read and modify data
{% code overflow="wrap" %}
```sql
GRANT SELECT,ALTER,ALTER ROUTINE,CREATE,CREATE ROUTINE,CREATE TEMPORARY TABLES,CREATE VIEW,DELETE,INDEX,INSERT,TRIGGER,UPDATE,REFERENCES ON *.* TO 'apono_connector'@'%';
GRANT GRANT OPTION ON *.* TO 'apono_connector'@'%';
```
{% endcode %}
{% endtab %}
{% tab title="ADMIN" %}
Allows Apono administrative-level access, including the ability to execute and drop tables
{% code overflow="wrap" %}
```sql
GRANT EXECUTE,DROP,SELECT,ALTER,ALTER ROUTINE,CREATE,CREATE ROUTINE,CREATE TEMPORARY TABLES,CREATE VIEW,DELETE,INDEX,INSERT,TRIGGER,UPDATE,REFERENCES ON *.* TO 'apono_connector'@'%';
GRANT GRANT OPTION ON *.* TO 'apono_connector'@'%';
```
{% endcode %}
{% endtab %}
{% endtabs %}
5. (MySQL 8.0+) Grant the user the authority to manage other roles. This enables Apono to create, alter, and drop roles. However, this role does not inherently grant specific database access permissions.
```sql
GRANT ROLE_ADMIN on *.* to 'apono_connector';
```
6. [Create a secret](/docs/connectors-and-secrets/apono-integration-secret#gcp) with the credentials from step **1**. Use the following key-value pair structure when generating the secret. Be sure to replace `#PASSWORD` with the actual value. If you used a different name for the user, replace `apono-connector` with the name you assigned to the user.
```json
"username": "apono_connector",
"password": "#PASSWORD"
```
{% hint style="info" %}
When using Cloud IAM authentication, no secret is needed.
{% endhint %}
You can now [integrate Google Cloud SQL - MySQL](#integrate-google-cloud-sql-mysql).
***
### Integrate Google Cloud SQL - MySQL
<figure><img src="/files/Q5T9dVLGlra3yW5pRCn5" alt="" width="563"><figcaption><p>Google Cloud SQL - MySQL</p></figcaption></figure>
{% hint style="success" %}
You can also use the steps below to integrate with Apono using Terraform.
In step **12**, instead of clicking **Confirm**, follow the **Are you integrating with Apono using Terraform?** guidance.
{% endhint %}
Follow these steps to complete the integration:
1. On the [**Catalog**](https://app.apono.io/catalog?search=sql+-+mysql) tab, click **Google Cloud SQL - MySQL**. The **Connect Integration** page appears.
2. Under **Discovery**, click one or more resource types and cloud services to sync with Apono.
{% hint style="info" %}
Apono automatically discovers and syncs all the instances in the environment. After syncing, you can manage access flows to these resources.
{% endhint %}
3. Click **Next**. The **Apono connector** section expands.
4. From the dropdown menu, select a connector.
{% hint style="success" %}
If the desired connector is not listed, click **+ Add new connector** and follow the instructions for creating a [GCP](/docs/gcp-environment/apono-connector-for-gcp) connector.
{% endhint %}
5. Click **Next**. The **Integration Config** section expands.
6. Define the **Integration Config** settings.
<table><thead><tr><th width="204">Setting</th><th>Description</th></tr></thead><tbody><tr><td><strong>Integration Name</strong></td><td>Unique, alphanumeric, user-friendly name used to identify this integration when constructing an access flow</td></tr><tr><td><strong>Auth Type</strong></td><td>Authorization type for the MySQL service account user</td></tr><tr><td>Option</td><td>Description</td></tr><tr><td><strong>IAM Auth</strong></td><td>Cloud IAM authentication</td></tr><tr><td><strong>User / Password</strong></td><td>Built-in authentication</td></tr><tr><td><strong>Project ID</strong></td><td>ID of the project where the MySQL instance is deployed</td></tr><tr><td><strong>Region</strong></td><td>Location where the MySQL instance is deployed</td></tr><tr><td><strong>Instance ID</strong></td><td>ID of the MySQL instance</td></tr><tr><td><strong>Instance ID User Override</strong></td><td>(Optional) Allows overriding the instance ID for the user</td></tr></tbody></table>
7. Click **Next**. The **Secret Store** section expands.
8. (User/Password only) [Associate the secret or credentials](/docs/connectors-and-secrets/apono-integration-secret).
{% hint style="info" %}
A secret is **not needed** or Cloud IAM authentication.
{% endhint %}
9. Click **Next**. The **Get more with Apono** section expands.
10. Define the **Get more with Apono** settings.
<table><thead><tr><th width="205">Setting</th><th>Description</th></tr></thead><tbody><tr><td><strong>Credential Rotation</strong></td><td>(Optional) Number of days after which the database credentials must be rotated<br><br>Learn more about the <a href="/pages/UsMtClaCM1SlvPsARUsM">Credentials Rotation Policy</a>.</td></tr><tr><td><strong>User cleanup after access is revoked (in days)</strong></td><td><p>(Optional) Defines the number of days after access has been revoked that the user should be deleted</p><p><br>Learn more about <a href="/pages/zJwQEG15iEhbPYg9hpqp">Periodic User Cleanup & Deletion</a>.</p></td></tr><tr><td><strong>Custom Access Details</strong></td><td>(Optional) Instructions explaining how to access this integration's resources<br><br>Upon accessing an integration, a message with these instructions will be displayed to end users in the User Portal. The message may include up to <strong>400 characters</strong>.<br><br>To view the message as it appears to end users, click <strong>Preview</strong>.</td></tr><tr><td><strong>Integration Owner</strong></td><td><p>(Optional) Fallback approver if no <a href="/pages/Ey4wuziyr2BzKYQnd5am">resource owner</a> is found<br><br>Follow these steps to define one or several integration owners:</p><ol><li>From the <strong>Attribute</strong> dropdown menu, select <strong>User</strong> or <strong>Group</strong> under the relevant identity provider (IdP) platform.</li><li>From the <strong>Value</strong> dropdown menu, select one or multiple users or groups.</li></ol><p><br><strong>NOTE</strong>: When <strong>Resource Owner</strong> is defined, an <strong>Integration Owner</strong> must be defined.</p></td></tr><tr><td><strong>Resource Owner</strong></td><td><p>(Optional) Group or role responsible for managing access approvals or rejections for the resource<br><br>Follow these steps to define one or several <a href="/pages/Ey4wuziyr2BzKYQnd5am">resource owners</a>:</p><ol><li>Enter a <strong>Key name</strong>. This value is the name of the tag created in your cloud environment.</li><li>From the <strong>Attribute</strong> dropdown menu, select an attribute under the IdP platform to which the key name is associated.<br><br>Apono will use the value associated with the key (tag) to identify the resource owner. When you update the membership of the group or role in your IdP platform, this change is also reflected in Apono.</li></ol><p><br><strong>NOTE</strong>: When this setting is defined, an <strong>Integration Owner</strong> must also be defined.</p></td></tr></tbody></table>
11. (Recommended) Click **Test Integration** to validate the integration.
{% hint style="info" %}
**Test Integration** is available after you have entered or selected values for all required integration fields.
During the test, Apono runs the following validation checks:
* **Connectivity:** The connector can reach the integration.
* **Configuration:** The integration is set up correctly.
* **Authentication:** The credentials are valid.
* **Discovery:** Resources can be fetched.
The **Test Validation** checklist shows the result of each check.
<img src="/files/ODqRkUwvqKuEtRqYQKaz" alt="" data-size="original">
If a check fails, Apono identifies the failed check and highlights the fields that need correction.
{% endhint %}
12. Click **Confirm**.
<details>
<summary>💡Are you integrating with Apono using Terraform?</summary>
If you want to integrate with Apono using Terraform, follow these steps instead of clicking **Confirm**:
1. At the top of the screen, click **View as Code**. A modal appears with the completed Terraform configuration code.
2. Click to copy the code.
3. Make any additional edits.
4. Deploy the code in your Terraform.
Refer to [Integration Config Metadata](https://docs.apono.io/metadata-for-integration-config/integration-metadata/gcp-cloud-sql-mysql) for more details about the schema definition.
</details>
Now that you have completed this integration, you can [create access flow](/docs/access-flows/access-flows) that grant permission to your Google Cloud SQL MySQL database.
# CloudSQL - PostgreSQL
Create an integration to manage access to PostgreSQL instances on Google Cloud SQL
Google Cloud SQL PostgreSQL is a fully managed relational database service built for the cloud. It provides a high-performance, scalable, and highly available PostgreSQL database instance without the overhead of managing infrastructure. With Google Cloud SQL, users benefit from Google Cloud's robust infrastructure, which ensures high availability, security, and scalability for their databases.
Through this integration, Apono helps you securely manage access to your Google Cloud SQL PostgreSQL database instances.
To enable Apono to manage Google Cloud SQL PostgreSQL user access, you must create a user and then configure the integration within the Apono UI.
***
### Prerequisites
<table><thead><tr><th width="237">Item</th><th>Description</th></tr></thead><tbody><tr><td><strong>Apono Connector</strong></td><td>On-prem <a href="/pages/xPrzAcLGsoliEpPJuozp">connection</a> serving as a bridge between your Google Cloud PostgreSQL databases and Apono<br><br><strong>Minimum Required Version</strong>: 1.4.1<br><br>Use the following steps to <a href="/pages/TmT0CXNeTeCE9vImZPl4">update an existing connector</a>.</td></tr><tr><td><strong>Cloud SQL Admin API</strong></td><td><a href="https://cloud.google.com/sql/docs/mysql/admin-api#enable_the_api">API</a> for managing database instances with resources, such as BackupRuns, Databases, and Instances</td></tr><tr><td><strong>Cloud SQL Admin Role</strong></td><td>(Cloud IAM authentication only) Google Cloud role that the Apono connector's service user must have at the instance's project or organization level</td></tr><tr><td><strong>PostgreSQL Info</strong></td><td><p>Information for the database instance to be integrated:</p><ul><li><a href="https://cloud.google.com/resource-manager/docs/creating-managing-projects#identifying_projects">Project ID</a></li><li><a href="https://cloud.google.com/bigquery/docs/datasets">Dataset Name</a></li></ul></td></tr></tbody></table>
***
### Create a PostgreSQL user
You must create a user in your PostgreSQL instance for the Apono connector and grant that user permissions to your databases.
{% hint style="danger" %}
You must use the admin account and password to connect to your database.
{% endhint %}
Following these steps to create a user and grant it permissions:
1. In the Google Cloud console, [create a new user](https://cloud.google.com/sql/docs/postgres/create-manage-users#creating) with either **Built-in authentication** or **Cloud IAM** authentication.
{% tabs %}
{% tab title="Built-In Authentication" %}
Use *apono\_connector* for the username.
This authentication method grants the user the `cloudsqlsuperuser` role. Be sure to set a strong password for the user.
{% hint style="success" %}
As an alternative, you can run the following command from your Postgre client:
`CREATE USER 'apono_connector'@'%' IDENTIFIED BY 'password'`
{% endhint %}
{% endtab %}
{% tab title="Cloud IAM" %}
Use *apono-connector-iam-sa@\[PROJECT\_ID].iam.gserviceaccount.com* for the **Principal**.
This authentication method **does not** grant the user account database privileges.
{% hint style="warning" %}
Be sure that the Apono connector GCP service account (*apono-connector-iam-sa@\[PROJECT\_ID].iam.gserviceaccount.com*) has the `Cloud SQL Admin` role.
{% endhint %}
{% endtab %}
{% endtabs %}
2. (Cloud IAM only) In your preferred client tool, grant `cloudsqlsuperuser` access to the user account.
```sql
ALTER ROLE "<CONNECTOR_USERNAME>" WITH CREATEROLE;
GRANT cloudsqlsuperuser TO "<CONNECTOR_USERNAME>";
```
3. In your preferred client tool, grant the `cloudsqlsuperuser` role privileges on all databases except `template0` and `cloudsqladmin`.\
\
This allows Apono to perform tasks that are not restricted to a single schema or object within the database, such as creating, altering, and dropping database objects.
{% code overflow="wrap" %}
```sql
DO $$
DECLARE
database_name text;
BEGIN
FOR database_name IN (SELECT datname FROM pg_database WHERE datname != 'template0' AND datname != 'cloudsqladmin') LOOP
EXECUTE 'GRANT ALL PRIVILEGES ON DATABASE ' || quote_ident(database_name) || ' TO cloudsqlsuperuser WITH GRANT OPTION';
END LOOP;
END; $$
```
{% endcode %}
4. For each database to be managed through Apono, connect to the database and grant `cloudsqlsuperuser` privileges on all objects in the schemas.\
\
This allows Apono to perform tasks that are restricted to schemas within the database, such as modifying table structures, creating new sequences, or altering functions.
{% code overflow="wrap" %}
```sql
DO $$
DECLARE
schema text;
BEGIN
FOR schema IN (SELECT schema_name FROM information_schema.schemata WHERE schema_name NOT LIKE 'pg_%' AND schema_name != 'information_schema' AND schema_name != 'cron') LOOP
EXECUTE 'GRANT ALL PRIVILEGES ON SCHEMA ' || quote_ident(schema) || ' TO cloudsqlsuperuser WITH GRANT OPTION';
EXECUTE 'GRANT ALL PRIVILEGES ON ALL TABLES IN SCHEMA ' || quote_ident(schema) || ' TO cloudsqlsuperuser WITH GRANT OPTION';
EXECUTE 'GRANT ALL PRIVILEGES ON ALL SEQUENCES IN SCHEMA ' || quote_ident(schema) || ' TO cloudsqlsuperuser WITH GRANT OPTION';
EXECUTE 'GRANT ALL PRIVILEGES ON ALL FUNCTIONS IN SCHEMA ' || quote_ident(schema) || ' TO cloudsqlsuperuser WITH GRANT OPTION';
END LOOP;
EXECUTE 'ALTER DEFAULT PRIVILEGES GRANT ALL PRIVILEGES ON TABLES TO cloudsqlsuperuser WITH GRANT OPTION';
EXECUTE 'ALTER DEFAULT PRIVILEGES GRANT ALL PRIVILEGES ON SEQUENCES TO cloudsqlsuperuser WITH GRANT OPTION';
EXECUTE 'ALTER DEFAULT PRIVILEGES GRANT ALL PRIVILEGES ON FUNCTIONS TO cloudsqlsuperuser WITH GRANT OPTION';
EXECUTE 'ALTER DEFAULT PRIVILEGES GRANT ALL PRIVILEGES ON SCHEMAS TO cloudsqlsuperuser WITH GRANT OPTION';
END; $$
```
{% endcode %}
5. Connect to the `template1` database and grant `cloudsqlsuperuser` privileges on all objects in the schemas.\
\
For any new databases created in the future, this allows Apono to perform tasks that are restricted to schemas within the database, such as modifying table structures, creating new sequences, or altering functions.
{% code overflow="wrap" %}
```sql
DO $$
DECLARE
schema text;
BEGIN
FOR schema IN (SELECT schema_name FROM information_schema.schemata WHERE schema_name NOT LIKE 'pg_%' AND schema_name != 'information_schema' AND schema_name != 'cron') LOOP
EXECUTE 'GRANT ALL PRIVILEGES ON SCHEMA ' || quote_ident(schema) || ' TO cloudsqlsuperuser WITH GRANT OPTION';
EXECUTE 'GRANT ALL PRIVILEGES ON ALL TABLES IN SCHEMA ' || quote_ident(schema) || ' TO cloudsqlsuperuser WITH GRANT OPTION';
EXECUTE 'GRANT ALL PRIVILEGES ON ALL SEQUENCES IN SCHEMA ' || quote_ident(schema) || ' TO cloudsqlsuperuser WITH GRANT OPTION';
EXECUTE 'GRANT ALL PRIVILEGES ON ALL FUNCTIONS IN SCHEMA ' || quote_ident(schema) || ' TO cloudsqlsuperuser WITH GRANT OPTION';
END LOOP;
EXECUTE 'ALTER DEFAULT PRIVILEGES GRANT ALL PRIVILEGES ON TABLES TO cloudsqlsuperuser WITH GRANT OPTION';
EXECUTE 'ALTER DEFAULT PRIVILEGES GRANT ALL PRIVILEGES ON SEQUENCES TO cloudsqlsuperuser WITH GRANT OPTION';
EXECUTE 'ALTER DEFAULT PRIVILEGES GRANT ALL PRIVILEGES ON FUNCTIONS TO cloudsqlsuperuser WITH GRANT OPTION';
EXECUTE 'ALTER DEFAULT PRIVILEGES GRANT ALL PRIVILEGES ON SCHEMAS TO cloudsqlsuperuser WITH GRANT OPTION';
END; $$
```
{% endcode %}
6. (Built-in authentication only) [Create a secret](/docs/connectors-and-secrets/apono-integration-secret#gcp) with the credentials from step **1**. Use the following key-value pair structure when generating the secret. Be sure to replace `#PASSWORD` with the actual value. If you used a different name for the user, replace `apono-connector` with the name you assigned to the user.
```json
"username": "apono_connector",
"password": "#PASSWORD"
```
{% hint style="info" %}
When using Cloud IAM authentication, the service account and its permissions are managed through Google Cloud IAM roles and policies. The service account is used to authenticate to the Cloud SQL instance.
**A secret does not need to be created.**
{% endhint %}
***
### Integrate Google Cloud SQL - PostgreSQL
<figure><img src="/files/vcQcAFxnrbXmAIUNTS6Y" alt="" width="563"><figcaption><p>Google Cloud SQL - PostgreSQL</p></figcaption></figure>
{% hint style="success" %}
You can also use the steps below to integrate with Apono using Terraform.
In step **12**, instead of clicking **Confirm**, follow the **Are you integrating with Apono using Terraform?** guidance.
{% endhint %}
Follow these steps to complete the integration:
1. On the [**Catalog**](https://app.apono.io/catalog?search=sql+-+postgreSQL) tab, click **Google Cloud SQL - PostgreSQL**. The **Connect Integration** page appears.
2. Under **Discovery**, click one or more resource types and cloud services to sync with Apono.
{% hint style="info" %}
Apono automatically discovers and syncs all the instances in the environment. After syncing, you can manage access flows to these resources.
{% endhint %}
3. Click **Next**. The **Apono connector** section expands.
4. From the dropdown menu, select a connector.
{% hint style="success" %}
If the desired connector is not listed, click **+ Add new connector** and follow the instructions for creating a [GCP](/docs/gcp-environment/apono-connector-for-gcp) connector.
{% endhint %}
5. Click **Next**. The **Integration Config** section expands.
6. Define the **Integration Config** settings.
<table><thead><tr><th width="200">Setting</th><th>Description</th></tr></thead><tbody><tr><td><strong>Integration Name</strong></td><td>Unique, alphanumeric, user-friendly name used to identify this integration when constructing an access flow</td></tr><tr><td><strong>Auth Type</strong></td><td><p>Authorization type for the MySQL service account user:</p><ul><li><strong>IAM Auth</strong>: Cloud IAM authentication</li><li><strong>User / Password</strong>: Built-in authentication</li></ul></td></tr><tr><td><strong>Project ID</strong></td><td>ID of the project where the PostgreSQL instance is deployed</td></tr><tr><td><strong>Region</strong></td><td>Location where the PostgreSQL instance is deployed</td></tr><tr><td><strong>Instance ID</strong></td><td>ID of the PostgreSQL instance</td></tr><tr><td><strong>Instance ID User Override</strong></td><td>(Optional) Allows overriding the instance ID for the user</td></tr><tr><td><strong>Database Name</strong></td><td>Name of the database to integrate<br><br>By default, Apono sets this value to <em>postgre</em>.</td></tr><tr><td><strong>SSL Mode</strong></td><td><p>(Optionl) Mode of Secure Sockets Layer (SSL) encryption used to secure the connection with the SQL database server:</p><ul><li><strong>require</strong>: An SSL-encrypted connection must be used.</li><li><strong>allow</strong>: An SSL-encrypted or unencrypted connection is used. If an SSL-encrypted connection is unavailable, the unencrypted connection is used.</li><li><strong>disable</strong>: An unencrypted connection is used.</li><li><strong>prefer</strong>: An SSL-encrypted connection is attempted. If the encrypted connection is unavailable, the unencrypted connection is used.</li><li><strong>verify-ca</strong>: An SSL-encrypted connection must be used and a server certification verification against the provided CA certificates must pass.</li><li><strong>verify-full</strong>: An SSL-encrypted connection must be used and a server certification verification against the provided CA certificates must pass. Additionally, the server hostname is checked against the certificate's names.</li></ul></td></tr></tbody></table>
7. Click **Next**. The **Secret Store** section expands.
8. (User/Password only) [Associate the secret or credentials](/docs/connectors-and-secrets/apono-integration-secret).
{% hint style="info" %}
A secret is **not needed** or Cloud IAM authentication.
{% endhint %}
9. Click **Next**. The **Get more with Apono** section expands.
10. Define the **Get more with Apono** settings.
<table><thead><tr><th width="202">Setting</th><th>Description</th></tr></thead><tbody><tr><td><strong>Credential Rotation</strong></td><td>(Optional) Number of days after which the database credentials must be rotated<br><br>Learn more about the <a href="/pages/UsMtClaCM1SlvPsARUsM">Credentials Rotation Policy</a>.</td></tr><tr><td><strong>User cleanup after access is revoked (in days)</strong></td><td><p>(Optional) Defines the number of days after access has been revoked that the user should be deleted</p><p><br>Learn more about <a href="/pages/zJwQEG15iEhbPYg9hpqp">Periodic User Cleanup & Deletion</a>.</p></td></tr><tr><td><strong>Custom Access Details</strong></td><td>(Optional) Instructions explaining how to access this integration's resources<br><br>Upon accessing an integration, a message with these instructions will be displayed to end users in the User Portal. The message may include up to <strong>400 characters</strong>.<br><br>To view the message as it appears to end users, click <strong>Preview</strong>.</td></tr><tr><td><strong>Integration Owner</strong></td><td><p>(Optional) Fallback approver if no <a href="/pages/Ey4wuziyr2BzKYQnd5am">resource owner</a> is found<br><br>Follow these steps to define one or several integration owners:</p><ol><li>From the <strong>Attribute</strong> dropdown menu, select <strong>User</strong> or <strong>Group</strong> under the relevant identity provider (IdP) platform.</li><li>From the <strong>Value</strong> dropdown menu, select one or multiple users or groups.</li></ol><p><br><strong>NOTE</strong>: When <strong>Resource Owner</strong> is defined, an <strong>Integration Owner</strong> must be defined.</p></td></tr><tr><td><strong>Resource Owner</strong></td><td><p>(Optional) Group or role responsible for managing access approvals or rejections for the resource<br><br>Follow these steps to define one or several <a href="/pages/Ey4wuziyr2BzKYQnd5am">resource owners</a>:</p><ol><li>Enter a <strong>Key name</strong>. This value is the name of the tag created in your cloud environment.</li><li>From the <strong>Attribute</strong> dropdown menu, select an attribute under the IdP platform to which the key name is associated.<br><br>Apono will use the value associated with the key (tag) to identify the resource owner. When you update the membership of the group or role in your IdP platform, this change is also reflected in Apono.</li></ol><p><br><strong>NOTE</strong>: When this setting is defined, an <strong>Integration Owner</strong> must also be defined.</p></td></tr></tbody></table>
11. (Recommended) Click **Test Integration** to validate the integration.
{% hint style="info" %}
**Test Integration** is available after you have entered or selected values for all required integration fields.
During the test, Apono runs the following validation checks:
* **Connectivity:** The connector can reach the integration.
* **Configuration:** The integration is set up correctly.
* **Authentication:** The credentials are valid.
* **Discovery:** Resources can be fetched.
The **Test Validation** checklist shows the result of each check.
<img src="/files/ODqRkUwvqKuEtRqYQKaz" alt="" data-size="original">
If a check fails, Apono identifies the failed check and highlights the fields that need correction.
{% endhint %}
12. Click **Confirm**.
<details>
<summary>💡Are you integrating with Apono using Terraform?</summary>
If you want to integrate with Apono using Terraform, follow these steps instead of clicking **Confirm**:
1. At the top of the screen, click **View as Code**. A modal appears with the completed Terraform configuration code.
2. Click to copy the code.
3. Make any additional edits.
4. Deploy the code in your Terraform.
Refer to [Integration Config Metadata](https://docs.apono.io/metadata-for-integration-config/integration-metadata/gcp-cloud-sql-postgresql) for more details about the schema definition.
</details>
Now that you have completed this integration, you can [create access flows](/docs/access-flows/access-flows) that grant permission to your Google Cloud SQL PostgreSQL instance.
# Google Cloud Functions
Google Cloud Functions enables you to build and connect cloud services by writing single-purpose functions that are attached to events emitted from your cloud infrastructure and services.
Its serverless architecture frees you to write, test, and deploy functions quickly without having to manage infrastructure setup.
With this integration, you can connect your internal applications to Cloud Functions and manage access to those applications with Apono.
{% hint style="danger" %}
Apono currently supports the original version of Google Cloud Functions, 1st Gen.
{% endhint %}
***
### Prerequisites
<table><thead><tr><th width="231">Item</th><th>Description</th></tr></thead><tbody><tr><td><strong>Apono Connector</strong></td><td>On-prem <a href="/pages/xPrzAcLGsoliEpPJuozp">connection</a> serving as a bridge between your Google Function and Apono, deployed with a GCP service account<br><br><strong>Minimum Required Version</strong>: 1.5.3<br><br>Use the following steps if you need to <a href="/pages/TmT0CXNeTeCE9vImZPl4">update an existing connector</a>.</td></tr><tr><td><strong>Cloud Function (1st gen)</strong></td><td>Named function set up within <a href="https://cloud.google.com/functions/docs">Cloud Functions</a><br><br>To allow the Apono connector to call the Cloud Function, add the <strong>Cloud Functions Invoke</strong> and <strong>Cloud Functions Viewer</strong> roles to the apono-connector service account <code>apono-connector-iam-sa</code> for that Cloud Function.</td></tr></tbody></table>
***
### Integrate a Google Cloud Function
{% hint style="success" %}
You can also use the steps below to integrate with Apono using Terraform.
In step **9**, instead of clicking **Confirm**, follow the **Are you integrating with Apono using Terraform?** guidance.
{% endhint %}
Follow these steps to complete the integration:
1. On the [**Catalog**](https://app.apono.io/catalog?search=cloudfunction) tab, click **Cloud Function Custom Integration**. The **Connect Integration** page appears.
2. Under **Discovery**, click **Next**. The **Apono connector** section expands.
3. From the dropdown menu, select a connector.
{% hint style="success" %}
If the desired connector is not listed, click **+ Add new connector** and follow the instructions for creating a [GCP connector](/docs/gcp-environment/apono-connector-for-gcp).
{% endhint %}
4. Click **Next**. The **Integration Config** section expands.
5. Define the **Integration Config** settings.
<table><thead><tr><th width="176">Setting</th><th>Description</th></tr></thead><tbody><tr><td><strong>Integration Name</strong></td><td>Unique, alphanumeric, user-friendly name used to identify this integration when constructing an access flow</td></tr><tr><td><strong>Access Details</strong></td><td>Instructions for accessing this integrations's resources</td></tr><tr><td><strong>Custom Parameters</strong></td><td>Key-value pairs to send to the Google Cloud Function<br><br>For example, you can provide a Google Function with a redirect URL that is used for internal provisioning access and passed as part of the action requests.</td></tr><tr><td><strong>Project ID</strong></td><td>ID of the project associated with the Cloud Function</td></tr><tr><td><strong>Region</strong></td><td>Location of the Google Cloud Function instance</td></tr><tr><td><strong>Function Name</strong></td><td>Name of the Google Cloud Function</td></tr></tbody></table>
6. Click **Next**. The **Get more with Apono** section expands.
7. Define the **Get more with Apono** settings.
<table><thead><tr><th width="179">Setting</th><th>Description</th></tr></thead><tbody><tr><td><strong>Credential Rotation</strong></td><td>(Optional) Number of days after which the database credentials must be rotated<br><br>Learn more about the <a href="/pages/UsMtClaCM1SlvPsARUsM">Credentials Rotation Policy</a>.</td></tr><tr><td><strong>User cleanup after access is revoked (in days)</strong></td><td><p>(Optional) Defines the number of days after access has been revoked that the user should be deleted</p><p><br>Learn more about <a href="/pages/zJwQEG15iEhbPYg9hpqp">Periodic User Cleanup & Deletion</a>.</p></td></tr><tr><td><strong>Custom Access Details</strong></td><td>(Optional) Instructions explaining how to access this integration's resources<br><br>Upon accessing an integration, a message with these instructions will be displayed to end users in the User Portal. The message may include up to <strong>400 characters</strong>.<br><br>To view the message as it appears to end users, click <strong>Preview</strong>.</td></tr><tr><td><strong>Integration Owner</strong></td><td><p>(Optional) Fallback approver if no <a href="/pages/Ey4wuziyr2BzKYQnd5am">resource owner</a> is found<br><br>Follow these steps to define one or several integration owners:</p><ol><li>From the <strong>Attribute</strong> dropdown menu, select <strong>User</strong> or <strong>Group</strong> under the relevant identity provider (IdP) platform.</li><li>From the <strong>Value</strong> dropdown menu, select one or multiple users or groups.</li></ol><p><br><strong>NOTE</strong>: When <strong>Resource Owner</strong> is defined, an <strong>Integration Owner</strong> must be defined.</p></td></tr><tr><td><strong>Resource Owner</strong></td><td><p>(Optional) Group or role responsible for managing access approvals or rejections for the resource<br><br>Follow these steps to define one or several <a href="/pages/Ey4wuziyr2BzKYQnd5am">resource owners</a>:</p><ol><li>Enter a <strong>Key name</strong>. This value is the name of the tag created in your cloud environment.</li><li>From the <strong>Attribute</strong> dropdown menu, select an attribute under the IdP platform to which the key name is associated.<br><br>Apono will use the value associated with the key (tag) to identify the resource owner. When you update the membership of the group or role in your IdP platform, this change is also reflected in Apono.</li></ol><p><br><strong>NOTE</strong>: When this setting is defined, an <strong>Integration Owner</strong> must also be defined.</p></td></tr></tbody></table>
8. (Recommended) Click **Test Integration** to validate the integration.
{% hint style="info" %}
**Test Integration** is available after you have entered or selected values for all required integration fields.
During the test, Apono runs the following validation checks:
* **Connectivity:** The connector can reach the integration.
* **Configuration:** The integration is set up correctly.
* **Authentication:** The credentials are valid.
* **Discovery:** Resources can be fetched.
The **Test Validation** checklist shows the result of each check.
<img src="/files/ODqRkUwvqKuEtRqYQKaz" alt="" data-size="original">
If a check fails, Apono identifies the failed check and highlights the fields that need correction.
{% endhint %}
9. Click **Confirm**.
<details>
<summary>💡Are you integrating with Apono using Terraform?</summary>
If you want to integrate with Apono using Terraform, follow these steps instead of clicking **Confirm**:
1. At the top of the screen, click **View as Code**. A modal appears with the completed Terraform configuration code.
2. Click to copy the code.
3. Make any additional edits.
4. Deploy the code in your Terraform.
Refer to [Integration Config Metadata](https://docs.apono.io/metadata-for-integration-config/integration-metadata/cloudfunction-custom-integration) for more details about the schema definition.
</details>
Now that you have completed this integration, you can [create access flows](/docs/access-flows/access-flows) that grant permission to your internal application.
# Integrate with GKE
Create an integration to manage access to Kubernetes clusters on Google Cloud
With a Kubernetes cluster in GKE on Google Cloud, GKE handles the complexities of Kubernetes management. Google Cloud provides a reliable, scalable database service.
Through this integration, Apono helps you securely manage access to your Google Cloud Kubernetes cluster.
***
### Prerequisites
<table><thead><tr><th width="221">Item</th><th>Description</th></tr></thead><tbody><tr><td><strong>Apono Connector</strong></td><td>On-prem <a href="/pages/xPrzAcLGsoliEpPJuozp">connection</a> installed on the GKE cluster that serves as a bridge between a Kubernetes cluster and Apono</td></tr><tr><td><strong>Kubernetes Engine Cluster Role</strong></td><td><a href="https://cloud.google.com/kubernetes-engine/docs/how-to/iam">Google Cloud role</a> that grants the Apono connector's service account access to retrieve and list GKE clusters<br><br>Apono does not require admin permissions to the Kubernetes environment.</td></tr></tbody></table>
***
### Integrate with Google Kubernetes Engine (GKE)
<figure><img src="/files/ycwH4VjMWdHzGMow8fL9" alt="" width="563"><figcaption><p>Google Kubernetes Engine (GKE) tile</p></figcaption></figure>
{% hint style="success" %}
You can also use the steps below to integrate with Apono using Terraform.
In step **12**, instead of clicking **Confirm**, follow the **Are you integrating with Apono using Terraform?** guidance.
{% endhint %}
Follow these steps to complete the integration:
1. On the [**Catalog**](https://app.apono.io/catalog?search=GKE) tab, click **Google Kubernetes Engine (GKE)**. The **Connect Integration** page appears.
2. Under **Discovery**, click one or more resource types and cloud services to sync with Apono.
{% hint style="info" %}
Apono automatically discovers and syncs all the instances in the environment. After syncing, you can manage [access flows](/docs/access-flows/access-flows) to these resources.
{% endhint %}
3. Click **Next**. The **Apono connector** section expands.
4. From the dropdown menu, select a connector.
{% hint style="success" %}
If the desired connector is not listed, click **+ Add new connector** and follow the instructions for creating a [GCP](/docs/connectors-and-secrets/apono-integration-secret/creating-secrets-in-google-secret-manager) connector.
{% endhint %}
5. Click **Next**. The **Integration Config** section expands.
6. Define the **Integration Config** settings.
<table><thead><tr><th width="188">Setting</th><th>Description</th></tr></thead><tbody><tr><td><strong>Integration Name</strong></td><td>Unique, alphanumeric, user-friendly name used to identify this integration when constructing an access flow</td></tr><tr><td><strong>Server URL</strong></td><td>(Optional) URL of the server where the cluster is deployed<br><br>Leave this field blank to connect the cluster where the Apono connector is deployed.</td></tr><tr><td><strong>Certificate Authority</strong></td><td>(Optional) Ensures that the Kubernetes API server you are communicating with is trusted and authentic<br><br>Leave this field blank to connect the cluster where the Apono connector is deployed.</td></tr><tr><td><strong>Project ID</strong></td><td>(Optional) ID of the GCP project where the cluster is deployed</td></tr><tr><td><strong>Region</strong></td><td>(Optional) Location where the cluster is deployed</td></tr><tr><td><strong>Cluster Name</strong></td><td>(Optional) Name of the cluster to connect<br><br>The cluster name should be the same as it appears in GKE.</td></tr></tbody></table>
7. Click **Next**. The **Secret Store** section expands.
8. (User/Password only) [Associate the secret or credentials](/docs/connectors-and-secrets/apono-integration-secret).
{% hint style="info" %}
When the Apono connector is installed on the GKE cluster, you do not need to enter values for the optional fields or to provide a secret.
{% endhint %}
9. Click **Next**. The **Get more with Apono** section expands.
10. Define the **Get more with Apono** settings.
<table><thead><tr><th width="187">Setting</th><th>Description</th></tr></thead><tbody><tr><td><strong>Credential Rotation</strong></td><td>(Optional) Number of days after which the database credentials must be rotated<br><br>Learn more about the <a href="/pages/UsMtClaCM1SlvPsARUsM">Credentials Rotation Policy</a>.</td></tr><tr><td><strong>User cleanup after access is revoked (in days)</strong></td><td><p>(Optional) Defines the number of days after access has been revoked that the user should be deleted</p><p><br>Learn more about <a href="/pages/zJwQEG15iEhbPYg9hpqp">Periodic User Cleanup & Deletion</a>.</p></td></tr><tr><td><strong>Custom Access Details</strong></td><td>(Optional) Instructions explaining how to access this integration's resources<br><br>Upon accessing an integration, a message with these instructions will be displayed to end users in the User Portal. The message may include up to <strong>400 characters</strong>.<br><br>To view the message as it appears to end users, click <strong>Preview</strong>.</td></tr><tr><td><strong>Integration Owner</strong></td><td><p>(Optional) Fallback approver if no <a href="/pages/Ey4wuziyr2BzKYQnd5am">resource owner</a> is found<br><br>Follow these steps to define one or several integration owners:</p><ol><li>From the <strong>Attribute</strong> dropdown menu, select <strong>User</strong> or <strong>Group</strong> under the relevant identity provider (IdP) platform.</li><li>From the <strong>Value</strong> dropdown menu, select one or multiple users or groups.</li></ol><p><br><strong>NOTE</strong>: When <strong>Resource Owner</strong> is defined, an <strong>Integration Owner</strong> must be defined.</p></td></tr><tr><td><strong>Resource Owner</strong></td><td><p>(Optional) Group or role responsible for managing access approvals or rejections for the resource<br><br>Follow these steps to define one or several <a href="/pages/Ey4wuziyr2BzKYQnd5am">resource owners</a>:</p><ol><li>Enter a <strong>Key name</strong>. This value is the name of the tag created in your cloud environment.</li><li>From the <strong>Attribute</strong> dropdown menu, select an attribute under the IdP platform to which the key name is associated.<br><br>Apono will use the value associated with the key (tag) to identify the resource owner. When you update the membership of the group or role in your IdP platform, this change is also reflected in Apono.</li></ol><p><br><strong>NOTE</strong>: When this setting is defined, an <strong>Integration Owner</strong> must also be defined.</p></td></tr></tbody></table>
11. (Recommended) Click **Test Integration** to validate the integration.
{% hint style="info" %}
**Test Integration** is available after you have entered or selected values for all required integration fields.
During the test, Apono runs the following validation checks:
* **Connectivity:** The connector can reach the integration.
* **Configuration:** The integration is set up correctly.
* **Authentication:** The credentials are valid.
* **Discovery:** Resources can be fetched.
The **Test Validation** checklist shows the result of each check.
<img src="/files/ODqRkUwvqKuEtRqYQKaz" alt="" data-size="original">
If a check fails, Apono identifies the failed check and highlights the fields that need correction.
{% endhint %}
12. Click **Confirm**.
<details>
<summary>💡Are you integrating with Apono using Terraform?</summary>
If you want to integrate with Apono using Terraform, follow these steps instead of clicking **Confirm**:
1. At the top of the screen, click **View as Code**. A modal appears with the completed Terraform configuration code.
2. Click to copy the code.
3. Make any additional edits.
4. Deploy the code in your Terraform.
Refer to [Integration Config Metadata](https://docs.apono.io/metadata-for-integration-config/integration-metadata/gcp-gke) for more details about the schema definition.
</details>
Now that you have completed this integration, you can [create access flows](/docs/access-flows/access-flows) that grant permission to your Google Cloud Kubernetes cluster.
# AlloyDB
Create an integration to manage access to an AlloyDB instance
AlloyDB is a fully managed PostgreSQL-compatible database service on Google Cloud. It offers high performance, scalability, and reliability for demanding enterprise workloads.
Through this integration, Apono helps you securely manage access to your AlloyDB instance.
***
### Prerequisites
<table><thead><tr><th width="206">Item</th><th>Description</th></tr></thead><tbody><tr><td><strong>Apono Connector</strong></td><td><p>On-prem<a href="/pages/xPrzAcLGsoliEpPJuozp"> connection</a> serving as a bridge between your Google Cloud SQL MySQL databases and Apono<br></p><p><strong>Minimum Required Version</strong>: 1.6.4</p><p><br>Use the following steps to<a href="/pages/TmT0CXNeTeCE9vImZPl4"> update an existing connector</a>.</p></td></tr><tr><td><strong>Allow Connector IP Access</strong></td><td><p>Allows the Apono connector to communicate with the AlloyDB instance</p><p>You must allow the connector IP range in the AlloyDB primary instance's IP allow list.</p></td></tr><tr><td><strong>API Services</strong></td><td><p>API services that must enabled:</p><ul><li>AlloyDB API</li><li>Compute Engine API</li><li>Service Networking API</li></ul><p>See <a href="https://cloud.google.com/service-usage/docs/enable-disable#console">Enabling and Disabling Services</a> for more information.</p></td></tr><tr><td><strong>AlloyDB Information</strong></td><td><p>Identifiers for AlloyDB resources:</p><ul><li>Primary Instance ID</li><li>Cluster ID</li></ul><p>See <a href="https://cloud.google.com/alloydb/docs/instance-view">View instance details</a> to learn how to obtain these identifiers.</p></td></tr></tbody></table>
***
### Assign roles to the Apono connector
Use the following tabs to assign roles to the Apono connector for either your [Google Project](#project) or [Google Organization](#organization).
{% tabs %}
{% tab title="Project" %}
Follow these steps to assign roles to the Apono connector:
1. In your shell environment, log in to Google Cloud and enable the API.
```sh
gcloud auth login
gcloud services enable cloudresourcemanager.googleapis.com
gcloud services enable iam.googleapis.com
```
2. Set the environment variables.
```sh
export GCP_PROJECT_ID=<GOOGLE_PROJECT_ID>
export SERVICE_ACCOUNT_NAME=<SERVICE_ACCOUNT_NAME>
```
3. Assign roles to the connector.
{% code overflow="wrap" %}
```sh
gcloud projects add-iam-policy-binding $GCP_PROJECT_ID \
--member="serviceAccount:$SERVICE_ACCOUNT_NAME@$GCP_PROJECT_ID.iam.gserviceaccount.com" \
--role="roles/alloydb.admin" \
--project $GCP_PROJECT_ID
gcloud projects add-iam-policy-binding $GCP_PROJECT_ID \
--member="serviceAccount:$SERVICE_ACCOUNT_NAME@$GCP_PROJECT_ID.iam.gserviceaccount.com" \
--role="roles/serviceusage.serviceUsageConsumer" \
--project $GCP_PROJECT_ID
```
{% endcode %}
{% endtab %}
{% tab title="Organization" %}
Follow these steps to assign roles to the Apono connector:
1. In your shell environment, log in to Google Cloud and enable the API.
```sh
gcloud alpha auth login
gcloud services enable cloudresourcemanager.googleapis.com
gcloud services enable iam.googleapis.com
```
2. Set the environment variables.
```sh
export GCP_ORGANIZATION_ID=<GOOGLE_ORGANIZATION_ID>
export GCP_PROJECT_ID=<GOOGLE_PROJECT_ID>
export SERVICE_ACCOUNT_NAME=<SERVICE_ACCOUNT_NAME>
```
3. Assign roles to the connector.
{% code overflow="wrap" %}
```sh
gcloud organizations add-iam-policy-binding $GCP_ORGANIZATION_ID \
--member="serviceAccount:$SERVICE_ACCOUNT_NAME@$GCP_PROJECT_ID.iam.gserviceaccount.com" \
--role="roles/alloydb.admin"
gcloud organizations add-iam-policy-binding $GCP_ORGANIZATION_ID \
--member="serviceAccount:$SERVICE_ACCOUNT_NAME@$GCP_PROJECT_ID.iam.gserviceaccount.com" \
--role="roles/serviceusage.serviceUsageConsumer"
```
{% endcode %}
{% endtab %}
{% endtabs %}
***
### Create an AlloyDB user
You must create a user in your AlloyDB instance for the Apono connector and grant that user permissions.
Use the following steps to create a user for the Apono connector and grant it permissions:
1. Create a new user and grant permissions with either [Built-in Authentication](#built-in-authentication) or [IAM Authentication](#iam-authentication).
{% tabs %}
{% tab title="Built-in Authentication" %}
Run the following commands from your PostgreSQL client.
```sql
CREATE USER CONNECTOR_USERNAME WITH PASSWORD 'password';
GRANT alloydbsuperuser TO CONNECTOR_USERNAME;
```
{% endtab %}
{% tab title="IAM Authentication" %}
1. In the Google Cloud console, enable IAM authentication for your AlloyDB instance by setting the **alloydb.iam\_authentication** flag to **on**.\
\ <img src="/files/yZMd87wysgWgfNhxRTkU" alt="" data-size="original">
2. Run the following command to grant superuser privileges to the Apono connector user.
{% code overflow="wrap" %}
```sh
gcloud alloydb users set-superuser CONNECTOR_USERNAME_IAM_SA_EMAIL@[PROJECT_ID].iam \
--superuser=true \
--cluster=CLUSTER_ID \
--region=REGION_ID
```
{% endcode %}
{% endtab %}
{% endtabs %}
2. (Built-in Authentication only) [Create a secret](/docs/connectors-and-secrets/apono-integration-secret) with the credentials from step **1**. Use the following key-value pair structure when generating the secret. Be sure to replace `#PASSWORD` with the actual value. Be sure to replace `#PASSWORD` with the actual value. If you used a different name for the user, replace `apono_connector` with the name you assigned to the user.
```json
"username": "<apono_connector",
"password": "#PASSWORD"
```
{% hint style="success" %}
When using IAM authentication, the service account and its permissions are managed through Google Cloud IAM roles and policies.
**A secret does not need to be created.**
{% endhint %}
***
### Integrate AlloyDB
{% hint style="success" %}
You can also use the steps below to integrate with Apono using Terraform.
In step **12**, instead of clicking **Confirm**, follow the **Are you integrating with Apono using Terraform?** guidance.
{% endhint %}
Follow these steps to complete the integration:
1. On the [**Catalog**](https://app.apono.io/catalog?search=alloydb) tab, click **AlloyDB**. The **Connect Integration** page appears.
2. Under **Discovery**, select one or multiple resource types for Apono to discover in the instance.
3. Click **Next**. The Apono connector section expands.
4. From the dropdown menu, select a connector. Choosing a connector links Apono to all the services available on the account where the connector is located.
{% hint style="success" %}
If the desired connector is not listed, click **+ Add new connector** and follow the instructions for creating a [connector for GCP](/docs/gcp-environment/apono-connector-for-gcp).
{% endhint %}
5. Click **Next**. The **Integration Config** page appears.
6. Define the **Integration Config** settings.
<table><thead><tr><th width="205">Setting</th><th>Description</th></tr></thead><tbody><tr><td><strong>Integration Name</strong></td><td>Unique, alphanumeric, user-friendly name used to identify this integration when constructing an access flow</td></tr><tr><td><strong>Auth Type</strong></td><td><p><a href="/pages/vW4JXTFjQy8THqQq7X21">Authorization type</a> for the AlloyDB user:</p><ul><li><strong>User / Password</strong>: Apono-created local user credentials</li><li><strong>IAM Authentication</strong>: Cloud IAM authentication</li></ul></td></tr><tr><td><strong>Project ID</strong></td><td>ID of the project associated with the AlloyDB instance</td></tr><tr><td><strong>Location</strong></td><td>Location of the AlloyDB instance</td></tr><tr><td><strong>Primary Instance ID</strong></td><td>ID for the primary instance within the AlloyDB cluster</td></tr><tr><td><strong>Cluster ID</strong></td><td>ID for the AlloyDB cluster</td></tr><tr><td><strong>Port</strong></td><td><p>Port value for the database</p><p>By default, Apono sets this value to <em>5432</em>.</p></td></tr><tr><td><strong>Instance ID User Override (optional)</strong></td><td>Overrides the instance ID for the user</td></tr><tr><td><strong>Database Name</strong></td><td><p>Name of the database to integrate</p><p>By default, Apono sets this value to <em>postgre</em>.</p></td></tr><tr><td><strong>SSL Mode</strong></td><td><p>(Optional) Mode of Secure Sockets Layer (SSL) encryption used to secure the connection with the SQL database server</p><p>Be sure to choose the SSL mode based on your AlloyDB primary instance <a href="https://cloud.google.com/alloydb/docs/instance-ssl">SSL mode configuration</a>:</p><ul><li><strong>require</strong>: An SSL-encrypted connection must be used.</li><li><strong>allow</strong>: An SSL-encrypted or unencrypted connection is used. If an SSL encrypted connection is unavailable, the unencrypted connection is used.</li><li><strong>disable</strong>: An unencrypted connection is used.</li><li><strong>prefer</strong>: An SSL-encrypted connection is attempted. If the encrypted connection is unavailable, the unencrypted connection is used.</li><li><strong>verify-ca</strong>: An SSL-encrypted connection must be used and a server certification verification against the provided CA certificates must pass.</li><li><strong>verify-full:</strong> An SSL-encrypted connection must be used and a server certification verification against the provided CA certificates must pass. Additionally, the server hostname is checked against the certificate's names.</li></ul></td></tr></tbody></table>
7. Click **Next**. The **Secret Store** section expands.
8. [Associate the secret or credentials](/docs/connectors-and-secrets/apono-integration-secret).
9. Click **Next**. The **Get more with Apono** section expands.
10. Define the **Get more with Apono** settings.
<table><thead><tr><th width="210">Setting</th><th>Description</th></tr></thead><tbody><tr><td><strong>Credential Rotation</strong></td><td>(Optional) Number of days after which the database credentials must be rotated<br><br>Learn more about the <a href="/pages/UsMtClaCM1SlvPsARUsM">Credentials Rotation Policy</a>.</td></tr><tr><td><strong>User cleanup after access is revoked (in days)</strong></td><td><p>(Optional) Defines the number of days after access has been revoked that the user should be deleted</p><p><br>Learn more about <a href="/pages/zJwQEG15iEhbPYg9hpqp">Periodic User Cleanup & Deletion</a>.</p></td></tr><tr><td><strong>Custom Access Details</strong></td><td>(Optional) Instructions explaining how to access this integration's resources<br><br>Upon accessing an integration, a message with these instructions will be displayed to end users in the User Portal. The message may include up to <strong>400 characters</strong>.<br><br>To view the message as it appears to end users, click <strong>Preview</strong>.</td></tr><tr><td><strong>Integration Owner</strong></td><td><p>(Optional) Fallback approver if no <a href="/pages/Ey4wuziyr2BzKYQnd5am">resource owner</a> is found<br><br>Follow these steps to define one or several integration owners:</p><ol><li>From the <strong>Attribute</strong> dropdown menu, select <strong>User</strong> or <strong>Group</strong> under the relevant identity provider (IdP) platform.</li><li>From the <strong>Value</strong> dropdown menu, select one or multiple users or groups.</li></ol><p><br><strong>NOTE</strong>: When <strong>Resource Owner</strong> is defined, an <strong>Integration Owner</strong> must be defined.</p></td></tr><tr><td><strong>Resource Owner</strong></td><td><p>(Optional) Group or role responsible for managing access approvals or rejections for the resource<br><br>Follow these steps to define one or several <a href="/pages/Ey4wuziyr2BzKYQnd5am">resource owners</a>:</p><ol><li>Enter a <strong>Key name</strong>. This value is the name of the tag created in your cloud environment.</li><li>From the <strong>Attribute</strong> dropdown menu, select an attribute under the IdP platform to which the key name is associated.<br><br>Apono will use the value associated with the key (tag) to identify the resource owner. When you update the membership of the group or role in your IdP platform, this change is also reflected in Apono.</li></ol><p><br><strong>NOTE</strong>: When this setting is defined, an <strong>Integration Owner</strong> must also be defined.</p></td></tr></tbody></table>
11. (Recommended) Click **Test Integration** to validate the integration.
{% hint style="info" %}
**Test Integration** is available after you have entered or selected values for all required integration fields.
During the test, Apono runs the following validation checks:
* **Connectivity:** The connector can reach the integration.
* **Configuration:** The integration is set up correctly.
* **Authentication:** The credentials are valid.
* **Discovery:** Resources can be fetched.
The **Test Validation** checklist shows the result of each check.
<img src="/files/ODqRkUwvqKuEtRqYQKaz" alt="" data-size="original">
If a check fails, Apono identifies the failed check and highlights the fields that need correction.
{% endhint %}
12. Click **Confirm**.
<details>
<summary>💡Are you integrating with Apono using Terraform?</summary>
If you want to integrate with Apono using Terraform, follow these steps instead of clicking **Confirm**:
1. At the top of the screen, click **View as Code**. A modal appears with the completed Terraform configuration code.
2. Click to copy the code.
3. Make any additional edits.
4. Deploy the code in your Terraform.
Refer to [Integration Config Metadata](https://docs.apono.io/metadata-for-integration-config/integration-metadata/gcp-alloydb) for more details about the schema definition.
</details>
Now that you have completed this integration, you can create [access flows](/docs/access-flows/access-flows) that grant permission to your AlloyDB instance.
# Apono Connector for Kubernetes
How to install a Connector on a Kubernetes cluster to integrate Kubernetes with Apono
## Overview
To integrate with Kubernetes and start managing JIT access to Kubernetes resources, you must **first install a connector in your Kubernetes cluster**.
This is can be done by one of the following methods:
1. Helm
2. Terraform
{% hint style="info" %}
**What's a connector? What makes it so secure?**
The Apono Connector is an on-prem connection that can be used to connect resources to Apono and separate the Apono web app from the environment for maximal [security](/docs/about-apono/security-and-architecture).
{% endhint %}
## With Helm
An Apono connector is installed in the cloud platform managing your Kubernetes resource. The installation is made by running a Helm command with the necessary parameters.
### Prerequisites
* An existing Kubernetes project on one of the following platforms:
* Google Kubernetes Engine (GKE)
* Elastic Kubernetes Service (EKS)
* Azure Kubernetes Engine (AKS)
* Kubernetes (self-managed)
* Helm
* kubectl
### Step-by-step guide
#### Find Your Integration Token
1. Select any Kubernetes integration in the Catalog.
{% hint style="info" %}
You can install a new connector from any Kubernetes New Integration form. Pick the one relevant to your network.
Connectors for EKS, GKE, AKS and self-managed Kubernetes work in the same way.
{% endhint %}
2. From the drop-down list on the next page select **Add a New Connector**, and then select Help.
3. Copy the **token** displayed toward the bottom of the page.
<figure><img src="/files/isXlmlIzf9q6ss6oWWcB" alt="" width="375"><figcaption></figcaption></figure>
#### Install the Connector
Run the following Helm command in a terminal:
**Without permissions**
* If you would like to install the connector in Kubernetes, but not grant Apono access to read or manage access to Kubernetes resources, use this code:
```curl
helm install apono-connector apono-connector --repo https://apono-io.github.io/apono-helm-charts \
--set-string apono.token=[APONO_TOKEN] \
--set-string apono.connectorId=[CONNECTOR_NAME] \
--set serviceAccount.manageClusterRoles=false \
--namespace apono-connector \
--create-namespace
```
**With permissions**
* If you would like to install the connector in Kubernetes and grant Apono access to read and manage access to Kubernetes resources, use this code:
```curl
helm install apono-connector apono-connector --repo https://apono-io.github.io/apono-helm-charts \
--set-string apono.token=[APONO_TOKEN] \
--set-string apono.connectorId=[CONNECTOR_NAME] \
--set serviceAccount.manageClusterRoles=true \
--namespace apono-connector \
--create-namespace
```
Where:
* \[APONO\_TOKEN] is the token copied from the integration page in the previous step.
* \[CONNECTOR\_NAME] is any name you choose to give the connector.
Helm will finish with a message that the **apono-connector** has been installed.
{% hint style="success" %}
Interested in HA for the connector?
Add this variable to the Helm chart to create one or more replicas of the Apono connector instance:
`--set-string replicaCount=<number_of_replicas>`
Read more [here](/docs/connectors-and-secrets/high-availability-for-connectors).
{% endhint %}
### Results and next steps
The Kubernetes Connector is now installed.
1. Return to the Add new integration form from step 1 for EKS, GKE, AKS or self-managed Kubernetes.
2. The Connector is found by the form, marked by a green checkmark
{% hint style="success" %}
You can now integrate Apono with your Kubernetes instance
Complete the integration with [EKS](/docs/aws-environment/aws-integrations/integrate-with-eks), [GKE](/docs/gcp-environment/gcp-integrations/integrate-with-gke), [AKS](/docs/azure-environment/azure-integrations/integrate-with-aks) or [self-managed Kubernetes](https://docs.apono.io/docs/integrate-with-self-managed-kubernetes).
{% endhint %}
### Troubleshooting
* If you are managing more than one Kubernetes cluster, you must be certain that the current context points to the cluster into which the Apono connector is to be added.
* Get the current context with `kubectl config current-context`
* Set the current context with `kubectl config use-context [clustername]`
## With Terraform
An Apono connector is installed in the cloud platform managing your Kubernetes resource. The installation is made by adding an Apono module to your Terraform configuration.
### Prerequisites
* A Kubernetes project on one of the following platforms:
* Google Kubernetes Engine (GKE)
* Elastic Kubernetes Service (EKS)
* Azure Kubernetes Engine (AKS)
* Kubernetes (self-managed)
* Terraform with the following providers:
* Helm
* Kubernetes
* AWS
### Step-by-step guide
#### Find Your Integration Token
1. Select any Kubernetes integration in the Catalog.
{% hint style="info" %}
You can install a new connector from any Kubernetes New Integration form. Pick the one relevant to your network.
Connectors for EKS, GKE, AKS and self-managed Kubernetes work in the same way.
{% endhint %}
2. From the drop-down list on the next page select **Add a New Connector**, and then select Terraform.
3. Copy the **token** displayed toward the bottom of the page.
<figure><img src="/files/isXlmlIzf9q6ss6oWWcB" alt="" width="375"><figcaption></figcaption></figure>
#### Edit the Terraform Configuration
1. Add the following to your Terraform module.
#### [**Without permissions**](#without-permissions)
* If you would like to install the connector in Kubernetes, but not grant Apono access to read or manage access to Kubernetes resources, use this code:
```
module "connector" {
source = "github.com/apono-io/terraform-modules/k8s/connector-without-permissions/stacks/apono-connector"
aponoToken = [APONO_TOKEN]
connectorId = [CONNECTOR_NAME] // choose connector name
}
```
#### [**With permissions**](#with-permissions)
* If you would like to install the connector in Kubernetes and grant Apono access to read and manage access to Kubernetes resources, use this code:
```
module "connector" {
source = "github.com/apono-io/terraform-modules/k8s/connector-with-permissions/stacks/apono-connector"
aponoToken = [APONO_TOKEN]
connectorId = [CONNECTOR_NAME] // choose connector name
}
```
Where:
* \[APONO\_TOKEN] is the token copied from the integration page in the previous step.
* \[CONNECTOR\_NAME] is any name you choose to give the connector.
2. Run `terraform init`. It will finish with the message:\
"Terraform has been successfully initialized!"
3. Run `terraform apply`. It will finish with the message:\
"Apply complete! Resources: (N) added.."
### Results and next steps
The Kubernetes Connector is now installed.
1. Return to the Add new integration form from step 1 for EKS, GKE, AKS or self-managed Kubernetes.
2. The Connector is found by the form, marked by a green checkmark
{% hint style="success" %}
You can now integrate Apono with your Kubernetes instance
Complete the integration with [EKS](https://docs.apono.io/docs/integrate-eks), [GKE](https://docs.apono.io/docs/integrate-with-gke), [AKS](https://docs.apono.io/docs/integrate-with-aks) or [self-managed Kubernetes](https://docs.apono.io/docs/integrate-with-self-managed-kubernetes).
{% endhint %}
## Next Steps
Return to the [Catalog](https://app.apono.io/catalog), and select one of the following Kubernetes integrations:
* [Google Kubernetes Engine (GKE)](https://app.apono.io/catalog/connect-integration/gcp-gke)
* [Elastic Kubernetes Service (EKS)](https://app.apono.io/catalog/connect-integration/aws-eks)
* [Azure Kubernetes Engine (AKS)](https://app.apono.io/catalog/connect-integration/azure-aks)
* [Kubernetes (self-managed)](https://app.apono.io/catalog/connect-integration/k8s-roles)
# Updating a Kubernetes connector
Learn how to update a connector through the Helm CLI
Periodically, you may need to update your Kubernetes connector to help maintain functionality, performance, and security.
This article explains how to update a connector through the Helm CLI.
***
### Prerequisites
<table><thead><tr><th width="370">Item</th><th>Description</th></tr></thead><tbody><tr><td><strong>Cluster admin access</strong></td><td>Cluster admin access to the cluster to integrate<br><br>The cluster admin access can be the built-in <a href="https://kubernetes.io/docs/reference/access-authn-authz/rbac/#user-facing-roles">cluster-admin</a> role or equivalent permission level.</td></tr><tr><td><strong>Helm Command Line Interface (Helm CLI)</strong></td><td><a href="https://helm.sh/docs/intro/install/">Command-line interface</a> used to manage Kubernetes applications</td></tr></tbody></table>
***
### Update a connector
Use the following steps to update an Apono connector for Kubernetes:
1. In the shell environment, run the following `helm upgrade` command to pull the most recent connector version.
Shell
```shell
helm upgrade apono-connector apono-connector --repo https://apono-io.github.io/apono-helm-charts \
--set-string apono.token=[APONO_TOKEN] \
--set-string apono.connectorId=[CONNECTOR_NAME] \
--set serviceAccount.manageClusterRoles=true \
--namespace apono-connector \
--create-namespace
```
| Parameter | Description |
| ---------------------------------------------- | --------------------------------------------------------------------------------------------------------------------------------------------------------------------------------------------------------------------------------------------------------------------- |
| **apono.connectorId** string | ID for the connector |
| **apono.token** string | Token value obtained from the Apono UI |
| **serviceAccount.managerClusterRoles** boolean | <p>Configures whether the connector also manages access to the cluster on which it is deployed<br><br>The value of <code>serviceAccount.manageClusterRoles</code> should be based on whether the installation has been set up to manage the cluster roles or not.</p> |
2. On the [**Connectors**](https://app.apono.io/connectors) page, verify that the connector has been updated.
# Kubernetes Integrations
Learn how to integrate and manage access to your K8s cluster
If your organization uses Kubernetes for development, Apono's **Kubernetes integrations** can help you securely manage access to your Kubernetes containers and databases.
<figure><img src="/files/mw7h98GZLzqyfwpl5l6l" alt="" width="375"><figcaption><p>Kubernetes logo</p></figcaption></figure>
By identifying and transforming existing privileges, Apono can shift your management from broad permissions to on-demand access flows. Through our integrations, Apono enables you to perform the following access tasks:
* **Limit Access:** Discover existing cluster privileges and convert them to just-in-time Access Flows.
* **Enable Self-Service Access:** Allow developers to request access to K8s clusters and pods via Slack.
* **Automate Approval Workflows:** Create automatic approval processes for sensitive K8s resources.
* **Restrict Third-Party Access:** Grant third-parties (customers or vendors) time-based access to specific containers with MFA verification.
* **Review Access:** Audit access, permissions granted, and reasons for access across K8s.
# Integrate with Self-Managed Kubernetes
## Overview
With a connector installed on your Kubernetes platform, the next step is setting permissions for Apono to manage access control.
## Prerequisites
* Cluster admin access to the cluster you'd like to integrate
* Helm
* An Apono [Kubernetes connector](/docs/kubernetes-environment/apono-connector-for-kubernetes)
{% hint style="warning" %}
Please note! If you installed the Apono connector on the cluster, there is no need to provide the secret in the Add Integration form in the UI.
The connector already handles the secret ;)
{% endhint %}
## Integrate Apono with Kubernetes
### Select a Connector
1. Select **Kubernetes** from the Catalog.
2. On the next page, select an existing connector from the drop-down list.
3. Click **Next** to view the Kubernetes integration form.
### Integration Form
<figure><img src="/files/0o6p1vVKhxuQEB1LCLeN" alt="" width="563"><figcaption></figcaption></figure>
1. Name the integration.
2. Enter the following Kubernetes parameters, which can be found with kubectl:
* Cluster Name
3. Secret
1. If you installed the Apono connector on the cluster, leave this empty. Otherwise:
* With a GCP secret manager:
* Project
* Secret ID
* With Kubernetes secret manager:
* Namespace
* Secret Name
* With an Azure secret manager:
* Vault URL
* Secret Name
## Results
Integration of Apono with self-managed Kubernetes is now complete.
## Next Steps
1. Manage [users](https://app.apono.io/settings#/admin-box/users) and groups. If you have and IdP set up, for example Okta or Azure AD, you may want to integrate Apono in order to sync users and groups.
2. You can now control access to this resource by defining [Access Flows](https://app.apono.io/access-flows).
3. Make it easy for your users to request access by integrating your [Slack](https://app.apono.io/catalog/add-integration/slack) or Teams organization with Apono.
# MCPs
# Atlassian MCP
Connecting the Atlassian MCP allows Apono Agent Privilege Guard to grant AI agents controlled, temporary access to Jira and Confluence. After completing the integration, you can create agentic access flows that govern how AI agents access your Atlassian resources.
***
### Prerequisites
<table><thead><tr><th width="210.06640625">Item</th><th>Description</th></tr></thead><tbody><tr><td><strong>Apono Connector</strong></td><td><p>On-prem connection serving as a bridge between an Atlassian instance and Apono:</p><ul><li><a href="/pages/U4HFH35XWDo3jyqhJqgQ">AWS</a></li><li><a href="https://docs.apono.io/docs/azure-environment/apono-connector-for-azure">Azure</a></li><li><a href="https://docs.apono.io/docs/gcp-environment/apono-connector-for-gcp">GCP</a></li><li><a href="/pages/p5PzUV4THznqePSTYgEH">Kubernetes</a></li></ul></td></tr><tr><td><strong>Agent Privilege Guard</strong></td><td>Agent Privilege Guard is enabled for your organization.</td></tr></tbody></table>
***
### Integrate the Atlassian MCP
Follow these steps to complete the integration:
1. On the [**Catalog**](https://app.apono.io/catalog?search=atlassian) tab, click **Atlassian (MCP OAuth)**. The **Connect Integration** page appears.
2. Under **Discovery**, click **Next**. The **Apono connector** section expands.
3. From the dropdown menu, select a connector. Choosing a connector links Apono to all the services available on the account where the connector is located.
{% hint style="success" %}
If the desired connector is not listed, click **+ Add new connector** and follow the instructions for creating a connector ([AWS](/docs/aws-environment/apono-connector-for-aws), [Azure](/docs/azure-environment/apono-connector-for-azure), [GCP](/docs/gcp-environment/apono-connector-for-gcp), [Kubernetes](/docs/kubernetes-environment/apono-connector-for-kubernetes)).
{% endhint %}
4. Click **Next**. The **Integration Config** section expands.
5. Define the **Integration Config** settings.
<table><thead><tr><th width="210">Setting</th><th>Description</th></tr></thead><tbody><tr><td><strong>Integration Name</strong></td><td>Unique, alphanumeric, user-friendly name used to identify this integration when constructing an access flow</td></tr></tbody></table>
6. Click **Next**. The **Get more with Apono** section expands.
7. Define the **Get more with Apono** settings.
<table><thead><tr><th width="209">Setting</th><th>Description</th></tr></thead><tbody><tr><td><strong>Custom Access Details</strong></td><td>(Optional) Instructions explaining how to access this integration's resources<br><br>Upon accessing an integration, a message with these instructions will be displayed to end users in the User Portal. The message may include up to <strong>400 characters</strong>.<br><br>To view the message as it appears to end users, click <strong>Preview</strong>.</td></tr><tr><td><strong>Integration Owner</strong></td><td><p>(Optional) Fallback approver if no <a href="/pages/Ey4wuziyr2BzKYQnd5am">resource owner</a> is found<br><br>Follow these steps to define one or several integration owners:</p><ol><li>From the <strong>Attribute</strong> dropdown menu, select <strong>User</strong> or <strong>Group</strong> under the relevant identity provider (IdP) platform.</li><li>From the <strong>Value</strong> dropdown menu, select one or multiple users or groups.</li></ol><p><br><strong>NOTE</strong>: When <strong>Resource Owner</strong> is defined, an <strong>Integration Owner</strong> must be defined.</p></td></tr><tr><td><strong>Resource Owner</strong></td><td><p>(Optional) Group or role responsible for managing access approvals or rejections for the resource<br><br>Follow these steps to define one or several <a href="/pages/Ey4wuziyr2BzKYQnd5am">resource owners</a>:</p><ol><li>Enter a <strong>Key name</strong>. This value is the name of the tag created in your cloud environment.</li><li>From the <strong>Attribute</strong> dropdown menu, select an attribute under the IdP platform to which the key name is associated.<br><br>Apono will use the value associated with the key (tag) to identify the resource owner. When you update the membership of the group or role in your IdP platform, this change is also reflected in Apono.</li></ol><p><br><strong>NOTE</strong>: When this setting is defined, an <strong>Integration Owner</strong> must also be defined.</p></td></tr></tbody></table>
8. (Recommended) Click **Test Integration** to validate the integration.
{% hint style="info" %}
**Test Integration** is available after you have entered or selected values for all required integration fields.
During the test, Apono runs the following validation checks:
* **Connectivity:** The connector can reach the integration.
* **Configuration:** The integration is set up correctly.
* **Authentication:** The credentials are valid.
* **Discovery:** Resources can be fetched.
The **Test Validation** checklist shows the result of each check.
<img src="/files/ODqRkUwvqKuEtRqYQKaz" alt="" data-size="original">
If a check fails, Apono identifies the failed check and highlights the fields that need correction.
{% endhint %}
9. Click **Confirm**.
Now that you have completed the integration, you can [create an agentic access flow](/docs/agent-privilege-guard/set-up-apono-agent-privilege-guard/apono-agent-privilege-guard-for-atlassian#create-an-agentic-access-flow) that grants permission to your Atlassian instance.
# monday.com MCP
Connecting the monday.com MCP allows Apono Agent Privilege Guard to grant AI agents controlled, temporary access to monday.com resources. After completing the integration, you can create agentic access flows that govern how AI agents access your monday.com instance.
***
### Prerequisites
<table><thead><tr><th width="210.06640625">Item</th><th>Description</th></tr></thead><tbody><tr><td><strong>Apono Connector</strong></td><td><p>On-prem connection serving as a bridge between a monday.com instance and Apono:</p><ul><li><a href="/pages/U4HFH35XWDo3jyqhJqgQ">AWS</a></li><li><a href="https://docs.apono.io/docs/azure-environment/apono-connector-for-azure">Azure</a></li><li><a href="https://docs.apono.io/docs/gcp-environment/apono-connector-for-gcp">GCP</a></li><li><a href="/pages/p5PzUV4THznqePSTYgEH">Kubernetes</a></li></ul></td></tr><tr><td><strong>Agent Privilege Guard</strong></td><td>Agent Privilege Guard is enabled for your organization.</td></tr></tbody></table>
***
### Integrate the monday.com MCP
Follow these steps to complete the integration:
1. On the [**Catalog**](https://app.apono.io/catalog?search=monday) tab, click **monday.com (MCP OAuth)**. The **Connect Integration** page appears.
2. Under **Discovery**, click **Next**. The **Apono connector** section expands.
3. From the dropdown menu, select a connector. Choosing a connector links Apono to all the services available on the account where the connector is located.
{% hint style="success" %}
If the desired connector is not listed, click **+ Add new connector** and follow the instructions for creating a connector ([AWS](/docs/aws-environment/apono-connector-for-aws), [Azure](/docs/azure-environment/apono-connector-for-azure), [GCP](/docs/gcp-environment/apono-connector-for-gcp), [Kubernetes](/docs/kubernetes-environment/apono-connector-for-kubernetes)).
{% endhint %}
4. Click **Next**. The **Integration Config** section expands.
5. Define the **Integration Config** settings.
<table><thead><tr><th width="210">Setting</th><th>Description</th></tr></thead><tbody><tr><td><strong>Integration Name</strong></td><td>Unique, alphanumeric, user-friendly name used to identify this integration when constructing an access flow</td></tr></tbody></table>
6. Click **Next**. The **Get more with Apono** section expands.
7. Define the **Get more with Apono** settings.
<table><thead><tr><th width="209">Setting</th><th>Description</th></tr></thead><tbody><tr><td><strong>Custom Access Details</strong></td><td>(Optional) Instructions explaining how to access this integration's resources<br><br>Upon accessing an integration, a message with these instructions will be displayed to end users in the User Portal. The message may include up to <strong>400 characters</strong>.<br><br>To view the message as it appears to end users, click <strong>Preview</strong>.</td></tr><tr><td><strong>Integration Owner</strong></td><td><p>(Optional) Fallback approver if no <a href="/pages/Ey4wuziyr2BzKYQnd5am">resource owner</a> is found<br><br>Follow these steps to define one or several integration owners:</p><ol><li>From the <strong>Attribute</strong> dropdown menu, select <strong>User</strong> or <strong>Group</strong> under the relevant identity provider (IdP) platform.</li><li>From the <strong>Value</strong> dropdown menu, select one or multiple users or groups.</li></ol><p><br><strong>NOTE</strong>: When <strong>Resource Owner</strong> is defined, an <strong>Integration Owner</strong> must be defined.</p></td></tr><tr><td><strong>Resource Owner</strong></td><td><p>(Optional) Group or role responsible for managing access approvals or rejections for the resource<br><br>Follow these steps to define one or several <a href="/pages/Ey4wuziyr2BzKYQnd5am">resource owners</a>:</p><ol><li>Enter a <strong>Key name</strong>. This value is the name of the tag created in your cloud environment.</li><li>From the <strong>Attribute</strong> dropdown menu, select an attribute under the IdP platform to which the key name is associated.<br><br>Apono will use the value associated with the key (tag) to identify the resource owner. When you update the membership of the group or role in your IdP platform, this change is also reflected in Apono.</li></ol><p><br><strong>NOTE</strong>: When this setting is defined, an <strong>Integration Owner</strong> must also be defined.</p></td></tr></tbody></table>
8. (Recommended) Click **Test Integration** to validate the integration.
{% hint style="info" %}
**Test Integration** is available after you have entered or selected values for all required integration fields.
During the test, Apono runs the following validation checks:
* **Connectivity:** The connector can reach the integration.
* **Configuration:** The integration is set up correctly.
* **Authentication:** The credentials are valid.
* **Discovery:** Resources can be fetched.
The **Test Validation** checklist shows the result of each check.
<img src="/files/ODqRkUwvqKuEtRqYQKaz" alt="" data-size="original">
If a check fails, Apono identifies the failed check and highlights the fields that need correction.
{% endhint %}
9. Click **Confirm**.
Now that you have completed the integration, you can [create an agentic access](/docs/agent-privilege-guard/set-up-apono-agent-privilege-guard/apono-agent-privilege-guard-for-monday.com#create-an-agentic-access-flow) flow that grants permission to your monday.com instance.
# GitHub MCP
Connecting the GitHub MCP allows Apono Agent Privilege Guard to grant AI agents controlled, temporary access to GitHub resources. After completing the integration, you can create agentic access flows that govern how AI agents access your GitHub instance.
***
### Prerequisites
<table><thead><tr><th width="210.06640625">Item</th><th>Description</th></tr></thead><tbody><tr><td><strong>Apono Connector</strong></td><td><p>On-prem connection serving as a bridge between a GitHub instance and Apono:</p><ul><li><a href="/pages/U4HFH35XWDo3jyqhJqgQ">AWS</a></li><li><a href="https://docs.apono.io/docs/azure-environment/apono-connector-for-azure">Azure</a></li><li><a href="https://docs.apono.io/docs/gcp-environment/apono-connector-for-gcp">GCP</a></li><li><a href="/pages/p5PzUV4THznqePSTYgEH">Kubernetes</a></li></ul></td></tr><tr><td><strong>Agent Privilege Guard</strong></td><td>Agent Privilege Guard is enabled for your organization.</td></tr><tr><td><strong>GitHub OAuth app</strong></td><td><p>OAuth app registered to your GitHub organization</p><p>Learn how to create a <a href="https://docs.github.com/en/apps/oauth-apps/building-oauth-apps/creating-an-oauth-app">GitHub OAuth app</a>.</p></td></tr><tr><td><strong>GitHub Client ID</strong></td><td><p>Unique identifier of the GitHub OAuth app</p><p><br>Apono uses this ID in place of a secret during integration.</p></td></tr><tr><td><strong>GitHub OAuth Scopes</strong></td><td><p>GitHub permissions each user consents to, defining what the AI agent can access</p><p><br>Learn more about <a href="https://docs.github.com/en/apps/oauth-apps/building-oauth-apps/scopes-for-oauth-apps">scopes for OAuth apps</a>.</p></td></tr></tbody></table>
***
### Integrate the GitHub MCP
Follow these steps to complete the integration:
1. On the [**Catalog**](https://app.apono.io/catalog?search=github+mcp) tab, click **GitHub (MCP OAuth)**. The **Connect Integration** page appears.
2. Under **Discovery**, click **Next**. The **Apono connector** section expands.
3. From the dropdown menu, select a connector. Choosing a connector links Apono to all the services available on the account where the connector is located.
{% hint style="success" %}
If the desired connector is not listed, click **+ Add new connector** and follow the instructions for creating a connector ([AWS](/docs/aws-environment/apono-connector-for-aws), [Azure](/docs/azure-environment/apono-connector-for-azure), [GCP](/docs/gcp-environment/apono-connector-for-gcp), [Kubernetes](/docs/kubernetes-environment/apono-connector-for-kubernetes)).
{% endhint %}
4. Click **Next**. The **Integration Config** section expands.
5. Define the **Integration Config** settings.
<table><thead><tr><th width="210">Setting</th><th>Description</th></tr></thead><tbody><tr><td><strong>Integration Name</strong></td><td>Unique, alphanumeric, user-friendly name used to identify this integration when constructing an access flow</td></tr><tr><td><strong>GitHub Client ID</strong></td><td>Unique identifier of the GitHub OAuth app</td></tr><tr><td><strong>GitHub OAuth Scopes</strong></td><td><p>GitHub permissions each user consents to, defining what the AI agent can access</p><p><br><strong>Example</strong> (comma-separated list): <em>repo,read:org,read:user</em></p></td></tr></tbody></table>
6. Click **Next**. The **Get more with Apono** section expands.
7. Define the **Get more with Apono** settings.
<table><thead><tr><th width="209">Setting</th><th>Description</th></tr></thead><tbody><tr><td><strong>Custom Access Details</strong></td><td>(Optional) Instructions explaining how to access this integration's resources<br><br>Upon accessing an integration, a message with these instructions will be displayed to end users in the User Portal. The message may include up to <strong>400 characters</strong>.<br><br>To view the message as it appears to end users, click <strong>Preview</strong>.</td></tr><tr><td><strong>Integration Owner</strong></td><td><p>(Optional) Fallback approver if no <a href="/pages/Ey4wuziyr2BzKYQnd5am">resource owner</a> is found<br><br>Follow these steps to define one or several integration owners:</p><ol><li>From the <strong>Attribute</strong> dropdown menu, select <strong>User</strong> or <strong>Group</strong> under the relevant identity provider (IdP) platform.</li><li>From the <strong>Value</strong> dropdown menu, select one or multiple users or groups.</li></ol><p><br><strong>NOTE</strong>: When <strong>Resource Owner</strong> is defined, an <strong>Integration Owner</strong> must be defined.</p></td></tr><tr><td><strong>Resource Owner</strong></td><td><p>(Optional) Group or role responsible for managing access approvals or rejections for the resource<br><br>Follow these steps to define one or several <a href="/pages/Ey4wuziyr2BzKYQnd5am">resource owners</a>:</p><ol><li>Enter a <strong>Key name</strong>. This value is the name of the tag created in your cloud environment.</li><li>From the <strong>Attribute</strong> dropdown menu, select an attribute under the IdP platform to which the key name is associated.<br><br>Apono will use the value associated with the key (tag) to identify the resource owner. When you update the membership of the group or role in your IdP platform, this change is also reflected in Apono.</li></ol><p><br><strong>NOTE</strong>: When this setting is defined, an <strong>Integration Owner</strong> must also be defined.</p></td></tr></tbody></table>
8. (Recommended) Click **Test Integration** to validate the integration.
{% hint style="info" %}
**Test Integration** is available after you have entered or selected values for all required integration fields.
During the test, Apono runs the following validation checks:
* **Connectivity:** The connector can reach the integration.
* **Configuration:** The integration is set up correctly.
* **Authentication:** The credentials are valid.
* **Discovery:** Resources can be fetched.
The **Test Validation** checklist shows the result of each check.
<img src="/files/ODqRkUwvqKuEtRqYQKaz" alt="" data-size="original">
If a check fails, Apono identifies the failed check and highlights the fields that need correction.
{% endhint %}
9. Click **Confirm**.
Now that you have completed the integration, you can [create an agentic access](/docs/agent-privilege-guard/set-up-apono-agent-privilege-guard/apono-agent-privilege-guard-for-github#create-an-agentic-access-flow) flow that grants permission to your GitHub instance.
# Okta MCP
Connecting the Okta MCP allows Apono Agent Privilege Guard to grant AI agents controlled, temporary access to Okta resources. After completing the integration, you can create agentic access flows that govern how AI agents access your Okta instance.
***
### Prerequisites
<table><thead><tr><th width="210.06640625">Item</th><th>Description</th></tr></thead><tbody><tr><td><strong>Apono Connector</strong></td><td><p>On-prem connection serving as a bridge between an Okta instance and Apono:</p><ul><li><a href="/pages/U4HFH35XWDo3jyqhJqgQ">AWS</a></li><li><a href="https://docs.apono.io/docs/azure-environment/apono-connector-for-azure">Azure</a></li><li><a href="https://docs.apono.io/docs/gcp-environment/apono-connector-for-gcp">GCP</a></li><li><a href="/pages/p5PzUV4THznqePSTYgEH">Kubernetes</a></li></ul></td></tr><tr><td><strong>Agent Privilege Guard</strong></td><td>Agent Privilege Guard is enabled for your organization.</td></tr><tr><td><strong>Okta OIDC app</strong></td><td><p>OIDC app integrated with your Okta organization</p><p>Learn how to <a href="https://help.okta.com/en-us/content/topics/apps/apps_app_integration_wizard_oidc.htm">create an Okta OIDC app integration</a>.</p></td></tr><tr><td><strong>Okta Org URL</strong></td><td>URL of your connected Okta organization</td></tr><tr><td><strong>Okta Client ID</strong></td><td>Unique identifier of the Okta OIDC app</td></tr></tbody></table>
***
### Integrate the Okta MCP
Follow these steps to complete the integration:
1. On the [**Catalog**](https://app.apono.io/catalog?search=okta+mcp) tab, click **Okta (MCP OAuth)**. The **Connect Integration** page appears.
2. Under **Discovery**, click **Next**. The **Apono connector** section expands.
3. From the dropdown menu, select a connector. Choosing a connector links Apono to all the services available on the account where the connector is located.
{% hint style="success" %}
If the desired connector is not listed, click **+ Add new connector** and follow the instructions for creating a connector ([AWS](/docs/aws-environment/apono-connector-for-aws), [Azure](/docs/azure-environment/apono-connector-for-azure), [GCP](/docs/gcp-environment/apono-connector-for-gcp), [Kubernetes](/docs/kubernetes-environment/apono-connector-for-kubernetes)).
{% endhint %}
4. Click **Next**. The **Integration Config** section expands.
5. Define the **Integration Config** settings.
<table><thead><tr><th width="210">Setting</th><th>Description</th></tr></thead><tbody><tr><td><strong>Integration Name</strong></td><td>Unique, alphanumeric, user-friendly name used to identify this integration when constructing an access flow</td></tr><tr><td><strong>Okta Org URL</strong></td><td>URL of your connected Okta organization</td></tr><tr><td><strong>Okta Client ID</strong></td><td>Unique identifier of the Okta OIDC app</td></tr></tbody></table>
6. Click **Next**. The **Get more with Apono** section expands.
7. Define the **Get more with Apono** settings.
<table><thead><tr><th width="209">Setting</th><th>Description</th></tr></thead><tbody><tr><td><strong>Custom Access Details</strong></td><td>(Optional) Instructions explaining how to access this integration's resources<br><br>Upon accessing an integration, a message with these instructions will be displayed to end users in the User Portal. The message may include up to <strong>400 characters</strong>.<br><br>To view the message as it appears to end users, click <strong>Preview</strong>.</td></tr><tr><td><strong>Integration Owner</strong></td><td><p>(Optional) Fallback approver if no <a href="/pages/Ey4wuziyr2BzKYQnd5am">resource owner</a> is found<br><br>Follow these steps to define one or several integration owners:</p><ol><li>From the <strong>Attribute</strong> dropdown menu, select <strong>User</strong> or <strong>Group</strong> under the relevant identity provider (IdP) platform.</li><li>From the <strong>Value</strong> dropdown menu, select one or multiple users or groups.</li></ol><p><br><strong>NOTE</strong>: When <strong>Resource Owner</strong> is defined, an <strong>Integration Owner</strong> must be defined.</p></td></tr><tr><td><strong>Resource Owner</strong></td><td><p>(Optional) Group or role responsible for managing access approvals or rejections for the resource<br><br>Follow these steps to define one or several <a href="/pages/Ey4wuziyr2BzKYQnd5am">resource owners</a>:</p><ol><li>Enter a <strong>Key name</strong>. This value is the name of the tag created in your cloud environment.</li><li>From the <strong>Attribute</strong> dropdown menu, select an attribute under the IdP platform to which the key name is associated.<br><br>Apono will use the value associated with the key (tag) to identify the resource owner. When you update the membership of the group or role in your IdP platform, this change is also reflected in Apono.</li></ol><p><br><strong>NOTE</strong>: When this setting is defined, an <strong>Integration Owner</strong> must also be defined.</p></td></tr></tbody></table>
8. (Recommended) Click **Test Integration** to validate the integration.
{% hint style="info" %}
**Test Integration** is available after you have entered or selected values for all required integration fields.
During the test, Apono runs the following validation checks:
* **Connectivity:** The connector can reach the integration.
* **Configuration:** The integration is set up correctly.
* **Authentication:** The credentials are valid.
* **Discovery:** Resources can be fetched.
The **Test Validation** checklist shows the result of each check.
<img src="/files/ODqRkUwvqKuEtRqYQKaz" alt="" data-size="original">
If a check fails, Apono identifies the failed check and highlights the fields that need correction.
{% endhint %}
9. Click **Confirm**.
Now that you have completed the integration, you can [create an agentic access](/docs/agent-privilege-guard/set-up-apono-agent-privilege-guard/apono-agent-privilege-guard-for-okta#create-an-agentic-access-flow) flow that grants permission to your Okta instance.
# Mixpanel MCP
Connecting the Mixpanel MCP allows Apono Agent Privilege Guard to grant AI agents controlled, temporary access to your instance. After completing the integration, you can create agentic access flows that govern how AI agents access your Mixpanel resources.
***
### Prerequisites
<table><thead><tr><th width="210.06640625">Item</th><th>Description</th></tr></thead><tbody><tr><td><strong>Apono Connector</strong></td><td><p>On-prem connection serving as a bridge between a Mixpanel instance and Apono:</p><ul><li><a href="/pages/U4HFH35XWDo3jyqhJqgQ">AWS</a></li><li><a href="https://docs.apono.io/docs/azure-environment/apono-connector-for-azure">Azure</a></li><li><a href="https://docs.apono.io/docs/gcp-environment/apono-connector-for-gcp">GCP</a></li><li><a href="/pages/p5PzUV4THznqePSTYgEH">Kubernetes</a></li></ul></td></tr><tr><td><strong>Agent Privilege Guard</strong></td><td>Agent Privilege Guard is enabled for your organization.</td></tr></tbody></table>
***
### Integrate the Mixpanel MCP
Follow these steps to complete the integration:
1. On the [**Catalog**](https://app.apono.io/catalog?search=mixpanel+mcp) tab, click **Mixpanel (MCP OAuth)**. The **Connect Integration** page appears.
2. Under **Discovery**, click **Next**. The **Apono connector** section expands.
3. From the dropdown menu, select a connector. Choosing a connector links Apono to all the services available on the account where the connector is located.
{% hint style="success" %}
If the desired connector is not listed, click **+ Add new connector** and follow the instructions for creating a connector ([AWS](/docs/aws-environment/apono-connector-for-aws), [Azure](/docs/azure-environment/apono-connector-for-azure), [GCP](/docs/gcp-environment/apono-connector-for-gcp), [Kubernetes](/docs/kubernetes-environment/apono-connector-for-kubernetes)).
{% endhint %}
4. Click **Next**. The **Integration Config** section expands.
5. Define the **Integration Config** settings.
<table><thead><tr><th width="210">Setting</th><th>Description</th></tr></thead><tbody><tr><td><strong>Integration Name</strong></td><td>Unique, alphanumeric, user-friendly name used to identify this integration when constructing an access flow</td></tr></tbody></table>
6. Click **Next**. The **Get more with Apono** section expands.
7. Define the **Get more with Apono** settings.
<table><thead><tr><th width="209">Setting</th><th>Description</th></tr></thead><tbody><tr><td><strong>Custom Access Details</strong></td><td>(Optional) Instructions explaining how to access this integration's resources<br><br>Upon accessing an integration, a message with these instructions will be displayed to end users in the User Portal. The message may include up to <strong>400 characters</strong>.<br><br>To view the message as it appears to end users, click <strong>Preview</strong>.</td></tr><tr><td><strong>Integration Owner</strong></td><td><p>(Optional) Fallback approver if no <a href="/pages/Ey4wuziyr2BzKYQnd5am">resource owner</a> is found<br><br>Follow these steps to define one or several integration owners:</p><ol><li>From the <strong>Attribute</strong> dropdown menu, select <strong>User</strong> or <strong>Group</strong> under the relevant identity provider (IdP) platform.</li><li>From the <strong>Value</strong> dropdown menu, select one or multiple users or groups.</li></ol><p><br><strong>NOTE</strong>: When <strong>Resource Owner</strong> is defined, an <strong>Integration Owner</strong> must be defined.</p></td></tr><tr><td><strong>Resource Owner</strong></td><td><p>(Optional) Group or role responsible for managing access approvals or rejections for the resource<br><br>Follow these steps to define one or several <a href="/pages/Ey4wuziyr2BzKYQnd5am">resource owners</a>:</p><ol><li>Enter a <strong>Key name</strong>. This value is the name of the tag created in your cloud environment.</li><li>From the <strong>Attribute</strong> dropdown menu, select an attribute under the IdP platform to which the key name is associated.<br><br>Apono will use the value associated with the key (tag) to identify the resource owner. When you update the membership of the group or role in your IdP platform, this change is also reflected in Apono.</li></ol><p><br><strong>NOTE</strong>: When this setting is defined, an <strong>Integration Owner</strong> must also be defined.</p></td></tr></tbody></table>
8. (Recommended) Click **Test Integration** to validate the integration.
{% hint style="info" %}
**Test Integration** is available after you have entered or selected values for all required integration fields.
During the test, Apono runs the following validation checks:
* **Connectivity:** The connector can reach the integration.
* **Configuration:** The integration is set up correctly.
* **Authentication:** The credentials are valid.
* **Discovery:** Resources can be fetched.
The **Test Validation** checklist shows the result of each check.
<img src="/files/ODqRkUwvqKuEtRqYQKaz" alt="" data-size="original">
If a check fails, Apono identifies the failed check and highlights the fields that need correction.
{% endhint %}
9. Click **Confirm**.
Now that you have completed the integration, you can [create an agentic access flow](/docs/agent-privilege-guard/set-up-apono-agent-privilege-guard/apono-agent-privilege-guard-for-mixpanel#create-an-agentic-access-flow) that grants permission to your Mixpanel instance.
# Custom MCP
Connecting a custom MCP, with or without OAuth, allows Apono Agent Privilege Guard to grant AI agents controlled, temporary access to your instance. After completing the integration, you can create agentic access flows that govern how AI agents access your organization’s resources.
***
### Prerequisites
<table><thead><tr><th width="210.06640625">Item</th><th>Description</th></tr></thead><tbody><tr><td><strong>Apono Connector</strong></td><td><p>On-prem connection serving as a bridge between your organization and Apono:</p><ul><li><a href="/pages/U4HFH35XWDo3jyqhJqgQ">AWS</a></li><li><a href="https://docs.apono.io/docs/azure-environment/apono-connector-for-azure">Azure</a></li><li><a href="https://docs.apono.io/docs/gcp-environment/apono-connector-for-gcp">GCP</a></li><li><a href="/pages/p5PzUV4THznqePSTYgEH">Kubernetes</a></li></ul></td></tr><tr><td><strong>Agent Privilege Guard</strong></td><td>Agent Privilege Guard is enabled for your organization.</td></tr></tbody></table>
***
### Integrate the Custom MCP
Follow these steps to complete the integration:
1. On the [**Catalog**](https://app.apono.io/catalog?search=custom+mcp) tab, click **Custom MCP** or **Custom (MCP OAuth)**. The **Connect Integration** page appears.
2. Under **Discovery**, click **Next**. The **Apono connector** section expands.
3. From the dropdown menu, select a connector. Choosing a connector links Apono to all the services available on the account where the connector is located.
{% hint style="success" %}
If the desired connector is not listed, click **+ Add new connector** and follow the instructions for creating a connector ([AWS](/docs/aws-environment/apono-connector-for-aws), [Azure](/docs/azure-environment/apono-connector-for-azure), [GCP](/docs/gcp-environment/apono-connector-for-gcp), [Kubernetes](/docs/kubernetes-environment/apono-connector-for-kubernetes)).
{% endhint %}
4. Click **Next**. The **Integration Config** section expands.
5. Define the **Integration Config** settings.
<table><thead><tr><th width="210">Setting</th><th>Description</th></tr></thead><tbody><tr><td><strong>Integration Name</strong></td><td>Unique, alphanumeric, user-friendly name used to identify this integration when constructing an access flow</td></tr></tbody></table>
6. Click **Next**. The **Get more with Apono** section expands.
7. Define the **Get more with Apono** settings.
<table><thead><tr><th width="209">Setting</th><th>Description</th></tr></thead><tbody><tr><td><strong>Custom Access Details</strong></td><td>(Optional) Instructions explaining how to access this integration's resources<br><br>Upon accessing an integration, a message with these instructions will be displayed to end users in the User Portal. The message may include up to <strong>400 characters</strong>.<br><br>To view the message as it appears to end users, click <strong>Preview</strong>.</td></tr><tr><td><strong>Integration Owner</strong></td><td><p>(Optional) Fallback approver if no <a href="/pages/Ey4wuziyr2BzKYQnd5am">resource owner</a> is found<br><br>Follow these steps to define one or several integration owners:</p><ol><li>From the <strong>Attribute</strong> dropdown menu, select <strong>User</strong> or <strong>Group</strong> under the relevant identity provider (IdP) platform.</li><li>From the <strong>Value</strong> dropdown menu, select one or multiple users or groups.</li></ol><p><br><strong>NOTE</strong>: When <strong>Resource Owner</strong> is defined, an <strong>Integration Owner</strong> must be defined.</p></td></tr><tr><td><strong>Resource Owner</strong></td><td><p>(Optional) Group or role responsible for managing access approvals or rejections for the resource<br><br>Follow these steps to define one or several <a href="/pages/Ey4wuziyr2BzKYQnd5am">resource owners</a>:</p><ol><li>Enter a <strong>Key name</strong>. This value is the name of the tag created in your cloud environment.</li><li>From the <strong>Attribute</strong> dropdown menu, select an attribute under the IdP platform to which the key name is associated.<br><br>Apono will use the value associated with the key (tag) to identify the resource owner. When you update the membership of the group or role in your IdP platform, this change is also reflected in Apono.</li></ol><p><br><strong>NOTE</strong>: When this setting is defined, an <strong>Integration Owner</strong> must also be defined.</p></td></tr></tbody></table>
8. (Recommended) Click **Test Integration** to validate the integration.
{% hint style="info" %}
**Test Integration** is available after you have entered or selected values for all required integration fields.
During the test, Apono runs the following validation checks:
* **Connectivity:** The connector can reach the integration.
* **Configuration:** The integration is set up correctly.
* **Authentication:** The credentials are valid.
* **Discovery:** Resources can be fetched.
The **Test Validation** checklist shows the result of each check.
<img src="/files/ODqRkUwvqKuEtRqYQKaz" alt="" data-size="original">
If a check fails, Apono identifies the failed check and highlights the fields that need correction.
{% endhint %}
9. Click **Confirm**.
Now that you have completed the integration, you can [create an agentic access flow](/docs/agent-privilege-guard/set-up-apono-agent-privilege-guard/apono-agent-privilege-guard-for-custom-tools#create-an-agentic-access-flow) that grants permission to your organization's resources.
# Databases and Data Repositories
## Overview
{% hint style="info" %}
**Is your Data Source a cloud service?**
If it is you can use the specific cloud service integration instead.
{% endhint %}
# Elasticsearch
Create an integration to manage access to an Elasticsearch instance
**Elasticsearch** is a distributed, RESTful search and analytics engine used to store, index, and analyze large volumes of data in real time. By integrating Elasticsearch with Apono, you can enable temporary access to Elasticsearch for developers, data engineers, and operations teams without compromising security.
This integration allows Apono to manage just-in-time access to your Elasticsearch indices by authenticating through a connector user with scoped privileges.
***
### Prerequisites
<table><thead><tr><th width="211">Item</th><th>Description</th></tr></thead><tbody><tr><td><strong>Elasticsearch role</strong></td><td><p><a href="https://www.elastic.co/docs/api/doc/elasticsearch/operation/operation-security-put-role">Create a role</a> for the Apono connector with the following privileges.</p><pre><code>{
"cluster": [ "monitor", "manage_security" ],
"indices": [
{
"names": [ "*" ],
"privileges": [ "monitor" ]
}
]
}
</code></pre></td></tr><tr><td><strong>Elasticsearch user</strong></td><td><a href="https://www.elastic.co/docs/api/doc/elasticsearch/operation/operation-security-put-user">Create a user</a> for the Apono connector and assign the role above</td></tr><tr><td><strong>Elasticsearch endpoint</strong></td><td><p>Unique URL for your Elasticsearch deployment<br></p><p>Learn how to <a href="https://www.elastic.co/docs/deploy-manage/deploy/cloud-on-k8s/accessing-services#k8s-request-elasticsearch-endpoint">access the Elasticsearch endpoint</a>.</p><p><br><strong>NOTE</strong>: For Elastic Cloud users, the endpoint can be found in the <strong>Deployments</strong> tab of your Elastic Cloud console.</p></td></tr><tr><td><strong>Apono connector</strong></td><td><p>On-prem connection serving as a bridge between a MySQL instance and Apono:</p><ul><li><a href="/pages/U4HFH35XWDo3jyqhJqgQ">AWS</a></li><li><a href="/pages/ztAsRPKJcMNxeQKE2GNB">Azure</a></li><li><a href="/pages/xPrzAcLGsoliEpPJuozp">GCP</a></li><li><a href="/pages/p5PzUV4THznqePSTYgEH">Kubernetes</a><br></li></ul><p>Learn how to update an existing <a href="/pages/cNMceTvopbZdVqebcrk5">AWS</a>, <a href="/pages/qX1nxTxfqQ683NIJVRn5">Azure</a>, <a href="/pages/TmT0CXNeTeCE9vImZPl4">GCP</a>, or <a href="/pages/PGql18C6xhmOlcwdDh6b">Kubernetes</a> connector.</p></td></tr><tr><td><strong>Apono HTTP proxy</strong></td><td><a href="/pages/zQYUgE5NWyU6BTRBaJIG">Authorization controls</a> to manage Elasticsearch<br><br>The default Elasticsearch capabilities do not include authorization controls and therefore neither does the API. When integrating with Apono using the HTTP Proxy, you will be able to manage access to Elasticsearch using Apono Access Flows.</td></tr><tr><td><strong>Apono Secret</strong></td><td><p><a href="https://docs.apono.io/docs/connectors-and-secrets/apono-integration-secret">Create a secret</a> using the credentials from the Elasticsearch user step.</p><p>Use the following key-value pair structure when generating the secret. Be sure to replace the placeholder values with the actual values.</p><p><code>"username": "<the Elasticsearch connector username>"</code></p><p><code>"password": "<the password for the connector user>"</code><br><br><em>Apono does not store credentials. The Apono Connector uses the secret to communicate with services in your environment and separate the Apono web app from the environment for maximal</em> <a href="https://docs.apono.io/docs/about-apono/security-and-architecture"><em>security</em></a><em>.</em></p></td></tr></tbody></table>
***
### Integrate Elasticsearch
<figure><img src="/files/LUchfiwyCUtA7VZrthAB" alt="" width="375"><figcaption><p><em>Elasticsearch resource tile</em></p></figcaption></figure>
{% hint style="success" %}
You can also use the steps below to integrate with Apono using Terraform.
In step **12**, instead of clicking **Confirm**, follow the **Are you integrating with Apono using Terraform?** guidance.
{% endhint %}
Follow these steps to complete the integration:
1. On the [**Catalog**](https://app.apono.io/catalog?search=elasticsearch) tab, click **Elasticsearch**. The **Connect integration** page appears.
2. Under **Discovery**, select one or more resources to connect to Apono.
3. Click **Next**. The **Apono connector** section expands.
4. From the dropdown menu, select a connector. Choosing a connector links Apono to all the services available on the account where the connector is located.
{% hint style="success" %}
If the desired connector is not listed, click **+ Add new connector** and follow the instructions for creating a connector ([AWS](/docs/aws-environment/apono-connector-for-aws), [Azure](/docs/azure-environment/apono-connector-for-azure), [GCP](/docs/gcp-environment/apono-connector-for-gcp), [Kubernetes](/docs/kubernetes-environment/apono-connector-for-kubernetes)).
{% endhint %}
5. Click **Next**. The **Integration Config** section expands.
6. Define the **Integration Config** settings.
<table><thead><tr><th width="218">Setting</th><th>Description</th></tr></thead><tbody><tr><td><strong>Integration Name</strong></td><td>Unique, alphanumeric, user-friendly name used to identify this integration when constructing an access flow</td></tr><tr><td><strong>URL</strong></td><td>Unique URL for your Elasticsearch deployment</td></tr></tbody></table>
7. Click **Next**. The **Secret Store** section expands.
8. [Associate the secret or credentials](/docs/connectors-and-secrets/apono-integration-secret).
{% hint style="info" %}
If you select the **Apono** secret manager, enter the value of the username and password for the `apono-connector` user.
{% endhint %}
9. Click **Next**. The **Get more with Apono** section expands.
10. Define the **Get more with Apono** settings.
<table><thead><tr><th width="220">Setting</th><th>Description</th></tr></thead><tbody><tr><td><strong>Credential Rotation</strong></td><td><p>(Optional) Number of days after which the database credentials must be rotated</p><p>Learn more about the <a href="/pages/UsMtClaCM1SlvPsARUsM">Credentials Rotation Policy</a>.</p></td></tr><tr><td><strong>User cleanup after access is revoked (in days)</strong></td><td><p>(Optional) Defines the number of days after access has been revoked that the user should be deleted</p><p><br>Learn more about <a href="/pages/zJwQEG15iEhbPYg9hpqp">Periodic User Cleanup & Deletion</a>.</p></td></tr><tr><td><strong>Custom Access Details</strong></td><td>(Optional) Instructions explaining how to access this integration's resources<br><br>Upon accessing an integration, a message with these instructions will be displayed to end users in the User Portal. The message may include up to <strong>400 characters</strong>.<br><br>To view the message as it appears to end users, click <strong>Preview</strong>.</td></tr><tr><td><strong>Integration Owner</strong></td><td><p>(Optional) Fallback approver if no <a href="/pages/Ey4wuziyr2BzKYQnd5am">resource owner</a> is found<br><br>Follow these steps to define one or several integration owners:</p><ol><li>From the <strong>Attribute</strong> dropdown menu, select <strong>User</strong> or <strong>Group</strong> under the relevant identity provider (IdP) platform.</li><li>From the <strong>Value</strong> dropdown menu, select one or multiple users or groups.</li></ol><p><br><strong>NOTE</strong>: When <strong>Resource Owner</strong> is defined, an <strong>Integration Owner</strong> must be defined.</p></td></tr><tr><td><strong>Resource Owner</strong></td><td><p>(Optional) Group or role responsible for managing access approvals or rejections for the resource<br><br>Follow these steps to define one or several <a href="/pages/Ey4wuziyr2BzKYQnd5am">resource owners</a>:</p><ol><li>Enter a <strong>Key name</strong>. This value is the name of the tag created in your cloud environment.</li><li>From the <strong>Attribute</strong> dropdown menu, select an attribute under the IdP platform to which the key name is associated.<br><br>Apono will use the value associated with the key (tag) to identify the resource owner. When you update the membership of the group or role in your IdP platform, this change is also reflected in Apono.</li></ol><p><br><strong>NOTE</strong>: When this setting is defined, an <strong>Integration Owner</strong> must also be defined.</p></td></tr></tbody></table>
11. (Recommended) Click **Test Integration** to validate the integration.
{% hint style="info" %}
**Test Integration** is available after you have entered or selected values for all required integration fields.
During the test, Apono runs the following validation checks:
* **Connectivity:** The connector can reach the integration.
* **Configuration:** The integration is set up correctly.
* **Authentication:** The credentials are valid.
* **Discovery:** Resources can be fetched.
The **Test Validation** checklist shows the result of each check.
<img src="/files/ODqRkUwvqKuEtRqYQKaz" alt="" data-size="original">
If a check fails, Apono identifies the failed check and highlights the fields that need correction.
{% endhint %}
12. Click **Confirm**.
<details>
<summary>💡Are you integrating with Apono using Terraform?</summary>
If you want to integrate with Apono using Terraform, follow these steps instead of clicking **Confirm**:
1. At the top of the screen, click **View as Code**. A modal appears with the completed Terraform configuration code.
2. Click to copy the code.
3. Make any additional edits.
4. Deploy the code in your Terraform.
Refer to [Integration Config Metadata](https://docs.apono.io/metadata-for-integration-config/integration-metadata/elasticsearch) for more details about the schema definition.
</details>
#### Usage
Now that the integration is complete, you can add Elasticsearch to define the resources in an access flow. This allows requesters to access Elasticsearch indices securely based on your approval and provisioning rules.
Follow the guidance in these articles to define the resource using Elastic Cloud:
* [Define the resource (Self Serve Access Flows)](/docs/access-flows/creating-access-flows-in-apono/self-serve-access-flows#define-the-resource)
* [Define the resource (Automatic Access Flows)](/docs/access-flows/creating-access-flows-in-apono/automatic-access-flows#define-the-resource)
# Microsoft SQL Server
Create an integration to manage access to a Microsoft SQL Server database
Microsoft SQL Server is a reliable and secure relational database management system. It can be used as the main data store for various applications, websites, and products.
Microsoft enables developers to create cloud-hosted SQL Server databases.
Through this integration, Apono helps you securely manage access to your Microsoft SQL Server database.
***
### Prerequisites
<table><thead><tr><th width="242">Item</th><th>Description</th></tr></thead><tbody><tr><td><strong>Apono Connector</strong></td><td><p>On-prem connection serving as a bridge between a Microsoft SQL Server database instance and Apono:</p><ul><li><a href="/pages/U4HFH35XWDo3jyqhJqgQ">AWS</a></li><li><a href="/pages/ztAsRPKJcMNxeQKE2GNB">Azure</a></li><li><a href="/pages/xPrzAcLGsoliEpPJuozp">GCP</a></li><li><a href="/pages/p5PzUV4THznqePSTYgEH">Kubernetes</a></li></ul></td></tr><tr><td><strong>Microsoft SQL Server Info</strong></td><td><p>Information for the database instance to be integrated:</p><ul><li>Hostname</li><li>Port number</li></ul></td></tr></tbody></table>
***
### Create a Microsoft SQL Server user
You must create a user in your Microsoft SQL Server instance for the Apono connector.
Use the following steps to create a user and grant it permissions to your databases:
1. In your preferred client tool, create a new user. Use *apono\_connector* or another name of your choosing for the username. Be sure to set a strong password for the user.
{% hint style="warning" %}
The password must be a minimum of 8 characters and include characters from at least three of these four categories:
* Uppercase letters
* Lowercase letters
* Digits (0-9)
* Symbols
{% endhint %}
```sql
CREATE LOGIN apono_connector WITH PASSWORD = 'password';
```
2. Grant the following access to the user. These permissions allow Apono to view database names, modify login information, grant administrative-level access, manage server-level roles, and perform instance-level configuration tasks.
{% hint style="info" %}
While these permissions are elevated, they are required for Apono to securely and reliably manage access provisioning across your SQL Server environment.
{% endhint %}
```sql
GRANT VIEW ANY DATABASE TO apono_connector;
USE master GRANT ALTER ANY LOGIN TO apono_connector;
USE master GRANT CONTROL SERVER TO apono_connector;
USE master ALTER SERVER ROLE securityadmin ADD MEMBER apono_connector;
USE master ALTER SERVER ROLE serveradmin ADD MEMBER apono_connector;
```
3. Using the credentials from step **1**, [create a secret](/docs/connectors-and-secrets/apono-integration-secret) for the database instance. Use the following key-value pair structure when generating the secret. Be sure to replace `#PASSWORD` with the actual value. If you used a different name for the user, replace `apono-connector` with the name you assigned to the user.
```json
"username": "apono_connector",
"password": "#PASSWORD"
```
You can now [integrate Microsoft SQL Server](#integrate-microsoft-sql-server).
***
### Integrate Microsoft SQL Server
<figure><img src="/files/BapPGmMy1tS97DG2Dohc" alt="" width="563"><figcaption><p>Microsoft SQL Server tile</p></figcaption></figure>
{% hint style="success" %}
You can also use the steps below to integrate with Apono using Terraform.
In step **12**, instead of clicking **Confirm**, follow the **Are you integrating with Apono using Terraform?** guidance.
{% endhint %}
Follow these steps to complete the integration:
1. On the [**Catalog**](https://app.apono.io/catalog?search=microsoft+sql+server) tab, click **Microsoft SQL Server**. The **Connect Integration** page appears.
2. Under **Discovery**, click one or more resource types to sync with Apono.
{% hint style="info" %}
Apono automatically discovers and syncs all the instances in the environment. After syncing, you can manage access flow to these resources.
{% endhint %}
3. Click **Next**. The **Apono connector** section expands.
4. From the dropdown menu, select a connector. Choosing a connector links Apono to all the services available on the account where the connector is located.
{% hint style="success" %}
If the desired connector is not listed, click **+ Add new connector** and follow the instructions for creating a connector ([AWS](/docs/aws-environment/apono-connector-for-aws), [Azure](/docs/azure-environment/apono-connector-for-azure), [GCP](/docs/gcp-environment/apono-connector-for-gcp), [Kubernetes](/docs/kubernetes-environment/apono-connector-for-kubernetes)).
{% endhint %}
5. Click **Next**. The **Integration Config** section expands.
6. Define the **Integration Config** settings.
<table><thead><tr><th width="216">Setting</th><th>Description</th></tr></thead><tbody><tr><td><strong>Integration Name</strong></td><td>Unique, alphanumeric, user-friendly name used to identify this integration when constructing an access flow</td></tr><tr><td><strong>Hostname</strong></td><td>Hostname of the Microsoft SQL Server instance to connect</td></tr><tr><td><strong>Port</strong></td><td>Port value for the instance<br><br>By default, Apono sets this value to <em>1433</em>.</td></tr><tr><td><strong>Database Name</strong></td><td>Name of the database<br><br>By default, Apono sets this value to <em>master</em>.</td></tr></tbody></table>
7. Click **Next**. The **Secret Store** section expands.
8. Associate the [secret or credentials](/docs/connectors-and-secrets/apono-integration-secret).
9. Click **Next**. The **Get more with Apono** section expands.
10. Define the **Get more with Apono** settings.
<table><thead><tr><th width="215">Setting</th><th>Description</th></tr></thead><tbody><tr><td><strong>Credential Rotation</strong></td><td>(Optional) Number of days after which the database credentials must be rotated<br><br>Learn more about the <a href="/pages/UsMtClaCM1SlvPsARUsM">Credentials Rotation Policy</a>.</td></tr><tr><td><strong>User cleanup after access is revoked (in days)</strong></td><td><p>(Optional) Defines the number of days after access has been revoked that the user should be deleted</p><p><br>Learn more about <a href="/pages/zJwQEG15iEhbPYg9hpqp">Periodic User Cleanup & Deletion</a>.</p></td></tr><tr><td><strong>Custom Access Details</strong></td><td>(Optional) Instructions explaining how to access this integration's resources<br><br>Upon accessing an integration, a message with these instructions will be displayed to end users in the User Portal. The message may include up to <strong>400 characters</strong>.<br><br>To view the message as it appears to end users, click <strong>Preview</strong>.</td></tr><tr><td><strong>Integration Owner</strong></td><td><p>(Optional) Fallback approver if no <a href="/pages/Ey4wuziyr2BzKYQnd5am">resource owner</a> is found<br><br>Follow these steps to define one or several integration owners:</p><ol><li>From the <strong>Attribute</strong> dropdown menu, select <strong>User</strong> or <strong>Group</strong> under the relevant identity provider (IdP) platform.</li><li>From the <strong>Value</strong> dropdown menu, select one or multiple users or groups.</li></ol><p><br><strong>NOTE</strong>: When <strong>Resource Owner</strong> is defined, an <strong>Integration Owner</strong> must be defined.</p></td></tr><tr><td><strong>Resource Owner</strong></td><td><p>(Optional) Group or role responsible for managing access approvals or rejections for the resource<br><br>Follow these steps to define one or several <a href="/pages/Ey4wuziyr2BzKYQnd5am">resource owners</a>:</p><ol><li>Enter a <strong>Key name</strong>. This value is the name of the tag created in your cloud environment.</li><li>From the <strong>Attribute</strong> dropdown menu, select an attribute under the IdP platform to which the key name is associated.<br><br>Apono will use the value associated with the key (tag) to identify the resource owner. When you update the membership of the group or role in your IdP platform, this change is also reflected in Apono.</li></ol><p><br><strong>NOTE</strong>: When this setting is defined, an <strong>Integration Owner</strong> must also be defined.</p></td></tr></tbody></table>
11. (Recommended) Click **Test Integration** to validate the integration.
{% hint style="info" %}
**Test Integration** is available after you have entered or selected values for all required integration fields.
During the test, Apono runs the following validation checks:
* **Connectivity:** The connector can reach the integration.
* **Configuration:** The integration is set up correctly.
* **Authentication:** The credentials are valid.
* **Discovery:** Resources can be fetched.
The **Test Validation** checklist shows the result of each check.
<img src="/files/ODqRkUwvqKuEtRqYQKaz" alt="" data-size="original">
If a check fails, Apono identifies the failed check and highlights the fields that need correction.
{% endhint %}
12. Click **Confirm**.
<details>
<summary>💡Are you integrating with Apono using Terraform?</summary>
If you want to integrate with Apono using Terraform, follow these steps instead of clicking **Confirm**:
1. At the top of the screen, click **View as Code**. A modal appears with the completed Terraform configuration code.
2. Click to copy the code.
3. Make any additional edits.
4. Deploy the code in your Terraform.
Refer to [Integration Config Metadata](https://docs.apono.io/metadata-for-integration-config/integration-metadata/mssql) for more details about the schema definition.
</details>
Now that you have completed this integration, you can [create access flows](/docs/access-flows/access-flows) that grant permission to your Microsoft SQL Server database.
# OpenSearch
Create an integration to manage access to an OpenSearch instance
OpenSearch is a community-driven, open-source search and analytics suite. Through this integration, Apono discovers OpenSearch indices and roles and manages access to these resources.
***
### Prerequisites
<table><thead><tr><th width="245.42578125">Item</th><th>Description</th></tr></thead><tbody><tr><td><strong>Apono Connector</strong></td><td><p>On-prem connection serving as a bridge between an OpenSearch instance and Apono:</p><ul><li><a href="/pages/U4HFH35XWDo3jyqhJqgQ">AWS</a></li><li><a href="/pages/ztAsRPKJcMNxeQKE2GNB">Azure</a></li><li><a href="/pages/xPrzAcLGsoliEpPJuozp">GCP</a></li><li><a href="/pages/p5PzUV4THznqePSTYgEH">Kubernetes</a></li></ul><p><strong>Minimum Required Version</strong>: 1.4.0<br><br>Learn how to update an existing <a href="/pages/cNMceTvopbZdVqebcrk5">AWS</a>, <a href="/pages/qX1nxTxfqQ683NIJVRn5">Azure</a>, <a href="/pages/TmT0CXNeTeCE9vImZPl4">GCP</a>, or <a href="/pages/PGql18C6xhmOlcwdDh6b">Kubernetes</a> connector.</p></td></tr><tr><td><strong>OpenSearch Account Access</strong></td><td>Account that can create internal users, roles, and role mappings in OpenSearch</td></tr><tr><td><strong>OpenSearch Endpoint</strong></td><td>URL of the OpenSearch console</td></tr></tbody></table>
***
### Create an OpenSearch user
You must create a user in your OpenSearch instance for the Apono connector and grant that user permissions to your resources.
Follow these steps to create a user and grant it permissions:
1. In OpenSearch, [create a new user](https://docs.opensearch.org/latest/security/access-control/users-roles/#opensearch-dashboards):
1. In the side navigation, click **Security > Internal users**. The **Internal users** page opens.
2. Click **Create internal user**.
3. Enter a username, such as *apono\_connector*.
4. Enter a strong password. Be sure to save this password to create a secret later.
5. Click **Submit**.
2. [Create a new role](https://docs.opensearch.org/latest/security/access-control/users-roles/#defining-roles). This new role grants the monitoring permissions required to identify the cluster and discover indices.
1. In the side navigation, click **Security > Roles**.
2. Click **Create role**.
3. Enter a role name, such as *apono\_connector*.
4. Under **Cluster permissions**, add the following permissions:
* **cluster:monitor/state**
* **cluster:monitor/health**
* **cluster:monitor/main**
5. Under **Index permissions > Index**, enter *\** as the index pattern.
6. Under **Index permissions**, add the following permissions:
* **indices:monitor/settings/get**
* **indices:monitor/stats**
7. Click **Submit**.
3. [Map the new user to the new Apono connector role:](https://docs.opensearch.org/latest/security/access-control/users-roles/#mapping-users-to-roles)
1. In the side navigation, click **Security > Roles**.
2. Click the new role. The role settings page appears.
3. On the **Mapped users** tab, click **Manage mapping**.
4. Under **Users**, add the Apono connector username.
5. Click **Map**.
4. Map the **security\_manager** role to the Apono connector user. This role lets Apono manage OpenSearch security configurations, including roles and role mappings.
1. In the side navigation, click **Security > Roles**.
2. Click the **security\_manager** role. The role settings page appears.
3. On the **Mapped users** tab, click **Manage mapping**.
4. Under **Users**, add the Apono connector username.
5. Click **Map**.
5. [Create a secret](/docs/connectors-and-secrets/apono-integration-secret) with the credentials from step **1**.\
\
Use the following key-value pair structure when generating the secret. Be sure to replace `<OPENSEARCH_CONNECTOR_USERNAME>` and `<OPENSEARCH_CONNECTOR_USERNAME_PASSWORD>` with the actual value.
```json
{
"username": "<OPENSEARCH_CONNECTOR_USERNAME>",
"password": "<OPENSEARCH_CONNECTOR_USERNAME_PASSWORD>"
}
```
{% hint style="success" icon="lightbulb" %}
You can also input the user credentials directly into the Apono UI during the integration process.
{% endhint %}
***
### Integrate OpenSearch
<figure><img src="/files/0aUrQCN0YCpmwGnDDB4a" alt="" width="563"><figcaption><p>OpenSearch tile</p></figcaption></figure>
{% hint style="success" %}
You can also use the steps below to integrate with Apono using Terraform.
In step **12**, instead of clicking **Confirm**, follow the **Are you integrating with Apono using Terraform?** guidance.
{% endhint %}
Follow these steps to complete the integration:
1. On the [**Catalog**](https://app.apono.io/catalog?search=opensearch) tab, click **OpenSearch**. The **Connect Integration** page appears.
2. Under **Discovery**, select one or multiple resource types.
{% hint style="info" %}
Apono automatically discovers and syncs all the instances in the environment. After syncing, you can manage access flows to these resources.
{% endhint %}
3. Click **Next**. The **Apono connector** section expands.
4. From the **Select Connector From List** dropdown menu, select a connector. Choosing a connector links Apono to all the services available on the account where the connector is located.
{% hint style="success" icon="lightbulb" %}
If the desired connector is not listed, click **New Connector** and follow the instructions for creating a connector ([AWS](/docs/aws-environment/apono-connector-for-aws), [Azure](/docs/azure-environment/apono-connector-for-azure), [GCP](/docs/gcp-environment/apono-connector-for-gcp), [Kubernetes](/docs/kubernetes-environment/apono-connector-for-kubernetes)).
{% endhint %}
5. Click **Next**. The **Integration Config** page appears.
6. Define the **Integration Config** settings.
| Setting | Description |
| -------------------- | ---------------------------------------------------------------------------------------------------------- |
| **Integration Name** | Unique, alphanumeric, user-friendly name used to identify the integration when constructing an access flow |
| **Url** | OpenSearch console URL |
7. Click **Next**. The **Secret Store** section expands.
8. [Associate the secret or credentials](https://docs.apono.io/docs/connectors-and-secrets/apono-integration-secret).
{% hint style="info" %}
If you select the Apono secret manager, enter the OpenSearch **Username** and **Password** for the Apono Connector.
{% endhint %}
9. Click **Next**. The **Get more with Apono** section expands.
10. Define the **Get more with Apono** settings.
<table><thead><tr><th width="254.18359375">Setting</th><th>Description</th></tr></thead><tbody><tr><td><strong>Credential rotation period (in days)</strong></td><td><p>(Optional) Number of days after which the database credentials must be rotated</p><p>Learn more about the <a href="/pages/UsMtClaCM1SlvPsARUsM">Credentials Rotation Policy</a>.</p></td></tr><tr><td><strong>User cleanup after</strong> <strong>access is revoked (in days)</strong></td><td><p>(Optional) Defines the number of days after access has been revoked that the user should be deleted</p><p>Learn more about <a href="/pages/zJwQEG15iEhbPYg9hpqp">Periodic User Cleanup & Deletion</a>.</p></td></tr><tr><td><strong>Custom Access Details</strong></td><td>(Optional) Instructions explaining how to access this integration's resources<br><br>Upon accessing an integration, a message with these instructions will be displayed to end users in the User Portal. The message may include up to <strong>400 characters</strong>.<br><br>To view the message as it appears to end users, click <strong>Preview</strong>.</td></tr><tr><td><strong>Integration Owner</strong></td><td><p>(Optional) Fallback approver if no <a href="/pages/Ey4wuziyr2BzKYQnd5am">resource owner</a> is found<br><br>Follow these steps to define one or several integration owners:</p><ol><li>From the <strong>Attribute</strong> dropdown menu, select <strong>User</strong> or <strong>Group</strong> under the relevant identity provider (IdP) platform.</li><li>From the <strong>Value</strong> dropdown menu, select one or multiple users or groups.</li></ol><p><br><strong>NOTE</strong>: When <strong>Resource Owner</strong> is defined, an <strong>Integration Owner</strong> must be defined.</p></td></tr><tr><td><strong>Resource Owner</strong></td><td><p>(Optional) Group or role responsible for managing access approvals or rejections for the resource<br><br>Follow these steps to define one or several <a href="/pages/Ey4wuziyr2BzKYQnd5am">resource owners</a>:</p><ol><li>Enter a <strong>Key name</strong>. This value is the name of the tag created in your cloud environment.</li><li>From the <strong>Attribute</strong> dropdown menu, select an attribute under the IdP platform to which the key name is associated.<br><br>Apono will use the value associated with the key (tag) to identify the resource owner. When you update the membership of the group or role in your IdP platform, this change is also reflected in Apono.</li></ol><p><br><strong>NOTE</strong>: When this setting is defined, an <strong>Integration Owner</strong> must also be defined.</p></td></tr></tbody></table>
11. (Recommended) Click **Test Integration** to validate the integration.
{% hint style="info" %}
**Test Integration** is available after you have entered or selected values for all required integration fields.
During the test, Apono runs the following validation checks:
* **Connectivity:** The connector can reach the integration.
* **Configuration:** The integration is set up correctly.
* **Authentication:** The credentials are valid.
* **Discovery:** Resources can be fetched.
The **Test Validation** checklist shows the result of each check.
<img src="/files/ODqRkUwvqKuEtRqYQKaz" alt="" data-size="original">
If a check fails, Apono identifies the failed check and highlights the fields that need correction.
{% endhint %}
12. Click **Confirm**.
<details>
<summary>💡Are you integrating with Apono using Terraform?</summary>
If you want to integrate with Apono using Terraform, follow these steps instead of clicking **Confirm**:
1. At the top of the screen, click **View as Code**. A modal appears with the completed Terraform configuration code.
2. Click to copy the code.
3. Make any additional edits.
4. Deploy the code in your Terraform.
Refer to [Integration Config Metadata](https://docs.apono.io/metadata-for-integration-config/integration-metadata/opensearch) for more details about the schema definition.
</details>
#### Usage
Now that the integration is complete, you can add OpenSearch as a resource in an access flow. This allows requesters to securely request temporary access to those resources based on your approval and provisioning rules.
Follow the guidance in these articles to define OpenSearch resources:
* [Define the resource (Self Serve Access Flows)](/docs/access-flows/creating-access-flows-in-apono/self-serve-access-flows#define-the-resource)
* [Define the resource (Automatic Access Flows)](/docs/access-flows/creating-access-flows-in-apono/automatic-access-flows#define-the-resource)
# MongoDB
Create an integration to manage access to a MongoDB instance
The MongoDB integration helps you to securely discover and manage your MongoDB resources through Apono.
After integrating MongoDB with Apono, you'll be able to:
* Automate resource discovery and mapping across your MongoDB infrastructure
* Enable administrators to implement just-in-time, least-privilege access policies and securely manage permissions
* Allow users to request temporary access to specific **clusters**, **roles**, **databases**, and **collections**
Review the following prerequisites and implementation steps to complete this integration.
***
### Prerequisites
<table><thead><tr><th width="260">Item</th><th>Description</th></tr></thead><tbody><tr><td><strong>Apono Connector</strong></td><td><p>On-prem connection serving as a bridge between a MongoDB instance and Apono:</p><ul><li><a href="/pages/U4HFH35XWDo3jyqhJqgQ">AWS</a></li><li><a href="/pages/ztAsRPKJcMNxeQKE2GNB">Azure</a></li><li><a href="/pages/xPrzAcLGsoliEpPJuozp">GCP</a></li><li><a href="/pages/p5PzUV4THznqePSTYgEH">Kubernetes</a></li></ul></td></tr><tr><td><strong>MongoDB Information</strong></td><td><p>Information for the database instance to be integrated:</p><ul><li>Hostname</li><li>Port</li></ul><p>This information can be obtained from a <a href="https://www.mongodb.com/docs/manual/reference/connection-string/">connection string</a>.</p></td></tr></tbody></table>
***
### Create a user
You must create a MongoDB user for the Apono connector.
Follow these steps to create a user:
1. In your MongoDB instance, switch to the admin database.
```mongodb
use admin;
```
2. Create a user (`user`) and password (`pwd`) for the Apono connector.
{% hint style="info" %}
For more information on creating a user, refer to MongoDB's [Create a User on Self-Managed Deployments](https://www.mongodb.com/docs/manual/tutorial/create-users/).
{% endhint %}
```mongodb
db.createUser({
user: "apono-connector",
pwd: "password",
roles: [
{
"role" : "clusterMonitor",
"db" : "admin"
},
{
"role" : "userAdminAnyDatabase",
"db" : "admin"
},
{
"role" : "readWriteAnyDatabase",
"db" : "admin"
},
{
"role" : "clusterManager",
"db" : "admin"
}
]
});
```
3. [Create a secret](/docs/connectors-and-secrets/apono-integration-secret) with the credentials from step **2**.\
\
Use the following key-value pair structure when generating the secret. Be sure to replace `#PASSWORD` with the actual value. If you used a different name for the user, replace `apono-connector` with the name you assigned to the user.
```json
"username": "apono-connector",
"password": "#PASSWORD"
```
{% hint style="success" %}
You can also input the user credentials directly into the Apono UI during the [integration process](#integrate-mongodb).
{% endhint %}
***
### Integrate MongoDB
<figure><img src="/files/zHIyGzCZjqtCntQwzFsN" alt="" width="563"><figcaption><p>MongoDB tile</p></figcaption></figure>
{% hint style="success" %}
You can also use the steps below to integrate with Apono using Terraform.
In step **12**, instead of clicking **Confirm**, follow the **Are you integrating with Apono using Terraform?** guidance.
{% endhint %}
Follow these steps to complete the integration:
1. On the [**Catalog**](https://app.apono.io/catalog?search=mongodb) tab, click **MongoDB**. The **Connect Integration** page appears.
2. Under **Discovery**, select one or multiple resource types.
{% hint style="info" %}
Apono automatically discovers and syncs all the instances in the environment. After syncing, you can manage access flows to these resources.
{% endhint %}
3. Click **Next**. The **Apono connector** section expands.
4. From the dropdown menu, select a connector. Choosing a connector links Apono to all the services available on the account where the connector is located.
{% hint style="success" %}
If the desired connector is not listed, click **+ Add new connector** and follow the instructions for creating a connector ([AWS](/docs/aws-environment/apono-connector-for-aws), [Azure](/docs/azure-environment/apono-connector-for-azure), [GCP](/docs/gcp-environment/apono-connector-for-gcp), [Kubernetes](/docs/kubernetes-environment/apono-connector-for-kubernetes)).
{% endhint %}
5. Click **Next**. The **Integration Config** section expands.
6. Define the **Integration Config** settings.
<table><thead><tr><th width="224">Setting</th><th>Description</th></tr></thead><tbody><tr><td><strong>Integration Name</strong></td><td>Unique, alphanumeric, user-friendly name used to identify this integration when constructing an access flow</td></tr><tr><td><strong>Hostname</strong></td><td>Address of the MongoDB instance</td></tr><tr><td><strong>Port</strong></td><td><p>Network port the MongoDB instance is listening on for connections</p><p>By default, MongoDB uses port <em>27017</em>.</p></td></tr></tbody></table>
7. Click **Next**. The **Secret Store** section expands.
8. [Associate the secret or credentials](/docs/connectors-and-secrets/apono-integration-secret).
9. Click **Next**. The **Get more with Apono** section expands.
10. Define the **Get more with Apono** settings.
<table><thead><tr><th width="224">Setting</th><th>Description</th></tr></thead><tbody><tr><td><strong>Credential Rotation</strong></td><td>(Optional) Number of days after which the database credentials must be rotated<br><br>Learn more about the <a href="/pages/UsMtClaCM1SlvPsARUsM">Credentials Rotation Policy</a>.</td></tr><tr><td><strong>User cleanup after access is revoked (in days)</strong></td><td><p>(Optional) Defines the number of days after access has been revoked that the user should be deleted</p><p><br>Learn more about <a href="/pages/zJwQEG15iEhbPYg9hpqp">Periodic User Cleanup & Deletion</a>.</p></td></tr><tr><td><strong>Custom Access Details</strong></td><td>(Optional) Instructions explaining how to access this integration's resources<br><br>Upon accessing an integration, a message with these instructions will be displayed to end users in the User Portal. The message may include up to <strong>400 characters</strong>.<br><br>To view the message as it appears to end users, click <strong>Preview</strong>.</td></tr><tr><td><strong>Integration Owner</strong></td><td><p>(Optional) Fallback approver if no <a href="/pages/Ey4wuziyr2BzKYQnd5am">resource owner</a> is found<br><br>Follow these steps to define one or several integration owners:</p><ol><li>From the <strong>Attribute</strong> dropdown menu, select <strong>User</strong> or <strong>Group</strong> under the relevant identity provider (IdP) platform.</li><li>From the <strong>Value</strong> dropdown menu, select one or multiple users or groups.</li></ol><p><br><strong>NOTE</strong>: When <strong>Resource Owner</strong> is defined, an <strong>Integration Owner</strong> must be defined.</p></td></tr><tr><td><strong>Resource Owner</strong></td><td><p>(Optional) Group or role responsible for managing access approvals or rejections for the resource<br><br>Follow these steps to define one or several <a href="/pages/Ey4wuziyr2BzKYQnd5am">resource owners</a>:</p><ol><li>Enter a <strong>Key name</strong>. This value is the name of the tag created in your cloud environment.</li><li>From the <strong>Attribute</strong> dropdown menu, select an attribute under the IdP platform to which the key name is associated.<br><br>Apono will use the value associated with the key (tag) to identify the resource owner. When you update the membership of the group or role in your IdP platform, this change is also reflected in Apono.</li></ol><p><br><strong>NOTE</strong>: When this setting is defined, an <strong>Integration Owner</strong> must also be defined.</p></td></tr></tbody></table>
11. (Recommended) Click **Test Integration** to validate the integration.
{% hint style="info" %}
**Test Integration** is available after you have entered or selected values for all required integration fields.
During the test, Apono runs the following validation checks:
* **Connectivity:** The connector can reach the integration.
* **Configuration:** The integration is set up correctly.
* **Authentication:** The credentials are valid.
* **Discovery:** Resources can be fetched.
The **Test Validation** checklist shows the result of each check.
<img src="/files/ODqRkUwvqKuEtRqYQKaz" alt="" data-size="original">
If a check fails, Apono identifies the failed check and highlights the fields that need correction.
{% endhint %}
12. Click **Confirm**.
<details>
<summary>💡Are you integrating with Apono using Terraform?</summary>
If you want to integrate with Apono using Terraform, follow these steps instead of clicking **Confirm**:
1. At the top of the screen, click **View as Code**. A modal appears with the completed Terraform configuration code.
2. Click to copy the code.
3. Make any additional edits.
4. Deploy the code in your Terraform.
Refer to [Integration Config Metadata](https://docs.apono.io/metadata-for-integration-config/integration-metadata/mongodb) for more details about the schema definition.
</details>
Now that you have completed this integration, you can [create access flows](/docs/access-flows/access-flows) that grant permission to your MongoDB instance.
# MongoDB Atlas
Create an integration to manage access to a MongoDB Atlas instance
MongoDB Atlas is a fully managed and scalable cloud database service. It provides a flexible and secure platform for storing and managing data across various applications.
Developers can easily deploy, manage, and scale MongoDB databases in the cloud. Features like automated backups, global clusters, and real-time monitoring simplify database management.
Through this integration, Apono helps you discover and securely manage access to the resources in your MongoDB Atlas instance.
***
### Prerequisites
<table><thead><tr><th width="260">Item</th><th>Description</th></tr></thead><tbody><tr><td><strong>Apono Connector</strong></td><td><p>On-prem connection serving as a bridge between a MongoDB Atlas instance and Apono:</p><ul><li><a href="/pages/U4HFH35XWDo3jyqhJqgQ">AWS</a></li><li><a href="/pages/ztAsRPKJcMNxeQKE2GNB">Azure</a></li><li><a href="/pages/xPrzAcLGsoliEpPJuozp">GCP</a></li><li><a href="/pages/p5PzUV4THznqePSTYgEH">Kubernetes</a></li></ul></td></tr><tr><td><strong>Atlas CLI</strong></td><td><a href="https://www.mongodb.com/docs/atlas/cli/current/install-atlas-cli/">Command-line interface</a> used to manage Atlas resources</td></tr><tr><td><strong>MongoDB Atlas Information</strong></td><td><p>Information for the database instance to be integrated:</p><ul><li><a href="https://www.mongodb.com/docs/atlas/tutorial/manage-project-settings">Project ID</a></li><li><a href="https://www.mongodb.com/docs/atlas/manage-database-deployments">Cluster Name</a></li><li><a href="https://www.mongodb.com/docs/atlas/manage-database-deployments">Cluster Type</a></li><li><a href="https://www.mongodb.com/docs/atlas/security-cluster-private-endpoint/">Private Endpoint ID</a> (when using a private endpoint)</li></ul></td></tr></tbody></table>
***
### Create a project owner API key
A project owner API key enables Apono to control Atlas user access across a [single](#single-project) or [multiple](#multiple-projects) projects.
{% tabs %}
{% tab title="Single Project" %}
If you have a single MongoDB Atlas project, you can use a project owner API key to manage it through Apono.
Follow these steps to create a project owner API key:
1. At the Atlas CLI prompt, run the following command. Be sure to replace `#PROJECT_ID` with the project ID that contains the cluster you want to integrate.
{% code overflow="wrap" %}
```sh
atlas projects apiKeys create --desc cli-created --projectId "#PROJECT_ID" --role GROUP_OWNER
```
{% endcode %}
2. Copy the public and private API key in the response.
3. [Create a secret](/docs/connectors-and-secrets/apono-integration-secret) with the credentials from step **2**. Use the following key-value pair structure when generating the secret. Be sure to replace `#PUBLIC_KEY` and `#PRIVATE_KEY` with actual values.
```json
"public_key": "#PUBLIC_KEY",
"private_key": "#PRIVATE_KEY"
```
{% hint style="success" %}
You can also input the user credentials directly into the Apono UI during the [integration process](/docs/connectors-and-secrets/apono-integration-secret#apono).
{% endhint %}
You can now [integrate MongoDB Atlas](#integrate-mongodb-atlas).
{% endtab %}
{% tab title="Multiple Projects" %}
If you have multiple MongoDB Atlas projects, you can use a single project owner API key to manage them all through Apono.
Follow these steps to create and associate a project owner API key:
1. At the Atlas CLI prompt, run the following command. Be sure to replace `#PROJECT_ID` with the project ID that contains the cluster you want to integrate.
{% code overflow="wrap" %}
```sh
atlas projects apiKeys create --desc cli-created --projectId "#PROJECT_ID" --role GROUP_OWNER
```
{% endcode %}
2. Copy the public and private API key in the response.
3. List all your Atlas projects and their IDs.
```bash
atlas projects list
```
4. For each additional project ID, assign the public API key. Be sure to replace `#API_KEY_ID` with your public API key from step **2** and `#PROJECT_ID` with the project ID of the additional project to associate with the API key.
{% code overflow="wrap" %}
```bash
atlas projects apiKeys assign #API_KEY_ID --role GROUP_OWNER --projectId #PROJECT_ID
```
{% endcode %}
5. [Create a secret](/docs/connectors-and-secrets/apono-integration-secret) with the credentials from step **2**. Use the following key-value pair structure when generating the secret. Be sure to replace `#PUBLIC_KEY` and `#PRIVATE_KEY` with actual values.
```json
"public_key": "#PUBLIC_KEY",
"private_key": "#PRIVATE_KEY"
```
{% hint style="success" %}
You can also input the user credentials directly into the Apono UI during the [integration process](/docs/connectors-and-secrets/apono-integration-secret#apono).
{% endhint %}
You can now [integrate MongoDB Atlas](#integrate-mongodb-atlas).
{% endtab %}
{% endtabs %}
***
## Integrate MongoDB Atlas
<figure><img src="/files/a8Qrls0IqRqnzGb0yWNl" alt="" width="563"><figcaption><p>MongoDB Atlas tile</p></figcaption></figure>
{% hint style="success" %}
You can also use the steps below to integrate with Apono using Terraform.
In step **12**, instead of clicking **Confirm**, follow the **Are you integrating with Apono using Terraform?** guidance.
{% endhint %}
Follow these steps to complete the integration:
1. On the [**Catalog**](https://app.apono.io/catalog?search=mongodb+atlas) tab, click **MongoDB Atlas**. The **Connect Integration** page appears.
2. Under **Discovery**, select one or multiple resource types.
{% hint style="info" %}
Apono automatically discovers and syncs all the instances in the environment. After syncing, you can manage access flows to these resources.
{% endhint %}
3. Click **Next**. The **Apono connector** section expands.
4. From the dropdown menu, select a connector. Choosing a connector links Apono to all the services available on the account where the connector is located.
{% hint style="success" %}
If the desired connector is not listed, click **+ Add new connector** and follow the instructions for creating a connector ([AWS](/docs/aws-environment/apono-connector-for-aws), [Azure](/docs/azure-environment/apono-connector-for-azure), [GCP](/docs/gcp-environment/apono-connector-for-gcp), [Kubernetes](/docs/kubernetes-environment/apono-connector-for-kubernetes)).
{% endhint %}
5. Click **Next**. The **Integration Config** section expands.
6. Define the **Integration Config** settings.
<table><thead><tr><th width="224">Setting</th><th>Description</th></tr></thead><tbody><tr><td><strong>Integration Name</strong></td><td>Unique, alphanumeric, user-friendly name used to identify this integration when constructing an access flow</td></tr><tr><td><strong>Project Id</strong></td><td>Unique identifier assigned to each project within MongoDB Atlas</td></tr><tr><td><strong>Cluster Name</strong></td><td>Name for a database cluster in MongoDB Atlas, serving as an identifier within a project</td></tr><tr><td><strong>Cluster Type</strong></td><td>Configuration of a MongoDB Atlas cluster</td></tr><tr><td><strong>Connection Type</strong></td><td><p>Type of network MongoDB Atlas connection used by the Apono connector<br><br><strong>Options</strong>:</p><ul><li><strong>Standard</strong>: Default connection over the public internet from an allowed public IP address</li><li><strong>Private</strong>: Private connection from a peered network using MongoDB Atlas network peering</li><li><strong>Private Endpoint</strong>: Private connection through a configured private endpoint, such as AWS PrivateLink, Azure Private Link, or Google Cloud Private Service Connect</li></ul></td></tr><tr><td><strong>Private Endpoint Id</strong></td><td>(Required when <strong>Connection Type</strong> is set to <strong>Private Endpoint</strong>) Unique identifier for a private endpoint in MongoDB Atlas</td></tr></tbody></table>
7. Click **Next**. The **Secret Store** section expands.
8. [Associate the secret or credentials](/docs/connectors-and-secrets/apono-integration-secret).
9. Click **Next**. The **Get more with Apono** section expands.
10. Define the **Get more with Apono** settings.
<table><thead><tr><th width="223">Setting</th><th>Description</th></tr></thead><tbody><tr><td><strong>Credential rotation period (in days)</strong></td><td><p>(Optional) Number of days after which the database credentials must be rotated</p><p>Learn more about the <a href="/pages/UsMtClaCM1SlvPsARUsM">Credentials Rotation Policy</a>.</p></td></tr><tr><td><strong>User cleanup after</strong> <strong>access is revoked (in days)</strong></td><td><p>(Optional) Defines the number of days after access has been revoked that the user should be deleted</p><p><br>Learn more about <a href="/pages/zJwQEG15iEhbPYg9hpqp">Periodic User Cleanup & Deletion</a>.</p></td></tr><tr><td><strong>Custom Access Details</strong></td><td>(Optional) Instructions explaining how to access this integration's resources<br><br>Upon accessing an integration, a message with these instructions will be displayed to end users in the User Portal. The message may include up to <strong>400 characters</strong>.<br><br>To view the message as it appears to end users, click <strong>Preview</strong>.</td></tr><tr><td><strong>Integration Owner</strong></td><td><p>(Optional) Fallback approver if no <a href="/pages/Ey4wuziyr2BzKYQnd5am">resource owner</a> is found<br><br>Follow these steps to define one or several integration owners:</p><ol><li>From the <strong>Attribute</strong> dropdown menu, select <strong>User</strong> or <strong>Group</strong> under the relevant identity provider (IdP) platform.</li><li>From the <strong>Value</strong> dropdown menu, select one or multiple users or groups.</li></ol><p><br><strong>NOTE</strong>: When <strong>Resource Owner</strong> is defined, an <strong>Integration Owner</strong> must be defined.</p></td></tr><tr><td><strong>Resource Owner</strong></td><td><p>(Optional) Group or role responsible for managing access approvals or rejections for the resource<br><br>Follow these steps to define one or several <a href="/pages/Ey4wuziyr2BzKYQnd5am">resource owners</a>:</p><ol><li>Enter a <strong>Key name</strong>. This value is the name of the tag created in your cloud environment.</li><li>From the <strong>Attribute</strong> dropdown menu, select an attribute under the IdP platform to which the key name is associated.<br><br>Apono will use the value associated with the key (tag) to identify the resource owner. When you update the membership of the group or role in your IdP platform, this change is also reflected in Apono.</li></ol><p><br><strong>NOTE</strong>: When this setting is defined, an <strong>Integration Owner</strong> must also be defined.</p></td></tr></tbody></table>
11. (Recommended) Click **Test Integration** to validate the integration.
{% hint style="info" %}
**Test Integration** is available after you have entered or selected values for all required integration fields.
During the test, Apono runs the following validation checks:
* **Connectivity:** The connector can reach the integration.
* **Configuration:** The integration is set up correctly.
* **Authentication:** The credentials are valid.
* **Discovery:** Resources can be fetched.
The **Test Validation** checklist shows the result of each check.
<img src="/files/ODqRkUwvqKuEtRqYQKaz" alt="" data-size="original">
If a check fails, Apono identifies the failed check and highlights the fields that need correction.
{% endhint %}
12. Click **Confirm**.
<details>
<summary>💡Are you integrating with Apono using Terraform?</summary>
If you want to integrate with Apono using Terraform, follow these steps instead of clicking **Confirm**:
1. At the top of the screen, click **View as Code**. A modal appears with the completed Terraform configuration code.
2. Click to copy the code.
3. Make any additional edits.
4. Deploy the code in your Terraform.
Refer to [Integration Config Metadata](https://docs.apono.io/metadata-for-integration-config/integration-metadata/mongodb-atlas) for more details about the schema definition.
</details>
Now that you have completed this integration, you can [create access flows](/docs/access-flows/access-flows) that grant permission to your MongoDB Atlas instance.
## Limitations
Please note: due to [Mongo Atlas limitations](https://www.mongodb.com/docs/atlas/security-add-mongodb-roles/#considerations), only 100 custom roles can be created per tenant. This may cause access requests to fail if the limit is exceeded.
---
[Next Page](/llms-full.txt/1)

