For the complete documentation index, see llms.txt. This page is also available as Markdown.

Requesting Access with the Web Portal

Use the Apono web portal to request access and manage access requests

The Apono Web Portal enables you to request, view, and receive permissions to services, databases, and applications that are centrally managed through Apono.

The Web Portal offers several benefits:

  • Streamline access requests to resources without navigating complex IT systems

  • Centralize access visibility to view pending approvals and current permissions

  • Enhance security and compliance with centrally managed access

  • Reduce risk of error by simplifying the access process


Prerequisites

Item
Description

Apono Account

Access to Apono You can verify that you have access by going to the Apono Portal or contacting your administrator to obtain a user account.

Access Flow Grantee

Inclusion in at least one access flow

Contact your administrator for more information.


Request new access

You can request new access from either the My Access or My Requests page:

  • Use the My Access page when you know the resource or bundle you need. Search by keyword, then select a result to open a partially populated request form.

  • Use the My Requests page to build a resource, app, or bundle request by entering the required details step by step.

My Access page

Follow these steps to request access to a resource or bundle:

  1. On the My Access page, click the search field. A pop-up window appears.

  2. In the field, begin typing the name of a resource or bundle. Matching resources and bundles appear.

lightbulb
  1. Click Request next to a resource or bundle. A partially populated request form appears.

  2. To complete the required fields for your request type, expand the relevant section below (Resource or Bundle) and follow the steps.

Resource
  1. From the Request on Behalf of dropdown menu, select the individual to receive access. By default, your user profile is selected.

  2. Select a Permission from the dropdown menu.

  3. (If applicable) Select the Ticket Type associated with your request as defined in your organization’s ticketing system.

  4. (If applicable) Enter the unique Ticket ID from your organization’s ticketing system to link the request to the tracked task.

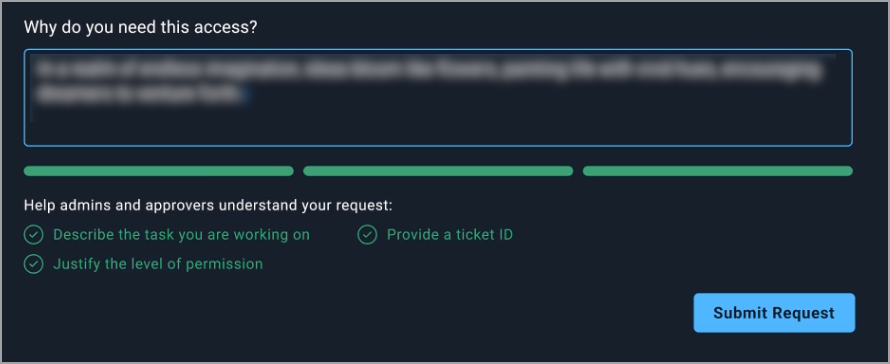
  5. Under Why do you need this access? enter a reason why you are requesting access to the resource.

A clear explanation helps approvers understand your request, speeds up approvals, and ensures the access can be audited later.

Bundle
  1. (If applicable) Select the Ticket Type associated with your request as defined in your organization’s ticketing system.

  2. (If applicable) Enter the unique Ticket ID from your organization’s ticketing system to link the request to the tracked task.

  3. Under Why do you need this access? enter a reason why you are requesting access to the resource.

A clear explanation helps approvers understand your request, speeds up approvals, and ensures the access can be audited later.

As you type, Apono provides real-time feedback to help you improve your justification. It evaluates whether you have:

  • Described the task you are working on

  • Explained why this level of access is required

  • Included a relevant ticket ID

When your justification meets these requirements, the indicator will turn green.

  1. Click Request. The request will appear with its status on the My Requests tab.

My Requests page

You can request access to specific resources, an app, or a bundle.

Resources request

A resources request lets you select specific resources and permissions from all available items across cloud environments. Upon submission, Apono separates the form into individual requests based on each resource's access flow.

Follow these steps to request access to resources:

  1. On the My Requests page, click New Request. The New Request page appears.

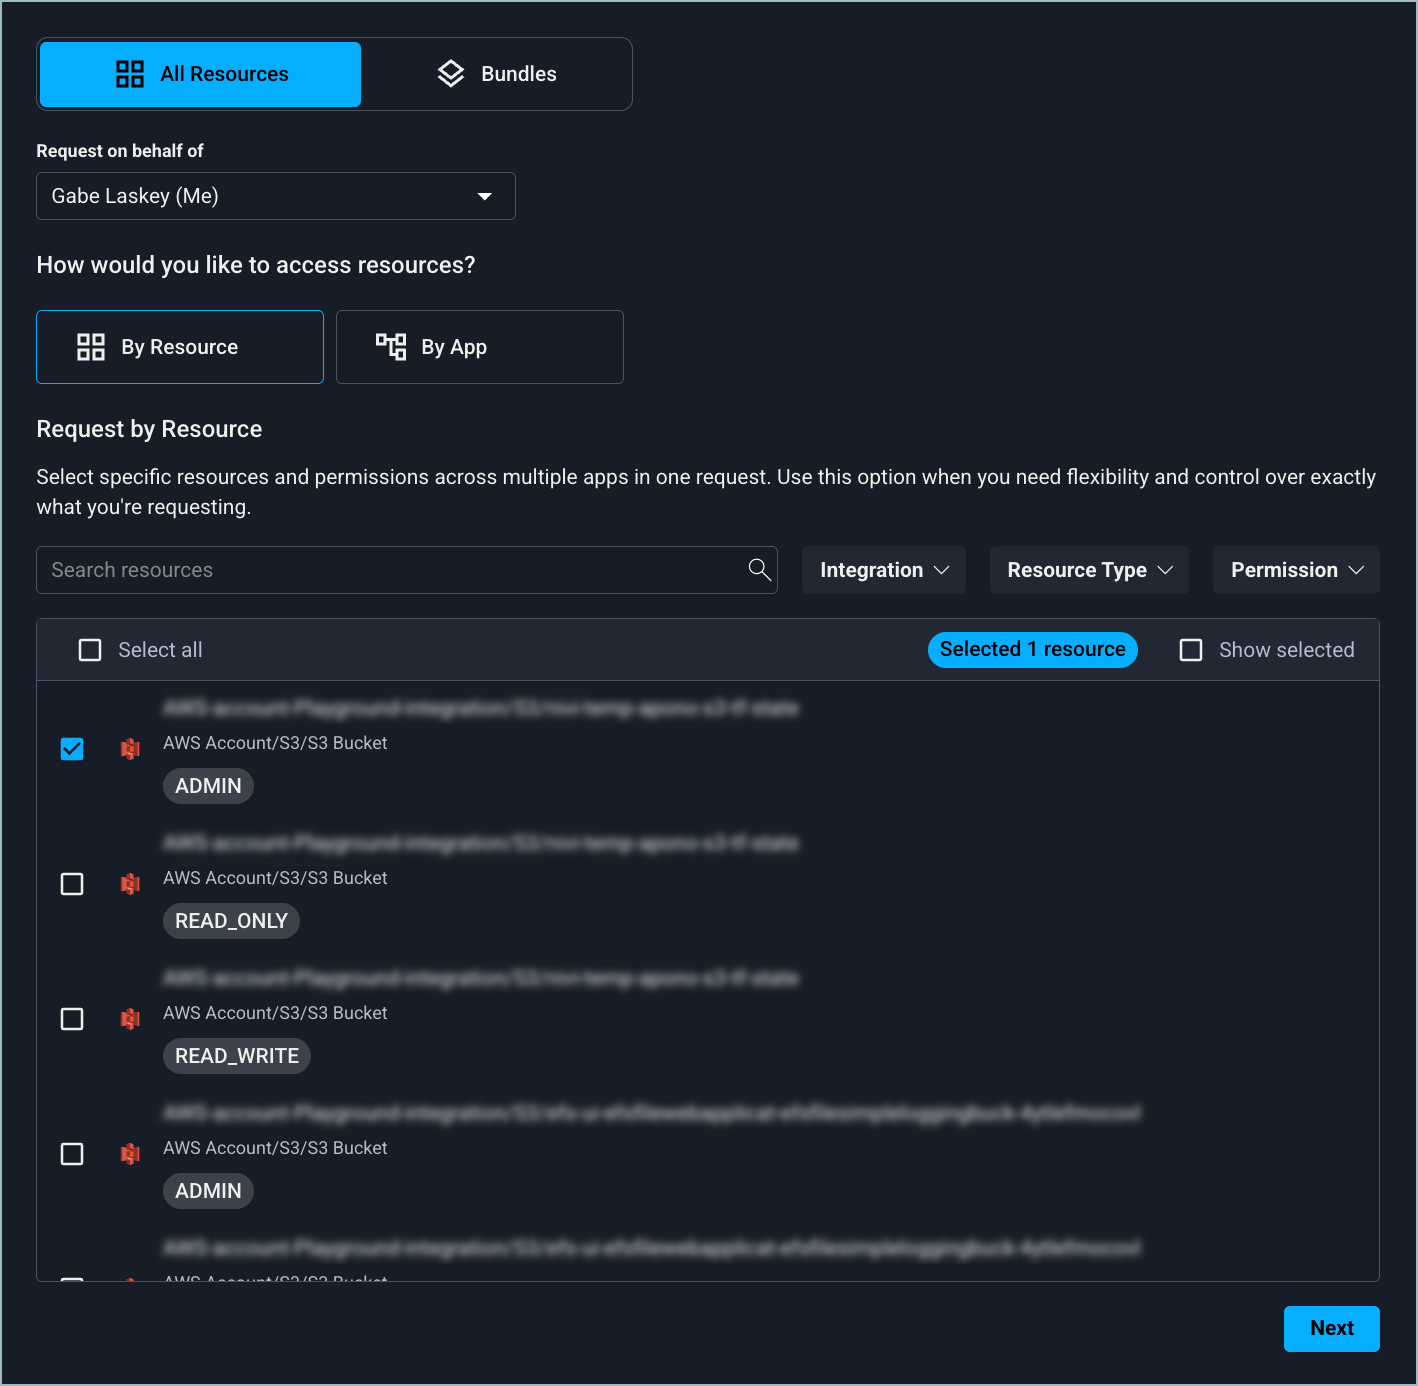
  2. Click the All Resources tab. The resources fields appear below.

  3. From the Request on Behalf of dropdown menu, select the individual to receive access. By default, your user profile is selected.

  4. Under How would you like to access resources?, click By Resource. The Request by Resource fields appear.

  5. (Optional) In the Search field, enter the name of a resource.

  6. (Optional) Apply one or both filters to refine the list of resources.

    1. From the Resource Type dropdown menu, select one or several resource types to filter the list of resources.

    2. From the Permission dropdown menu, select one or several permissions to filter the list of resources.

  7. Select one or several resources. You can select a maximum of 1,000 resources.

  1. Click Next. The Complete Additional Details page appears.

  2. Choose a Duration from the dropdown menu to set the access period.

  3. (If applicable) Select the Ticket Type associated with your request as defined in your organization’s ticketing system.

  4. (Optional) Enter the unique Ticket ID from your organization’s ticketing system to link the request to the tracked task.

  5. Under Why do you need this access? enter a reason why you are requesting access to the resource.

A clear explanation helps approvers understand your request, speeds up approvals, and ensures the access can be audited later.

As you type, Apono provides real-time feedback to help you improve your justification. It evaluates whether you have:

  • Described the task you are working on

  • Explained why this level of access is required

  • Included a relevant ticket ID

When your justification meets these requirements, the indicator will turn green.

  1. Click Submit Request. The request will appear with its status on the My Requests tab.

If enabled by your admin, you will receive a notification via Slack or Microsoft Teams. Otherwise, the notification will be delivered by email.

Integration request

Follow these steps to request access to an integration:

  1. On the My Requests page, click New Request. The New Request page appears.

  2. Click the All Resources tab. The resources fields appear below.

  3. From the Request on Behalf of dropdown menu, select the individual to receive access. By default, your user profile is selected.

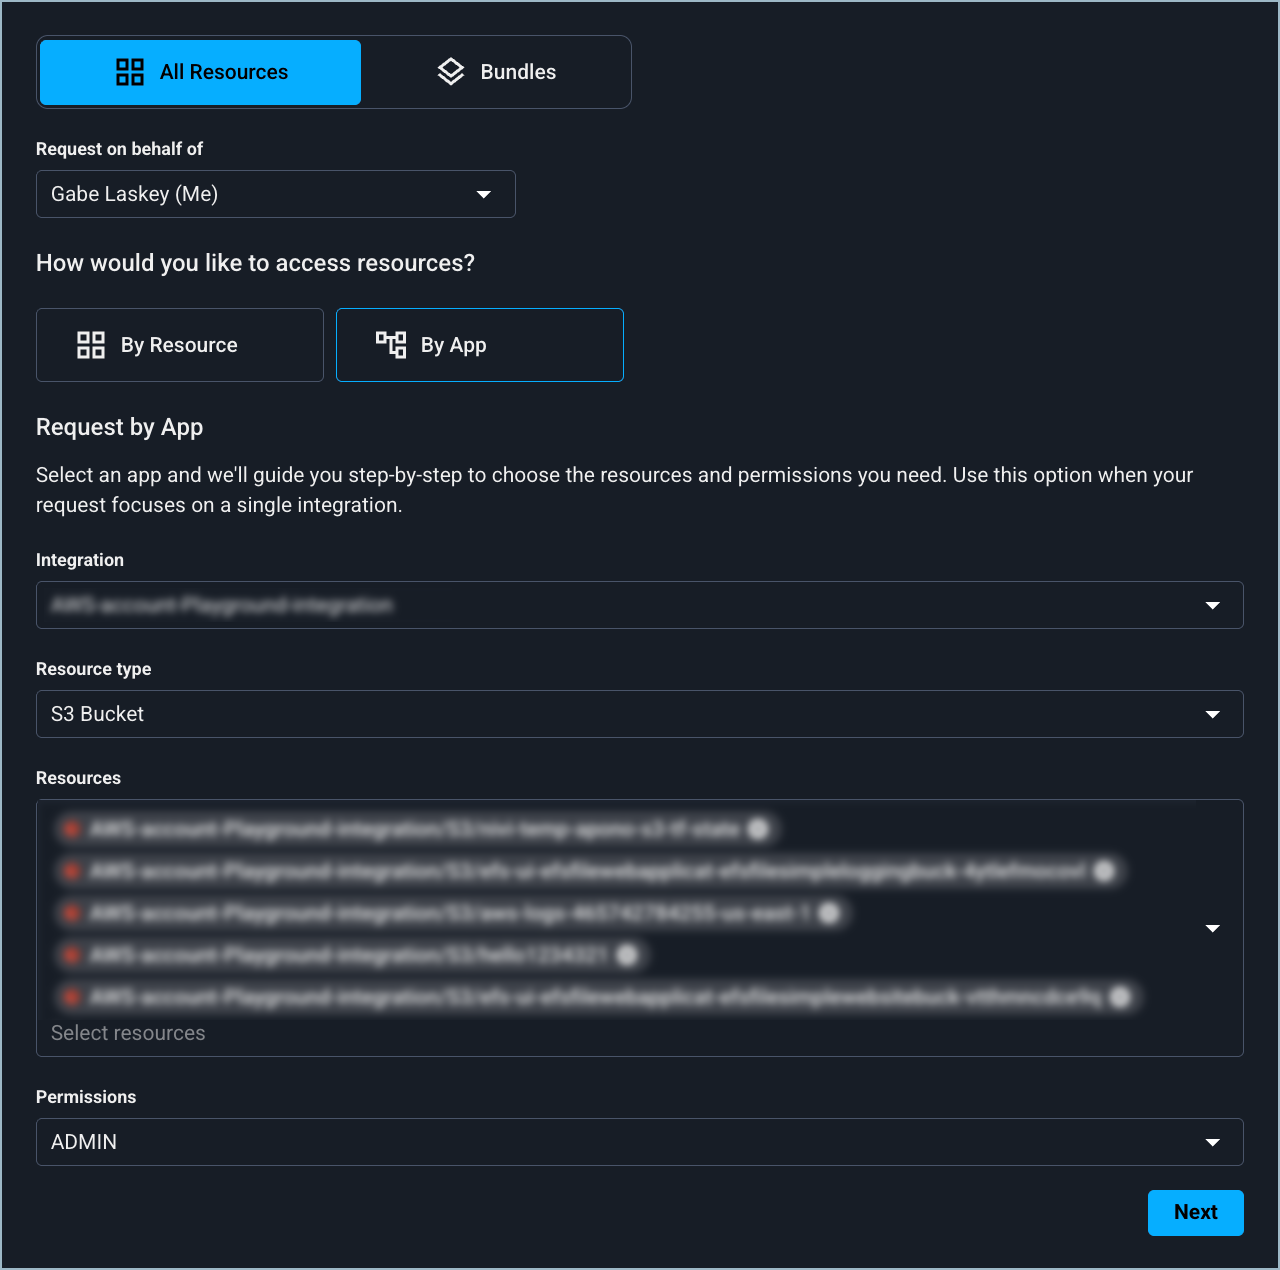
  4. Under How would you like to access resources?, click By App. The Request by App fields appear.

  5. Select an Integration.

  6. Select a Resource Type. The available options depend upon the selected integration.

  7. Select one or several Resources. The available options depend upon the selected resource type.

  8. Select one or several Permission options. The available options depend upon the selected resources.

  9. Click Next. The Complete Additional Details page appears.

  10. Choose a Duration from the dropdown menu to set the access period.

  11. (If applicable) Select the Ticket Type associated with your request as defined in your organization’s ticketing system.

  12. (If applicable) Enter the unique Ticket ID from your organization’s ticketing system to link the request to the tracked task.

  13. Under Why do you need this access? enter a reason why you are requesting access to the resource.

A clear explanation helps approvers understand your request, speeds up approvals, and ensures the access can be audited later.

As you type, Apono provides real-time feedback to help you improve your justification. It evaluates whether you have:

  • Described the task you are working on

  • Explained why this level of access is required

  • Included a relevant ticket ID

When your justification meets these requirements, the indicator will turn green.

  1. Click Submit Request. The request will appear with its status on the My Requests tab.

If enabled by your admin, you will receive a notification via Slack or Microsoft Teams. Otherwise, the notification will be delivered by email.

Bundle request

Follow these steps to request access to a bundle:

  1. On the My Requests page, click New Request. The New Request page appears.

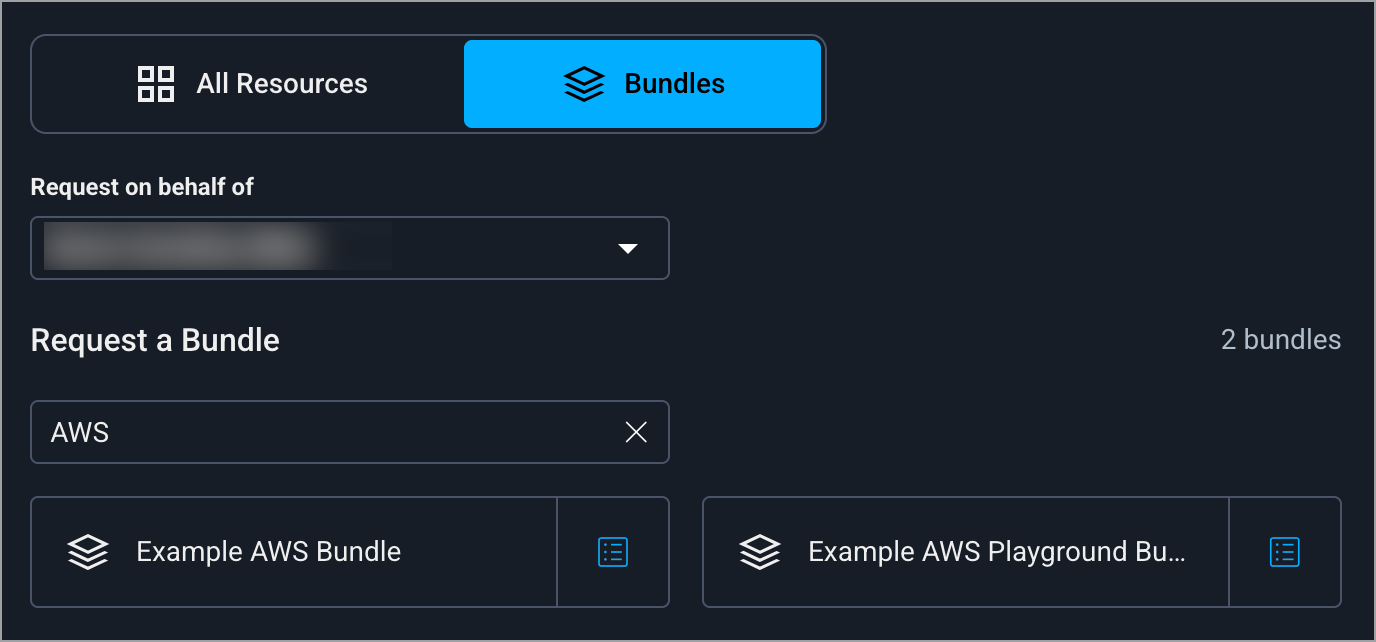
  2. Click the Bundles tab. The bundle fields appear below.

  3. From the Request on Behalf of dropdown menu, select the individual to receive access. By default, your user profile is selected.

  4. (Optional) Under Request a bundle, in the Search field, enter the full or partial bundle name. The list updates to show matching bundle cards and the total number of results.

  5. Select a bundle card.

  1. Click Next. The Complete Additional Details page appears.

  2. Choose a Duration from the dropdown menu to set the access period.

  3. (If applicable) Select the Ticket Type associated with your request as defined in your organization’s ticketing system.

  4. (If applicable) Enter the unique Ticket ID from your organization’s ticketing system to link the request to the tracked task.

  5. Under Why do you need this access? enter a reason why you are requesting access to the resource.

A clear explanation helps approvers understand your request, speeds up approvals, and ensures the access can be audited later.

As you type, Apono provides real-time feedback to help you improve your justification. It evaluates whether you have:

  • Described the task you are working on

  • Explained why this level of access is required

  • Included a relevant ticket ID

When your justification meets these requirements, the indicator will turn green.

  1. Click Submit Request. The request will appear with its status on the My Requests tab.

If enabled by your admin, you will receive a notification via Slack or Microsoft Teams. Otherwise, the notification will be delivered by email.


Extend existing access duration

If the Extend option is enabled for an access request, it becomes active when your access is nearing expiration. After clicking the Extend button, the duration of your existing access is increased, based on settings defined by your administrator.

Extending access will not interrupt your work. You will not be prompted to do any of the following when extending access:

  • Re-authenticate with credentials or MFA

  • Create a new user

  • Start a new session

If this option is not available, or you have reached the maximum number of extensions, you must submit a new access request to continue accessing the resource.

Follow these steps to extend access:

  1. On the My Requests page, in the row of the request, click Extend. The Extend this request? pop-up window appears.

  1. Click Extend. The duration of your resource access is increased.


Request access again

If your access has expired, been revoked, or been rejected, you can request the same access again from one of the following locations.

My Access page

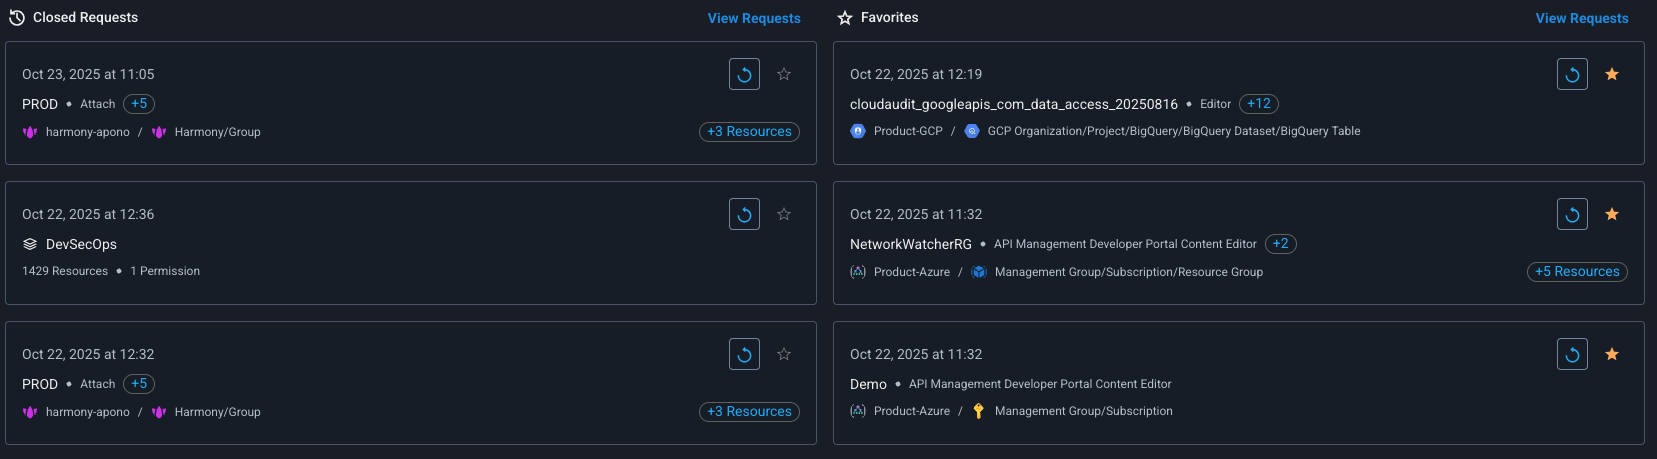
Only the three most recent closed requests and favorites appear on the My Access page.

Follow these steps to request access to a resource, an app, or a bundle:

  1. On the My Access page, click (Request again icon) next to a request under Closed Requests or Favorites. A pop-up window appears.

  2. Under Why do you need this access?, review the prefilled justification from your most recent request and revise it, if necessary.

  3. Click Submit.

My Requests tab

If someone else has made a request on your behalf and you lack permission to request access for yourself, only the requester can request access again for you.

Follow these steps to request access to a resource, an app, or a bundle:

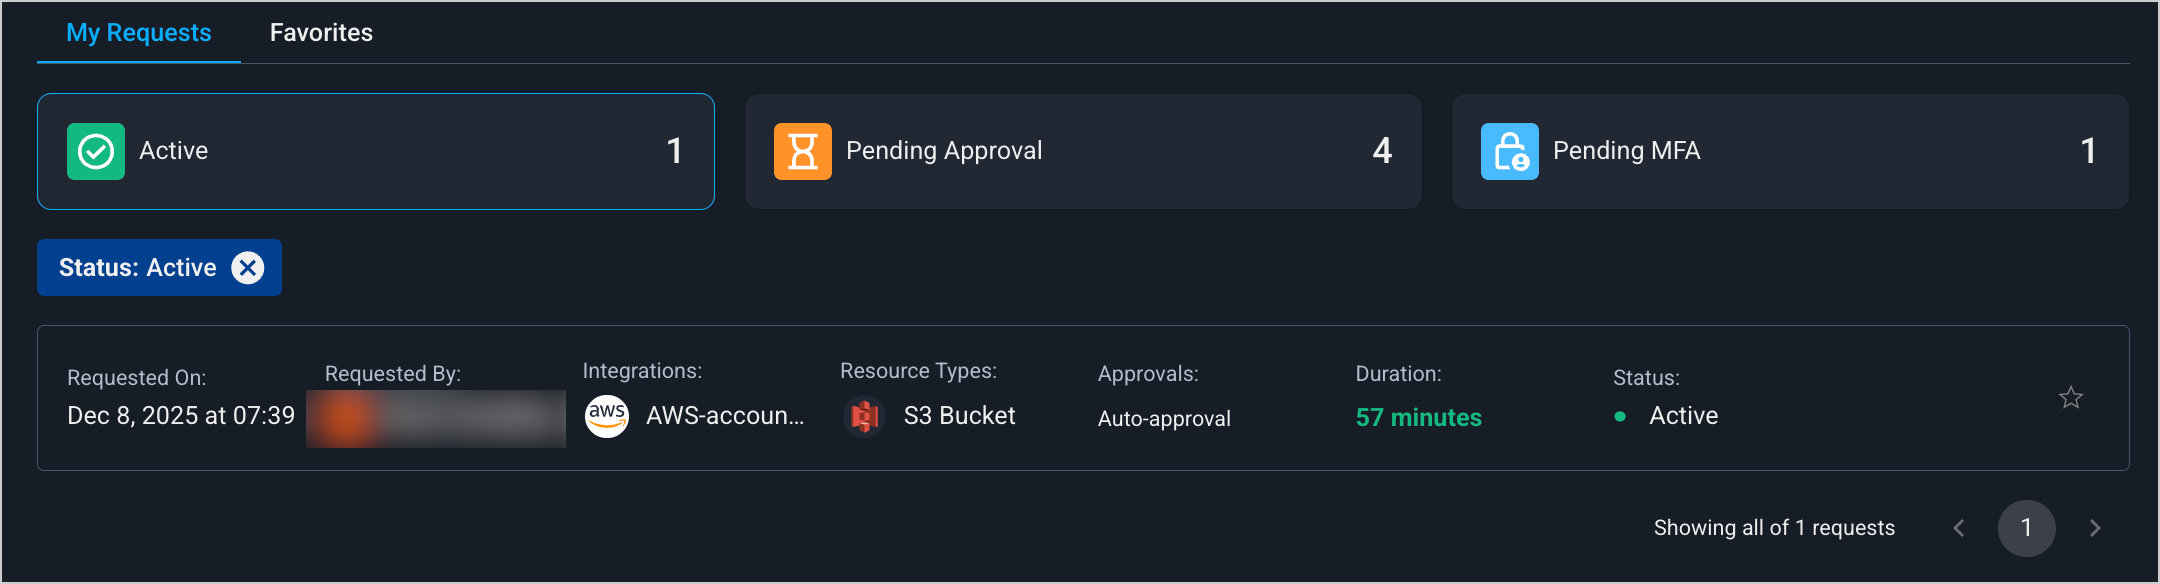
  1. On the My Requests tab, from the Status dropdown menu, select none, one, or several options to filter the list of requests.

  2. In the row of your desired request, click (Request again icon). A pop-up window appears.

  3. Under Why do you need this access?, review the prefilled justification from your most recent request and revise it, if necessary.

  4. Click Submit. The request will appear with its status on the My Requests tab.

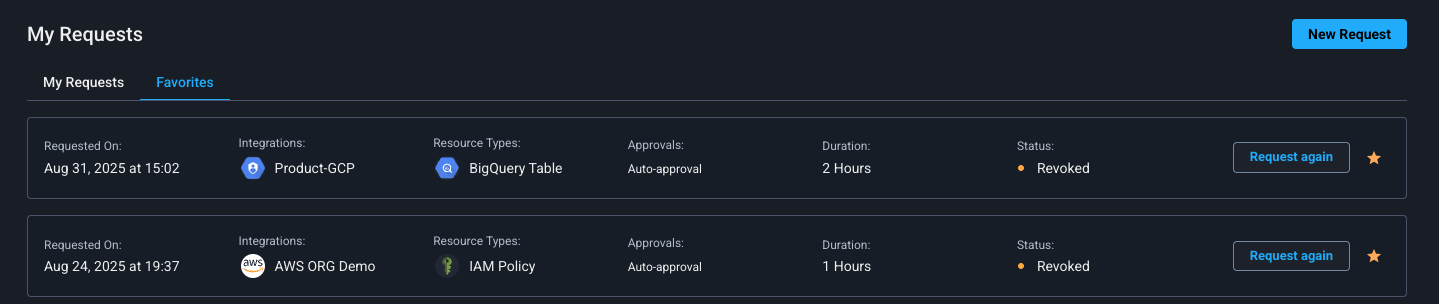
Favorites tab

Only requests marked as favorites appear on this tab.

Follow these steps to request access to a resource, an app, or a bundle:

  1. On the Favorites tab, in the row of your desired request, click Request again. A pop-up window appears.

  2. Under Why do you need this access?, review the prefilled justification from your most recent request and revise it, if necessary.

  3. Click Submit. The request will appear with its status on the My Requests tab.

Delegated Requests page

Follow these steps to request access to a resource, an app, or a bundle for a grantee:

  1. On the Delegated Requests page, from the Status dropdown menu, select one or more options to filter the list of requests.

  2. In the row of your desired request, click (Request again icon). A pop-up window appears.

  3. Under Why do you need this access?, review the prefilled justification from your most recent request and revise it, if necessary.

  4. Click Submit. The request will appear with its status on the Delegated Requests page.

If enabled by your admin, you will receive a notification via Slack or Microsoft Teams. Otherwise, the notification will be delivered by email.


View requests

You can view your open and closed requests.

Request details

Follow these steps to view your requests:

  1. On the My Requests tab, from the Status dropdown menu, select one or more options to filter the list of requests.

  1. Click a request card. A panel appears displaying the details of the access request.

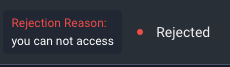
For requests with the Rejected status, you can view the Rejection Reason under Approvals.

  1. Under Access to, click View resources to display the resources to which the request grants access.

  2. (Optional) For requests with the Active status, click Use Access to open the My Access page.

  3. (Optional) Click Request again to resubmit the request.

  4. At the top right of the panel, click X to close the panel.

  5. (Optional) Click the ⭐ icon on the request card to mark this request as a favorite.

You can only favorite requests that you have submitted for yourself.

Request details

Follow these steps to view and track the statuses all the requests you have made on behalf of grantees:

  1. On the Delegated Requests page, from the Status dropdown menu, select none, one, or several options to filter the list of requests.

  2. Click a request card. A panel appears displaying the details of the access request.

For requests with the Rejected status, you can view the Rejection Reason under Approvals.

  1. Under Access to, click View resources to display the resources to which the request grants access.

  2. (Optional) Click Request again to resubmit the request.

  3. At the top right of the panel, click X to close the panel.


Revoke an access request

If someone else has made a request on your behalf, only the requester can revoke the request.

Follow these steps to revoke your access:

  1. On the My Requests tab, from the Status dropdown menu, select none, one, or more options to filter the list of requests.

  2. Click a request card. A panel appears displaying the details of the access request.

  3. Click Revoke access. A confirmation window appears.

  4. Click Yes.

Follow these steps to revoke access from a grantee for whom you requested access:

  1. On the Delegated Requests page, from the Status dropdown menu, select none, one, or more options to filter the list of requests.

  2. Click a request card. A panel appears displaying the details of the access request.

  3. Click Revoke access. A confirmation window appears.

  4. Click Yes.


Access Statuses

Status
Description

Pending Approval

The request is waiting for the approver to approve or reject the request.

Granting

The request has been approved. Apono is provisioning the access.

Active

Access has been provisioned. You can access the resource.

Follow these steps to access the resource:

  1. On the My Access page, click Access Details for the resource. A pop-up window appears.

  2. Follow the instructions to access the resource.

Requests in this status also appear on the My Requests tab. If enabled by your admin, you will also receive a notification through Slack or Teams. Otherwise, the notification will be delivered by email.

Rejected

The request has been rejected either automatically or by approvers.

Hover over the status to read the rejection reason written by the approver.

Revoking

An admin has initiated removing your resource access.

Revoked

An admin has removed your resource access.

Failed

An error has occurred with your request. Contact your admin.

Last updated

Was this helpful?